

Turning a panorama to 360-degree imagery is a great way to share an immersive view with friends and family. All you need is the right software and a little bit of practice.
In this article, we’ll show you how to create a 360-degree photo using your phone or computer. We’ll also give you some tips for getting the best results. Let’s get started!
What You Need to Follow This Tutorial on Panorama to 360
There are many 360 Panorama photo apps. It is easy to get lost trying to decide which one to use. To help you with this, I chose my favourite app and a viewer to go with it. You can download them for free from the Google Play (Android) or the AppStore (iPhone). They will give you a great start in the 360 Panorama world. You can experiment later with other apps if you feel you need it.
To follow this tutorial, you will need to install:
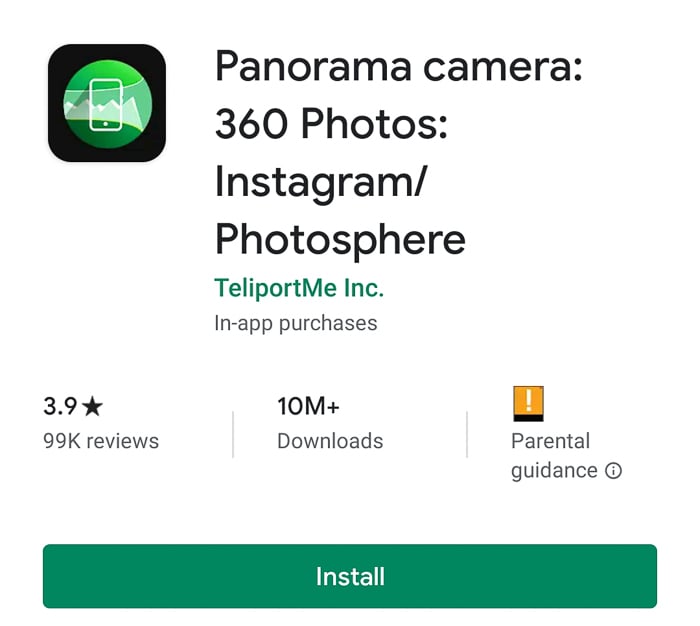
– Panorama camera: 360 Photos (or P360)
– 360 panorama viewer: If you try to open your 360 Panorama as any other image, you will see it as a deformed panorama. To fully enjoy the 360 photos in your phone, you need a viewer such as Viewmake-VR360 Photo Editor HD
To save time, you can first go into Google Play/AppStore, search for both apps and install them. This way, you can follow this tutorial without stopping your workflow to install apps.
Create Your 360 Panorama in Seconds Using the P360 App
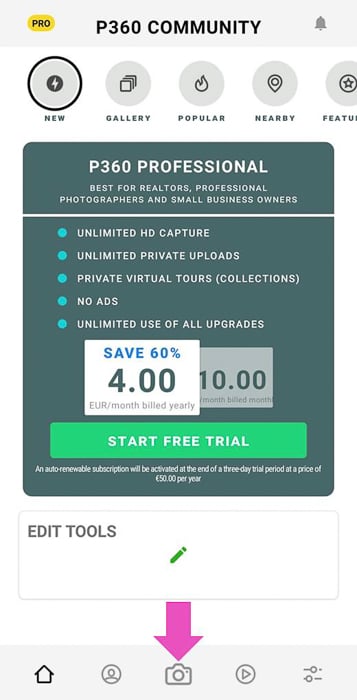
With this app, the capturing process is easy and quick. Like with other apps, start by pressing the camera icon and follow the dots until you complete the Panorama.
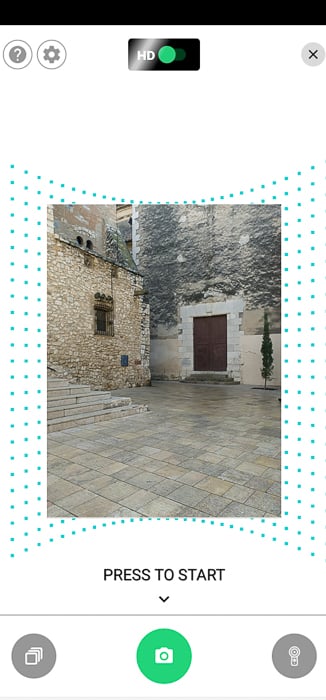
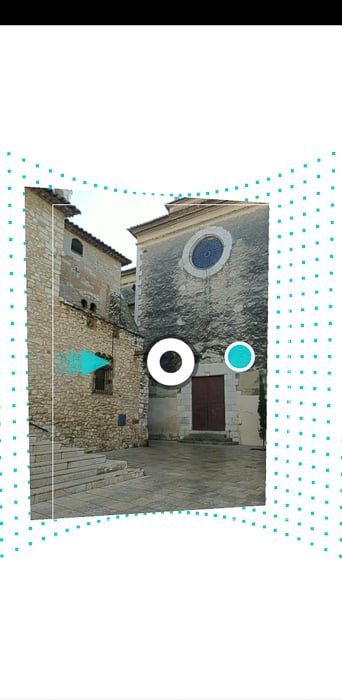
Make sure to hold your phone up in portrait mode. Once this is done, the app will stitch your images and save them in the Gallery. If you upgrade to the Pro version of the app you can even stitch the image later to save battery on the go.
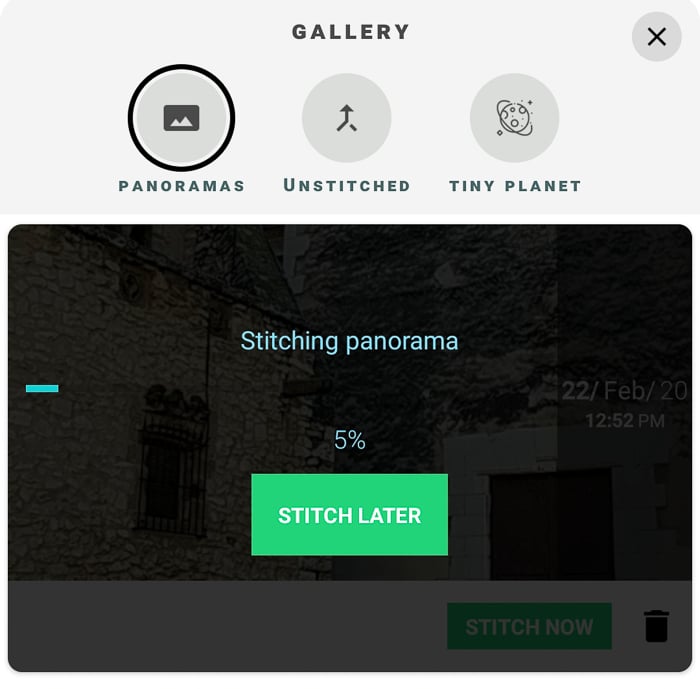
Share Your 360 Panoramas With P360
You will find your photos in your app gallery. To share them, select the photo and click on the share icon. You can share with a 3D viewer (you need to register as a user), or you can share it to Facebook. The app is also saving the panoramas in an album in your Gallery. You can share them from there as a regular image.
If you are an Instagrammer, you will find it useful to know that you can easily share your 360 Panoramas. Select the image you want to share, click on the Edit option and select Instagram.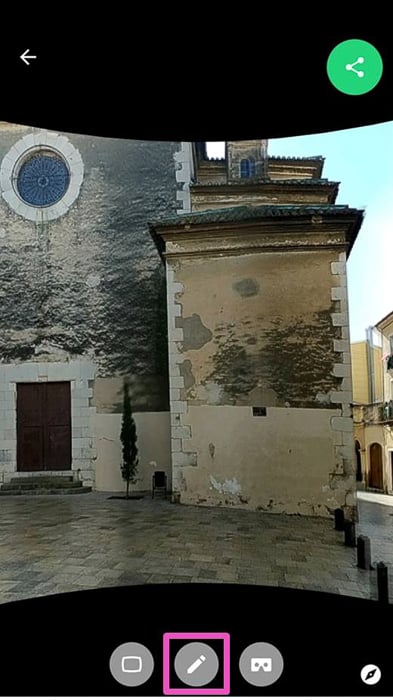
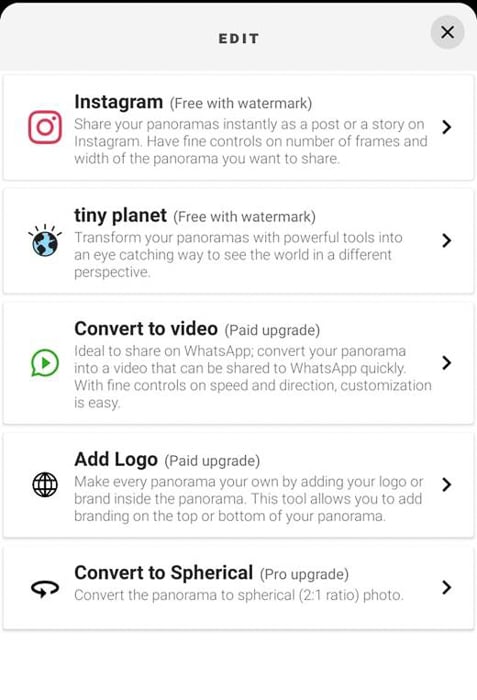
The app will slice your Panorama in several 1×1 images. You can then select them to post them as a Multi-Photo post.
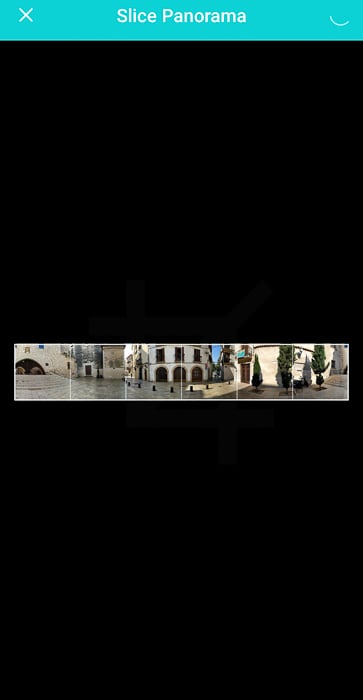
The sliced panorama will have a watermark that can be removed in the Pro version.
Transform Your Panoramas Into Tiny Planets Using P360
This is a fun feature that not all the 360 Panorama apps offer.
In P360, select the Tiny Planet option in your Gallery.
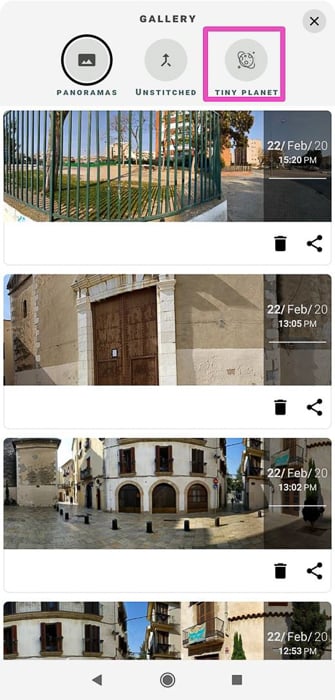
Click on the + to select the Panorama you want to transform.
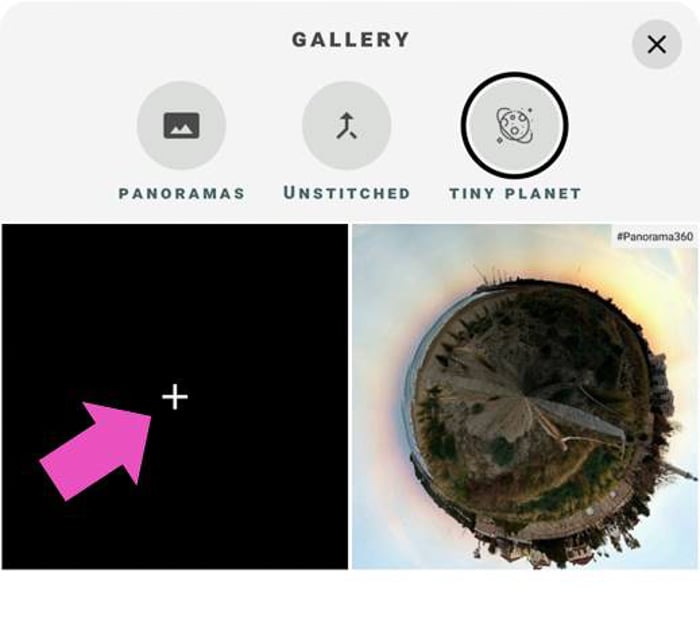
You will get to the Tiny Planet settings.
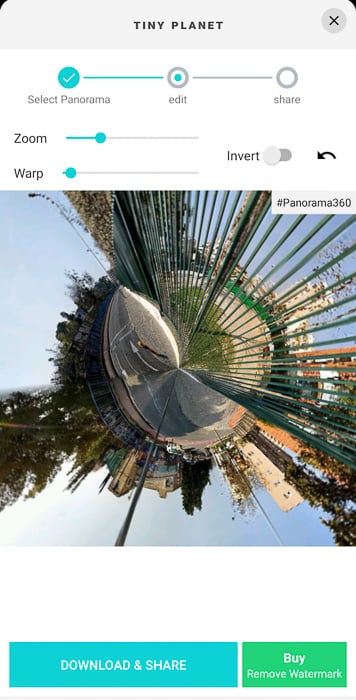
In this screen, you can play around with the Zoom and Wrap sliders until you are happy with the result. Then, click on download and share. The app is going to save the image in your Gallery. It will have a watermark that can be removed only in the Pro Version.
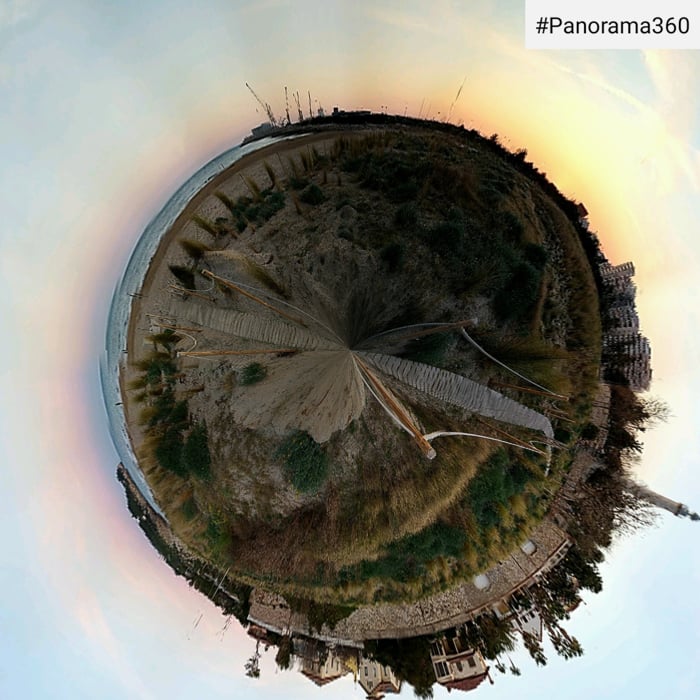
The final image will have a watermark. You can take it out if you upgrade to the Pro version.
General Tips for Taking 360 Panoramas and Photospheres
Taking panoramas and photospheres requires patience. Try to avoid having people, animals or moving objects in the frames. You can end up with some nasty distortions. If you do want to include someone in the image, ask them to move as little as possible until you’re finished.
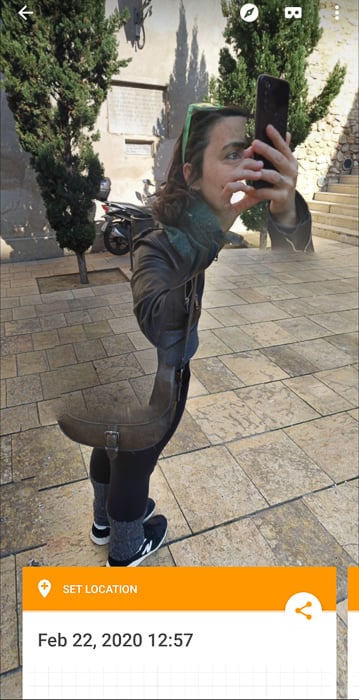
Avoid close-ups and small places. Elements that are close to the camera tend to get stitched in odd ways. This happens because of the changes in angles between the frames you take. This will create distortions and inconsistencies in the final image.
Taking the bottom part of the photosphere is always challenging. If the floor is not important to you, you can leave it as is or blur it to make it look smooth. If the floor is important to the photo, try using a selfie stick.
Common Questions
How Do You Make 360 Pictures?
To make a 360 picture, you need to install an app that enables this feature to your phone, such as Panorama 360. Once you have the app, follow its guides and take all the photos required. The app will stitch these photos together into a 360 picture.
How Do I Take Panoramic Photos?
Most camera apps today come with a "panorama" feature. To create a panorama, select this feature and take a photo following the app's instructions. You will need to move the camera horizontally or vertically to capture the area you want. You can also stitch individual photos using photo stitching software.
How Do You Make a 3D Panorama?
To turn your photosphere or 360 panoramas into 3D, you need a pair of VR glasses and a panorama viewer app that enables VR view on your phone. Set up the glasses, activate the VR feature in the app and enjoy your panoramas and photospheres in an immersive 3D experience.

Photo by Kamran Khan from Pexels
Conclusion
360 panoramas and photospheres are a great way to share your experiences. I encourage you to explore and experiment with this new way of taking photos. Try several apps and see what fits you best. Be patient and methodical when taking the photos. With some practice, you will soon have awesome creations to share with the world.