Today, we show you how to make your own Lightroom contact sheet. This is a simple process that lets you look at a variety of photographs in a single document.
Luckily, Adobe Lightroom has a quick and easy process to create contact sheets. Follow our step-by-step guide to create your own and understand the customization available!
A contact sheet is a specific type of document that includes thumbnails of photographs. Contact sheets help sift you through a wide range of photographs to find the ones that stand out as the strongest.
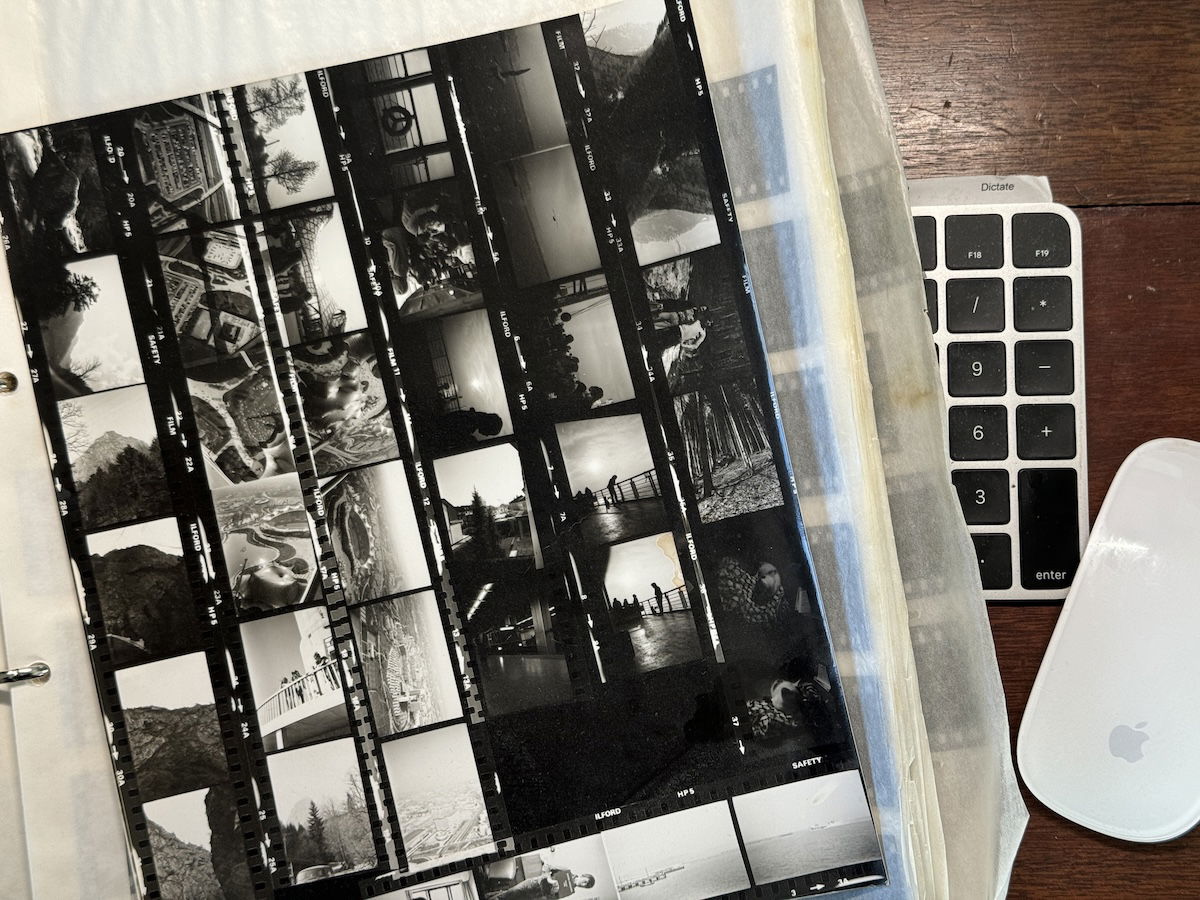
Contact sheets were first used in analog photography. It would be a way to see your entire roll of film, not in its negative aesthetic. These sheets would often be marked and drawn over as the negatives remain untouched.
Contact sheets are still relevant as we may want to send over an entire photoshoot to a client or editor. Or we could print these sheets to make notes directly on the sheet. Either way, learning to make a digital contact sheet is still extremely useful for some photographers’ workflow.
You can only make a contact sheet in Lightroom Classic. Lightroom Classic features a Print section, whereas Lightroom (Creative Cloud) does not. This is a big oversight for Lightroom CC as many photographers want to print their photographs from their printers.
But, upon purchasing Adobe Lightroom, you do get both versions of Lightroom. This means that, at worst, you must download the other program and re-upload your photographs.
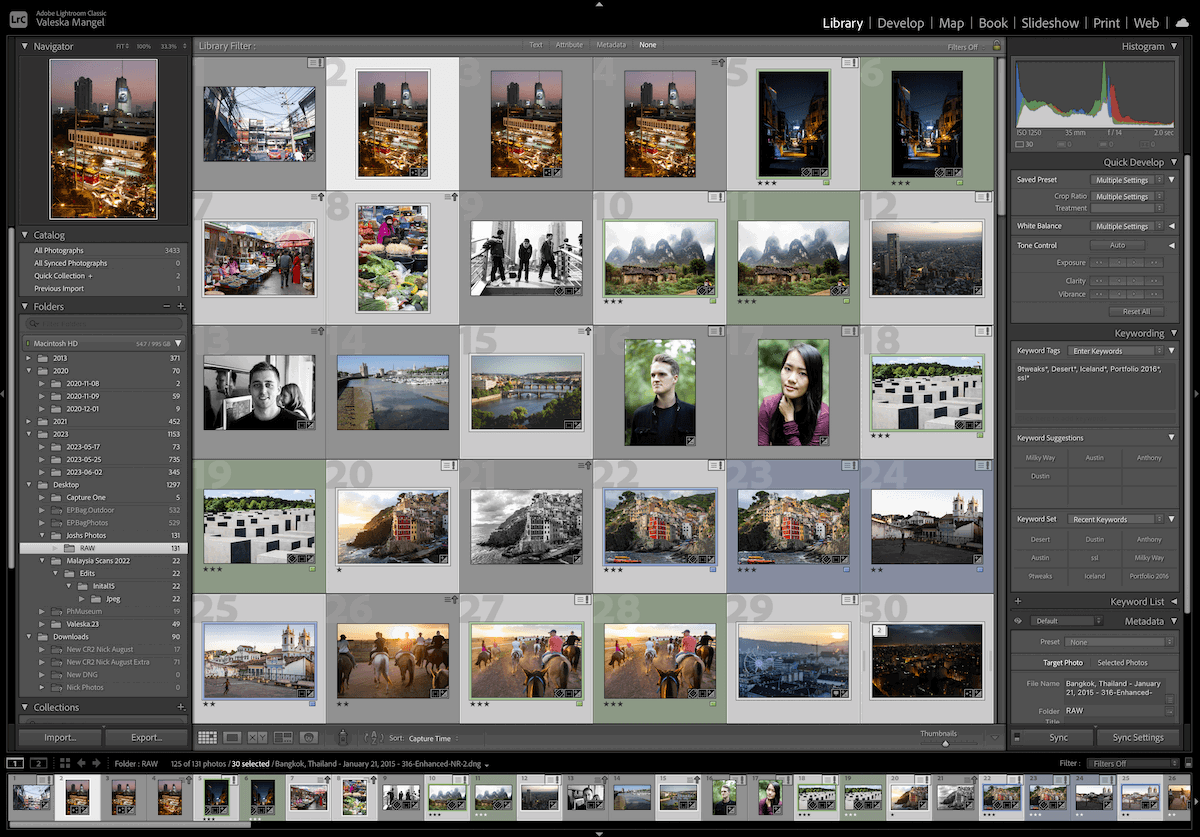
The first step to creating a contact sheet is to select your images. It may be worth culling some images in Lightroom if you are dealing with a photoshoot with hundreds of images.
After selecting your images, Shift-click the entire section of images. Or Command-click (Ctrl-click for Windows users) the particular images you want. You can always add or take out images in the next steps, so don’t worry too much about it at this point.
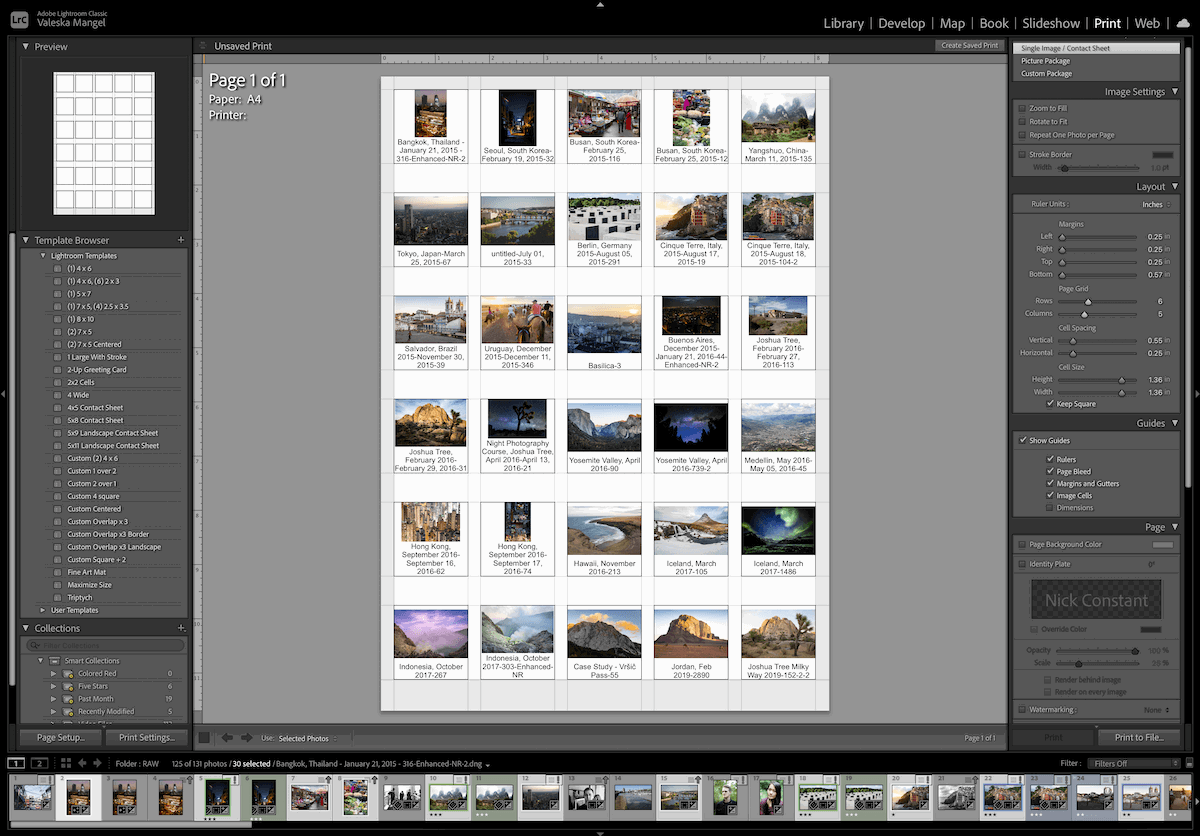
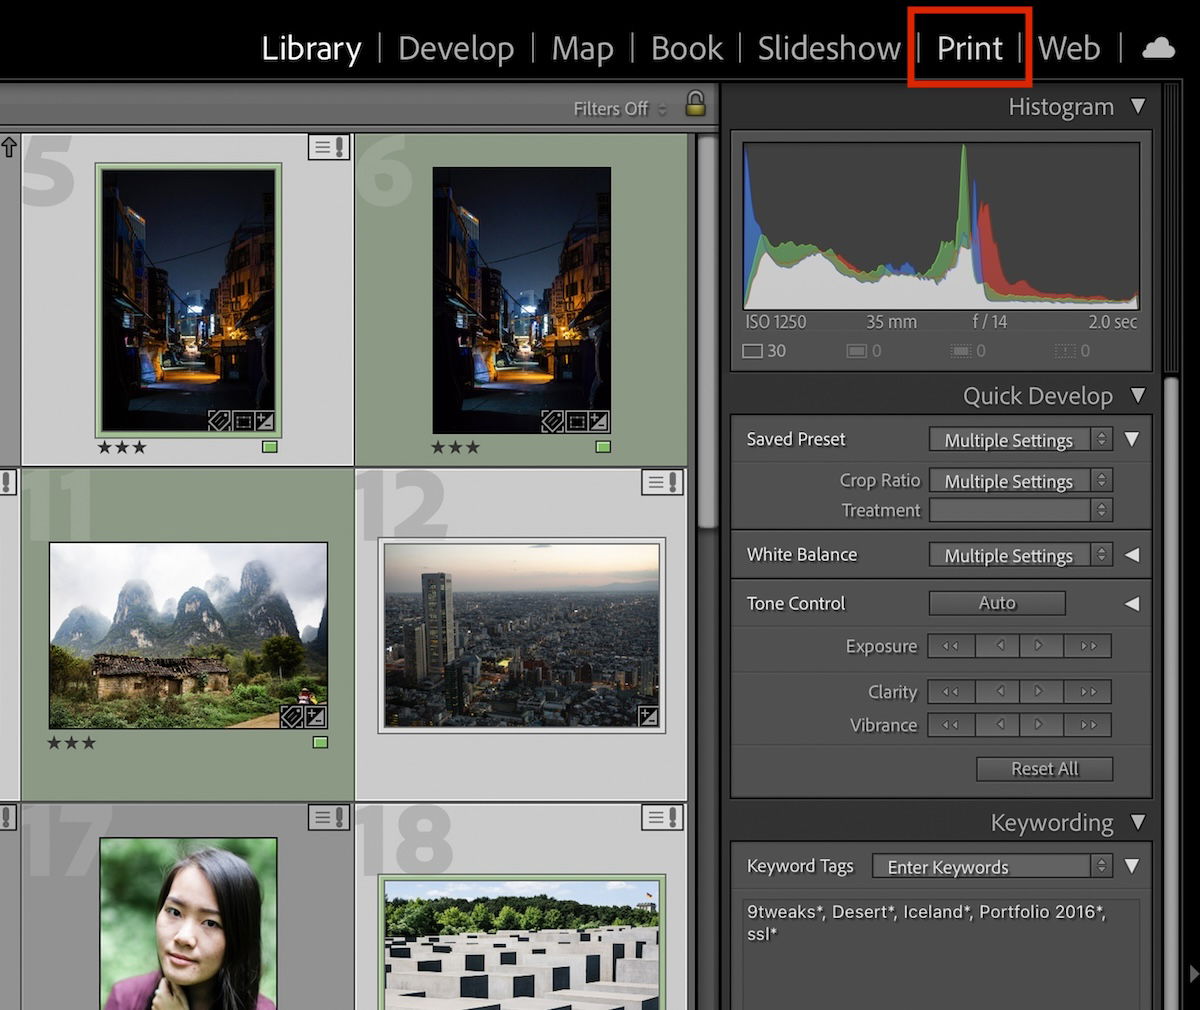
Go to the Print module (File > Printer) in Lightroom Classic. This can be found along the top toolbar on the right-hand side of the application.
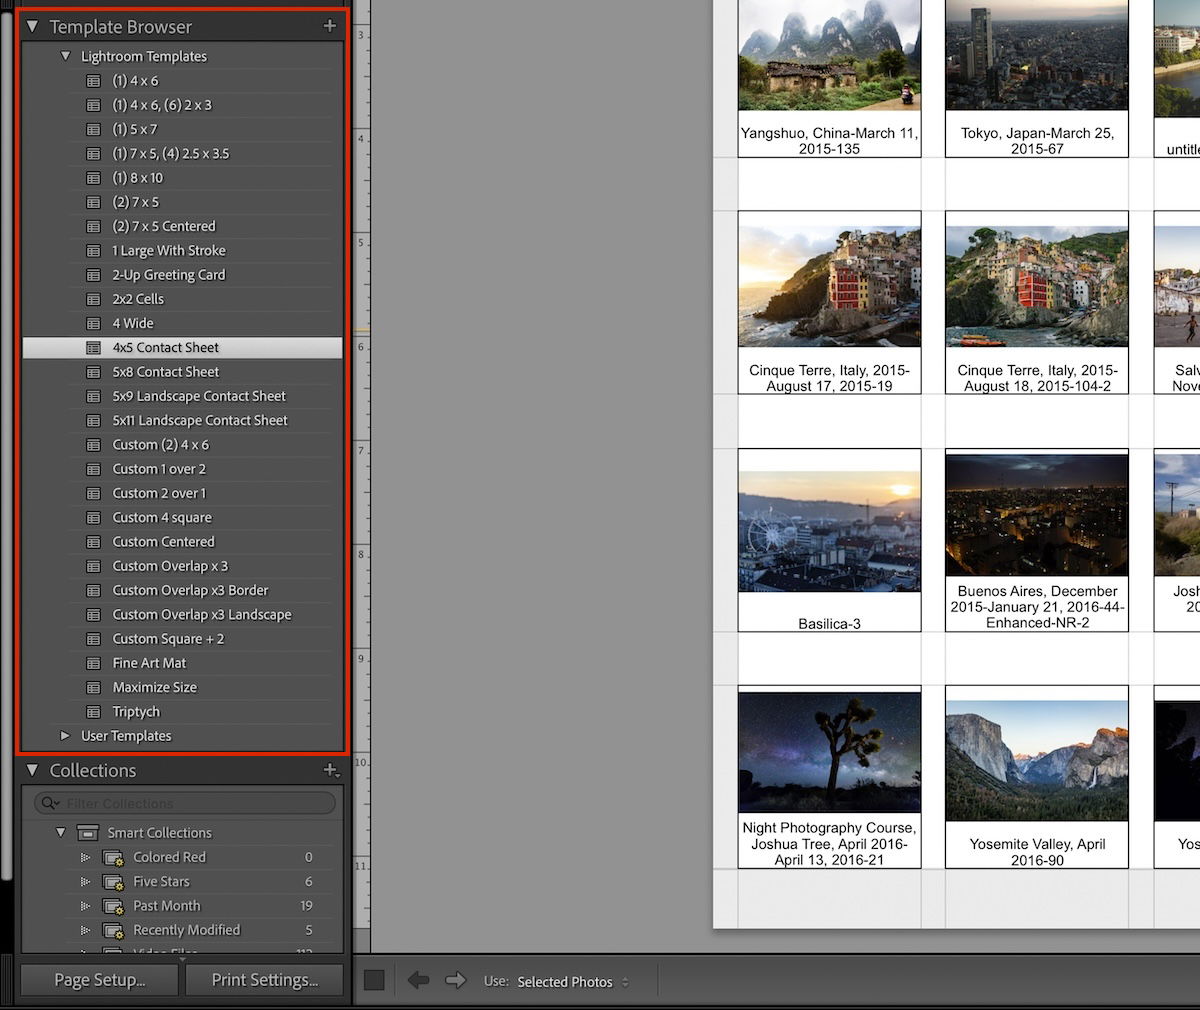
You should find a Template Browser section in the Print module’s left panel. Choose one of the templates ending with “contact sheet” that best matches your desired style.
You can choose a Contact Sheet template that isn’t labeled as one. But these options won’t display the image titles. You can always edit your template to your exact preference later on.
First, you should ensure you have all the relevant images in your contact sheet. From the Print module, you can still see your Library filmstrip below. You can Command-click (Ctrl-click) the missing images into the contact sheet.
Lightroom even lets you browse other folders through the filmstrip. This is helpful if you have other images you want to include in your contact sheet from another folder.
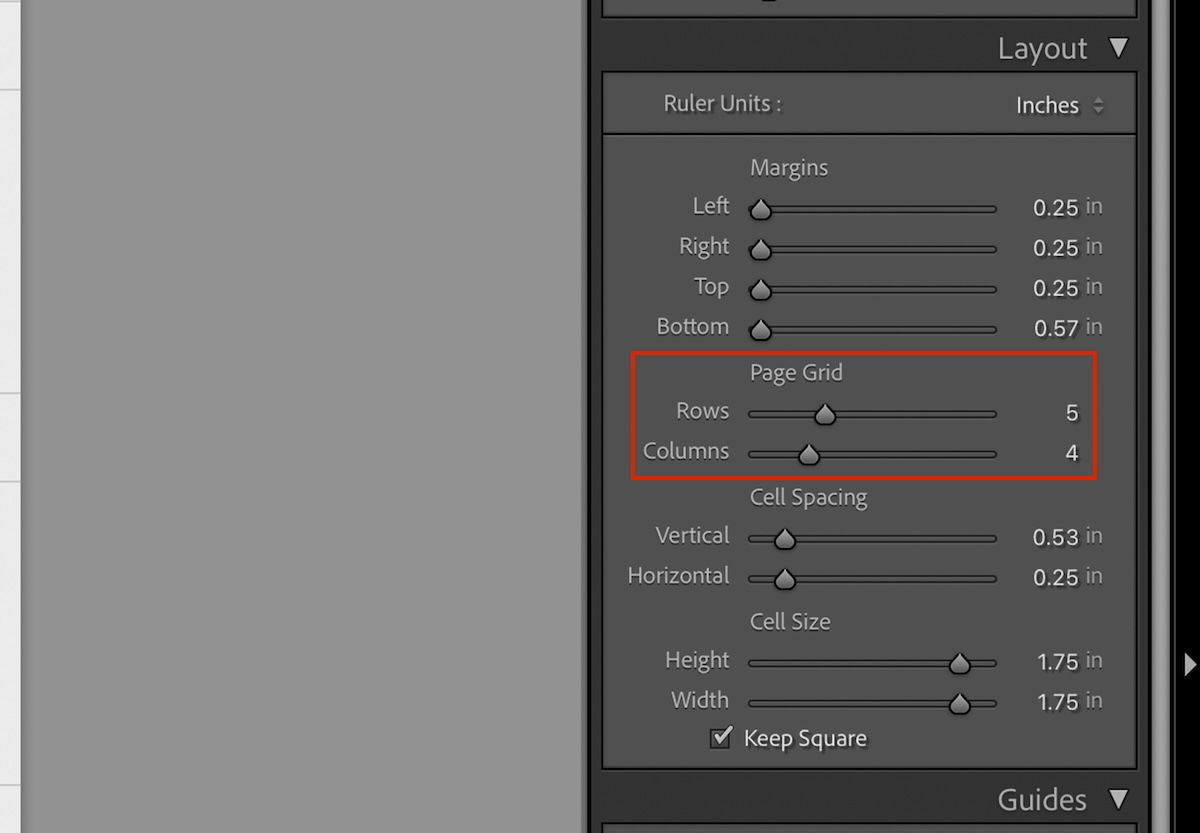
The next step is to finalize the layout of your contact sheet. You can edit this in the right-hand Layout panel. Lightroom offers many ways to fine-tune your layout.
The most important section here is the Page Grid section. This sub-section has two sliders, one labeled Rows and another Columns. These dictate the amount of images you can fit on a page and how much space you get between each image.
When editing the rows and columns, you must consider multiple factors. The most important point is whether you need space around the image to make notes. Some people also like to draw on their images to visualize a crop.
Do not worry about fitting all your images onto a single contact sheet. Lightroom automatically makes numerous contact sheets depending on how many images you have.
The Layout panel sub-sections also have sliders for Cell Spacing and Cell Size. These two sections work together, so increasing the size of one decreases the other.
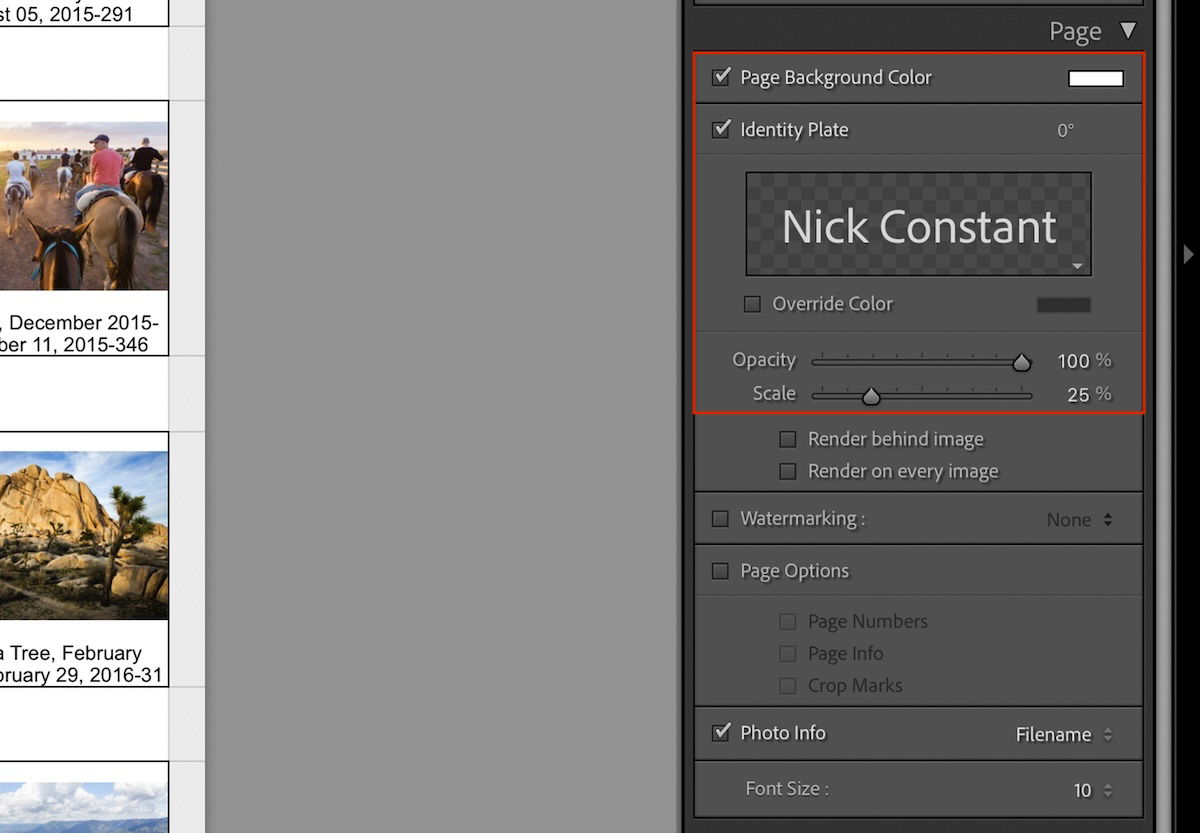
The Page panel below Layout lets you add a watermark or change the background color of your document. This is helpful for copyright, branding, and presentation purposes.

Lightroom lets you print your contact sheet directly from the application. You can click the Print button on the bottom right-hand panel. The Printer… button next to it lets you customize this process.
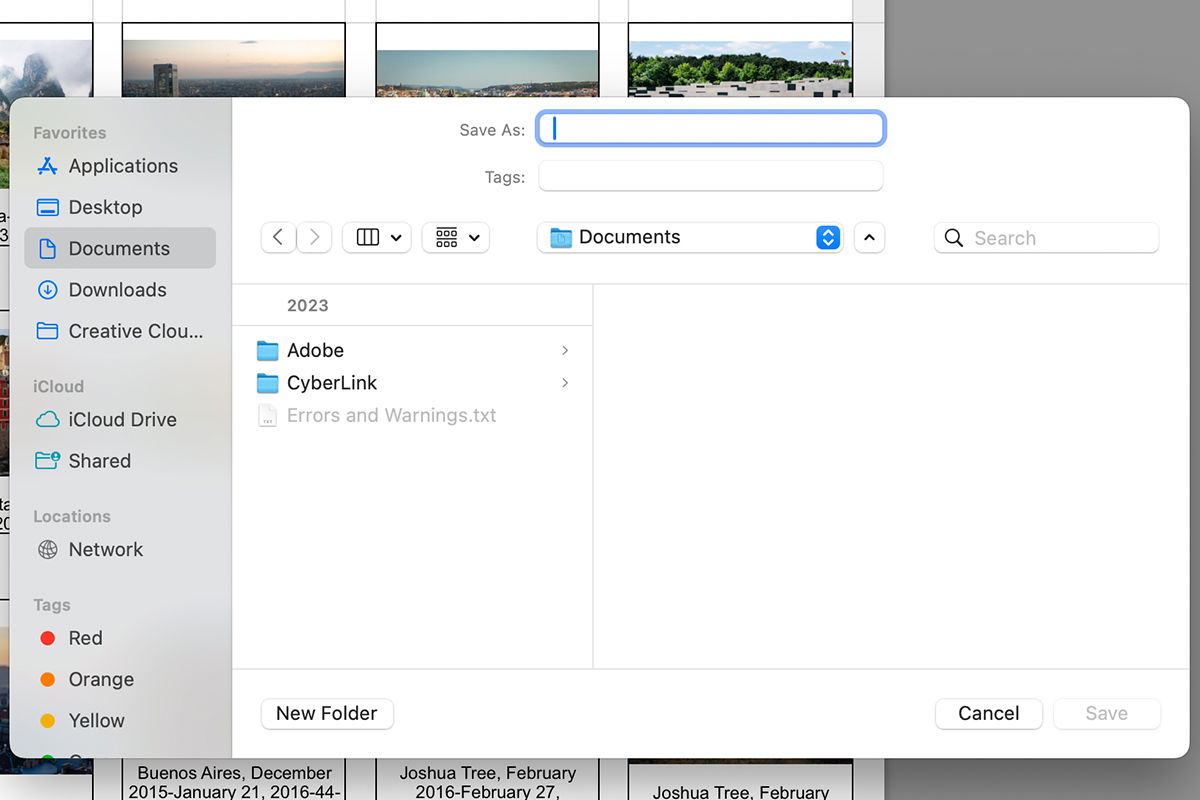
If you want to keep your contact sheet as a digital file, export it as a JPEG. You have to edit the Print To box in the Print Job section. In this drop-down menu, you can select JPEG File.
After choosing JPEG File, you can customize the different options for your document. Click Print to File… to save your Lightroom contact sheet. Your contacts sheets will then appear in a folder in your desired destination.
If you want to keep your contact sheet in Lightroom, a button at the top-right of the screen says Create Saved Print. This lets you save your contact sheet print in your Lightroom catalog.


Now you know how to create a contact sheet in Adobe Lightroom Classic. Remember to use the Template Browser to try different layouts and styles. The image text on your contact sheets is helpful. It makes finding your favorite image much easier.
This is a quick process. So you can try it within seconds. It is a great way to show clients a big batch of images while ensuring they don’t use high-quality images before being discussed. It is also a great method to help you cull and sort images into a sequence!
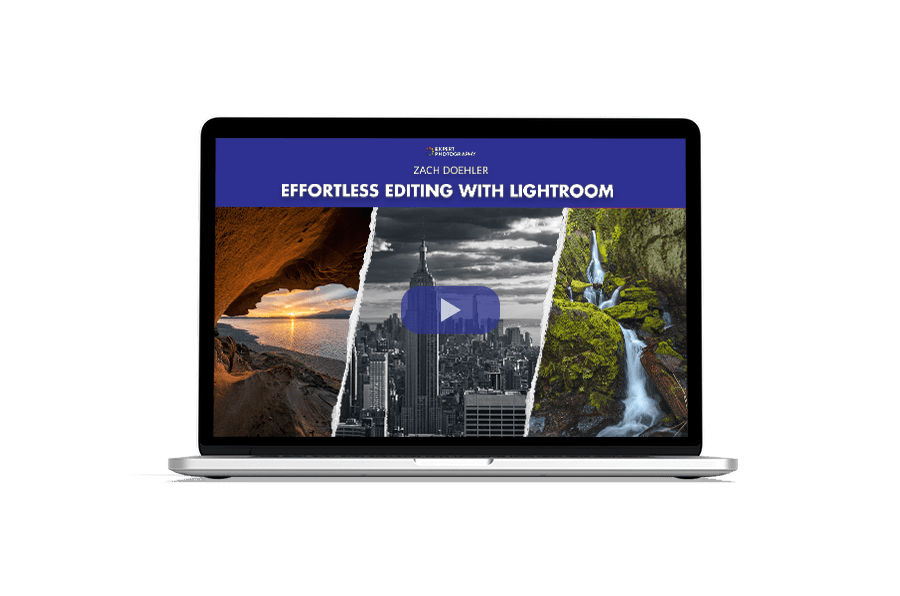
Check out our Effortless Editing With Lightroom course for more easy-to-follow tips!


![P08 [Lead Gen] Product Sidebar_v2_date_20230223](https://expertphotography.b-cdn.net/wp-content/uploads/2023/02/P08-Lead-Gen-Product-Sidebar_v2_date_20230223-300x295.jpg)
![P08 [Lead Gen] Sidebar Banner 2_date_20230223](https://expertphotography.b-cdn.net/wp-content/uploads/2023/02/P08-Lead-Gen-Sidebar-Banner-2_date_20230223-300x245.png)
![P08 [Lead Gen] Sidebar Banner 3_date_20230223](https://expertphotography.b-cdn.net/wp-content/uploads/2023/02/P08-Lead-Gen-Sidebar-Banner-3_date_20230223-300x245.png)