You may be wondering, “How can I make a watermark for free?” Today, we guide you through making a watermark design in Canva for free. We also show you three easy ways to make a watermark or add one to a photo using Adobe Photoshop or Lightroom.
Use a watermark to sign your images as the owner and deter copyright infringement. It’s easier than you think!

What Is a Watermark?
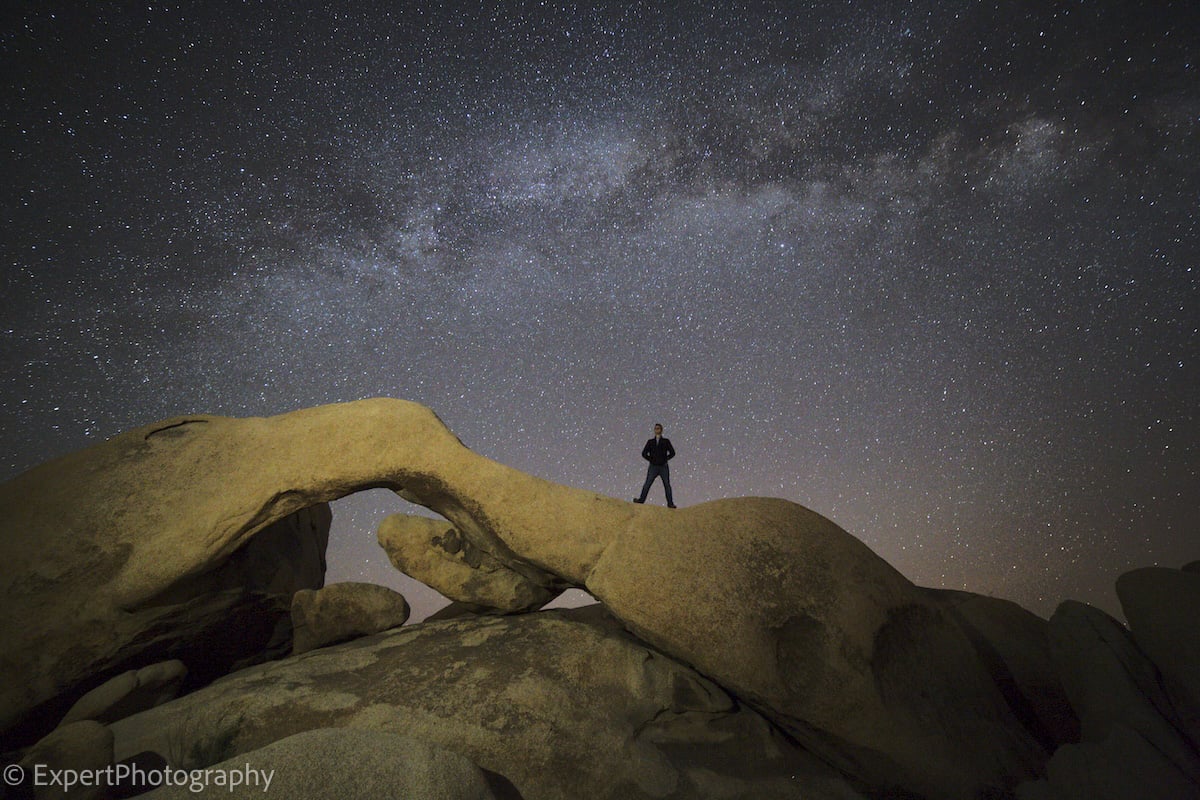
A watermark is usually a logo, stamp, or signature superimposed onto a photo. Photographers use watermarks on their photos to make them easy to identify. Watermarks also let people know the picture has a copyright.
Why Make a Watermark for Photos?
Many photographers create watermarks for their photos to protect images against copyright infringement. And maybe someone sees your photo and wants to buy a license to use it. A watermark also makes it easier for people to contact you.
If someone intentionally removes a watermark, you can take steps to notify them to stop using your image. You can file a Digital Millennium Copyright Act (DMCA) takedown notice if the infringement occurs online.
You do this with the hosting provider or platform where the infringing material has been used. This notice requests the removal of the infringing material from the website or platform.
It’s also possible to take legal action, if necessary, to seek monetary compensation in infringement cases.

Watermark Characteristics
Most watermarks often have a degree of transparency. You also often find them in corners or at the bottom of images. This is to make them look less distracting. You also have the option to tweak your camera settings and add copyright info to your photo’s EXIF data.
Some photographers prefer to add a watermark like a painter signs their artwork. Others prefer a barely visible line of text or logo. It’s best to create a well-designed watermark. You can then use it to build consistent recognition for your photos.
It becomes part of your branding and identity, so you don’t want to change it frequently. Next, we show you how to make a watermark in a few minutes.

How to Make a Watermark Design
The easiest way is to create a logo with an app. In my opinion, the easiest app to use is Canva. It’s free and offers tons of font and design options. Look for the logo elements you want, drag and drop them into your image, and that’s it!
Brandmark is another option if you want to try a paid logo-maker site. Whatever you use, what you add to your watermark is a matter of personal taste. But put some effort into its design to make it look good in your image.
Don’t type your name in Comic Sans or your favorite calligraphy font. It doesn’t look professional. Most importantly, ensure it doesn’t distract the viewer from your beautiful pictures.
Some photographers like to use their website address or a copyright symbol. I have used both of these in the past. You can also download your Canva logo as a PNG file to add pictures using Photoshop or Lightroom.
Photography logo templates in Canva
How to Add a Watermark in Photoshop
Now, we’ll teach you how to make a watermark in Photoshop. There are many different ways to do it. But the most effective is creating a custom brush for your watermark design.
Create a Custom Watermark Brush
As mentioned, create a watermark with Adobe Illustrator, a logo maker, or a watermark app. Then, we will create a custom brush in Photoshop.
First, create a new document (File > New…) with the same dimensions as your watermark. I made mine 900 x 900 pixels and 300 ppi (pixels per inch). Then, select a white background.
Don’t make your watermark too small. It’s much better to scale down than it is to scale up. If it’s too small, you lose clarity and quality and must scale it up. A resized image between 500 and 1,000 pixels on the wide side works for most watermarks.
Drag and drop your logo into your new document, or select the Text tool to add text. You can use any color. If you use black, you can easily change it once you have created the custom brush.
After you have your design on a white background, go to Edit > Define Brush Preset, and name your custom brush. Now, you’re ready to add watermarks to photos!
Add Watermarks With the Custom Brush
So, how do you add a watermark to photos with the custom brush? It’s as simple as hovering your mouse over your image and left-clicking it into place.
Your new custom brush works the same way as any Photoshop brush does. You can change the color or size before you apply it with the color picker. You can also change the blend mode and opacity if you want your watermark to be semi-transparent.
Experiment with the different settings to see what looks best on your photos. Depending on your preference, you can use the same opacity, blend mode, and color or variations thereof.
Photoshop’s brush preset picker (top left) and color picker (top right)
Finding Your New Watermark Brush
Sometimes, it can be frustrating when you can’t find the custom brush you made. Here’s a great way to access it quickly when adding watermarks to photos.
First, select your Brush tool. Then go to the Brush Preset picker in the top menu on the left. Your custom brush should automatically be listed there.
You can click and drag it to the top of the list (or to whichever folder you like). Your custom brush will show at the beginning of your brush options every time you create a watermark.
How to Add a Watermark in Lightroom
Now, we know how to create a watermark in Photoshop. But what about Adobe Lightroom? The process is slightly different if you prefer using Lightroom to create watermarks.
With Lightroom, you don’t create a custom brush. Instead, you must create one or more watermark presets to add to your photos when you export them from Lightroom.
How to Add a Text Watermark
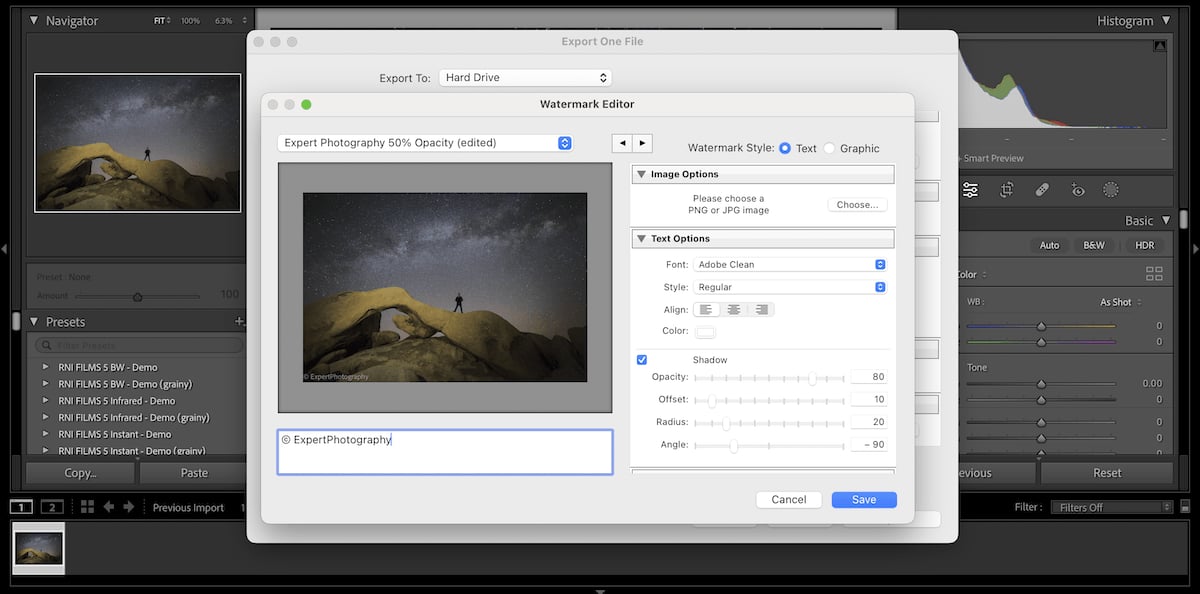
After editing your photo or batch of photos, open the Export window (File > Export). You can export your photos as JPEG, PSD, or TIFF files and include a watermark. Lightroom does not allow you to add a watermark to DNG or original RAW files.
Choose your preferred export options. Then click the Watermark checkbox near the bottom of the export dialogue box. From the drop-down menu, select Edit Watermarks. This opens a new window with various options.
At the top right, you will see a Watermark Style option. First, select Text. In the window’s lower left box, enter the text you want to appear on your watermarks. To make the copyright character (©) in Windows, press the Alt key and type 0169. On a Mac, press Option+G.
You can work through the options in this window to tweak the look of your simple text watermark. You can control the text’s font, color, alignment, and other aspects. Again, experiment to see what you like and what best suits your photography style.
When you finish creating your watermark, click save. Then, name your new preset. Lightroom will then add it to the watermark drop-down in the Export window.
How to Add a Graphic Logo Watermark
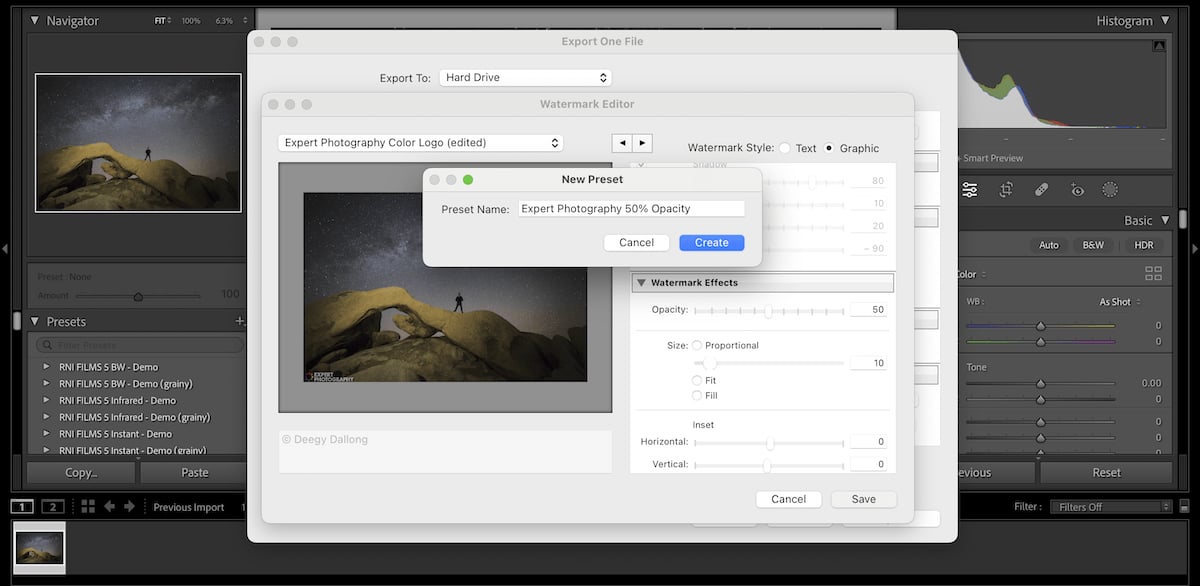
Like creating a text watermark, you can add your logo and save it as a preset in Lightroom. Open the Export window, then select Edit Watermarks from the drop-down menu in the Watermarking options area. Finally, select the Graphic watermark style option in the top right.
Locate the logo you want to set as your Lightroom watermark. Under Watermark Effects, you have options for opacity, size, and position. You can’t include text in your logo when creating a graphic watermark, so make sure you add that beforehand.
After you finish creating your logo, click save. You can then name your new watermark preset.
Making a Watermark (Photoshop vs Lightroom)
Adobe Photoshop is more flexible when adding a photography watermark to your images. Your options are more limited in Adobe Lightroom.
With Photoshop, you can position your watermark precisely where you want it to appear. It is also easier to manipulate the custom brush to achieve the look and feel that suits the image.
But the main advantage of using Lightroom to add your watermark is that it’s easy to batch export. This means the position and properties of your watermark remain the same on every image you save.
Ultimately, it’s all a matter of preference. Weigh each editing suite’s pros and cons and decide if you like the best.
If Photoshop and Lightroom intimidate you, you can add watermarks to Canva images now. It’s more limited but can do the trick for less comprehensive photo projects.
![]()
Conclusion: How to Make a Watermark
A well-designed and placed watermark can help build your brand and identity. At the same time, a poorly designed or badly placed one may prevent people from looking at your work.
Take time to experiment with watermarking your photos. Find something that works for you and does everything a watermark needs to do. You don’t want to change your watermark often- otherwise, people may mistake your photos for someone else’s!
Look around the internet at photographers you admire. Look at how they add watermarks to their images. Draw inspiration from those doing it well, and consider how you would design yours.