In this tutorial, I will show you how to make a simple, versatile and affordable wood backdrop. You can use this DIY wood backdrop for many of your photography projects.
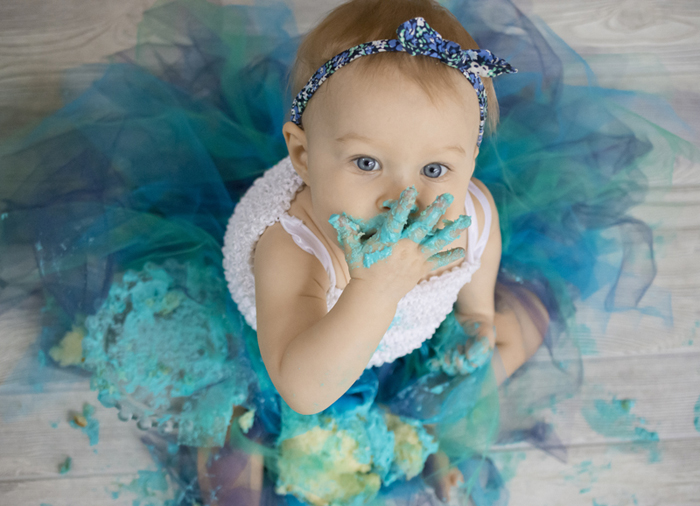
You can use it for objects, food photography backgrounds, portraits, headshots, and even for baby pictures.
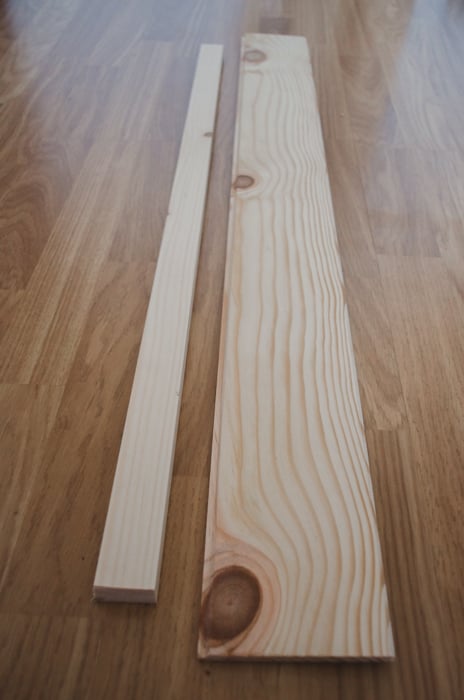
How to Make a DIY Wood Backdrop: What You Need
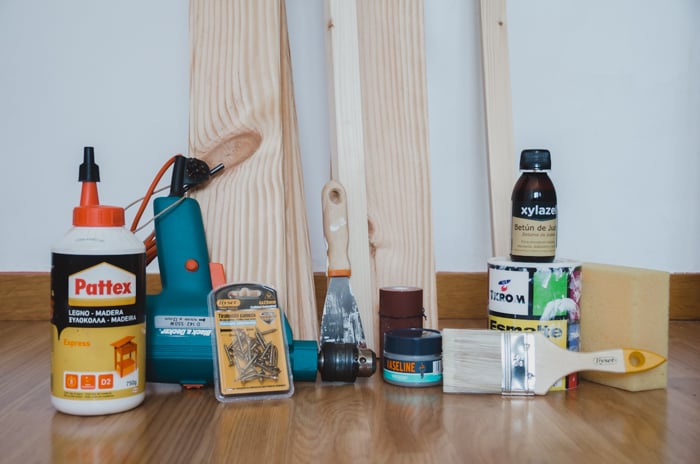
I used what I had available and fit my needs. Feel free to adjust and improvise according to your needs and resources.
- 7 pinewood flooring boards (10cm x 100cm x 0.9cm)
- 2 pinewood beams (38cm x 60cm x18cm)
- Carpenter’s glue
- Wood screws (25mm x 3mm)
- Screwdriver
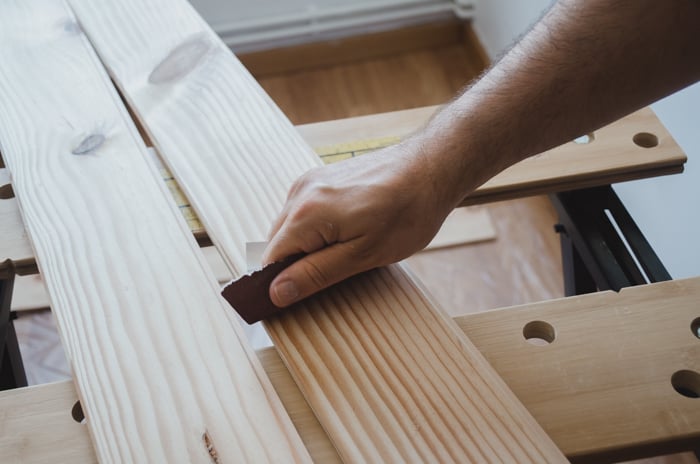
- Sanding paper (grit size 120 should be enough)
- Wood stain (I used bitumenasphalt pigment stain, but you can use any stain you want)
- Petroleum jelly (aka Vaseline)
- Measuring tape
- White acrylic water-based paint
- Paintbrush and a clean sponge
- For the standalone backdrop version: Small hinges with matching, an electric sander, and a power drill
Step One: Choosing the Wood
Think of the look you want your backdrop to have. Do you want it to have a new and luxurious look or do you want it to look old and vintage?
Keep in mind we are talking about the background of your image. Do you want it light or dark?
There is no right or wrong. Get the materials that you feel will answer your needs.
Why I Used Pine Flooring Boards to Build My Wood Backdrop
I chose to use pine because this wood is light-colored and easy to work with. You can either leave it as is and have a nice light wood background or add a bit of wood stain to create a barn wood background.
It’s also lightweight. Once the backdrop is finished it will be easy to move around.
I prefer flooring boards because they come at the right width, thickness and length. I bought 2 meter longboards which I later sawed in half. You can buy shorter boards or ask at the shop to cut them for you.
These are affordable and they come already packed. This made my life much easier. And they are made to interlock with one another so it is easier to organize them.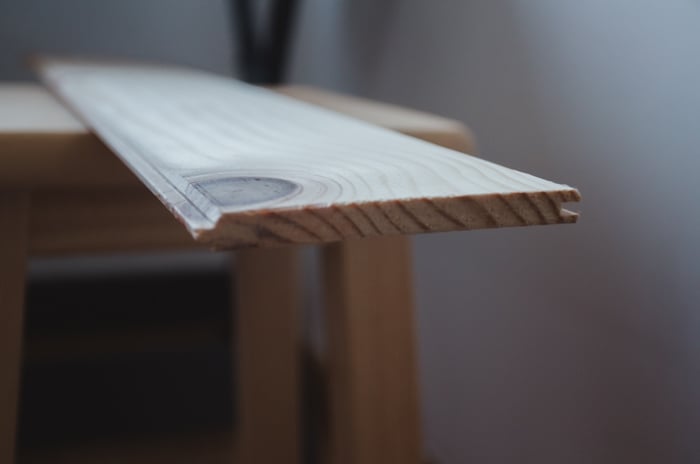
Choose the Right Beams to Hold Your Boards Together
Besides the flooring boards, I used pine wood beams to attach the boards in order to make the platform more rigid. I built 2 platform plates. One could be used as a standing background and one as a flooring background (for photos from above).
I made the platforms one meter wide by 70 centimeters long and used 7 boards for each platform. For this size, I used two 60cm long 3.8cm by 1.8cm beams.
The important thing you need to keep in mind is that they need to be thick enough so that the screws you'll use in the coming steps will be buried in them.
Make Your Backdrop With Salvaged Wood
I want to note that you do not have to buy boards. You can use wood you have at home or you can try and find some. Be careful of nails and screws, you don't want to get cut by a rusty nail.
Also, pay attention and make sure they don't have any signs of termites, mold or fungus. They will weaken the wood and you really don't want to let them into your home.
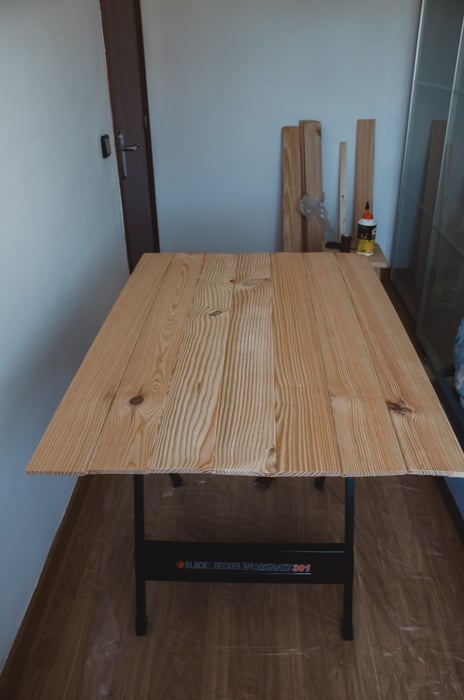
Step Two: Constructing Your Plates
Inject carpenters glue into the grooves of the flooring boards. When you interlock them, they will stick together.
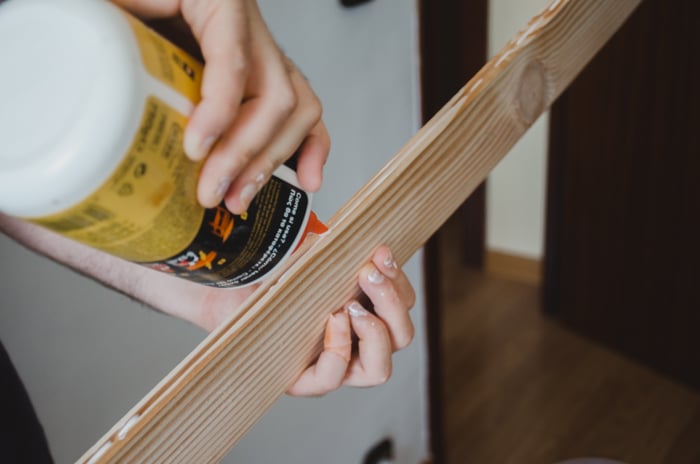
Fit the boards into each other's grooves so that you get a plate made of 7 planks. If your boards don't have grooves just glue the boards together pressing them side to side.

Something you should think about at this step. What side of each board do you want to be facing forward?
You should look at the boards and decide that before attaching them together.
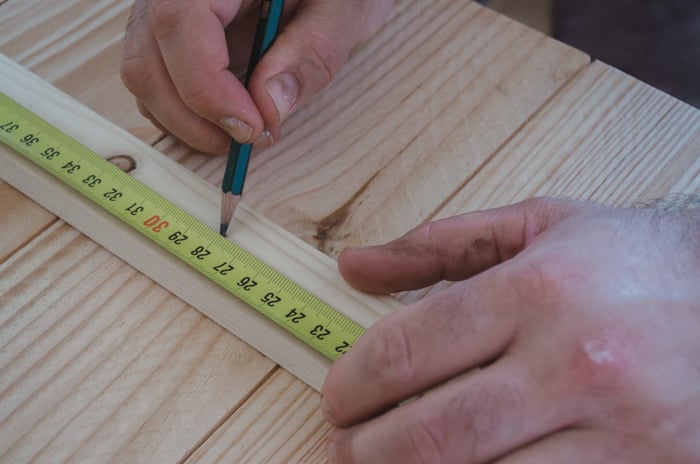
Step Three: Prepare the Beams
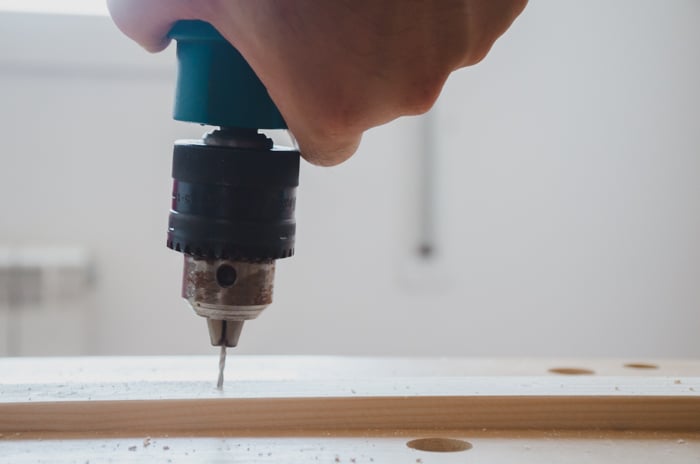
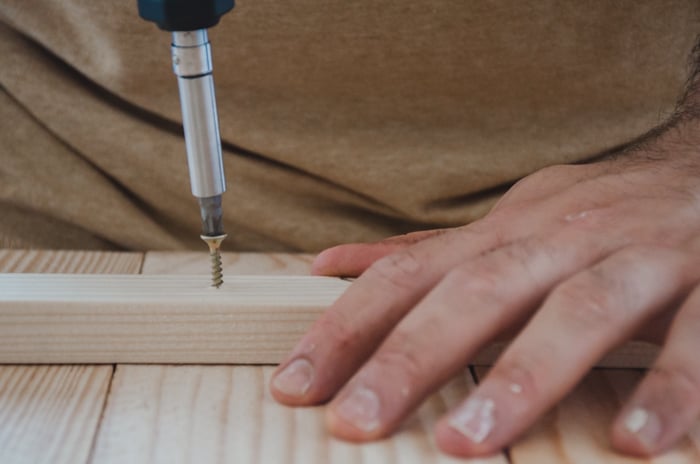
The next step is to connect two beams to the backside of the plate with wood screws. First, you need to flip the plate so that it faces down.
Before starting, I marked and drilled pilot holes into the beams to make it easier to drive the screws in and help avoid splintering.
You want to place the pilot holes ten centimeters apart from each other so that each board in your plate has a hole.
Then drive screws to connect between each of the boards and the beams. I made sure to use screws that will be long enough to go through the beam and be buried in the boards without penetrating to the front.
You should keep in mind the total thickness of wood you have and choose the length of the screws accordingly.
At this point, you should leave the plates overnight for the glue to set and dry.
Step Four: Staining the Wood
Choose a Stain for Your Backdrop
You can find diluted stains as well as concentrated stains such as bitumen or turpentine at your local hardware shop.
The good thing about the diluted ones is that you can start using it immediately. The concentrated one requires diluting. Concentrated stains are more affordable, and you can choose (to a certain degree) how much to dilute it and with what.
If you are working on a limited budget, concentrated stains are a good choice.
If you want to work with baby photo sessions, don’t use bitumen or turpentine because they can be toxic. A good alternative is brewing strong black coffee (no sugar) and use it as a water-based stain.
How to Stain the Wood
I chose to work with concentrated bitumen stain. I diluted it at a ratio of 1:8 with turpentine so that it will dry faster.
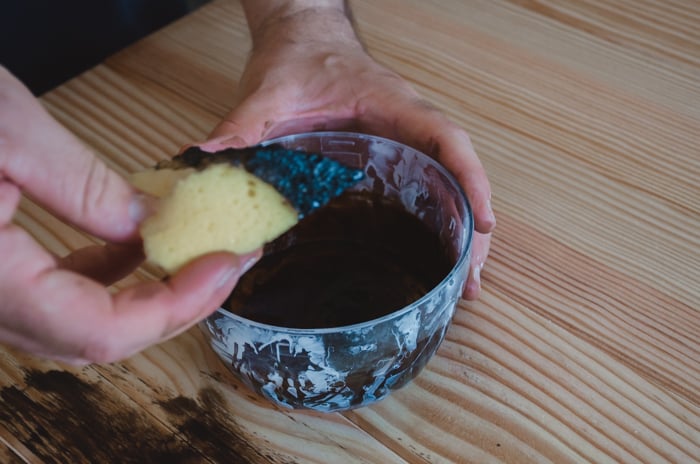
After having your stain prepared you can start staining the wood. To avoid dripping I recommend using a sponge or a cloth instead of a brush.
Just dab the sponge in the stain and start running it across the boards. Make sure to move along the grain of the wood.
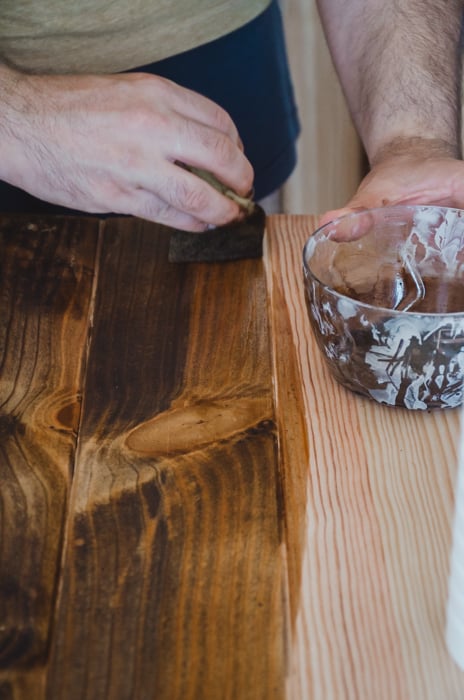
Leave the plates to dry for a few hours. At this point, you should already have a pretty decent wooden backdrop. If you are content with it you can stop here.
If you want to add a special effect, continue reading and learn how to make a distressed wood effect.
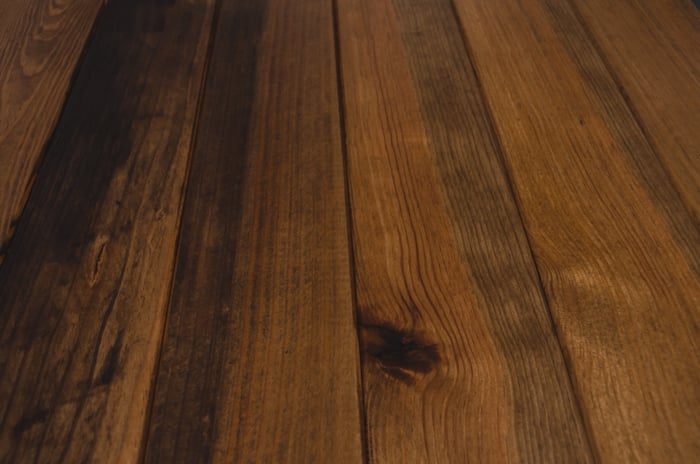
I recommend that you varnish it or give it an oil treatment so that it will have a nice finish and last longer.
Step Five: Add Petroleum Jelly for a Distressed Wood Effect
If you want to add a distressed wood effect, wipe generous amounts of petroleum jelly in the spots on the boards that you want to be distressed. Do this after the stain dries.
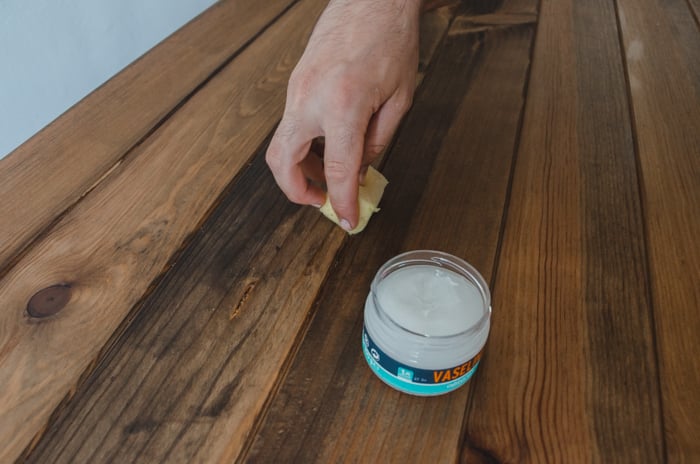
I recommend putting it along the seams, near the edges and on interesting wood patterns. Take care of how you add the jelly and try not to do patterns that are not common in wood, such as geometrical shapes or waves.
They will be noticeable after distressing the wood and they might look unnatural.
Step Six: Paint a Second Layer.
Using a brush, paint the plates with water-based acrylic paint. In my case, I chose white paint because the wood underneath was dark. The contrast between them was stronger than with a darker color paint.
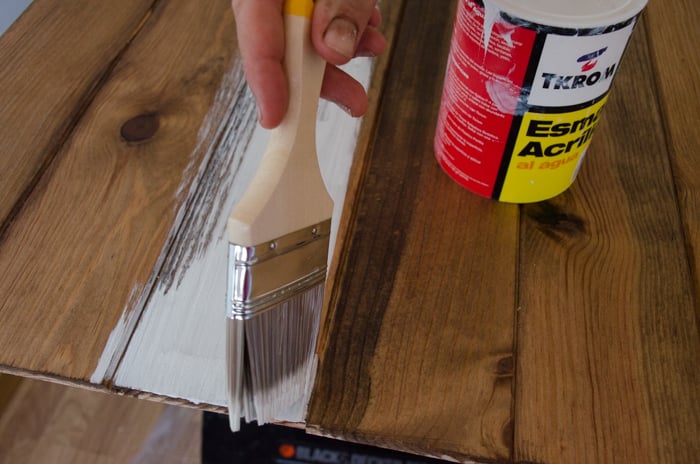
You can use any color you like that fits your backdrop purposes. Make sure to cover the wood well, including over the petroleum jelly areas.
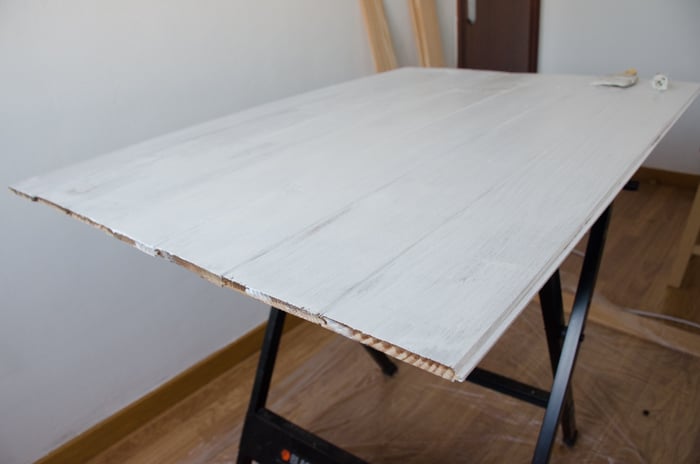
Let the paint dry. This should take anywhere between a few hours to a full day.
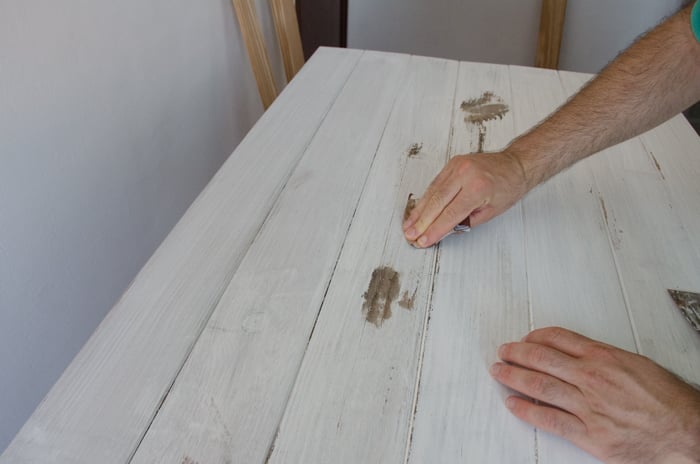
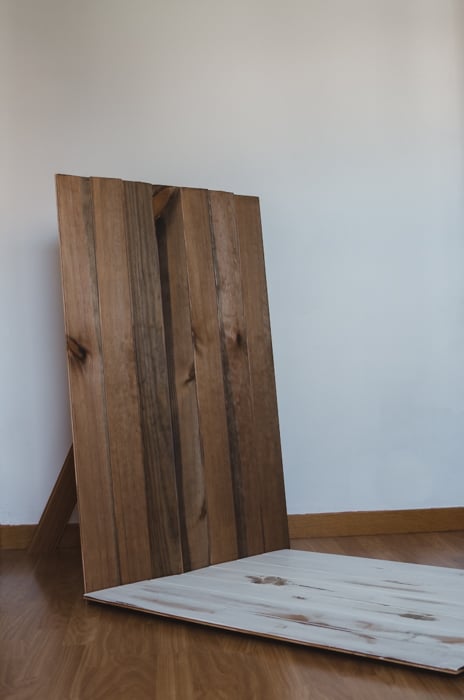
Step Seven: Complete the Distressed Wood Effect
After the paint dries, start scraping the upper layer of paint using a metal spatula. The patches that cover the petroleum jelly should peal right of, exposing the stained wood underneath.
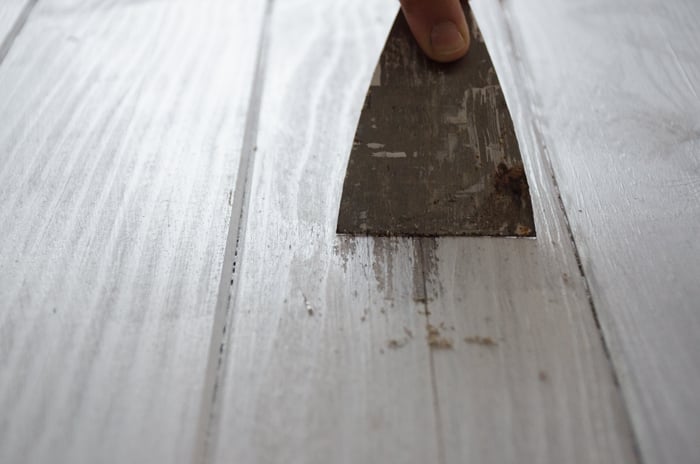
You can also use sanding paper to give the white paint a worn look.
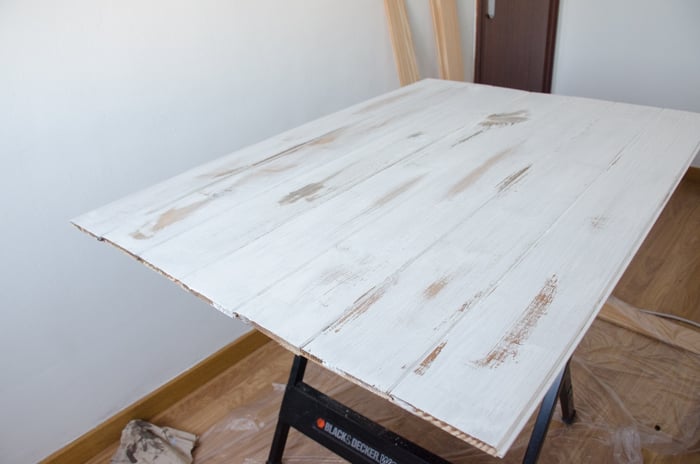
At this point, you have your wooden backdrop, ready to be used!
Optional: Turning the Backdrop Into a Standalone Background
At this stage, in order to use the backdrop, you have to prop it against something, like a wall for example, so that it will stand.
This, of course, can be quite limiting, especially if you want to take the photos outdoors or in the middle of the room.
In the following steps, I will show you how to make the backdrop stand by itself.
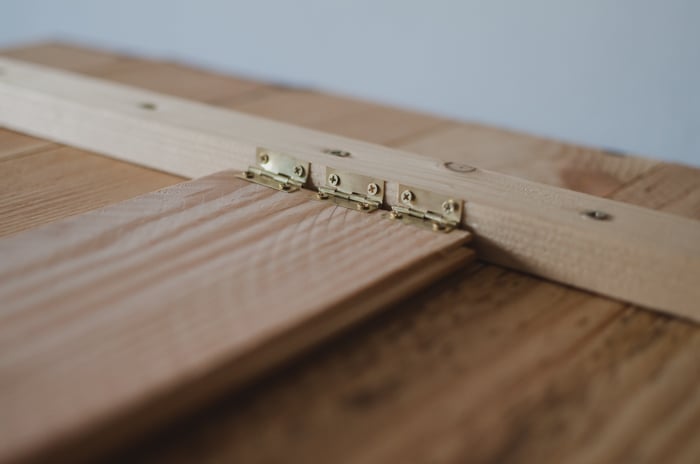
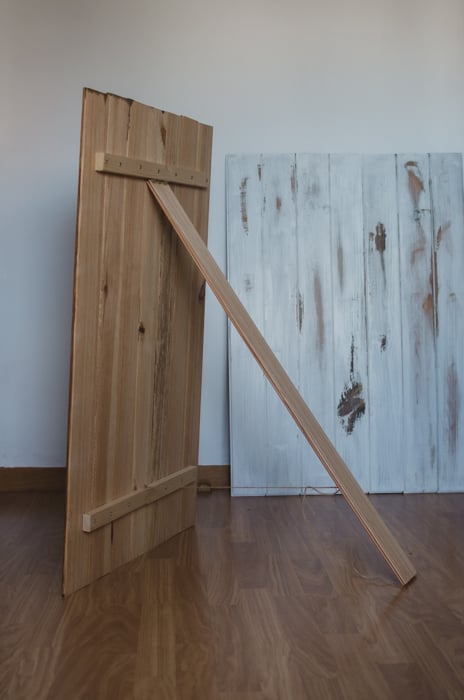
Step Eight: Make a Support Leg for the Backdrop
Take a board or a plank as long as your plate and screw a hinge onto one of its edges. Depending on the plank you use, you might need to use a very small hinge, as I had to.
You might want to use several hinges to make the axis sturdier.
Step 9: Install Anchor Points in the Plate and in the Support Leg
Drive one screw into the plate at the opposite side from where you intend to attach the support leg.
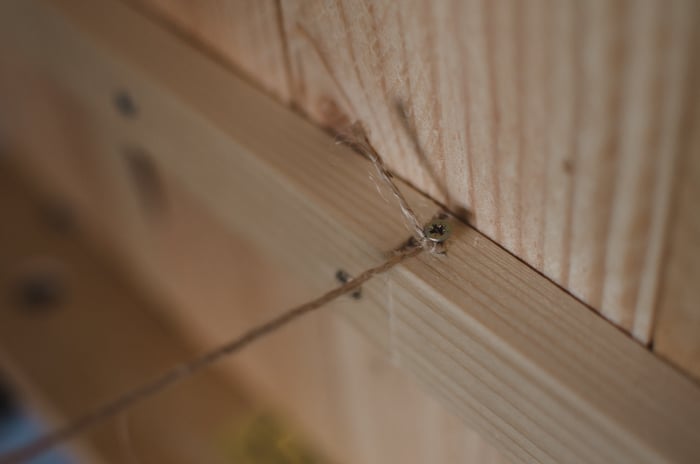
Drive a second screw into the support leg ten centimeters above the edge you intend to come in contact with the ground.
These two screws will be used as anchor points that will be connected to each other with a cord and keep the support leg from slipping.
Step 10: Attach the Support Leg to the Plate
Screw the free flaps of the hinge (or hinges) onto the back of the plate. For optimal support attach the leg at the center of the plate about fifteen centimeters from the top of the plate.
If you can, I recommend attaching it onto the beam itself, this way the leg will close better.
Step 11: Anchor the Support Leg With a Cord
To keep the leg from slipping and sliding open, tie a cord between the anchor point on the plate and on the leg.
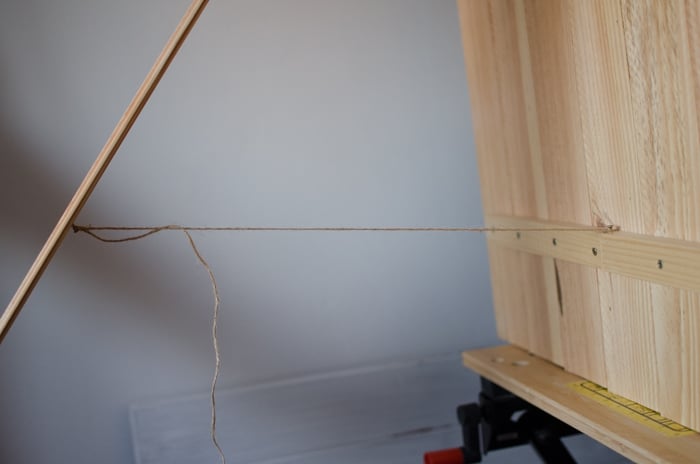
The cord should be just long enough to allow you to open the leg so that the plate will stand up with a slight recline backward for stability.
And there you have it, a wood backdrop that stands on its own. I made two backdrops so that I could combine the two, one standing and one laying down.
Conclusion
In this tutorial, I explained how to make your very own wood backdrop from available materials. This backdrop is extremely useful and versatile. You can use it as a food or product photography background, or for newborn photos.
You can make many creative effects such as distressed wood background or white wood background, using very simple techniques.
Remember to think ahead and adjust the backdrop to your needs. If you intend to use it with foods, animals or children make sure to use non-toxic materials.
Check out our post on how to make a DIY backdrop stand next!