There are quite a few composition rules in photography. And you probably have heard of things like leading lines, the golden ratio, and the rule of thirds. But the golden triangle in photography might be one you haven’t heard of.
In today’s article, you’ll learn how to apply the golden triangle to improve your composition.
[courses category="Composition"]
What Is the Golden Triangle?
The golden triangle is a type of composition. This rule is similar to the rule of thirds. But the way the photo is divided is a little different.
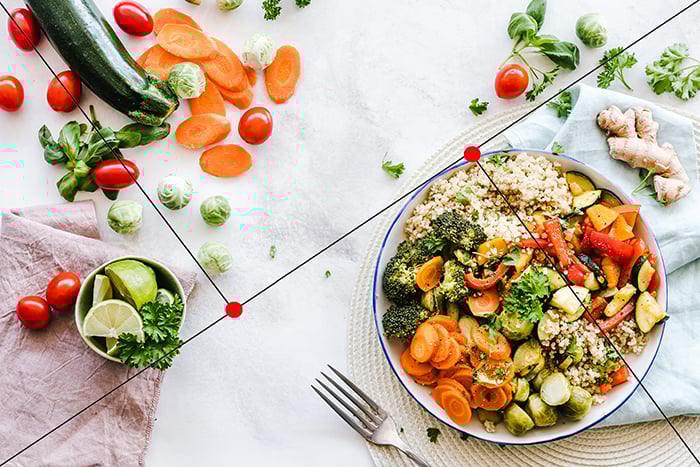
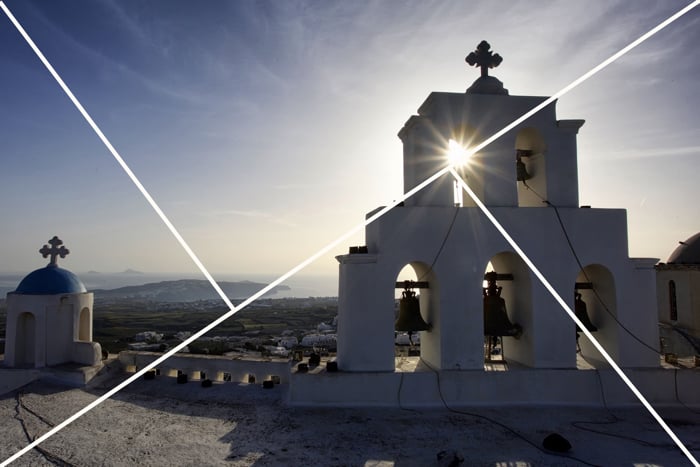
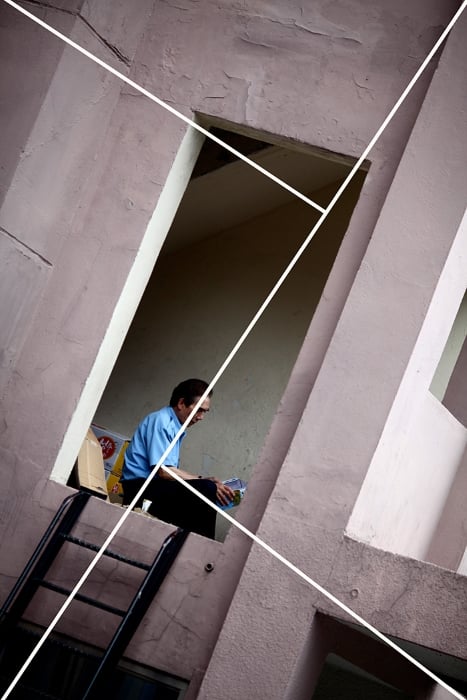
The golden triangle is a series of diagonal lines that form right-angle triangles to act as a composition guide. The main subject of the photo should sit on the intersection of these triangles.
Why Use the Golden Triangle in Photography?
There are lots of common ways to compose your image in photography. But after a while, these formulas can get a little repetitive. If you want to change your composition, look at a variant of the rule of thirds—the golden triangle.
With this type of composition, you use diagonal lines in your photo. This will give your photo a more dynamic feel.
How Is the Golden Triangle Composition Formed?
The rule of thirds puts important elements on the intersecting points of the rule of thirds grid. This grid uses two lines to divide the frame vertically and horizontally to form a 3 x 3 grid.
For the golden triangle, you’ll use triangles instead of boxes, creating diagonals across your composition.
Imagine your frame and draw a diagonal line from the top left corner, and draw it down to the bottom right corner. It doesn’t matter which corners you connect.
Now, from the bottom right corner, draw a line that connects to the diagonal line at a right angle. You can complete this line to the edge of your frame if you wish. Do the same thing with a line from the top left corner until it hits the diagonal line at a right angle.
You now have triangles that form the photographic composition known as the golden triangle. You can use this composition for either a landscape or portrait orientation.
How to Compose a Photo Using the Golden Triangle
Once you have your grid set up for the golden triangle, you’ll notice two intersecting points. Just like in the rule of thirds, you want to put your point of interest over this point of intersection.
Photos tend to have a point of interest and leading lines that run through them. This is how they should be handled for the golden triangle.
- Point of interest—This is the main subject of your photo. For a portrait, the dominant eye should rest on one of these points—most likely the one towards the top of the frame. Landscape subjects, like lone trees or a house, would sit on the intersection point.
- Leading lines—The line that leads to the subject is important. This is what makes your photo a golden triangle composition as opposed to the rule of thirds. Look for a diagonal line that leads to your main subject. This could be a variety of things. In landscape photography, photographers often use a road that cuts through the frame to your main subject.
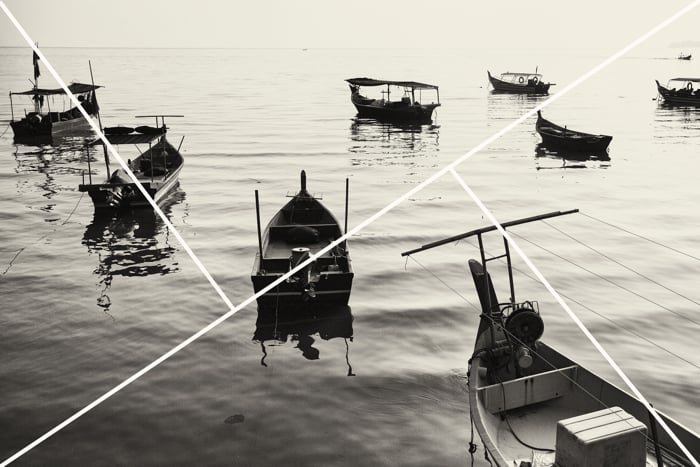
The interesting way the boats line up in this photo makes for a strong composition with some nice triangular formations.
Which Subjects Work Best for This Composition?
There are locations where golden triangle composition is only possible with Dutch angles. But Dutch-angle photos aren’t always everyone’s favorite.
So what type of subjects work for this type of photo? Below are a few ideas to get you started. But just like every other art form, you’ll have to use your own judgment to create your own style.
- Portraits—A standard portrait probably won’t work here. You’ll have too many straight lines. Instead, look at portraits where the model is sitting or lying down. You can play with the angles to create diagonals. Use the arms and legs to create the diagonals that form the golden triangles.
- Mountains—When your horizon line isn’t flat, you have more options to form the golden triangle. Use a diagonal horizon line that leads toward your main subject. You don’t have to use mountains, you can also use something like a sand dune the same way.
- Roads—You can use a road that cuts through your frame at a diagonal to produce a golden triangle composition. Standing to the side of the road is one way to make the road run through your frame diagonally. If you can shoot from above the road to remove the horizon line, this may also help with composition.
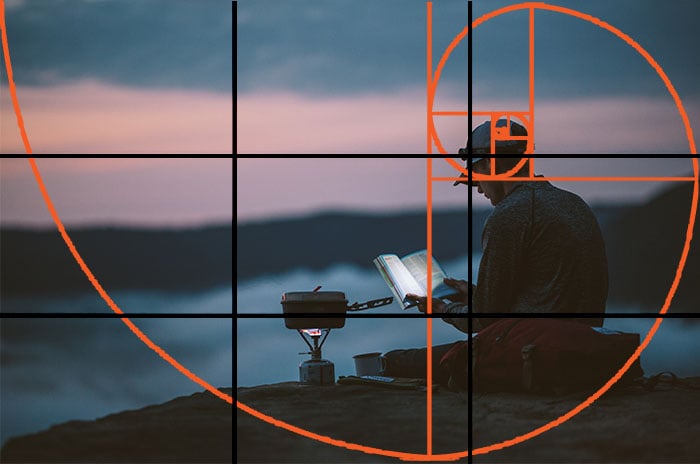
The Golden Triangle vs. The Golden Ratio
The golden ratio is an alternative way of composing a photo. It’s based on rectangles within rectangles that decrease in size through the composition.
The ratio is 1:1.618, which creates a spiral similar to a nautilus shell. As you look more outward from the subject, the other elements continue to line up to this golden spiral.
Conclusion—Golden Triangle in Photography
Good photography depends on a strong composition. It’s important to experiment with different ways to frame a photo.
At first, it might be difficult to see this new way of composing your image. But the more you practice, the easier it becomes. It’s a bit like learning a new language, only this is a visual language. With practice, you’ll start seeing the golden triangle everywhere.
[courses category="Composition"]


