A smooth Lightroom workflow is essential for keeping digital photography organized. Beginners may not immediately see its importance, but more experienced photographers will always wish they had organized their digital editing software from the beginning.
This article will guide you on everything you need to know about getting your Lightroom workflow in the right state. We will cover the basics while explaining how the Lightroom cataloging system works. We will also include some essential tips covering adjustments you need to know.
Each section links to a detailed article on the subject. Click these links for step-by-step instructions on the key points mentioned.
Why is a Good Workflow Important?
Your Lightroom workflow is important because this is the digital editing software that houses all your photography. If you make a conscious decision to stay on top of your Lightroom workflow, you will be able to easily transfer between cameras and computers while keeping your archive uniform.
Ensure you understand each section, as it will be important in the long run. A good workflow makes searching for old photos a breeze. It also means that sorting through large jobs to whittle down to a final selection is as easy as possible.
What is the Lightroom Catalog?
Adobe Lightroom uses a Catalog system to provide different workspaces for different photographs. If you are a beginner, I suggest using one Catalog to keep all your photographs inside the same space. Experienced photographers may want different Catalogs, one for personal photographs and one for work.
This next section will dive deeper into the Catalog system so you can use it to its full potential. We will also cover how you can easily transfer these from one computer to another and how to back it up so you never lose your photos!
Understanding the Catalog
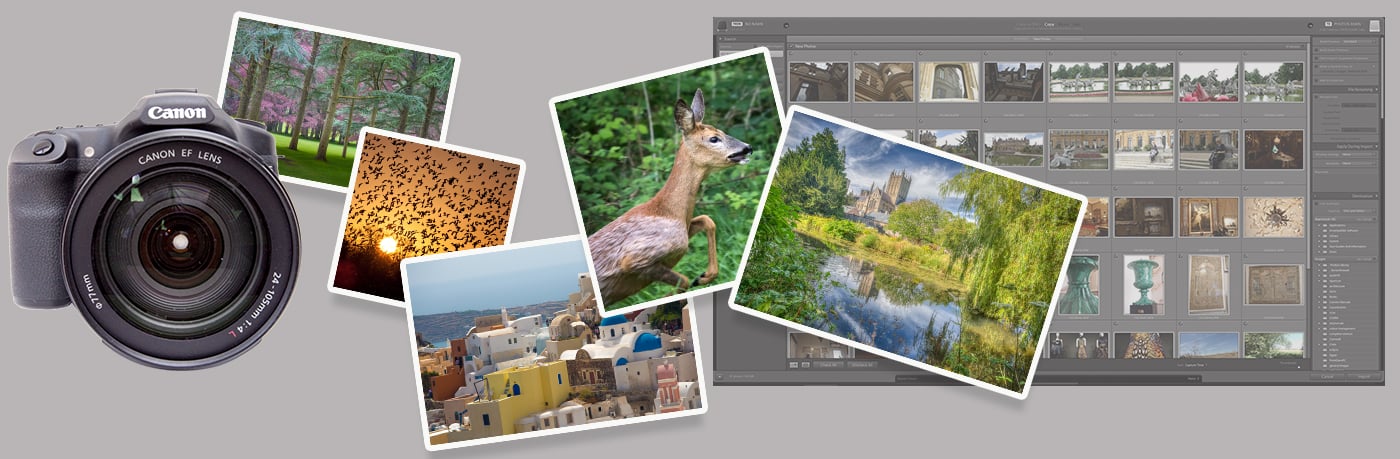
The Lightroom catalog system is a database that stores all your photos and keeps track of the changes you make. It also saves metadata like camera settings, lens info, and GPS location.
Lightroom uses catalogs to organize photos. A single catalog can hold a huge number of images. You can sort photos inside a catalog using collections and smart collections.
The catalog makes it easy to find and edit any photo in your library. Editing is non-destructive, so you never lose the original file. Lightroom’s develop module has simple sliders for adjusting things like exposure, contrast, and color. To dive deeper into Lightroom editing, the lightroom catalog system is a great place to start.
Backup Your Catalog
Lightroom doesn’t actually store your photos. It simply stores information about them in a catalog. Any edits, presets, stars, labels, or metadata you add to an image gets stored with the image file.
Backing up your Lightroom catalog is important. If anything happens to your computer, like theft or hard drive failure, you’d have to start from scratch without a backup. Ideally, have two external backups and one in a cloud-based program.
To find your catalog location, go to Catalog Settings > General > Location > Show. The backup is stored in the same place, in a “Backups” folder. You can also find out how to set how often to backup your Lightroom catalog here. Choosing “Every time Lightroom exits” is the safest option.

Transfer Lightroom Catalog
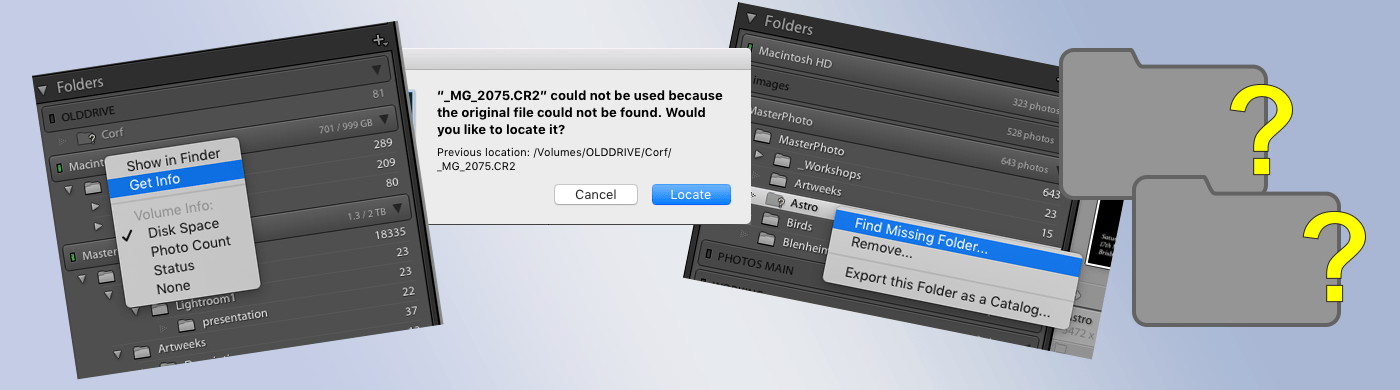
Transferring your Lightroom catalog to a new computer is a simple process. First, organize your folders in Lightroom on your old computer. Then, back up your photos, catalog, presets, and preferences.
Install Lightroom on your new computer and transfer the backed-up files, making sure to put them in the same paths as the original locations. Open the catalog file and relink any missing photos or folders. Finally, check that your presets, preferences, and plug-ins are all there.
Learning how to transfer a Lightroom catalog to a new computer will ensure a smooth transition and get you back to editing your photos quickly.
Lightroom Basics
If you are a complete beginner, you may be overwhelmed by the Lightroom interface. This next section will guide you to the most crucial parts of Lightroom: the import, organization, and export of your photographs.
These features are well signposted in the interface, but you may want to know which settings are best for working with. This next section will ensure you get the crucial information that other photography websites often overlook.
Importing Photos
Importing photos into Lightroom is simple. Connect your camera to your computer using a USB cable and turn it on. Click the Import button to bring up the import dialogue box.
In the center window, select the photos you want to import. Choose Copy or Copy as DNG at the top center of the screen. This copies the photos to your computer’s hard drive so you can reuse your memory card.
The right window shows where your photos will be copied. You can select a folder or create a new one. Apply any desired settings like copyright info or keywords in the Apply During Import panel. Finally, click Import to bring your photos into Lightroom. For a more in-depth look at importing photos into Lightroom, our beginner’s guide covers everything you need to know.
Organize Your Photos
Let’s now take a look at some top tips to organize your photos.You can choose where to store your images, such as on an external hard drive. Also, you should create a folder structure that works for you, like organizing by date or photo shoot.
Use one master catalog in Lightroom instead of multiple catalogs. This makes it easier to search for photos across all your shoots. Adjust your catalog settings and preferences to fit your needs.
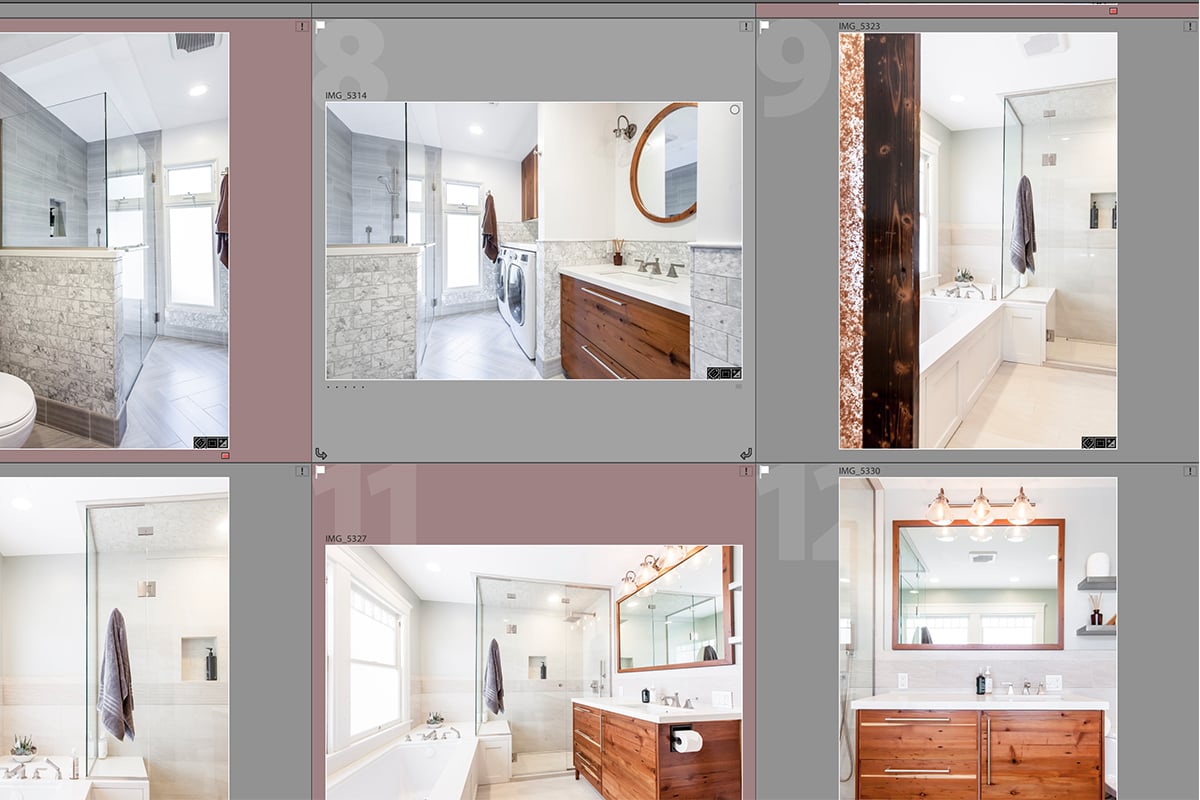
Create metadata presets with your copyright info. Add keywords to your photos so you can find them later with Lightroom’s search. Use flags, stars, and color labels to mark your best images.
You should delete rejected photos to save space and reduce clutter. Group your best images into Collections for quick access.
Organizing photos in Lightroom is key to an efficient editing workflow. Taking time to set up these systems will save you hours in the long run.

Exporting Photos
Exporting photos from Lightroom is an important step in sharing your edited images. To export, select the photo and go to File > Export. Choose your export settings like file type, size, and quality.
You can export multiple photos at once by highlighting them before starting the export process. The export settings you choose will apply to all selected images.
To save time, create export presets for common settings like web or print. Lightroom Classic also lets you export to online galleries like Smugmug and Flickr. If you’d like to learn more about exporting photos from Lightroom, this in-depth guide covers the process step by step.

Ideal Export Settings
Exporting photos from Lightroom is not a one-size-fits-all situation. The best export settings depend on where you plan to share your images. For online posting, JPEG is the universal file format. But it’s a compressed file, so you lose some quality when exporting.
To reduce file size in Lightroom, use the slider to reduce JPEG quality to 85% or set a size limit. Most online content is viewed on screens with limited colors, so sRGB is the best color space for posting online. If you’re printing photos, export your file with the original size and change the resolution to 300 ppi.
Lightroom export settings are important to master for sharing your best work. By adjusting settings like file format, color space, and resolution, you can optimize your photos for different uses without losing quality.

Useful Tips
This next section is for photographers who want to learn simple but crucial adjustments you can make in digital photo editing software. These actions range from editing a batch of images simultaneously to importing presets that you may buy online.
Each section will introduce a new tip or technique. To get a full step-by-step guide to these actions, click the link!
Resize an Image
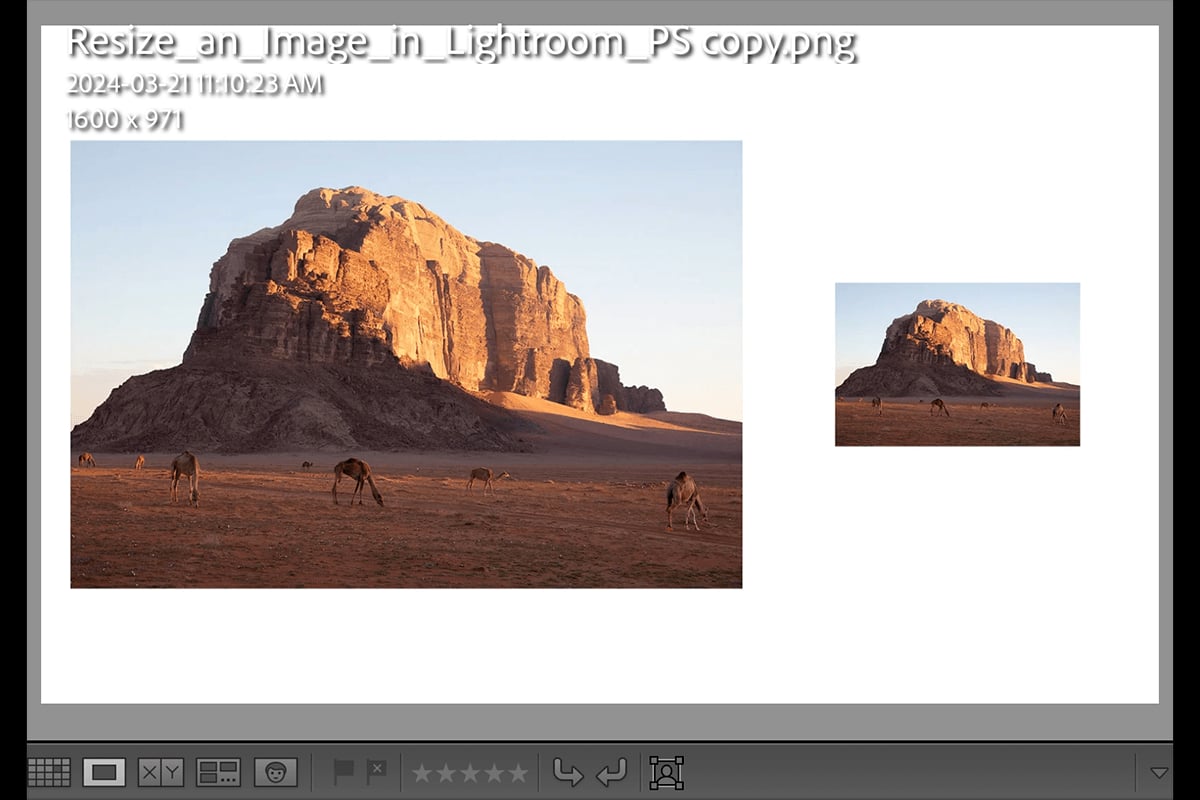
Resizing images in Lightroom is an important skill for photographers. It lets you adjust photo dimensions for different uses, like printing or sharing online.
Lightroom offers several ways to resize photos. You can set exact width and height values, resize based on the long or short edge length, or even specify a megapixel size. The export dialog also lets you choose the resolution in pixels per inch.
For web images, 72 PPI is standard. Print photos need higher resolution, usually 300 PPI. Lightroom makes it simple to resize your images to the perfect dimensions. Resizing an image in Lightroom is a key part of any editing workflow.
Batch Edit
Batch editing in Lightroom saves time by applying adjustments to multiple photos at once. This is helpful when editing photos from an event or photoshoot with similar lighting.
There are several ways to batch edit in Lightroom. You can apply presets during import, use the Quick Develop panel in the Library module, or sync adjustments across selected photos. The Auto Sync feature lets you adjust multiple images in real-time.
Creating your own presets is the easiest way to batch edit. Simply apply your favorite adjustments to one photo, then save them as a preset to use on other images. You can also batch edit in Lightroom by copying and pasting metadata across a group of photos.

Import Presets
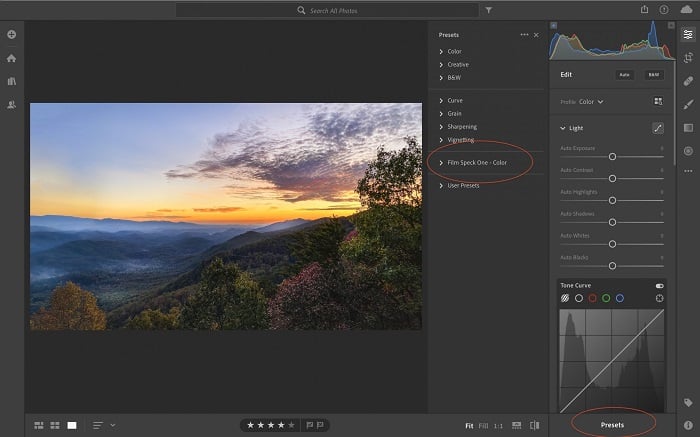
Lightroom presets are post-processing recipes that can completely change the look and style of your image with just one click. You don’t need to be a post-processing expert to give your photos a professional look. The installation process is simple once you know a few steps, and it’s slightly different depending on whether you’re using Lightroom Classic or Lightroom CC.
To get started, download the preset or preset bundle onto your hard drive. If it downloads as a .zip file, unzip it first. In Lightroom Classic, go to the Develop Module and click on the “+” sign next to the Presets heading. Select “Import Presets,” navigate to the preset file, and click “Import.” In Lightroom CC, select File > Import Profiles and Presets, navigate to the preset file, and click “Import.”
Once you’ve imported the presets, you’re ready to start using them. Select an image and click on a preset to instantly update the settings for a new look. If you’d like to learn more about how to import lightroom presets, there are many helpful resources available online.
Adding Watermarks
Adding a watermark to your photos in Lightroom is a simple way to protect them from theft and unauthorized use. It’s also a great tool for marketing your work or identifying the photos as your own.
Lightroom offers two types of watermarks: text and graphic. Text watermarks are perfect for adding your name or copyright, while graphic watermarks allow you to add a logo or any other image to your photo. The best part is that you can apply watermarks to multiple images in batches during the export process, saving you a lot of time.
To create a watermark, go to the Edit Watermarks menu in Lightroom. Here you can choose between text and graphic options, and personalize your watermark using various settings like font, opacity, size, and position. Once you’ve created your watermark preset, simply select it from the drop-down menu during export to add a watermark in lightroom to your chosen photos.
![]()
Smart Previews
Lightroom smart previews are a great way to speed up your workflow. They are small, compressed DNG files that Lightroom creates from your original RAW files. This means you can edit your photos without having the RAW files connected to your computer.
Smart previews take up much less space on your hard drive than RAW files. They also allow Lightroom to run faster when you’re editing in the Develop Module. You can even create HDR images and panoramas using smart previews.
To see if an image has a smart preview, look under the histogram in the right-hand panel of the Library or Develop Module. Lightroom smart previews give you the flexibility to edit your photos remotely without needing to bring along all your original files.

Lightroom Shortcuts
Lightroom shortcuts can speed up your editing workflow. Flagging photos with ‘P’ and rejecting with ‘X’ makes culling quicker. Use number keys to apply star ratings from 1-5 and color labels from 6-9.
Press ‘L’ to cycle through Lights Out modes for a clutter-free view. ‘F’ toggles full screen mode. Shift+Tab hides side and top/bottom panels.
In the Develop module, ‘R’ activates crop mode. ‘Q’ accesses the heal/clone brush, with Shift+T to switch between them. ‘M’ opens the graduated filter and Shift+M the radial filter. ‘K’ activates the adjustment brush. ‘V’ converts to black and white.
To save time, copy settings with Command+Shift+C (PC: Control+Shift+C) and paste to other photos with Command+Shift+V (PC: Control+Shift+V). For more lightroom shortcuts, press Command+/ (PC: Control+/).