Where you place the subject in your photos has a huge effect on your final composition. There are no set rules for subject placement in photography. You have to freedom to place your subject wherever you want. But there are a few conceptual ideas that can help you find more impactful solutions to placing your subject in photos.
This article is a great starting point if you want to learn more about subject placement in photography. We explore how subject placement influences the viewer’s interpretation of your image. And look at how different placement styles, to help you develop a better sense for subject placement.
Each section has a link with more information, so follow the links to learn more.
Placement in Photography
Placing your subject in the right spot can greatly improve your photos. Use leading lines to draw attention to your subject or apply the rule of thirds to position them at points of interest. When photographing moving subjects, leave space in the frame for them to move into.
Contrasting colors, lighting, and textures can make your subject stand out. Side lighting adds drama while diffused light conveys calmness. Experiment with different angles and perspectives to change the feeling of your image.
Declutter the scene so every element has a purpose and leads the viewer’s eyes to your subject. If you’re struggling to find interesting subjects, step out of your comfort zone and try new photography genres or engage in a photography challenge to test your creativity.
Focal Point
The focal point is the part of an image that draws the viewer’s eye. It’s the center of attention, and choosing the right one is important. It has a big impact on how the viewer appreciates the image.
To create a strong focal point, use a narrow depth of field by focusing on the subject while keeping the rest of the elements blurry. This works best when the subject is farther from the background. You can also use the rule of thirds or leading lines to place your subject for stronger compositions.
Contrast is another way to highlight your focal point. Place the subject in bright areas with strong light contrast, or use color contrast by having the subject stand out against the background. In portraits, focus on the eyes for the strongest impact. If you want to learn more about focal point in photography, there are many great resources available.
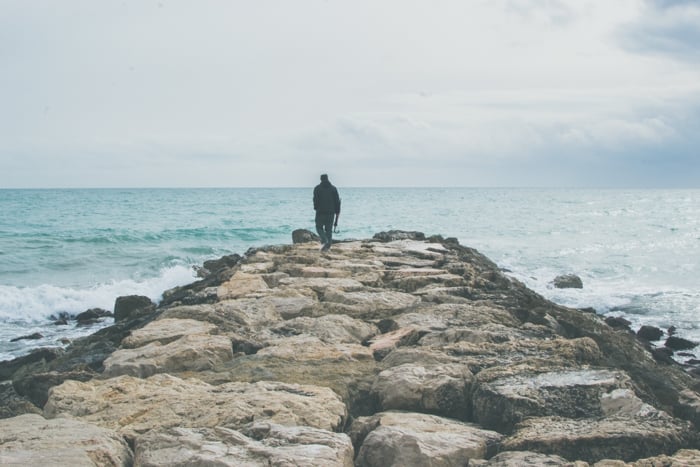
Horizontal Placement
The horizon is one of the most important elements in photography composition. Where you place it can make a big difference in the overall look and feel of your photos.
Avoid placing the horizon directly in the middle of the frame, as this tends to divide the photo in half and results in an unnatural look. Instead, place the horizon slightly lower or higher in the frame to create a feeling of stability and balance.
If the top half of the frame is more interesting, adjust your composition so the horizon is lower. This can help evoke extra feelings and draw attention to the sky. On the other hand, if the ground is more interesting, place the horizon higher to focus on the color and lines in the foreground.
To learn more about horizon placement, check out our in-depth guide.

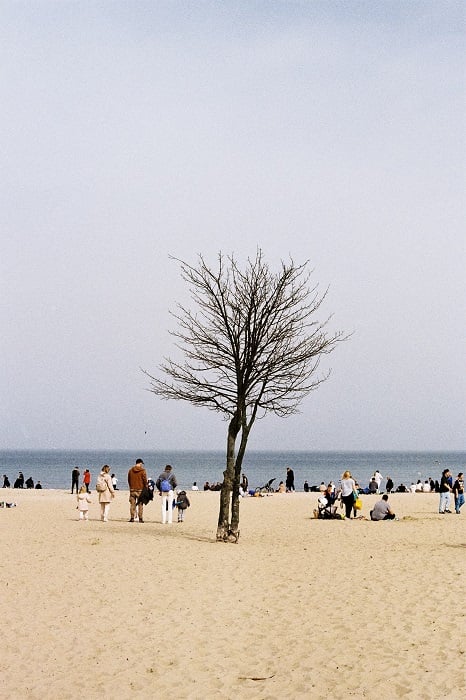
Single Point Composition
The single point in composition is a powerful tool for creating compelling photos. By placing a single subject against a contrasting background, you can draw the viewer’s eye and evoke emotions.
The placement of the point is key. Centering the subject can create a sense of balance, while placing it off-center or near the edge can make the photo more dynamic and thought-provoking. The surrounding area should still be interesting to look at, even if the focus is on the single point.
Contrast is also important. The point of interest should stand out from the rest of the frame, whether through size, color, tone, or shape. Black and white photos can be particularly striking in this regard.
To learn more about the single point in composition, check out this in-depth article.

Vanishing Point
A vanishing point in photography is where parallel lines seem to converge in the distance. This creates a sense of depth and can guide the viewer’s eye to an important element in the frame.
To capture vanishing points, use a wide aperture like f/11 or f/16 for a large depth of field. Focus carefully to keep both foreground and background sharp. Wide-angle lenses exaggerate the distance and perspective.
Combine vanishing points with the rule of thirds for strong compositions. Place the point where the lines converge near one of the intersections formed by dividing the frame into thirds. You can also position your main subject in front of the vanishing point to emphasize it.
To learn more about vanishing point in photography, this in-depth article explores the topic further.