ExpertPhotography
  • Articles
  • My Learning
  • Store
  • About
  • Contact
  • Photo Quiz
ExpertPhotography

Learn Photography
  • Quick Capture Cheat Sheets
  • Photography for Beginners
  • Intuitive Composition
  • Show more...
  • Effortless Editing With Lightroom
  • Epic Landscape Editing
  • The Preset Collection
  • Show more...
  • The Magical Photography Spellbook
  • Dreamy Childhood Portraits
  • The Creative Photography Cookbook
  • Show more...
  • Simply Stunning Landscapes
  • Infinite Exposures
  • Milky Way Mastery
  • Show more...
  • Products In Focus
  • Fairytale Portraits
  • Organic Marketing for Photographers
  • Show more...
Need Help?
Contact UsCookie PolicyPrivacy PolicyTerms of Use
Connect

ExpertPhotography is part of several affiliate sales networks. This means we may receive a commission if you purchase something by clicking on one of our links.

ExpertPhotography is a participant in the Amazon Services LLC Associates Program, an affiliate advertising program designed to provide a means for sites to earn advertising fees by advertising and linking to amazon.com.

As an Amazon Associate, I earn from qualifying purchases.

Expert Photography © 2011-2024. All Rights Reserved.

Privacy Policy Terms of Use

News and Interviews

How to Rotate an Image in Photoshop

Szilard Kovacs
by Szilard Kovacs
Last updated: 04/04/2025-2 min read
ExpertPhotography is supported by readers. Product links on ExpertPhotography are referral links. If you use one of these and buy something, we make a little money. Need more info? See how it all works here.

In the world of digital design and photography, Photoshop reigns supreme, but even the most seasoned users can stumble upon simple tasks such as image rotation. Whether you’re correcting a slanted horizon, or simply want to change the orientation of your photo for a creative project, knowing how to rotate an image efficiently in Photoshop is a crucial skill. This article provides a comprehensive, step-by-step guide on how to do just that. From selecting your image to fine-tuning the rotation and applying the final touches, we’ve got you covered. Let’s get started.

Fantastic photo adventures course Fantastic photo adventures course

Step 1. Open the Free Transform Tool

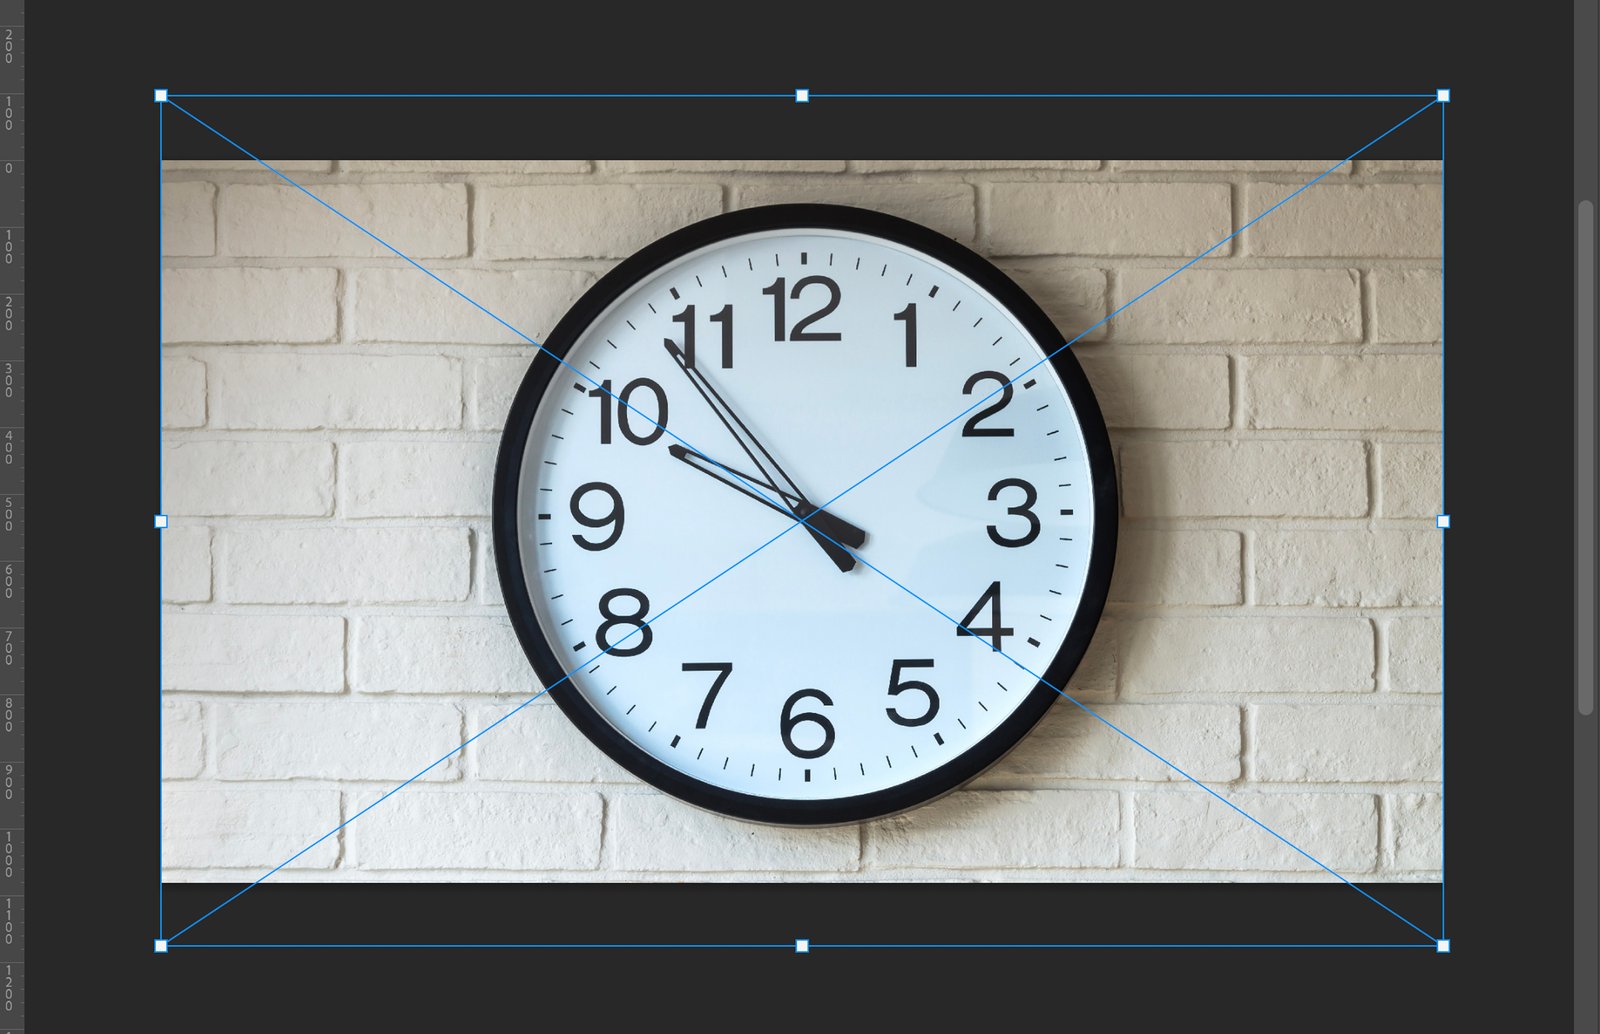
Now that we’ve selected the image, let’s move on to the Free Transform tool. Go to Edit > Free Transform, or press Ctrl + T (Command + T on Mac) to open it.

A clock with a clear, bold black number against a white background.

Step 2. Rotate the Image

Time to rotate! There are two ways to do this.

Step 2.1 Rotate Using the Free Transform Handles

Click and hold one of the corner handles of the bounding box around your image. As you move your cursor, the image will start to rotate.

A large clock set against a brick wall background.

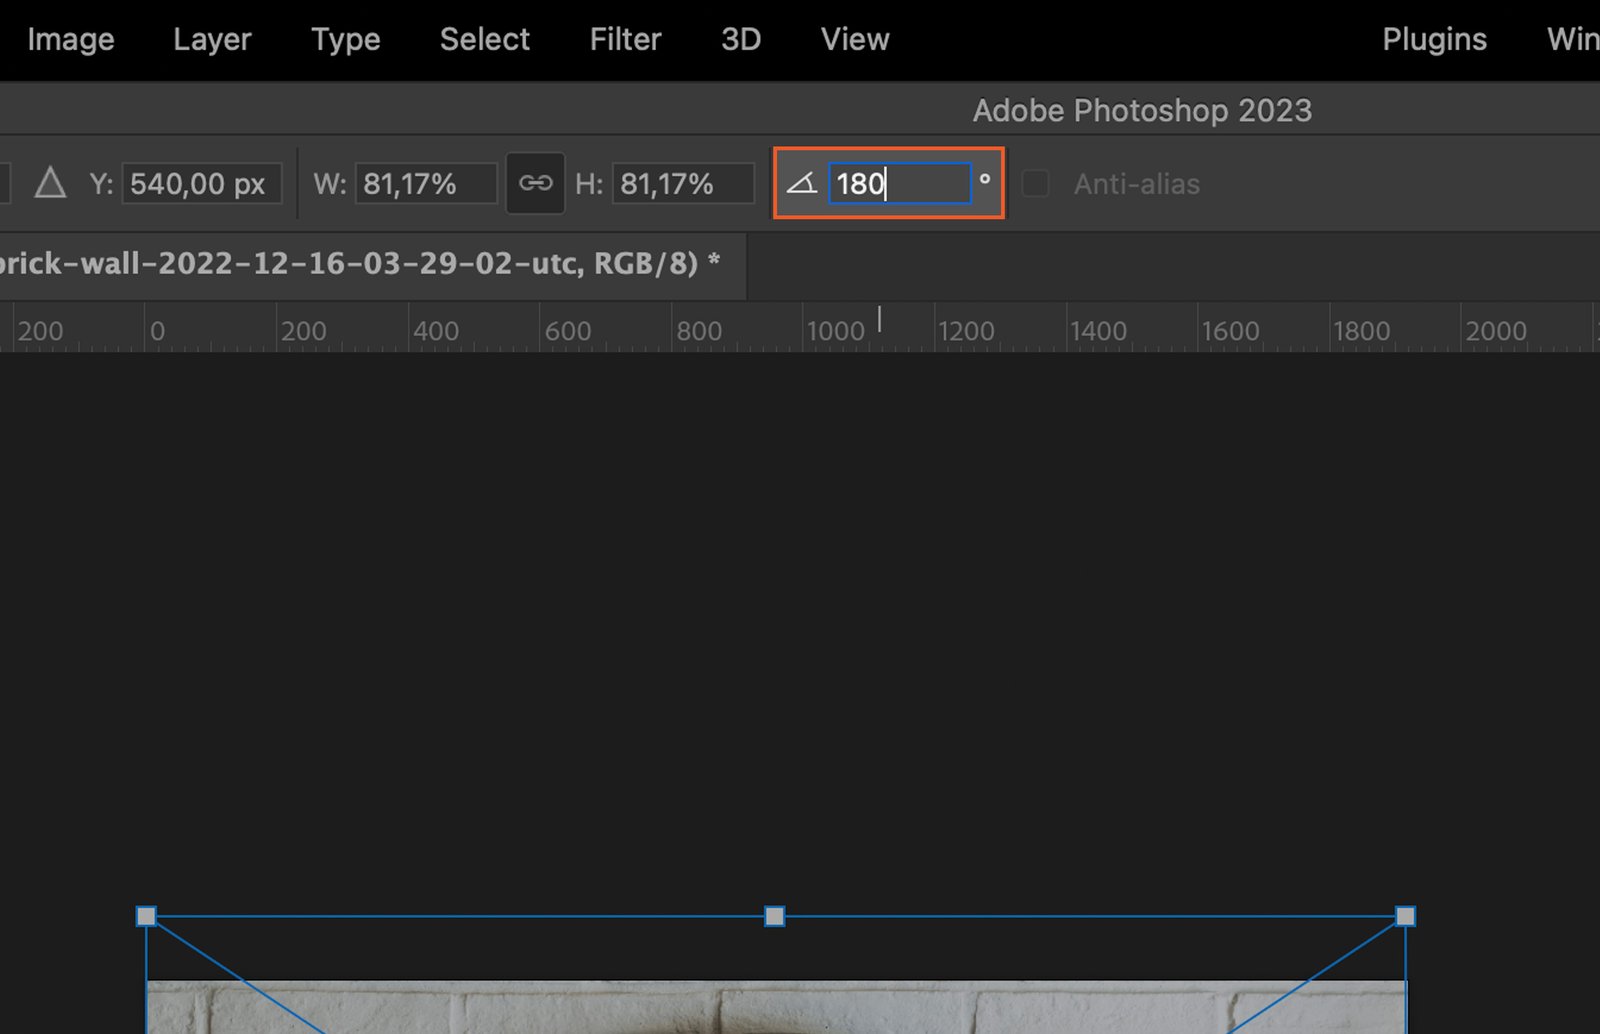
Step 2.2 Rotate Using the Options Bar

Alternatively, you can use the rotation angle box in the Options bar. Just type in your desired degree and hit Enter.

Rotation angle option in Photoshop.

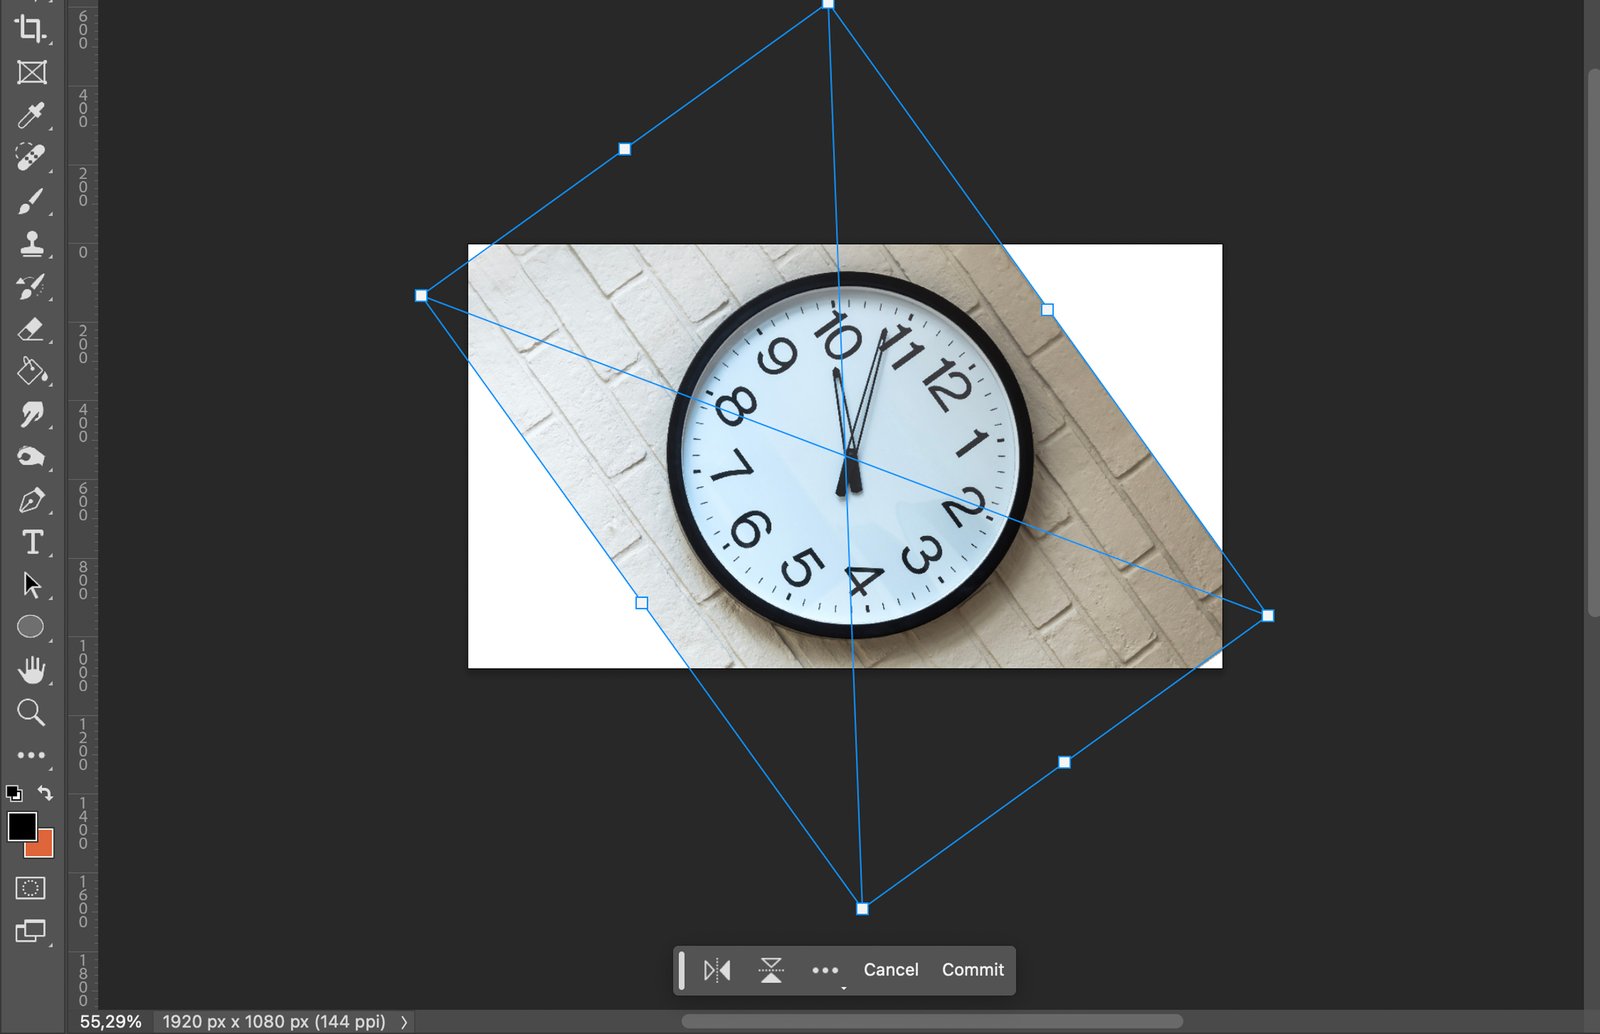
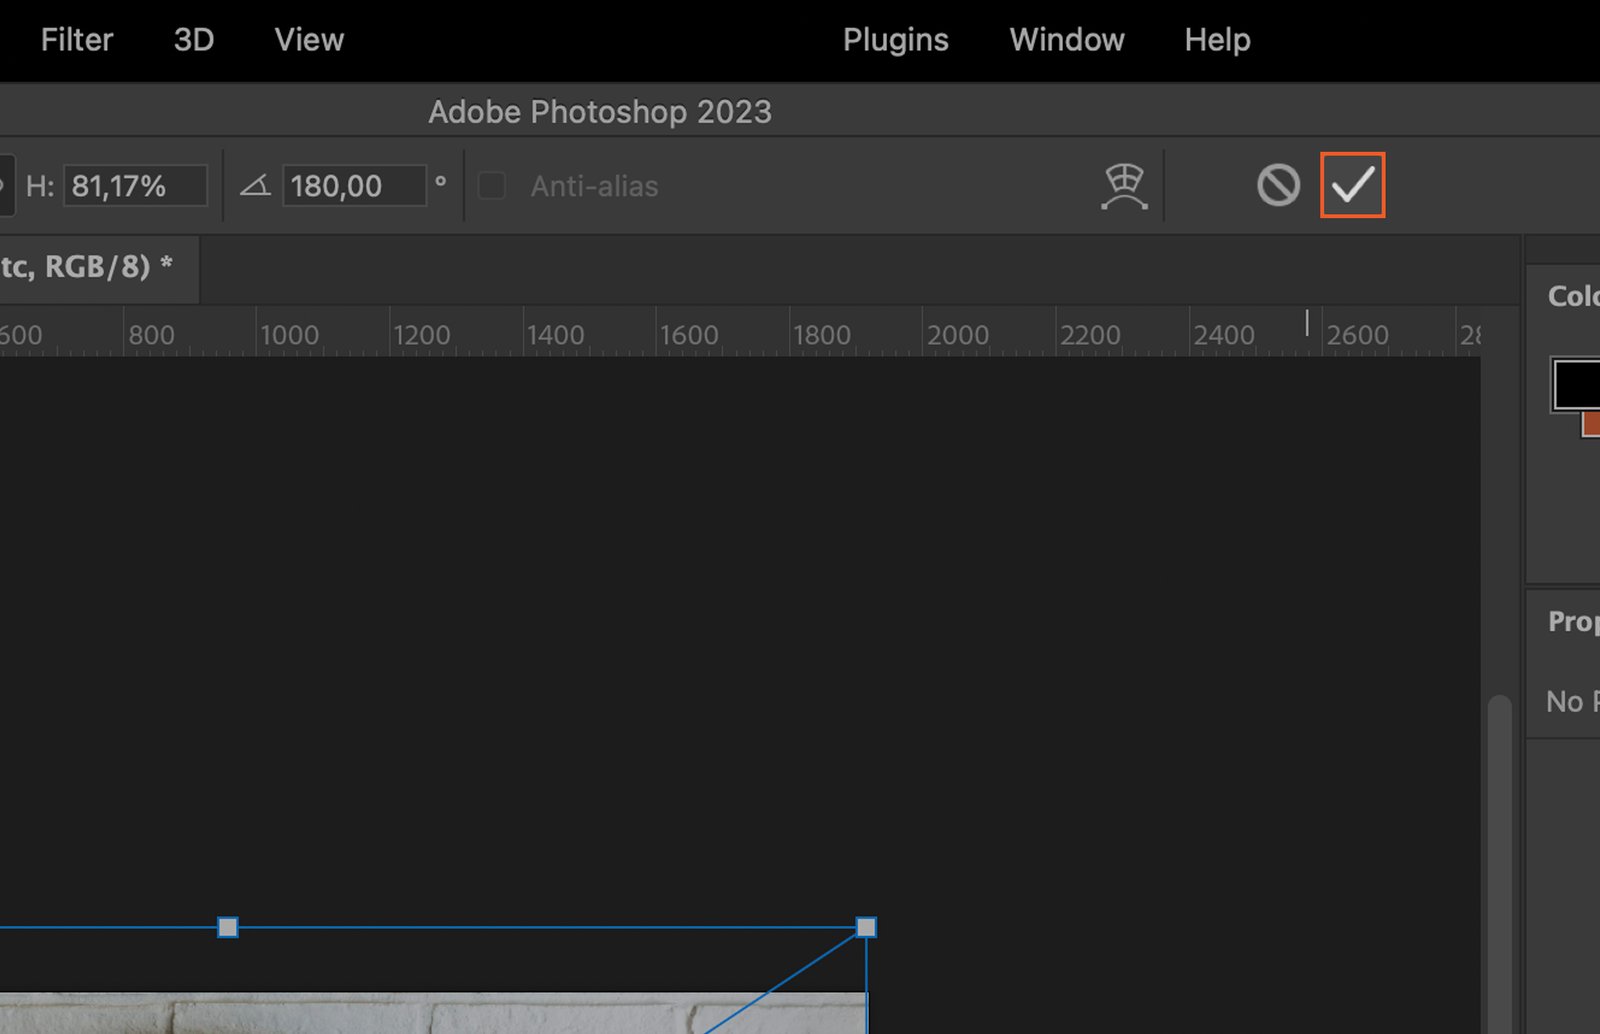
Step 3. Confirm the Rotation

Happy with the rotation? Great! Click the checkmark in the Options bar to confirm it.

A highlighted confirmation icon.

Step 4. Fine-Tuning the Rotation

If you need to make minor adjustments, just repeat steps 2 and 3 until you’re satisfied.

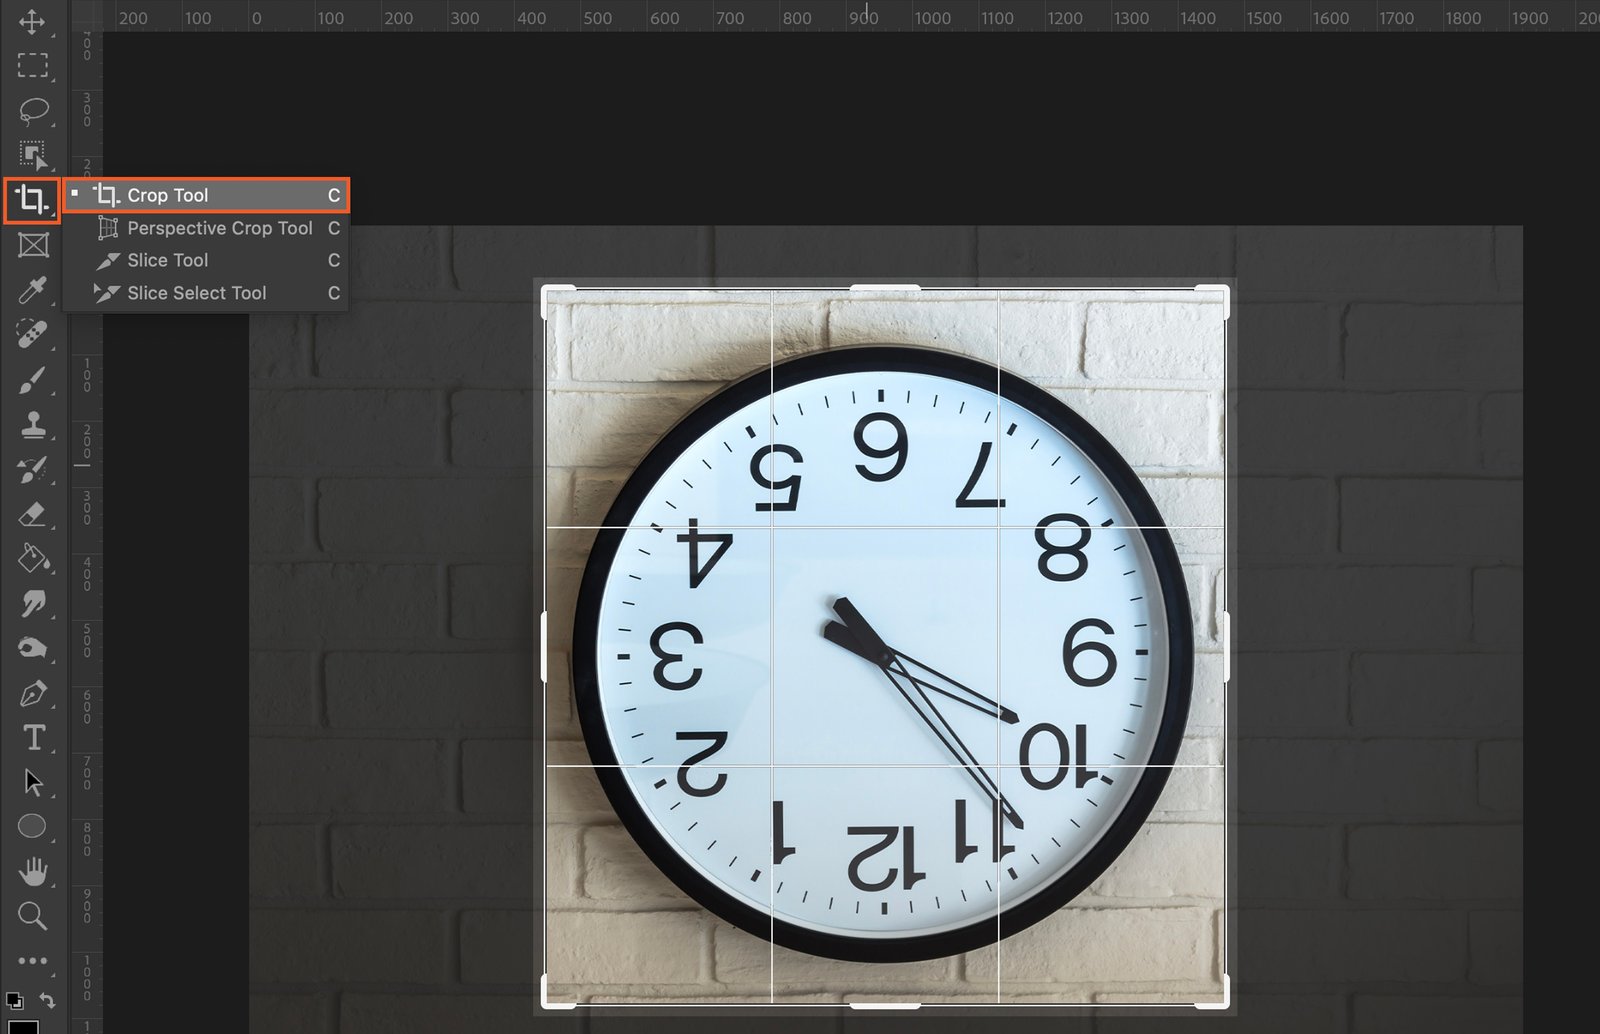
Step 5. Use the Crop Tool

Got some extra space after rotating? Use the Crop tool. Click the Crop tool icon (it’s the one that looks like two intersecting right angles) and adjust the area you want to keep.

An analog clock against a brick wall background.

P32 [Lead gen] sidebar banner Related ebook
P32 [Lead gen] Sidebar Banner
P32 [Lead gen] Sidebar Banner 2

Popular Content

How to Adjust White Balance in Photoshop (Step by Step)

Read Article