Today, we will compare Darktable vs Lightroom as photo editing applications. We will dissect Darktable to see whether it is a good alternative to Adobe Lightroom. This Darktable review will examine this digital editing software in detail to see if it is the right program for you.
The main advantage Darktable has in Darktable vs Lightroom is that it is free. This is enough of a feature to convince any photographer to try this photo editing application. So, if you don’t want to commit to an Adobe subscription package, read ahead and see if this is for you.
What is Darktable?
Darktable is an open-source digital editing software. It allows you to read RAW files, sort and catalog your images, and perform a range of basic edits.
These abilities cover basic to intermediate levels of photo editing, so Darktable could be the only digital editing software you need.
Darktable is a free Lightroom alternative. It performs many of the same actions and exists as a direct competitor to the Adobe giants. As we have mentioned, its most attractive quality is that it is completely free.
Like Lightroom, Darktable is a non-destructive photo editing software. This means the programs will not edit or modify your original RAW files.
Darktable is available for Mac, Windows, and Linux users. I work on Mac, so we will look at both programs on Apple’s operating system.
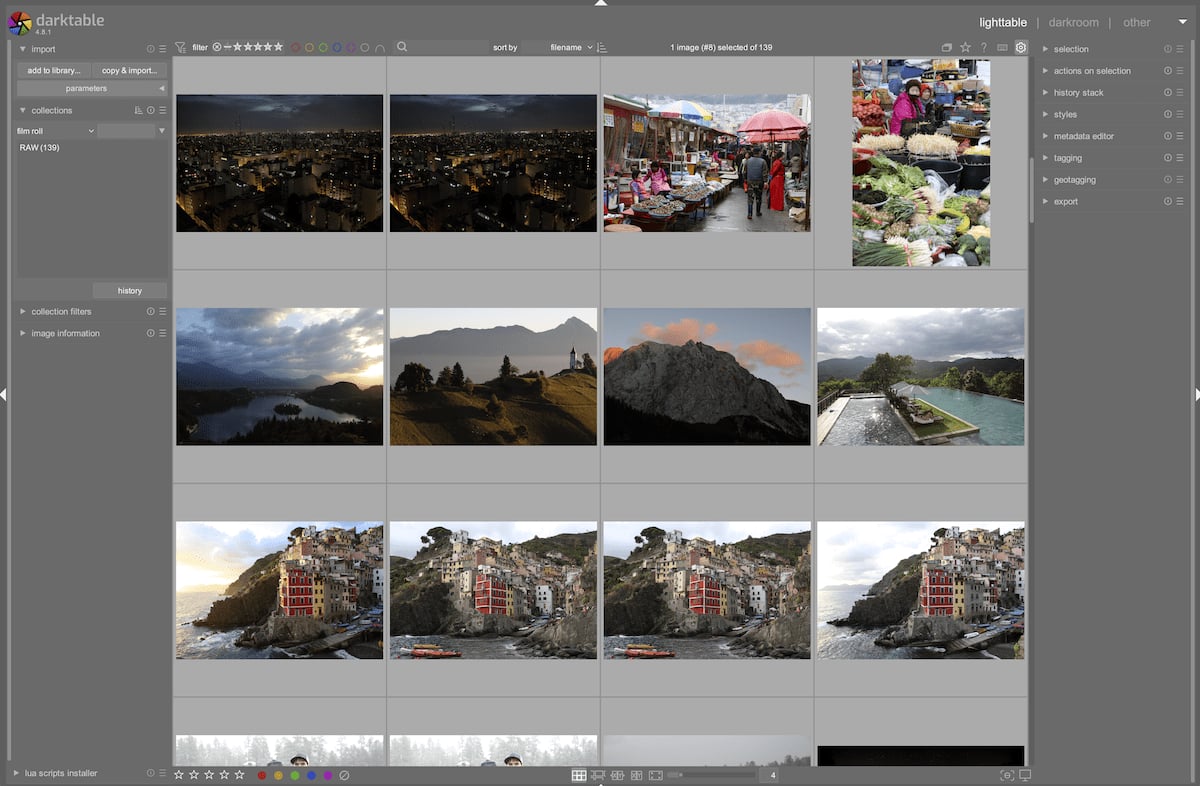
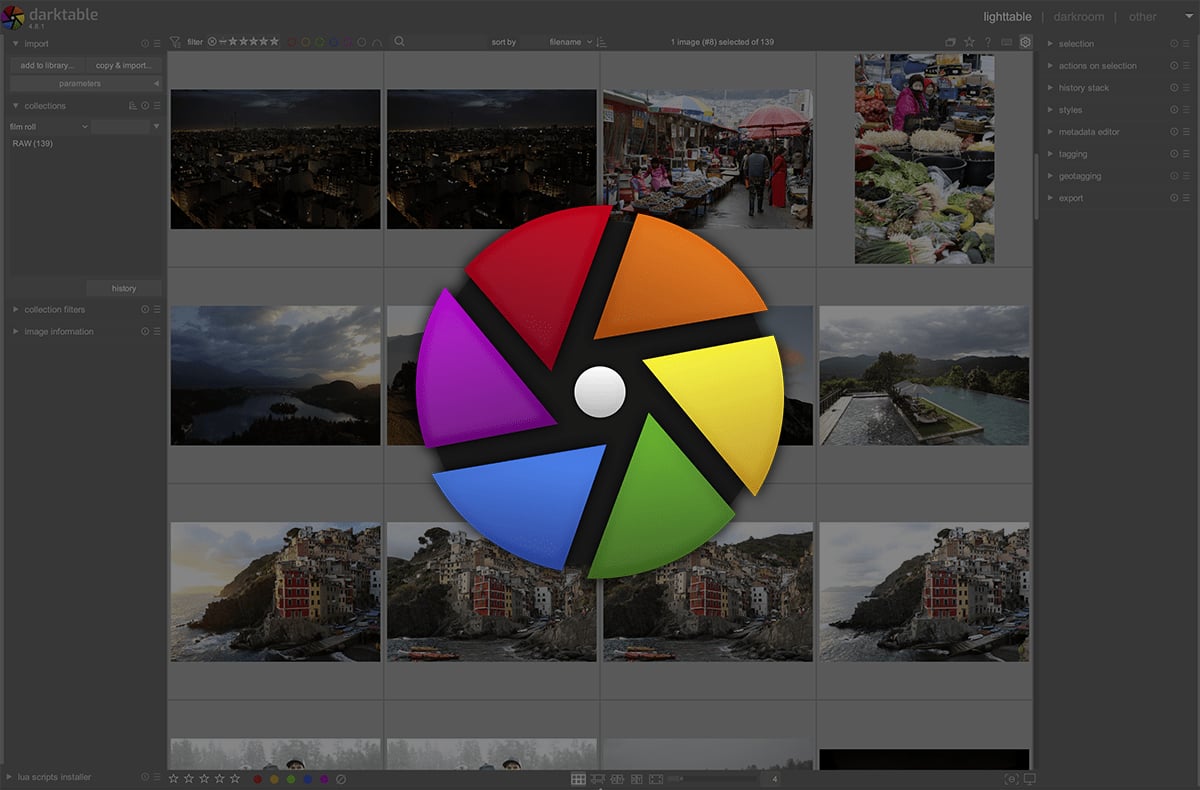
The Darktable library section is called ‘Lighttable’
Darktable vs Lightroom
The main difference between Darktable vs Lightroom is that one is free open-source software, and the other is a subscription-based service. This means that the funding and resources available for the better-funded program will result in much better features and user experience.
So, Adobe Lightroom will have cutting-edge technology designed by top software engineers to make our lives easier for editing. On top of this, the user design and experience are also considered in detail.
These features mean that Adobe will most likely be the digital editing software of choice for photographers. But the price point is costly. This means many photographers will turn to Darktable as a program that is not quite as capable but is completely free.
Despite Darktable’s shortcomings, open-source programs can triumph over other software due to community engagement and responses. This is an attractive feature for photographers who want to be involved with the software they use.
Software We Will Use
Let’s now compare the two programs across a range of different features. I will use Lightroom Classic to contrast with Darktable, which is the most similar. Read our Lightroom review to learn the difference between Lightroom and Lightroom Classic.
Importing and Organising Images
Darktable is similar to Lightroom as it uses different modules for different workflows. The first you will come across is Lighttable, which is the equivalent of the Library module in Lightroom.
The Lighttable interface houses all the importing and cataloging abilities. Let’s see how these features hold up on Darktable vs Lightroom.

Importing Process
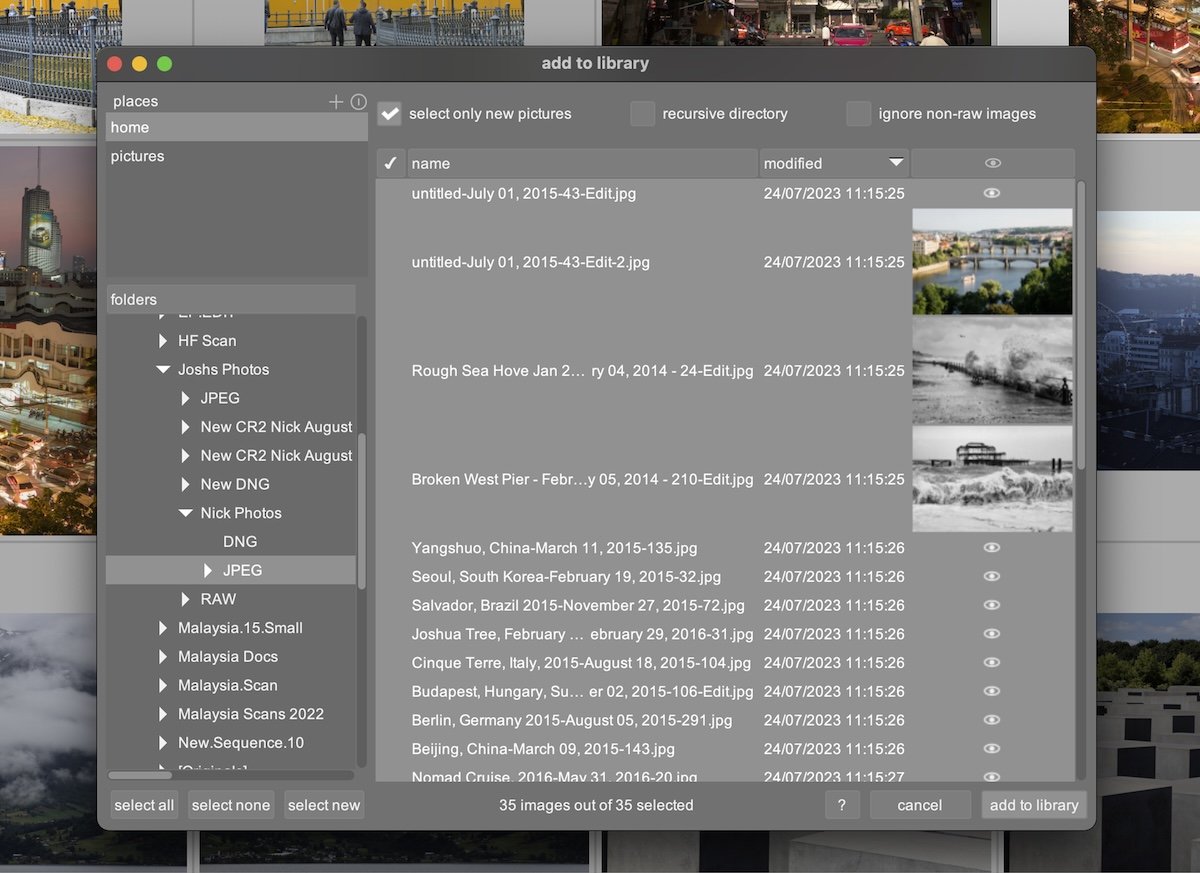
The importing process is not as sophisticated as that of Darktable vs Lightroom. You do not miss out on any features, but it could be more user-friendly and easy to navigate around.
The most noticeable feature is the need for more imagery in Darktable. You can see each picture by clicking the eye icon at the end of each image’s information. But this only brings up a low-res thumbnail. In contrast, Lightroom offers good-resolution thumbnails that you can adjust in size.
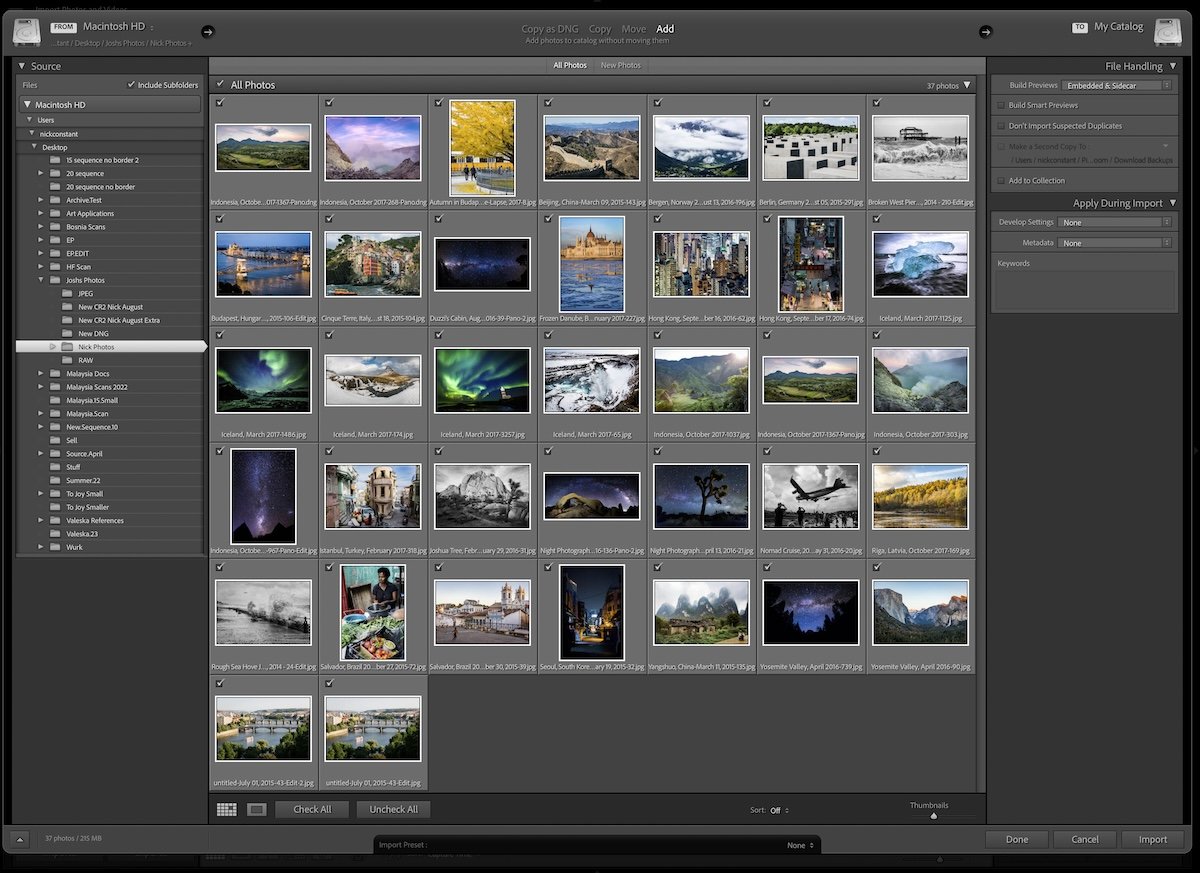
Lightroom also offers the chance to start cataloging your images and applying edits to your images at this early stage. Darktable does not allow you to do this. However, it is not an issue as these are features that you will likely not use daily.
Cataloging and Organizing
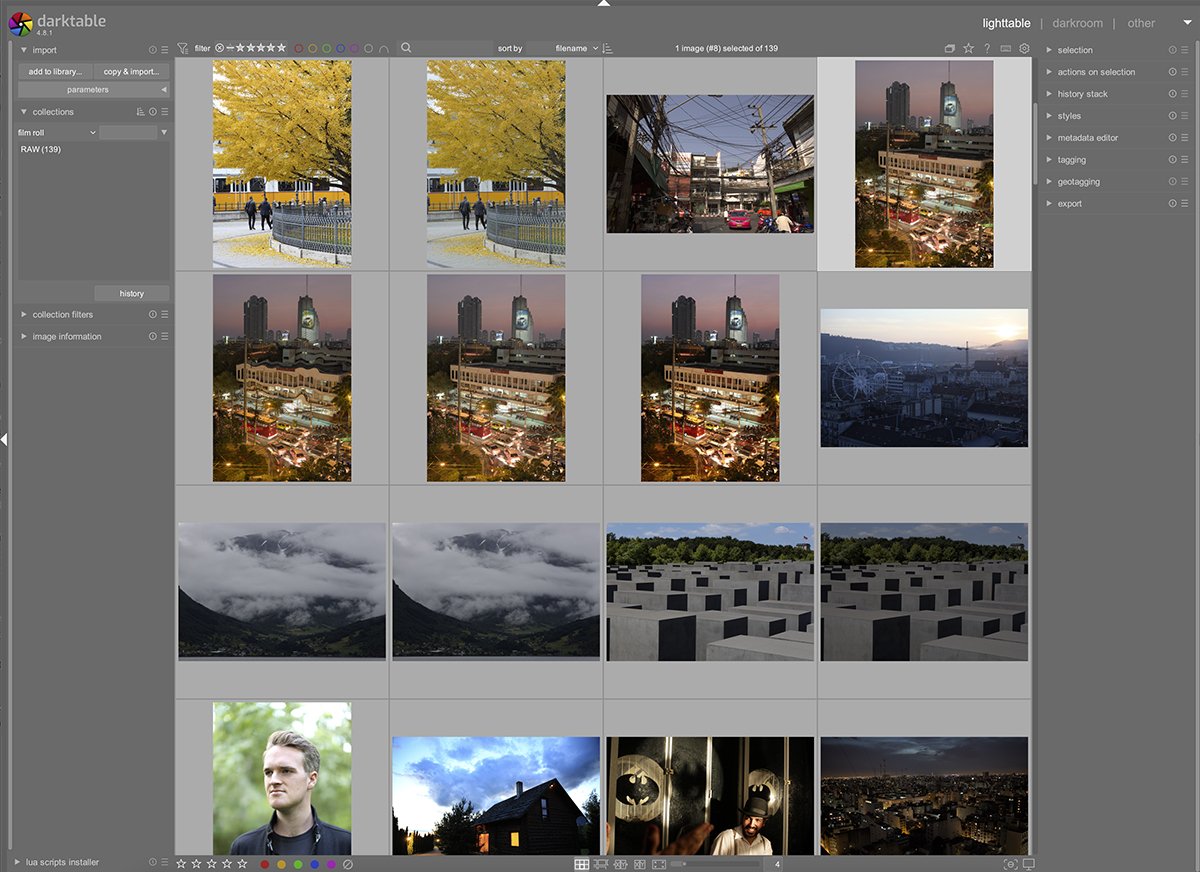
The organization and sorting of your uploaded images are well thought through on Darktable. Like the importing process, the organization isn’t as user-friendly. However, there are many ways to help you sort and source your desired images for editing.
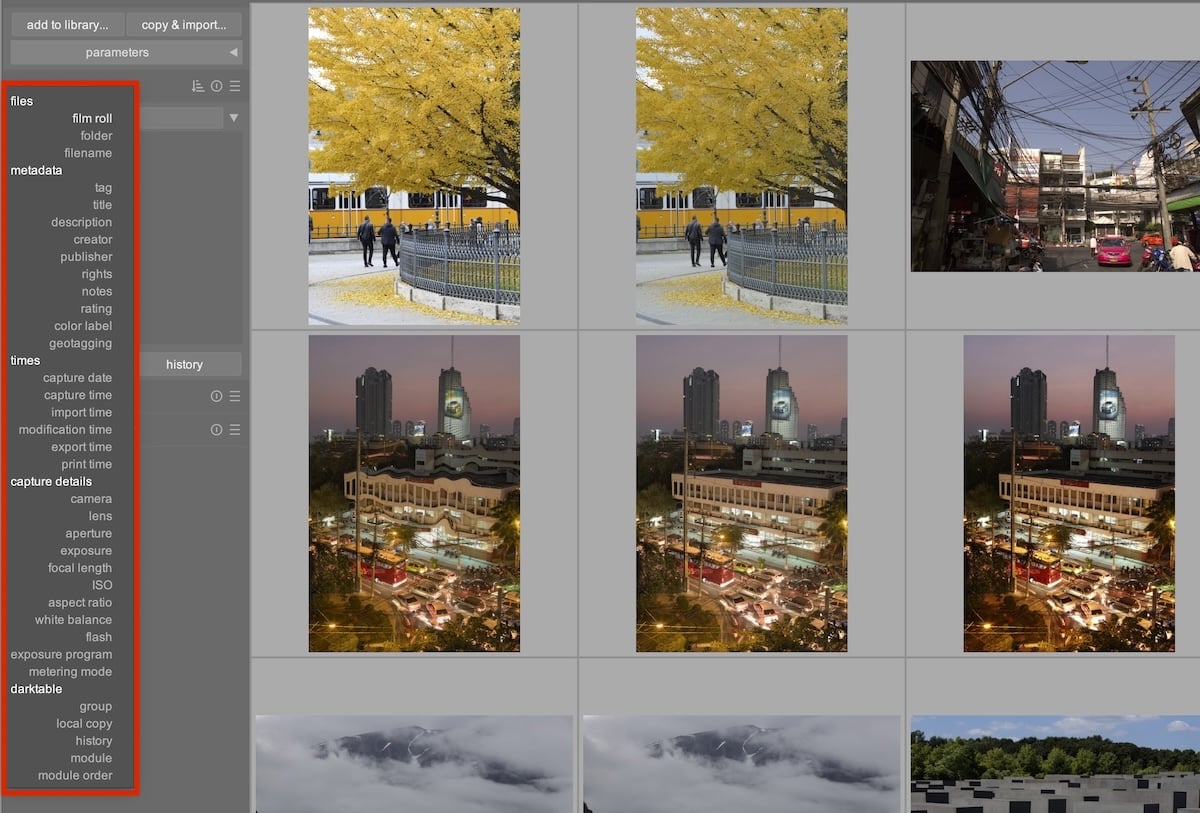
Under ‘Collections’ in Lighttable, you can sort your Library in various ways. These options range from the folders they have been uploaded from to metadata, capture details, and many more.
Darktable features all the usual rating systems in most good digital editing software. You can apply star and color ratings to your photos.
On the right-hand side of the Lighttable section, you will find more useful controls to help with your organization process. Here, you are able to apply tags and geotags, edit metadata, and even export quickly with custom controls.
Darktable vs Lightroom
After examining the importing and organizing features in Darktable vs Lightroom, you can see that Lightroom is much simpler. This is thanks to its design and interface as well as extra features such as its extended picture viewing modes and Quick Develop.
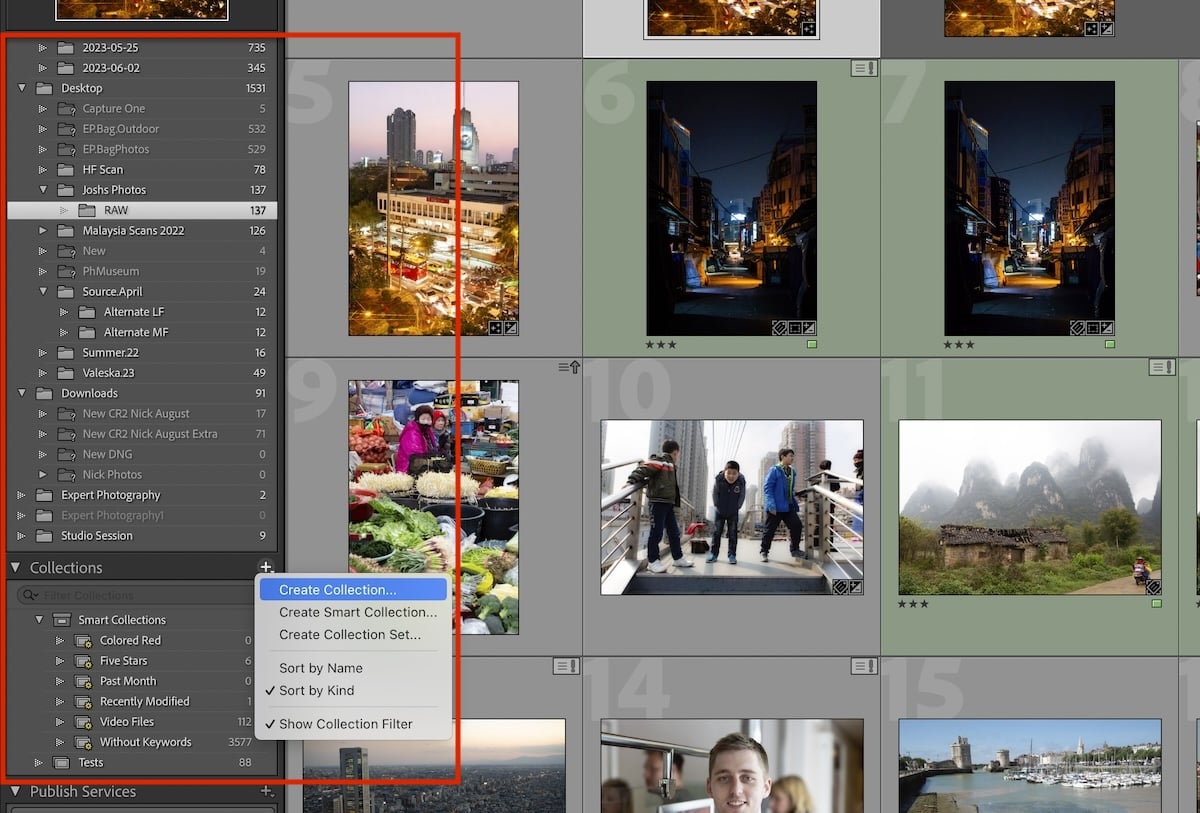
Darktable allows you to sort through sets of images more easily, thanks to its detailed drop-down menu in Collections. This is similar to the Smart Collection feature in Lightroom. Lightroom allows you to create your own Smart Collections, so there is more flexibility in the Adobe software.
Overall, Darktable provides an extensive range of crucial features needed for professional levels of organization. It may lack some of the fine-tuning features that make Lightroom so usable. However, Darktable is still better than many other paid software that are trying to replicate Lightroom.
Editing Abilities
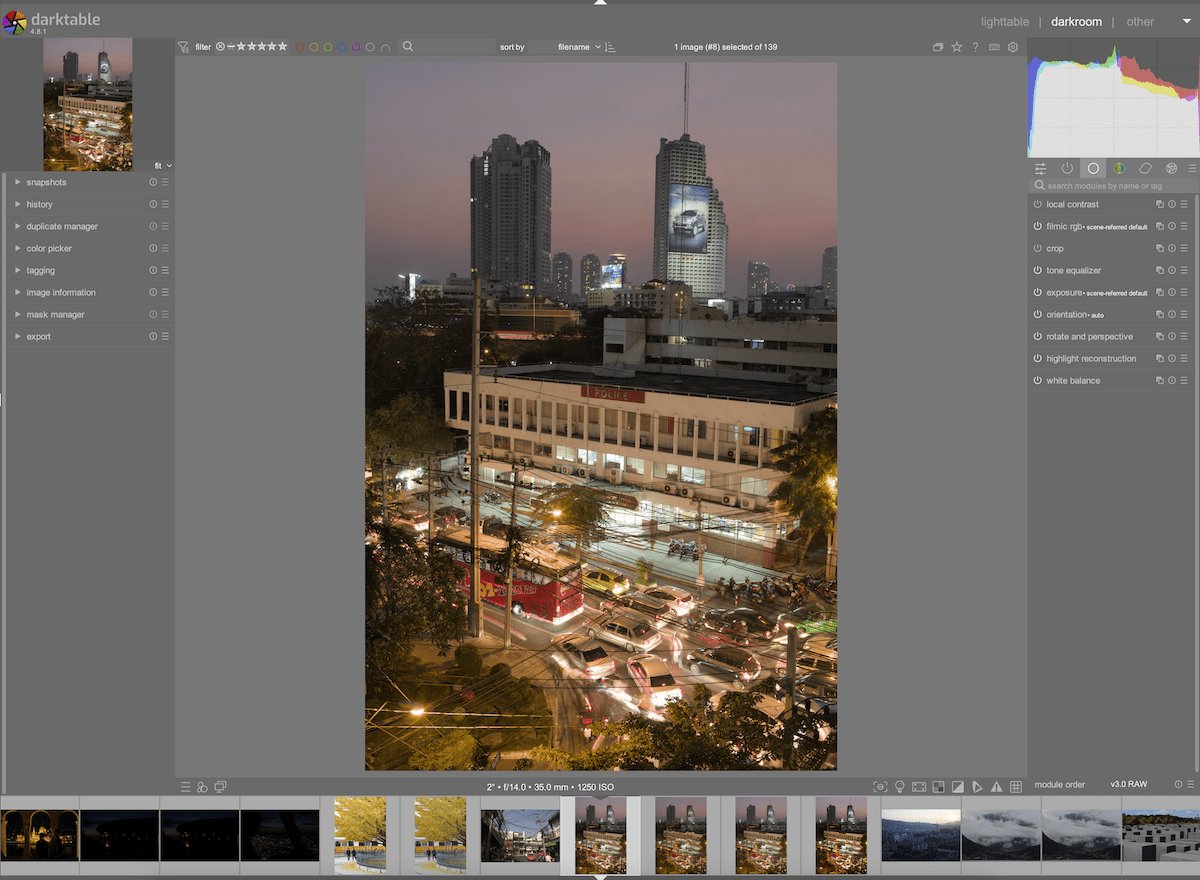
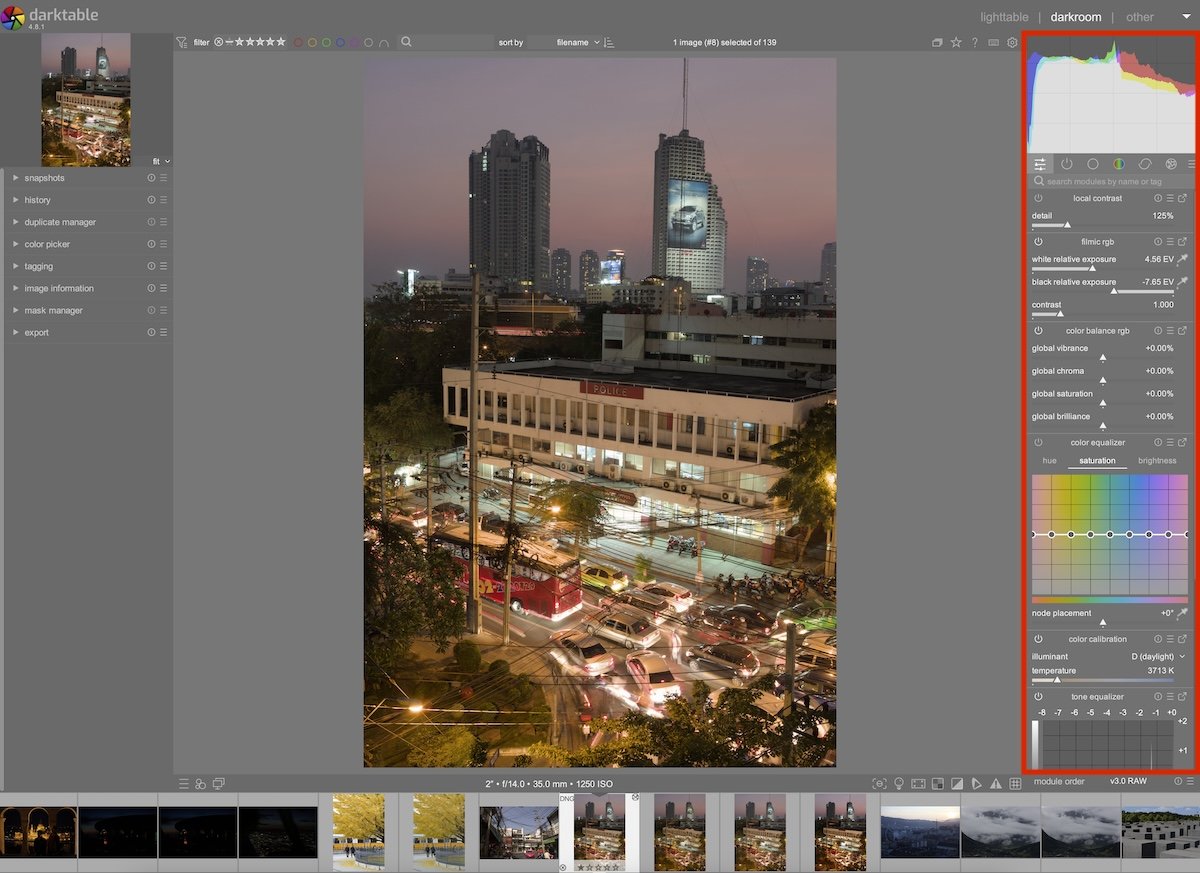
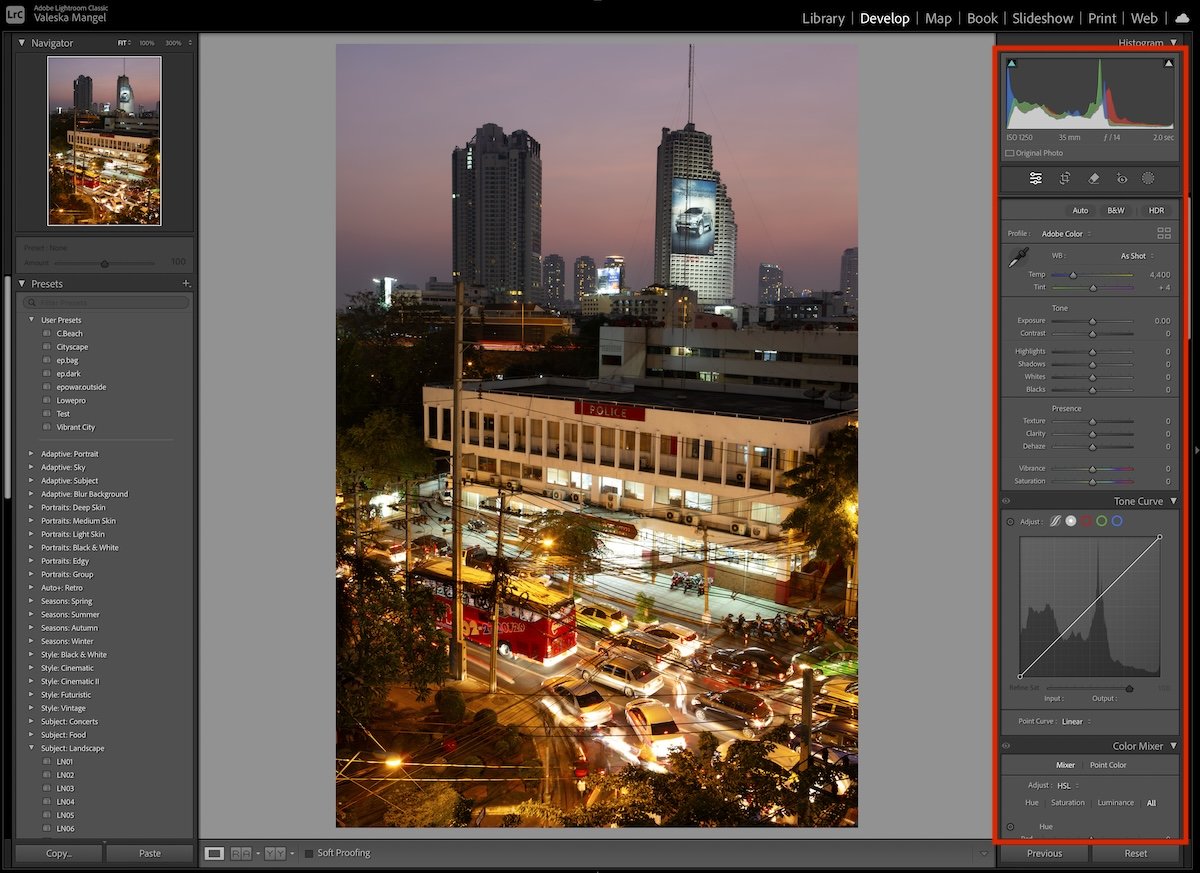
The editing module in Darktable is called Darkroom. This is the equivalent of Develop in Lightroom. Again, similar themes emerge when comparing Darktable vs Lightroom.
Lightroom is more user-friendly thanks to its top-down approach. This means you will have the most important controls up top and more niche controls further down.
Darktable allows you to fully customize your workspace, so you can set this yourself. But, most photographers who benefit from this easy approach system will probably not spend time editing their workspace.
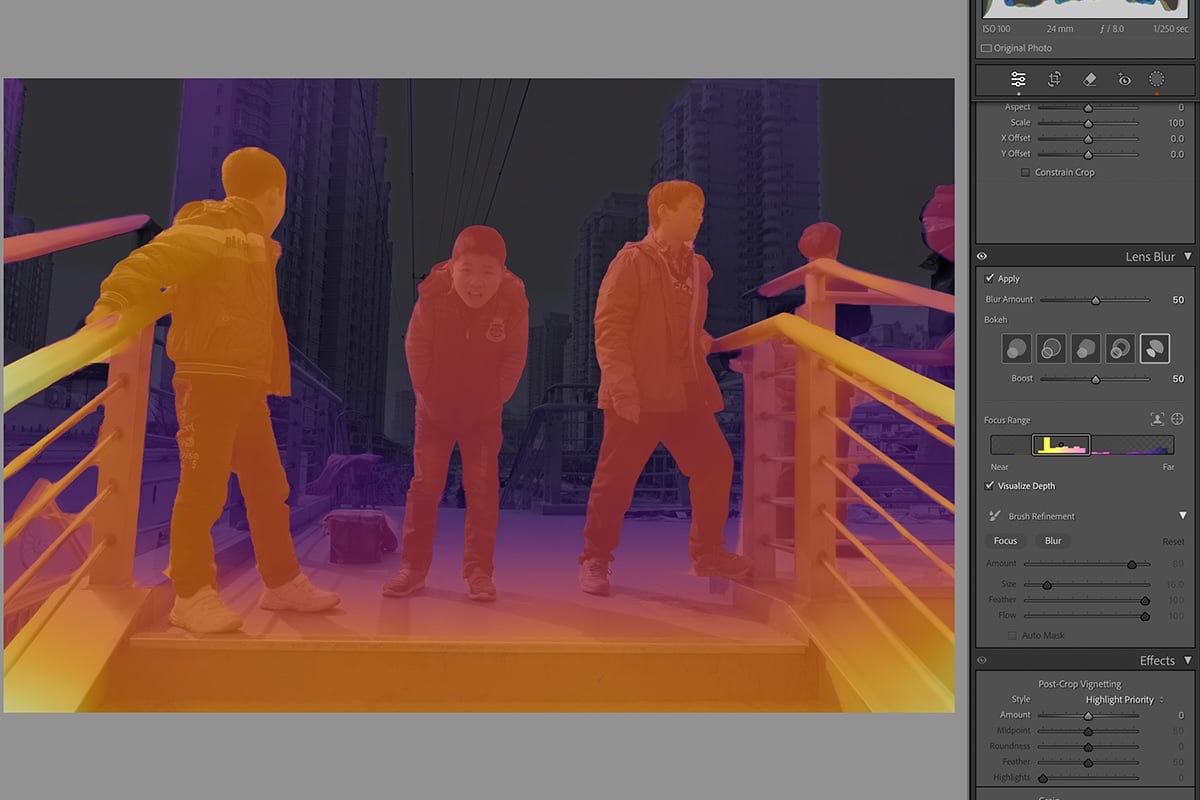
Range of Adjustments
Darktable offers a wide range of photo adjustments to edit your photos. These adjustments are sorted into five different categories: Quick Access Panel, Base, Color, Correct, and Effects. You can swap between these using the icons below the histogram.
The adjustments in the Darkroom section are mostly in the form of sliders. You will not find simple adjustments like in Lightroom. By simple adjustment, I mean a semi-guided approach to editing. In Lightroom, you can work down the list, applying the relevant adjustments in a sensible order.
The adjustments themselves work well. Some are specialist adjustments, so beginners would need to learn more about the adjustments before using them. The sliders can be dramatic, so it may be hard to move them in small increments.
Some of Darktable’s adjustments are ideal for professionals. As it is an open-source program, the experienced photographers who use it are able to contribute to the application. Therefore, you will find adjustments that are not common in other software.
A good example of this is how they can visually display image information. You can find these options where the histogram is. You can visualize this data as a vectorscope, waveform, or RGB parade.
Darktable vs Lightroom
Although Darkroom doesn’t have as easy of an approach to editing as Lightroom, it is a worthy opponent. The adjustments do not have the same finesse as Lightroom, but they all have believable reactions. This is hard to replicate in software, as many other paid applications cannot do this well.
Another key point is that Darktable can take a few seconds to apply the adjustment after moving the slider. This is a manageable issue, but photographers who like to do small amounts of editing quickly would find this frustrating.
Image Handling
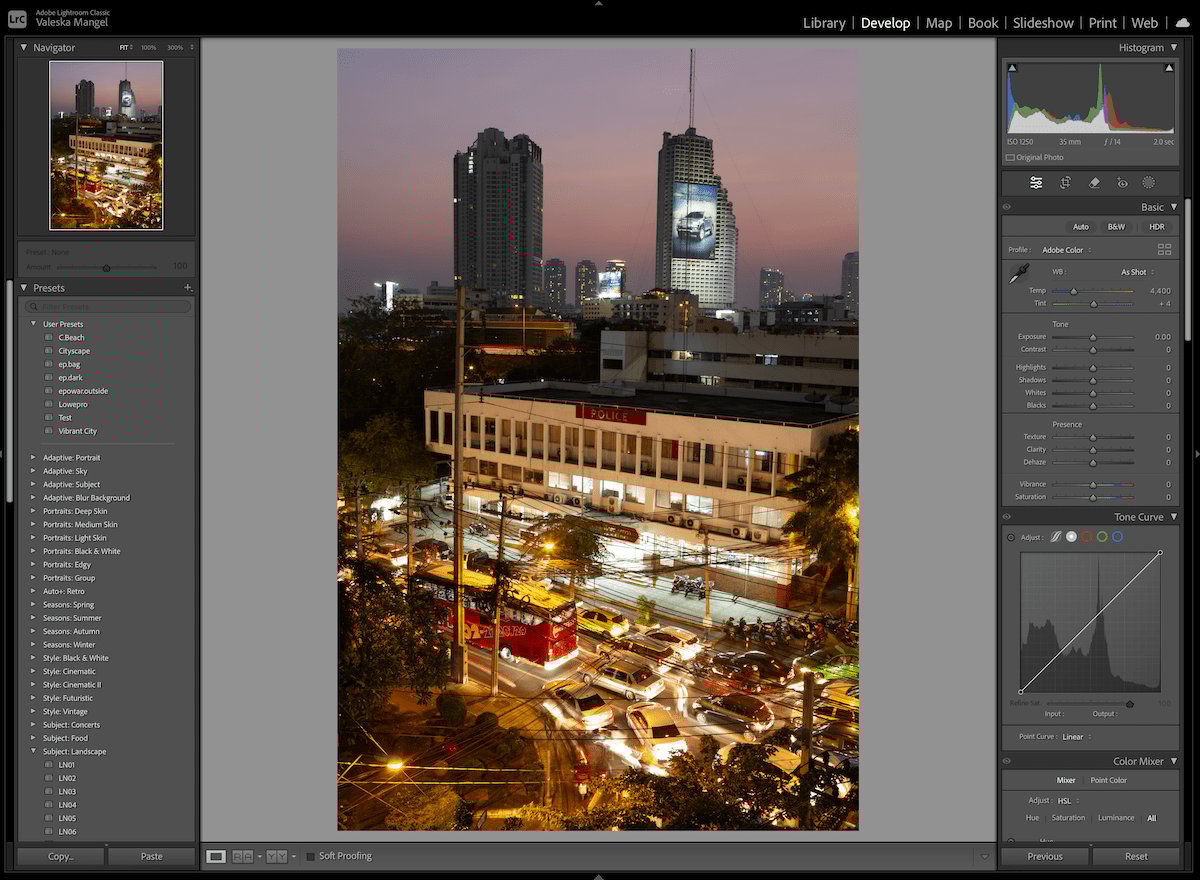
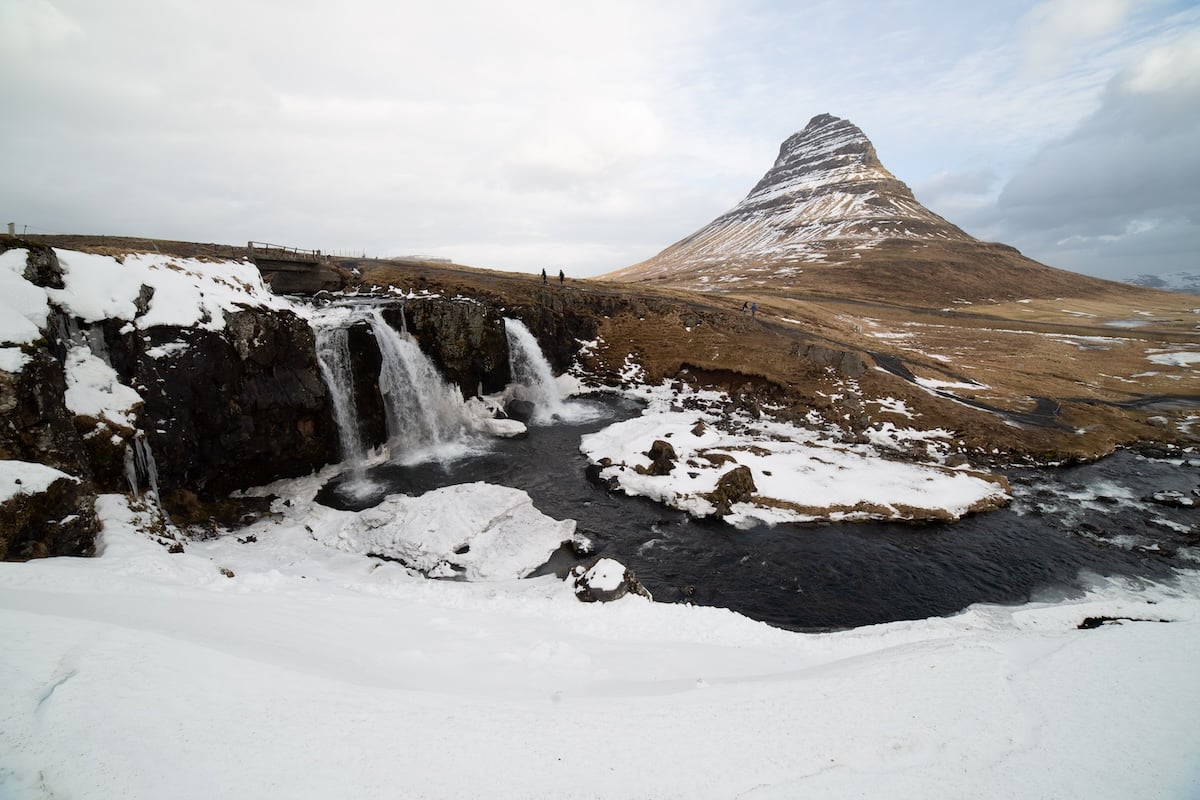
You will notice a big difference when uploading your RAW files to Darktable vs Lightroom. Every program will read RAW files in different ways. This means your ‘base’ photo will always look slightly different in each program.
Let’s look at how these two digital editing applications handle our images.
RAW Processing
The difference between Darktable and Lightroom is huge. From this comparison, we can see that the Darktable results are much flatter. Professionals will understand that starting with a flat base can be beneficial as you can build the edit exactly how you want. It also lets you see as much information as possible.
Even though the Lightroom may have washed out some of the information, it is all there. You would still get the same level of detail if you were to make edits to reveal what’s in the highlights.
Lightroom adds tonal, color, and even lens correction edits in the upload stage. Darktable produces a much flatter and possibly more ‘true’ RAW file. This means it may take a lot longer and more knowledge on photo editing to get the Darktable results up to a fully edited photo.

Basic Editing Tools
To compare how each application’s tools work, we will focus on a big and important one: exposure compensation.
It is hard to compare as the base exposures are so different. But, we can look at how each program treats the highlights/shadows when altered. From the results, we can see that both editing software produce accurate results. This means that the exposure change simulates what would happen in-camera well.
Darktable’s edit seems harsher, but this could be due to its point on the exposure range. Darktable’s exposure compensation can only move up to four stops in either direction, whereas Lightroom can do five.
Overall, the basic editing tools in Darkroom follow suit. They all provide accurate and professional results. Again, you will need more experience in photo editing to get the most out of your image than in Lightroom.


Main Issues
Let’s now outline the main differences and issues in Darktable vs Lightroom.
Learning Curve
Darktable doesn’t hold your hand through editing as much as Lightroom does. Not that Lightroom doesn’t have a learning curve, as it does. But, Lightroom is set out with an interface and order that means beginners can easily find their way around.
There will be many more features you will have to search for in Darktable. Luckily, the app has a strong community, so you will be able to find answers online easily.
Adjustment Speeds
You will also notice that the adjustments will come with a slower wait time than Lightroom. We are now used to programs that work instantaneously. An adjustment may take a second or two extra, but these seconds build up and can hinder the editing experience.
I am using an M1 Mac mini and have had to wait a few seconds for adjustments. This computer should be more than competent to run photo editing software.
Selection of Adjustments
Darktable does have a select range of professional adjustments. But it feels like some simple adjustments are missing from Darktable. For instance, its tone equalizer is a brilliant tool, but it makes it hard for beginners to make detailed tonal adjustments. Therefore, this leads to a feeling of a lack of tonal control.
Conclusion: Darktable vs Lightroom
In this Darktable vs Lightroom comparison, I have been nitpicking all the bad features of Darktable. This is an incredibly good sign for free software when put up against the Adobe giant.
You will notice a big difference in usability and a lack of some adjustment tools. But, the overall differences between the programs are not that vast. Darktable does perform better than some paid photo editing apps out there.
Overall, I recommend Darktable to anyone looking for free digital editing software. If you are an avid Lightroom user, you may miss a range of its features. So, you will have to weigh if these features are worth the money you will be saving.