Slideshows make sharing pictures with friends and family a special event. It is also a professional way to showcase your images to clients or for a presentation. Adobe Lightroom has a slideshow feature, but you can also create a slideshow in Photoshop. Photoshop is almost as easy as using Lightroom and you can save your slideshow as a video file to share on social media.
In this article, we'll take you through the steps on how to create a Photoshop slideshow.
Creating a Photoshop Slideshow
Step 1: Select Images
Choose the pictures you want to include in your show. There is usually a theme that unites them. You can showcase a product or your best photos. You can also show pictures from a recent trip or create a project.
Choose images that are eye-catching and different enough from each other to be interesting. Keep your show short as most viewers have a short attention span.
Decide on the order you want the images to play. Start and end your show with your best. Consider if there is a story or natural sequence that influences the order.
Step 2: Open Images in Photoshop
Open your pictures as individual layers in one Photoshop file. There are a couple of ways you can do this. If your images are in Lightroom, choose the photos. Go to the Photo drop-down menu. Select Photo > Edit In > Open as Layers in Photoshop.
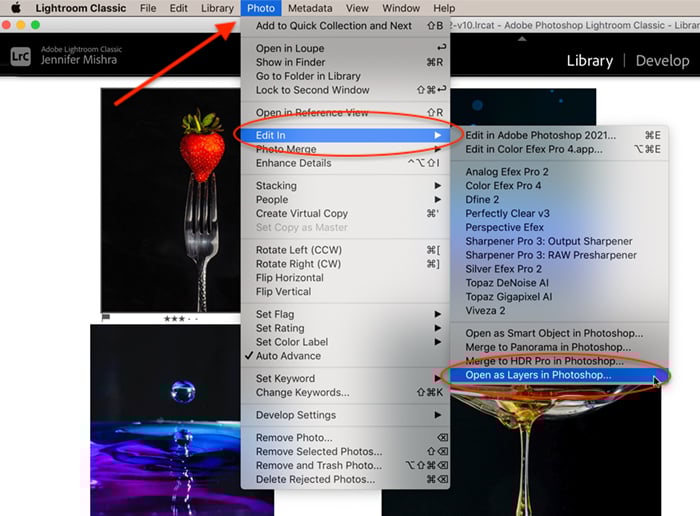
Lightroom Classic screenshot showing how to open files as layers in Photoshop
Load files individually by right-clicking on the file and selecting Open With > Adobe Photoshop. They will open as tabs in Photoshop. Grab the background layer from each of your files and drag it to the first image tab. Drop it. This creates a new layer.
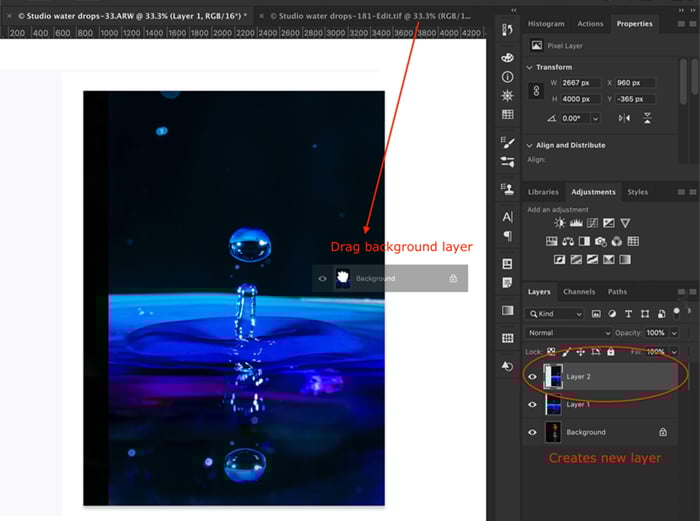
Photoshop screenshot showing how to open new layer by dragging from one tab to another
Step 3: Resize Images
There is a lot of debate online about what the best size is for slideshows. The size is limited by the monitor. Most monitors are 1920 x 1080 pixels, which has a 16:9 aspect ratio. Use this aspect ratio if you like the look. If not, size your canvas to fit your largest image. If you need to make it larger or smaller, go to Image > Canvas Size.
Resize your images to fit your canvas. You can include photos of different sizes, but your show looks better if the layers are one size. First, convert each layer to a smart object. Go to the Layer drop-down menu and select Layer > Smart Objects > Convert to Smart Object. Then go to Edit > Free Transform (Ctrl or ⌘T). Drag the corners of the photo to change the size.
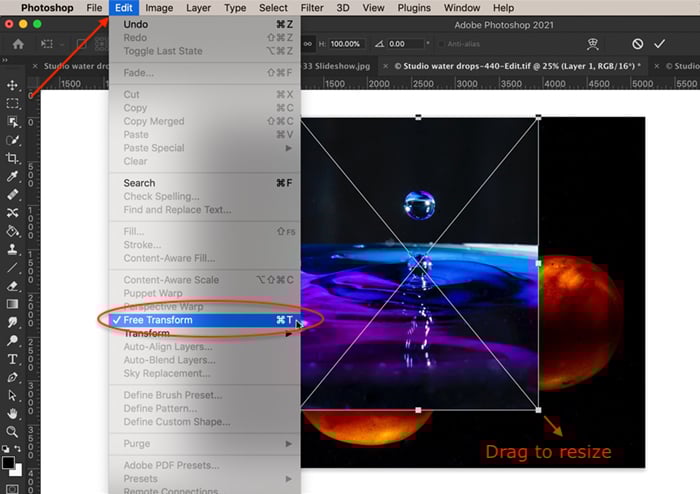
Photoshop screenshot showing how to resize layer using Free Transform tool
If your photo is smaller than the canvas, you can add a background. Use the paint bucket tool to fill in color. Black and white are classic. Feel free to add text if you want. You can also duplicate and enlarge the photo to fill the background. Drag the background layer under the image layer and lower the opacity. Finally, merge the layers by selecting both and clicking Layers > Merge Layers (Ctrl or ⌘E).
Step 4: Create Video Timeline
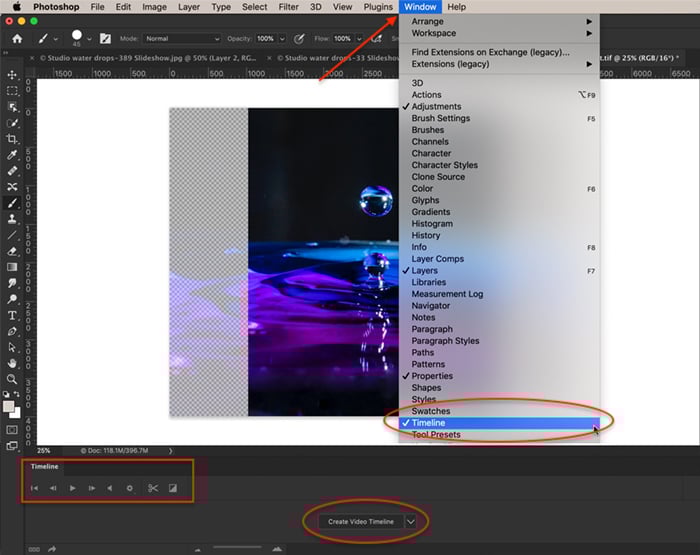
If you’ve not edited a video in Photoshop before, your timeline panel might not be visible. To reveal the timeline panel, go to the Window drop-down menu and select Window > Timeline. A video editing window will open at the bottom of your screen with a timeline toolbar.
The first four tools from the left control playback followed by an audio tool. Next is a settings gear that includes additional features and a split tool that looks like a pair of scissors. On the far right is the transition tool.
Photoshop screenshot showing how to open video timeline window
Click the Create Video Timeline button at the bottom of the screen. Photoshop will open all layers in the timeline panel and add an audio layer.
Each layer is a purple bar on a separate track. Put the images on the same track by highlighting all the tracks. Select the arrow next to the filmstrip icon. There is one for each track. It doesn't matter which you select. Choose New Video Group from Clips. This creates one video timeline with all of your images in a row and one audio track.
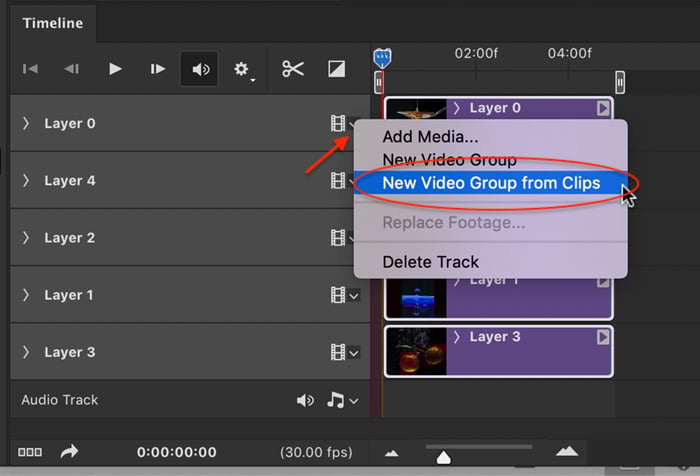
Photoshop screenshot showing how to group clips onto one track
Step 5: Order Images
By default, the bottom layer is the first image in your show. You can change the order by grabbing an image and dragging it into a different position along the timeline.
Step 6: Time Slides
By default, the images are 5 seconds each. To change the time, grab the right end of the purple bar and drag. You can magnify the timeline using the slider at the bottom if this helps you adjust times accurately.
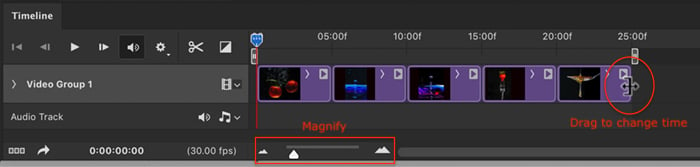
Photoshop screenshot showing how to change time on slides
Step 7: Add Transitions & Effects (Optional)
Transitions and effects make your presentation look more professional. Open the transition icon. It is a square divided into two triangles. You will have options like Fade and Crossfade.
Select one of the transitions and set a time. The default is 1 second, but you may find this transition too quick. Drag a transition between the slides. An opaque symbol appears at the end of the image bar or between bars depending on the effect. Click the play button to see how the transitions look.
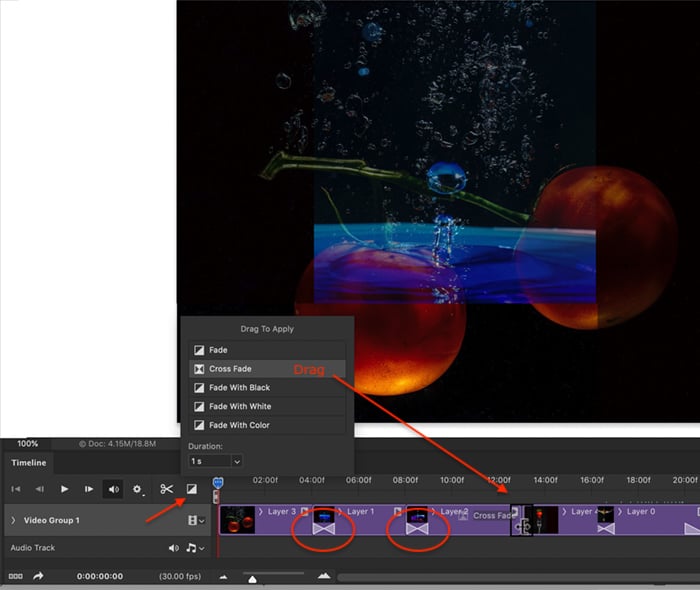
Photoshop screenshot showing how to drag transitions onto timeline. Crossfade creates an overlap between images for a smooth transition
Effects add motion to your images. To add an effect, click the arrow in the upper right corner of each purple bar. By default, the setting is No Motion. Click the drop-down menu to see other options. You have various combinations of pan, zoom, and rotate. Panning slides the image across the screen. Zoom moves the image closer or away. Rotate twists the image. You can change angles and directions.
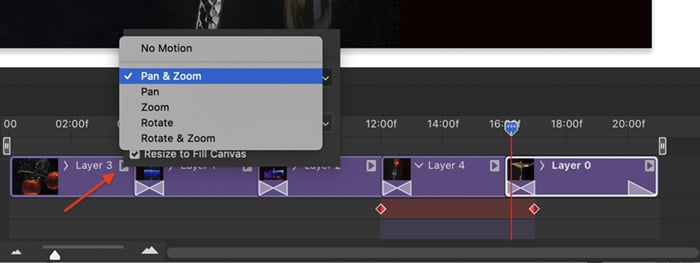
Photoshop screenshot showing how to open effects panel
Step 8: Add Music (Optional)
Adding an audio clip is optional, but it enhances your presentation. Click the arrow next to the music note icon on the audio track. Choose Add Audio. Navigate to the audio track saved on your computer. Note that copyrighted music is not allowed on social media unless you purchase a license to use the music or use public domain music.
You can make the audio track longer or shorter by dragging the right end of the green bar. Or you can place the blue playhead at the end of your show. Then click the clip tool that looks like a pair of scissors. This will cut your audio track in two. Delete the half that you do not need.
To fine-tune your audio, click the arrow at the end of the green bar. You have the option to change the volume and fade the audio.
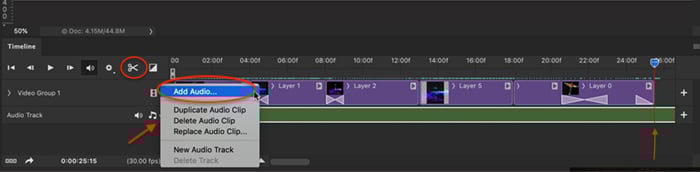
Photoshop screenshot showing how to add an audio track
Step 9: Create Slideshow Video
The last step is to create a video of your show. Click the arrow icon in the bottom left corner of the timeline window to open the export workspace. Change Photoshop Image Sequence to Adobe Media Encoder. Click the Render button to export the video.
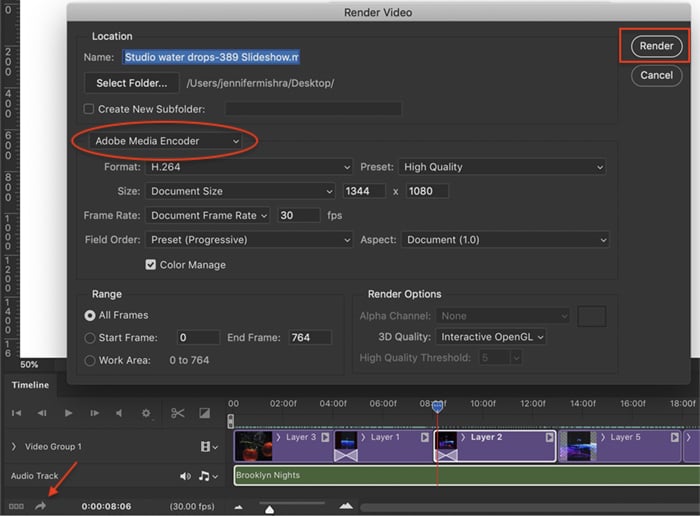
Photoshop screenshot showing how to render video of slideshow
Conclusion
With Photoshop, you can create a slideshow to share on your website or send to friends. Create an introduction slide with text and end credits to make your slideshow more professional. Photoshop slideshow is a simple tool to create a video project.


