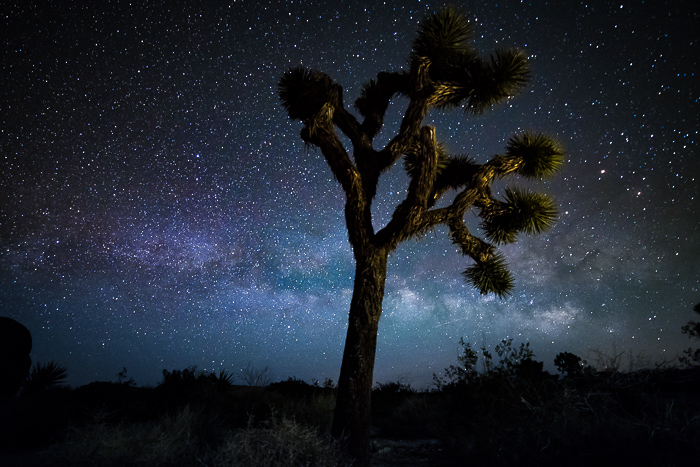
Forget everything you know about how to process a photograph. When it comes to adjusting the settings for images of the Milky Way, nothing is the same.
You will make adjustments to sliders that you would never dream of when editing a regular landscape photograph. With Milky Way processing, this is 100% acceptable. The rules change, but the principles remain the same. Let’s explore the ten settings essential for effectively enhancing images of the Milky Way!
1. Adjusting Milky Way Imagery: Utilizing the Graduated Filter for Color Correction
When processing a photo in Adobe Lightroom, it’s always best to start at the top of the Develop window. For the majority of my photography capturing the Milky Way, I discover that a Graduated Filter for color correction is frequently utilized.
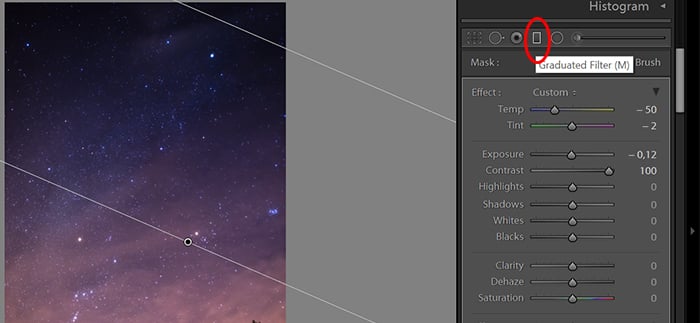
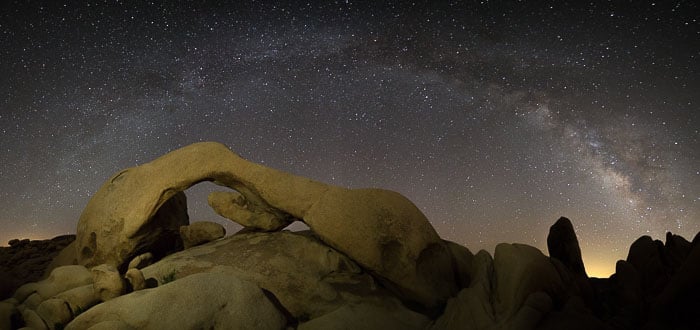
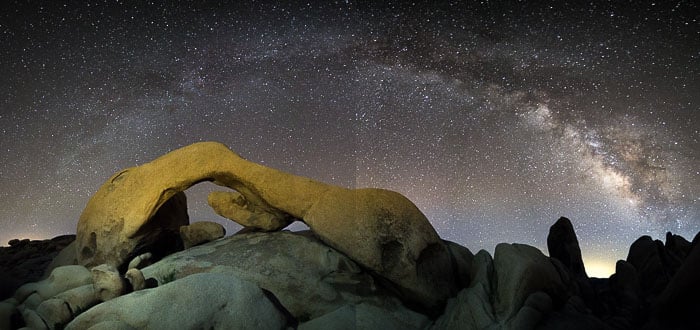
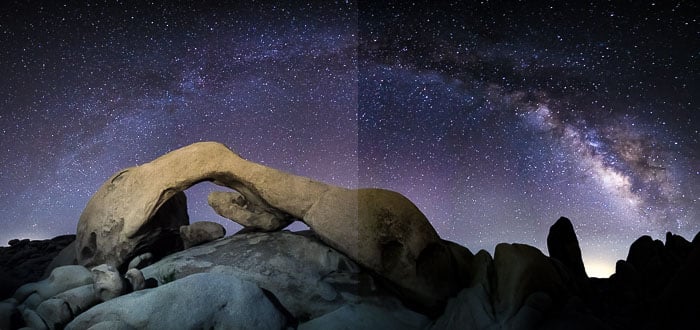
In the photo below, I have added a blue Graduated Filter to the right side of the image. You can see a noticeable difference. It has removed the orange glow from the horizon.
By using a Graduated Filter, you can apply the color correction to the affected area. Meanwhile, you will leave the rest of the photo untouched.
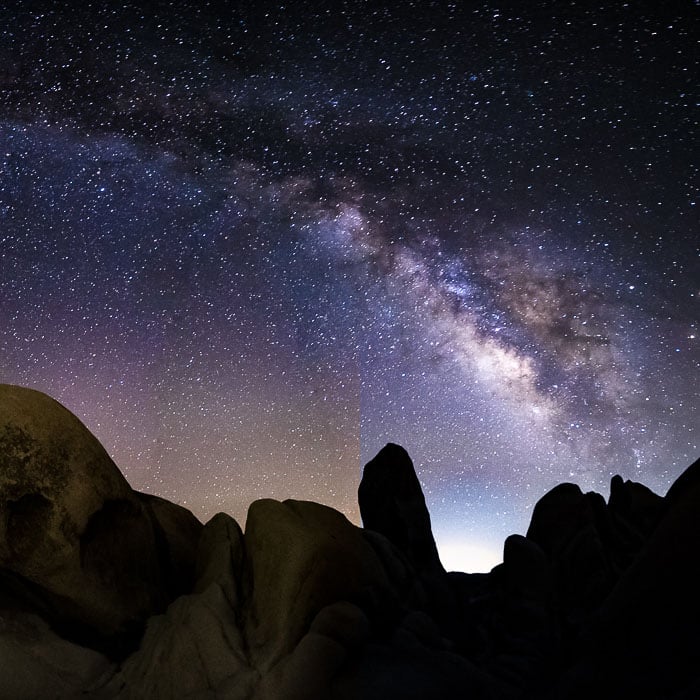
2. Adjust White Balance for Spectacular Colors
As noted, color correction is essential for photography of the Milky Way.
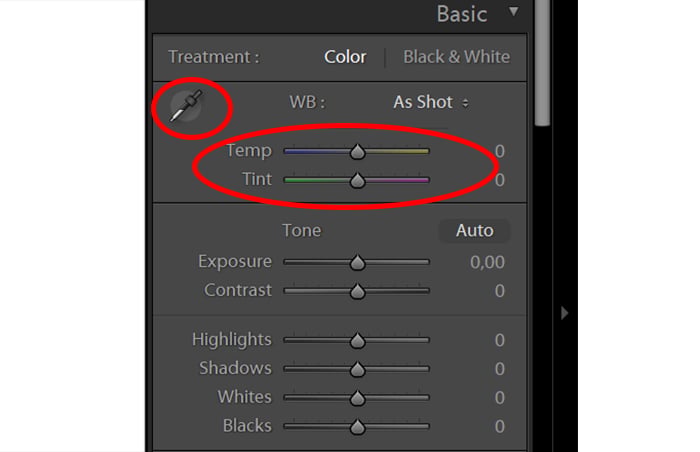
Generally, you will want to make the sky bluer. You can use the White Balance and Tint sliders on the top of the workspace.
If you cannot reach your desired result manually, you can use the pipette tool to select a part of the photo that should be white. Clicking on this part will automatically adjust the white balance of the whole picture to the extent that Lightroom thinks is right.
3. Highlight the Stars
The stars are bright white specks in the sky, making sense to enhance them by increasing the highlights. This will affect only the brightest parts of the photograph.
I also suggest bringing out the whites. This will make the whole photo brighter but we can correct that.

4. Use Shadows for a Natural Look
Adjusting the highlights and whites can cause the photo to get too bright. As a result, the sky starts to look grey. To counteract this, we bring the Shadows slider to the left. This makes the image darker while still maintaining the bright spots of the stars.
5. Increase Clarity For More Details
This is where Milky Way processing comes into its own. I would never dream of playing with the Clarity slider this much on any other kind of photograph.
The Clarity slider is going to make those small details much sharper and more defined. This is why it’s perfect for editing the Milky Way. The stars stand out and you can see the structure of the galaxy in much greater detail.
I have increased the clarity below by +60.
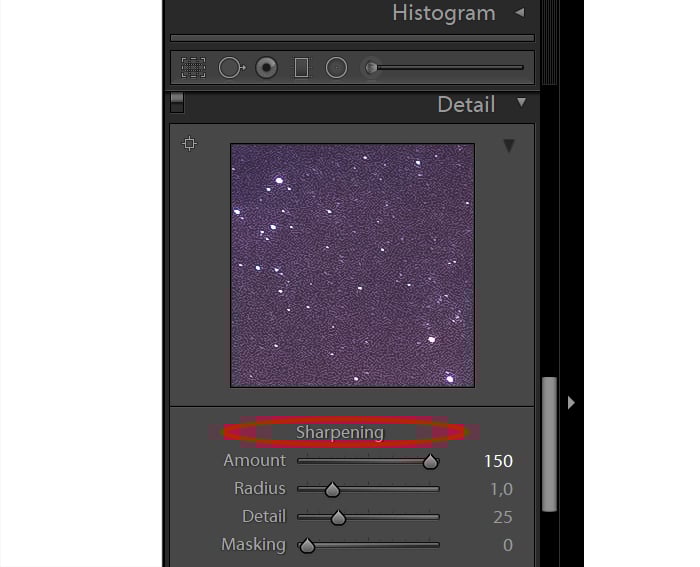
6. Sharpen for Crisp Stars
You can add Sharpening for the same reason as clarity. It brings out details and emphasises the stars. The image will also be crisper.
7. Reduce Noise for More Detail
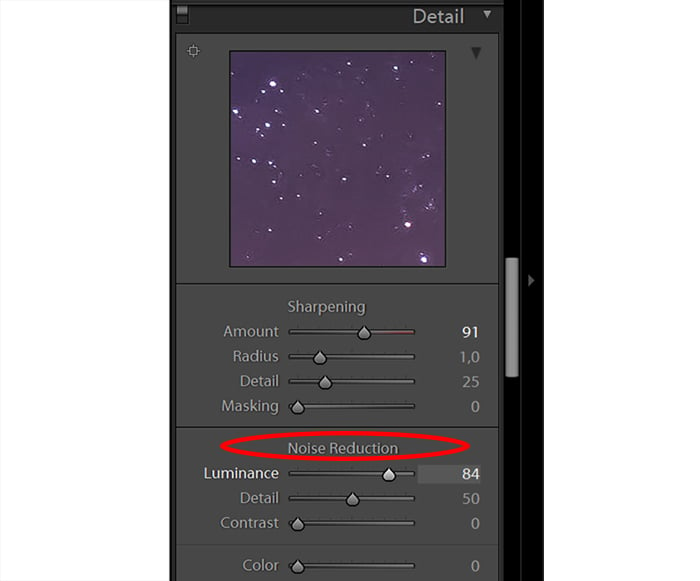
Essentially, night photos require relatively high ISO values. This causes them to be noisy, which can ruin picture quality very quickly if sharpening is also applied. For this reason, it is essential to reduce noise while bringing up the sharpening.
In Lightroom, there is a Noise Reduction slider under the sharpening section. Use the slider to reach a subtle noise reduction while maintaining as much detail as possible.
8. Adjust Color Saturation Sliders
This is perhaps the most subtle processing technique here. Despite being hard to spot in the image below, it has quite a remarkable effect.
We use the color saturation sliders because we want to remove any orange or yellow glow from the sky. We want to do so while enhancing the blues and purples naturally found inside the Milky Way.
9. Add Lens Correction For a Natural Look
The previous photo examples have been multi-photo panoramas. Although there are times where you might use lens correction on them, it’s best to show you how lens correction works on a single photo.
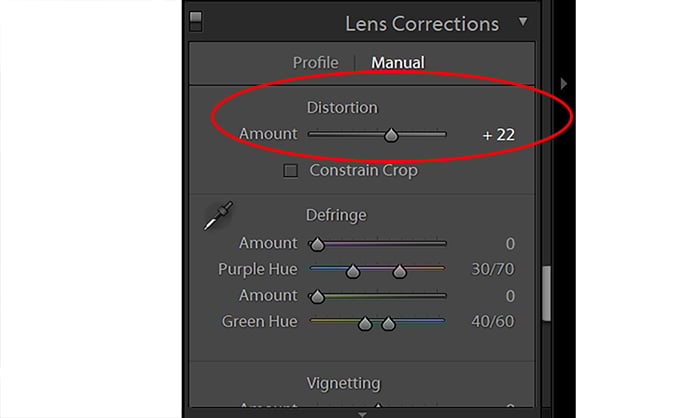
The animated gif below shows you how the correction removes the barrel distortion from the photo. This way, it makes it look more like what we see with our naked eye, effectively straightening out the corners and removing the curve.
10. Dehaze
I have saved the best for last. This simple slider produces dramatic results to add the finishing touches to your Milky Way photography.
The Dehaze tool does just that. It removes the haze, and you will be surprised at just how much there is in the sky.
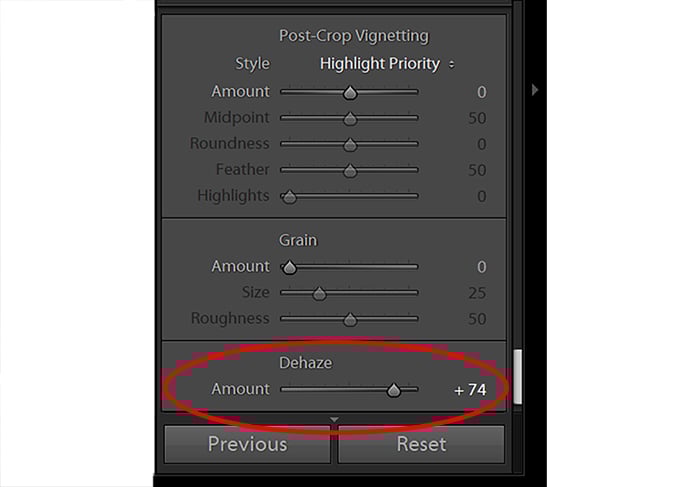
It does a remarkable job of making the bright (but now white) parts of the night sky darker. I have cranked the Dehaze slider up to +74 here for the best results.
Conclusion
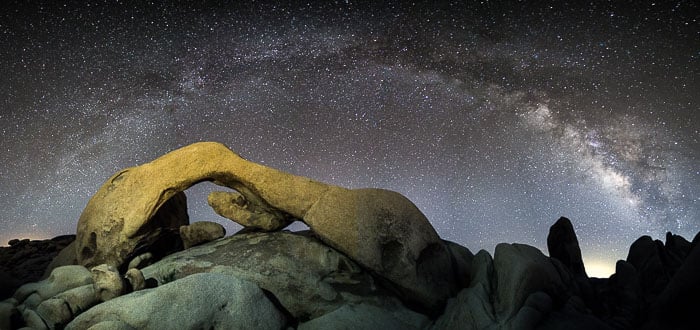
Editing your Milky Way images can undoubtedly be a challenge. There are many aspects to pay attention to, but the main goal is always the same. You need to highlight the stars while creating a spectacular view of the sky.
Leverage our guidance on adjusting images of the Milky Way to fully capture the night sky’s beauty.
Take magazine quality Milky Way photos without flashy and expensive equipment with our Milky Way Mastery course!