This is a SkyWatcher Star Adventurer review and set-up guide. It concludes our set of astrophotography articles.
This is one of the most highly-regarded, affordable, and portable equatorial tracking mounts. It’s for lightweight astrophotography and time-lapses.
If you’re into astrophotography, you must get an equatorial tracking mount. It’s even more critical than fast lenses or telescopes. Our review tells you all you need to know about the Star Adventurer.
Skywatcher Star Adventurer: A Small Mount For Big Adventures
The Skywatcher Star Adventurer is arguably one of the best equatorial mounts out there for beginners and astrophotographers on the move. It is lightweight, flexible, compact and reasonably priced.
The main pros of this mount are:
- Complete astrophotography bundle available;
- Lightweight and compact;
- Ease of use;
- Max payload weight is 5kg (with counterweight);
- Different tracking speed for stars, the moon and sun;
- Ability to control the camera;
- Some photographic settings for time lapse and panorama modes;
- Good polar scope and date/time dials for accurate polar alignment;
- Can be guided;
- Powered by 4AA batteries or external usb power;
- Can be mounted on any photographic tripod with xxx thread;
- Affordable price: it’s is cheaper than many lenses;
The main drawbacks of the star adventurer are its rather poor user guide, and its lack of go-to settings. You have to manually frame your target.
These are the specs in a nutshell:
| Mount Type: | Ultra compact equatorial tracking platform |
| Motor Drive: | DC Servo |
| Power Supply: | 4xAA battery |
| Payload Capacity: | 5 kgs (11 lb, with counterweight) |
| Tracking Modes: | Sidereal, Solar or Lunar tracking rate for both Northern & Southern hemisphere. Time-lapse photography (48hr/12hr/4hr/2hr rev.) |
| Auto-guiding interface: | built-in, ST4 |
| Weight: | 1.2 kg |
| Polar finder: | built-in |
The Astrophotography Bundle
The Star Adventurer is sold in three different bundles: motor only, photography bundle and the astrophotography bundle.
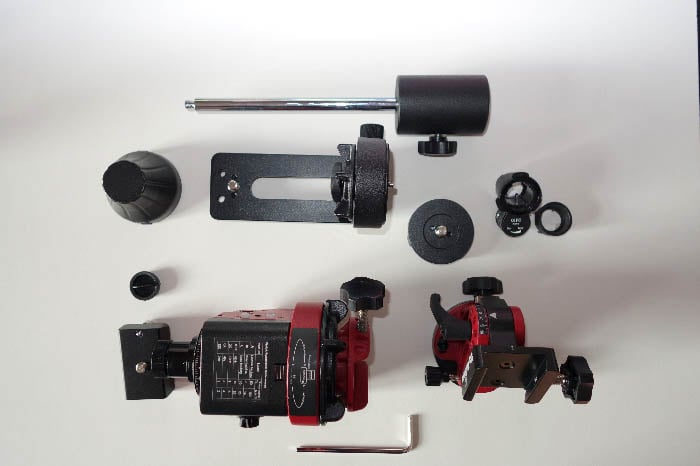
You can purchase all accessories separately. But I highly recommend buying the full astrophotography bundle.
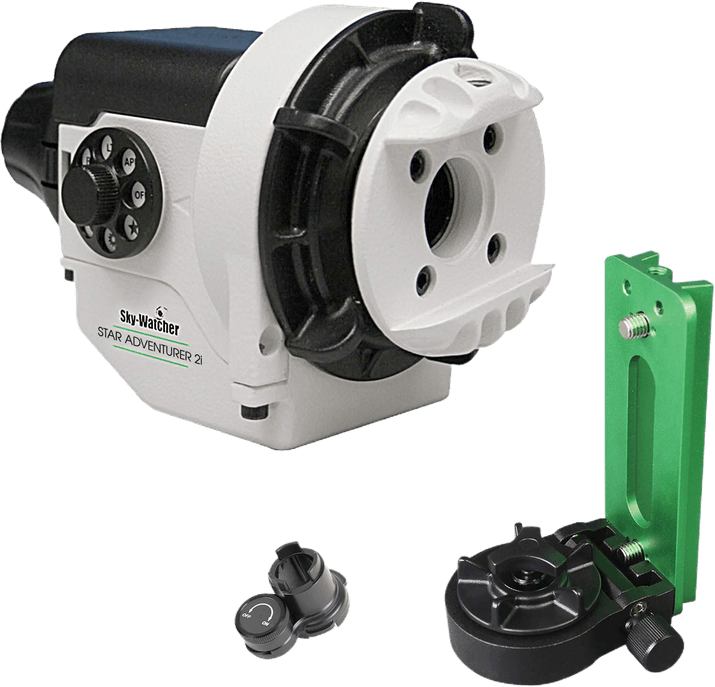
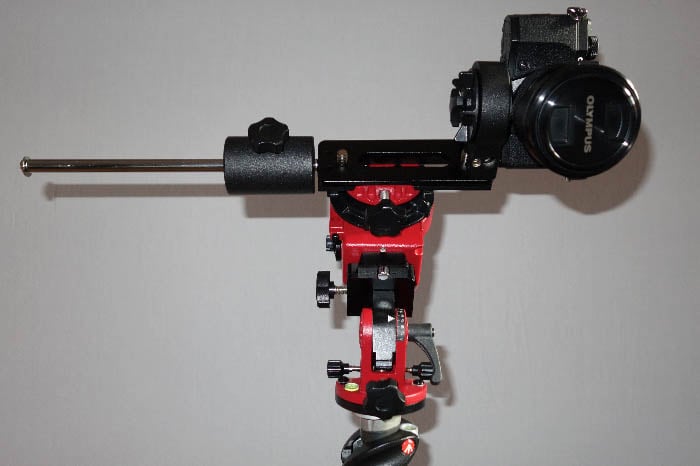
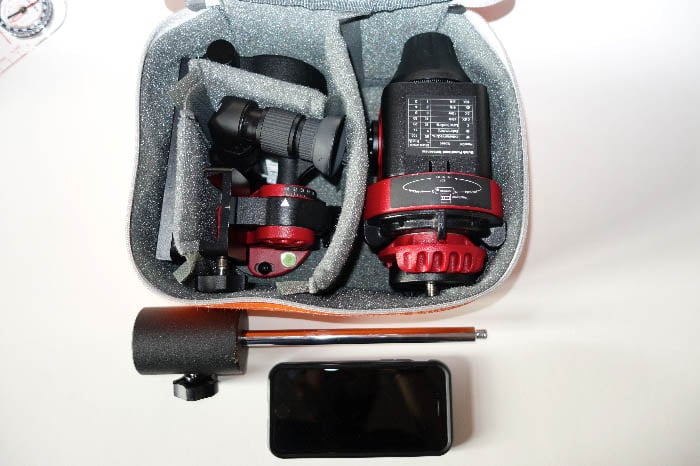
The Star Adventurer
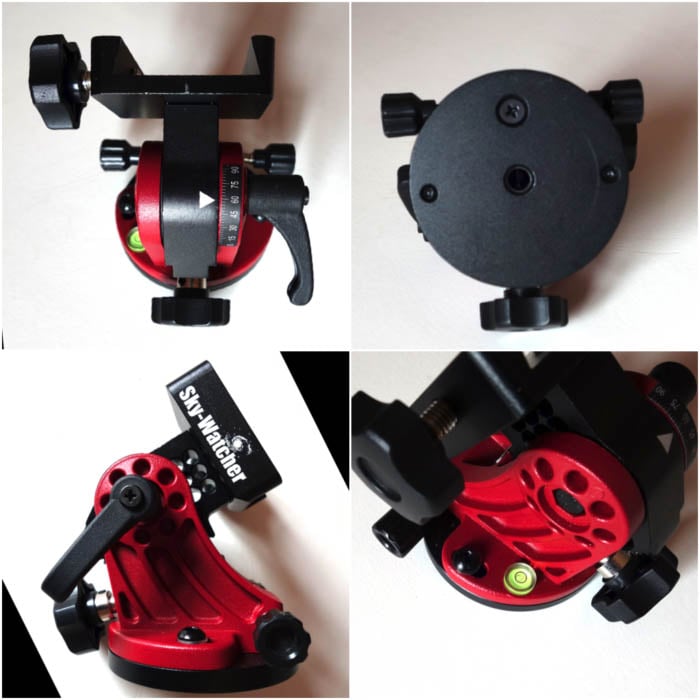
The Star Adventurer unit is basically an electric motor with a polar scope. This is the piece of gear that, once aligned to the celestial pole, will rotate your photographic equipment in sync with the stars.
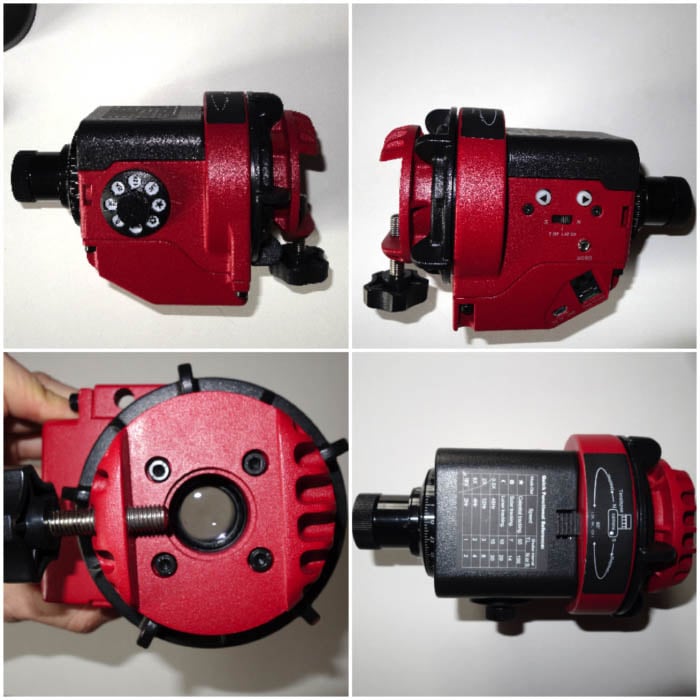
Looking at the Star Adventurer from the top, on the right side you will find a selector to choose a tracking mode or a rotation speed. Star, Moon and Sun tracking modes are available. And 0.5x (1 full rotation in 48hrs), 2x, 6x and 12x rotation speeds.
The lowest speed works well with starry landscapes, while the others are more for time lapse with camera movement.
On the left side of the unit you have a selector to specify your hemisphere, the plug for the cable to control the camera, a micro USB and a ST4 port for guiding.
On the front, there is the clutch (the black ring) and the head for vixen style plates. The front lens of the polar scope is visible in the middle of the head. The top view shows the cover of the compartment for 4 AA batteries with a printed summary of the different functions.
At the bottom there is the hole to mount the unit on a photographic tripod/head or, with a vixen plate, on its own wedge.
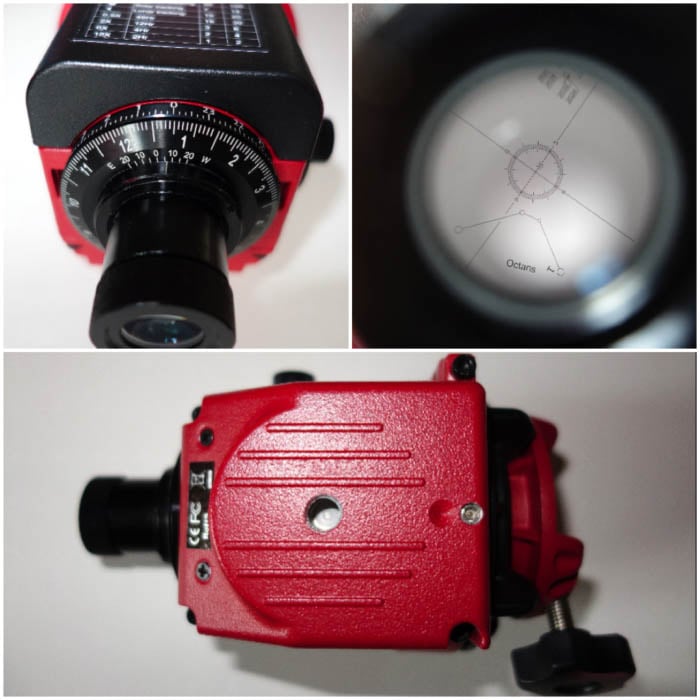
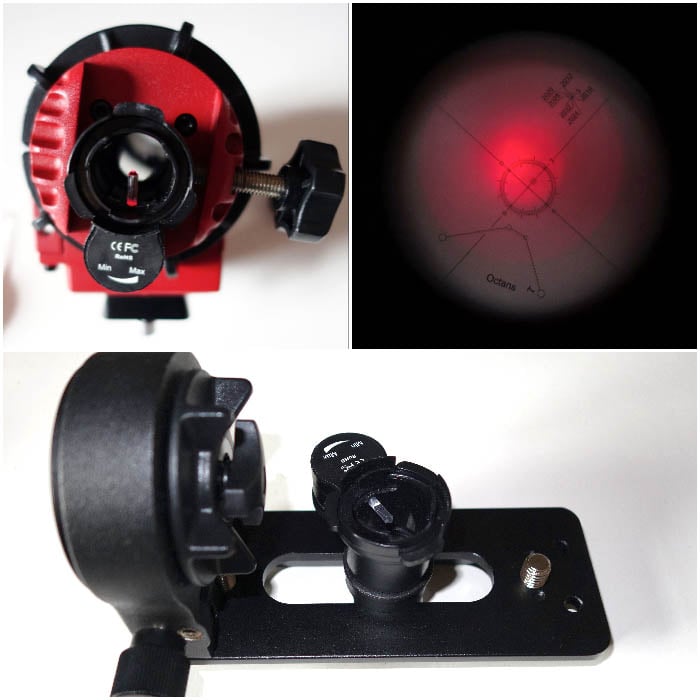
At the back we have the ocular of the polar scope with a particular reticle engraved in and the date/time dials used for the polar alignment procedure.
The Star Adventurer Dials
It is important to learn how these dials work. They allow for the fast and precise alignment of the mount.
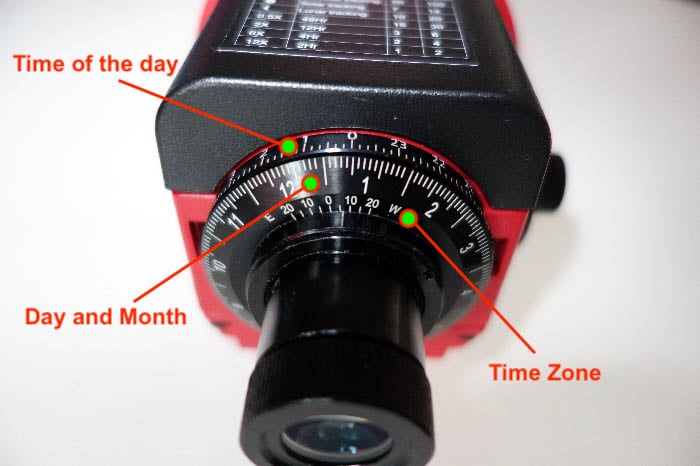
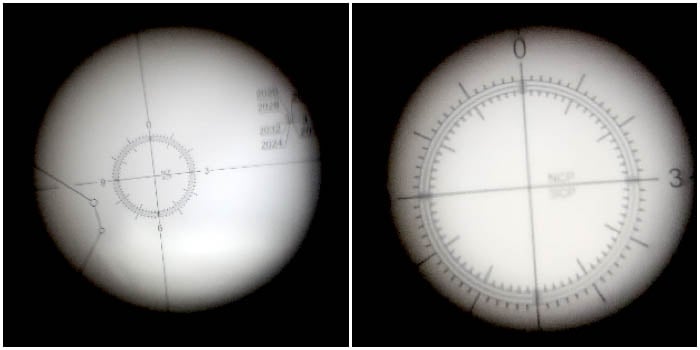
The outermost graduated dial is fixed. It shows the time of day and cover from 5 pm to 7 am. It also has a mark for every 10 minutes. The other big dials are for the date. The bigger numbers indicate the months and you have a mark for every 2 days.
This dial rotates together with the mount. The innermost dial, with the W and E letters, is for the time zone. The zero should be aligned to the mark on the ocular. Every mark is for 5 hour timezones. The + timezones are towards E and – timezones are towards W.
Assuming the date is January 1st, the image below shows the Star Adventurer set to 0:35 a.m. in time zone -6.
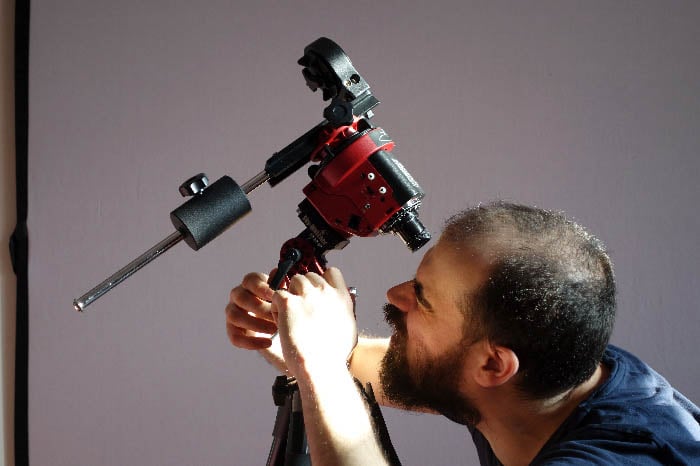
Check the Alignment
You must check the alignment of the polar scope to the mount when you buy the Star Adventurer. Release the clutch so that the head can freely rotate, set time zone 0 and the time and date to midnight, October 31st.
With these settings, the 0-6 line of the clock in the reticle should be vertical. Pointing the scope to the corner of a house or light pole in daylight will help you see if the 0-6 line is vertical. If it’s not, contact your seller.

Checking the polar scope alignment on my mount.
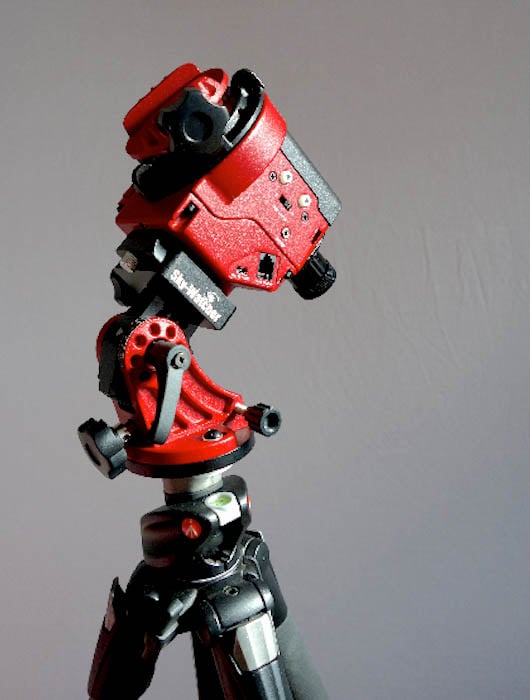
The Wedge
The wedge is a crucial element of the setup. It allows the Star Adventurer to align with the celestial pole.
The wedge has a spirit level, a knob and graduated scale to set the latitude and two screws that swing the wedge left to right for precise alignment.
It works as a tripod head on which the Star Adventurer is mounted.
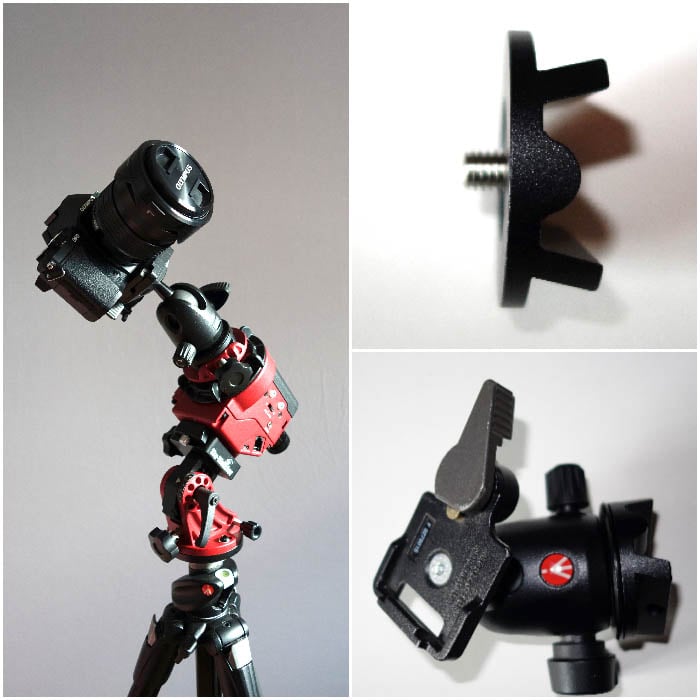
The Ball Head Adapter
This adapter allows you to mount a ball head directly on the Star Adventurer. It is a quick setup. But I only recommend it for lightweight and compact gear. The payload will not be balanced on the mount.
L-Plate And Counterweight
For heavy and bulky equipment, the L-plate is a must have. It has a removable right ascension head with a fine tune adjustment mechanism and a second screw to use two cameras or an off-axis auto-guider.
The plate has a window where you can slide in the illuminator. You can check and correct the polar alignment without removing your gear from the mount.
This plate comes with a shaft and 1kg counterweight for optimal balance of the payload.
Polar Illuminator
The last piece of equipment in the astrophotography bundle is a polar illuminator. This is a piece of kit with a small red LED to illuminate the polar scope. This way you can see the reticle for alignment.
Dim the light of the LED until you can see both the stars and the reticle. It also comes with an adapter to be mounted on the L-plate.
The fitting could be better. It is a bit too loose and can easily fall off.
Useful Accessories
The astrophotography bundle is nearly complete. But there are a few extra accessories you could use.
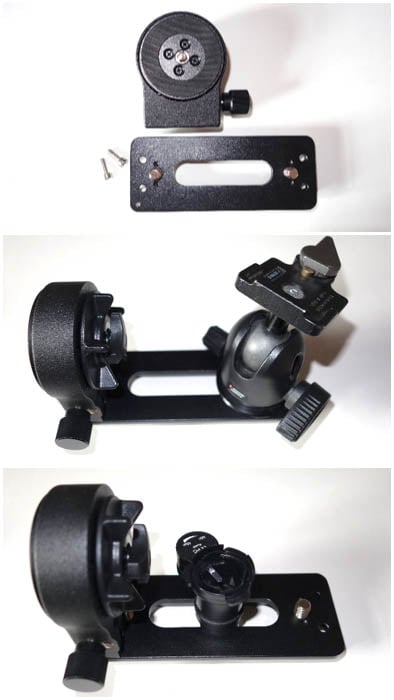
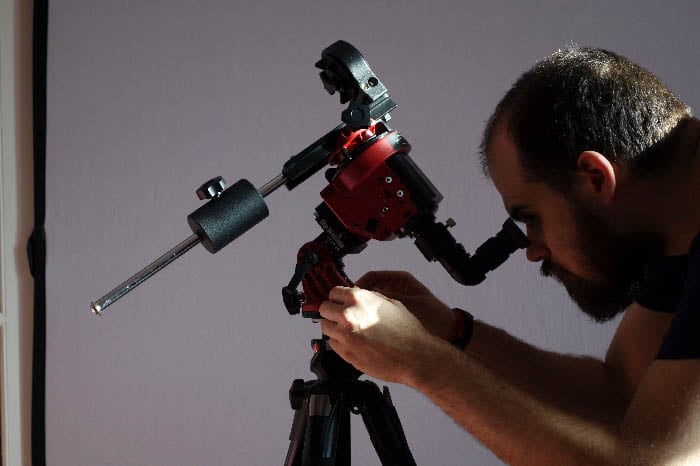
90-degrees Polar View Finder
If you are not at the equator, the celestial pole is up high in the sky. The farther away from the equator that you are, the higher the Star Adventurer has to point in order to align to the celestial pole.
This will make the whole aligning process very uncomfortable for you.
A 90 degrees view finder for the polar scope will make life more comfortable.
Finally, the viewfinder has 1x and 2x magnification for perfect polar alignment. My viewfinder is manufactured by TS -Optics for the Star Adventurer and other mounts.
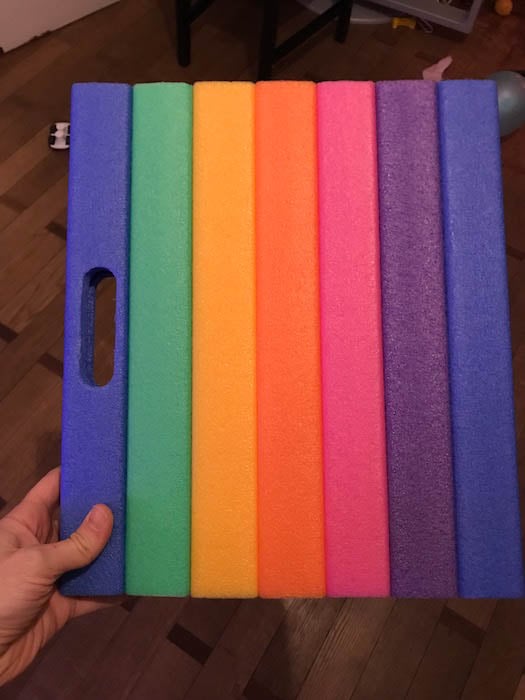
A knee pad like these gardening foam pieces is perfect to polar align comfortably.
Camera Connection Cable
Skywatcher sells cables to allow the Star Adventurer to take control of your camera. These are available for all major camera brands.
Tripod Trailer
You might have many accessories and equipment that you need to keep near the mount. A foldable tripod trailer can come in handy.
Compass
You need a compass to help you point the Star Adventurer towards North or South. You can use an electronic compass (smart phones or GPS units). I prefer a classic compass.

How To Set Up The Star Adventurer
Your results will strongly depend on the quality of the polar alignment. So let’s see how to properly set up the Star Adventurer.
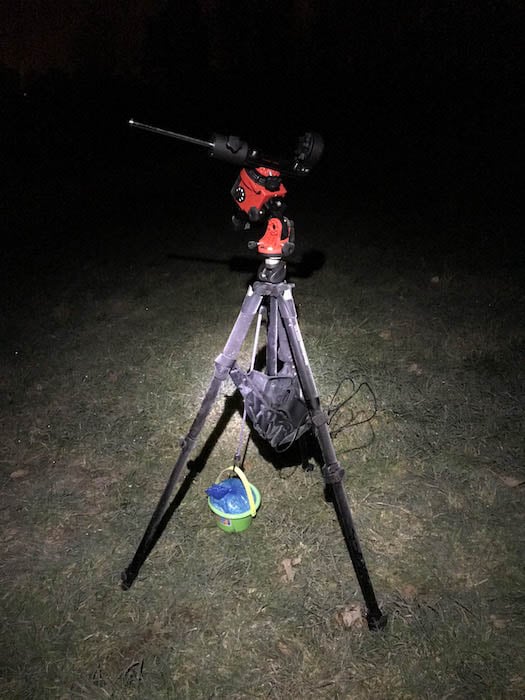
The Tripod
You can place the Star Adventurer on a photographic tripod. It must be a good one: sturdy, preferably with two section legs, stable and with high load capacity. If it can dump vibration fast, even better.
A relatively cheap and valid alternative is a surveyor’s tripod. I use a Manfrotto 055XPROB. It’s sturdy, stable and with a large platform to mount my wedge on.
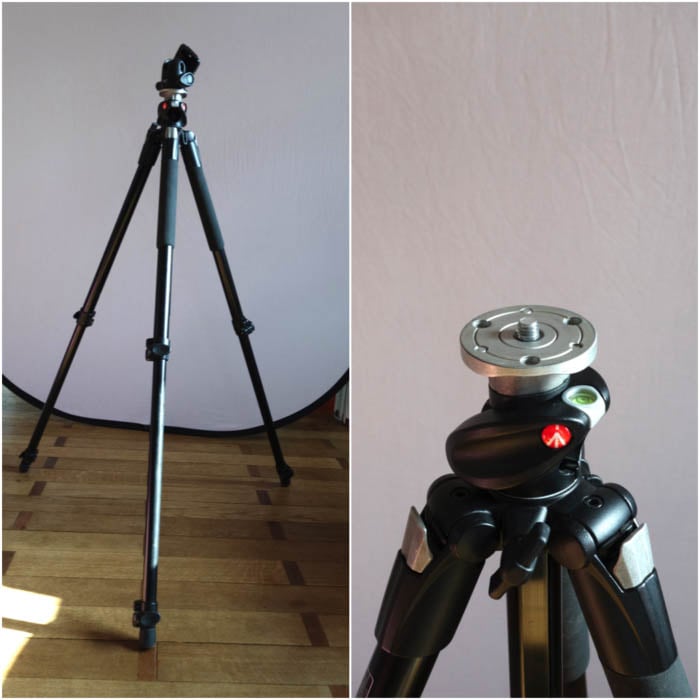
In the field, I use a children’s bucket filled with sand to further stabilize the whole setup.
The Coarse Polar Alignment
Polar alignment is the most important step to perform. We can break it down into “coarse” and “fine” alignment.
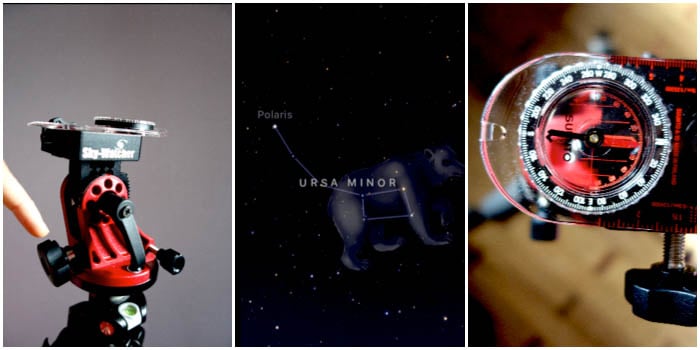
This guide is valid for aligning to the North celestial pole. If you are in the southern hemisphere, you have to use Octans instead of Polaris. It also requires a slightly different procedure.
To start, mount your wedge on the tripod. Level it with the aid of the level spirit on the wedge’s base. Next, point the nob to set the latitude roughly towards North.
You can use a compass for this or eyeball Polaris if you can find it in the sky. You can also use a smartphone app such as Sky Guide to locate it.
Next, set the wedge to your current latitude. Use the graduated scale from 0 (equator) to 90 (north/south pole) with a mark every 3 degrees of latitude.
This coarse alignment will place Polaris within the field of view of the polar scope, but most probably not in the right position. This alignment can be good enough to photograph bright objects with relatively short exposures, such as the Moon, the Sun and the planets.
But for the faintest deep sky objects, you need the fine alignment too.
If you use the L-plate, now is time to balance your gear. Unlock the clutch and place the counterweight shaft parallel to the ground. Then slide the weight back and forth until the payload is balanced and there is no rotation if you let go.
Example of unbalanced payload.
Balancing your gear will put less strain on the motor. And you will have better, smoother tracking.
The Fine Tuned Polar Alignment
Polaris is not exactly on the celestial pole. But it is quite close and moves in a small circle around it. Fine alignment means placing Polaris in the right position on the clock of the polar scope reticle.
One way to do this is to use the PS Align app. This can show you the position Polaris should have on the reticle for the current time, date and location. All you need to do is replicate what you see on your smartphone screen.
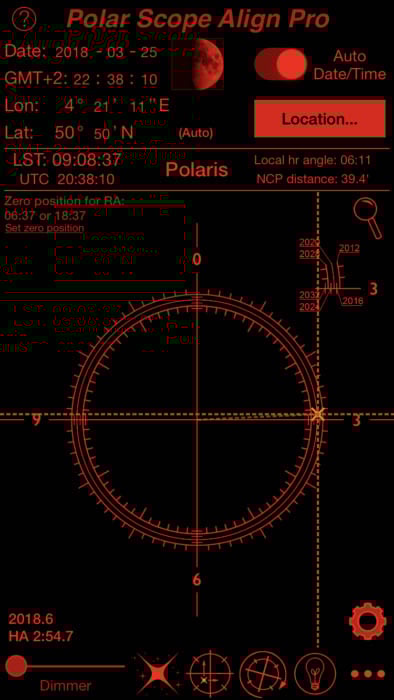
In the image above, I can see that at my current latitude (50º50’N) Polaris should be a bit before 3 o’clock.
This seems easy, but there are a few things to note. You need to reset your Star Adventurer to timezone 0 and midnight of October 31st to be sure your clock appears as in the display (if the mount is calibrated ok).
Also, looking at the display will spoil your night vision, making it harder to see the reticle and Polaris.
I prefer to set my Star Adventure to the proper time zone, time and date. Once you do this, you must always have Polaris on the central circle corresponding to 6. Simple, fast and accurate.
To place Polaris in the right position, you need to operate the two thumb screws on the wedge and possibly the latitude knob. After that, lock all the screws gently but not too tightly.
Take your time to properly align the mount as this will allow you to take longer exposures without star trails.
Blind Polar Alignment
If you cannot see Polaris from your location, you can still align your mount by using the drift method. This is a bit more complicated and time consuming, but a quick internet search will show you how to do it properly.
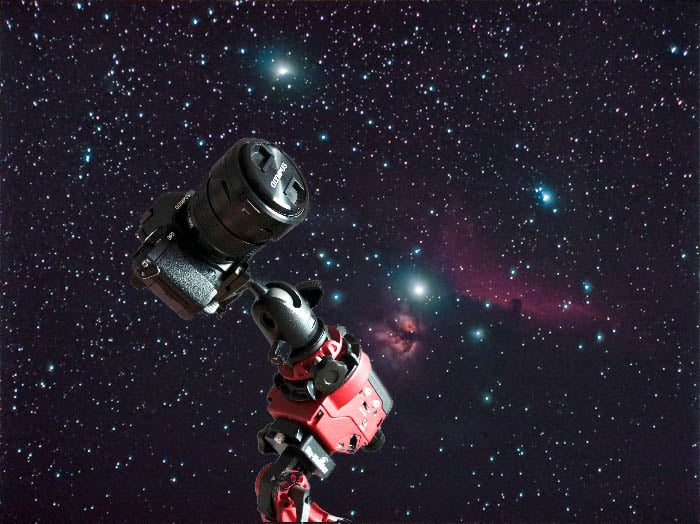
Framing The Target
Once you have aligned the mount, you can frame your target. Be gentle while manipulating the payload to avoid losing your alignment.
Before starting your astrophotography session, take a few test shots to check your focus. Look for star trails to see if your alignment is good enough.
Tracking Accuracy And Other Considerations
This mount has very small periodic error for its category and it is quite capable. I can comfortably track stars for 60 seconds with a 600mm focal length ().
I found that, due to the period error, I will have to throw away 1 frame every 10 minutes or so. Other factors may contribute to ruin a single exposure: planes, satellites, wind and vibrations. Usually, in a good session, only 70/80% of your images will be usable.
The motor is quiet, it runs smoothly and, with 4 good quality AA batteries, you can image for more than one night.
Alternative Mounts
Here are some interesting alternatives to the Star Adventurer:
- Skywatcher Star Adventurer Mini Wi-Fi: the smaller brother of the mount I have, with payload limited to 3kg. You can control it through a smartphone app via WiFi;
- iOptron SkyGuider (available in different versions and bundles);
- TS Optics Sky Tracker pro set.
Conclusions
The Skywatcher Star Adventurer is a great little mount that is very popular with astrophotographers. All in all, it is a well built and complete setup for lightweight astrophotography.
It is compact and you can transport in a small camera bag or backpack.
It is a great performer thanks to a small periodic error, can manage a payload up to 5Kg (with counterweight) and it is easy and fast to set up.
With a price tag of little more than 300$, it is cheaper than a new fast lens and will greatly improve your astrophotography. I definitely highly recommend it if you want to photograph the night sky.