Sometimes, it’s hard to know what to do with photos. Most people stick them in a photo album or on their computer, never to look at them again. But what if you could use your photos to create beautiful and unique gifts for your friends and family?
Recommended Equipment to Make DIY Photo Gifts
What to Do With Photos: 10 DIY Gifts and Ideas
Here are ten DIY photography gifts you can make using your photos. These gifts are perfect for any occasion and will surely please anyone who receives them.
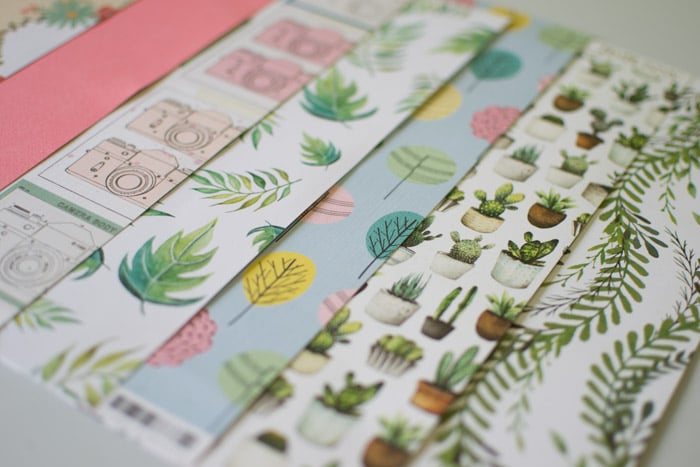
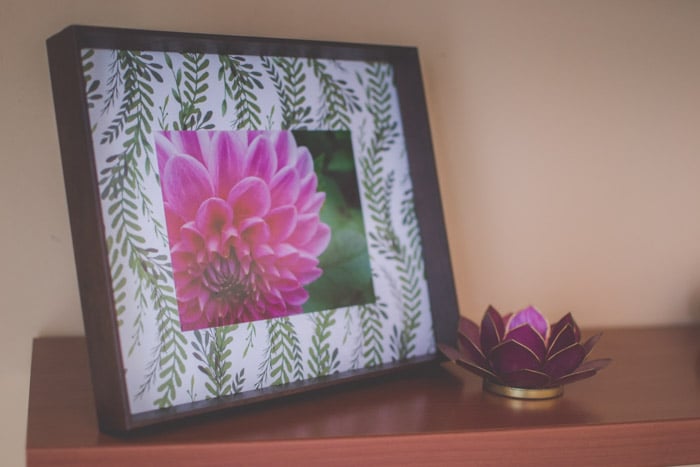
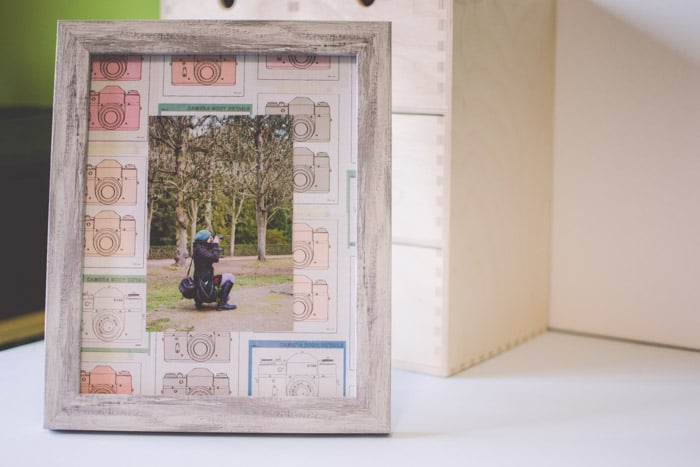
1. Frame Them With Scrapbook Paper
When I want to display photos, I usually look for a simple frame that won’t distract attention. But occasionally, it’s nice to do things differently and add color or texture to the image.
An easy way to do this is to change the usually neutral mat (picture mount). You can also easily create one from scrapbook paper.
Choose a frame that is distinctively bigger than what fits your photo. This leaves a lot of space around the photo for the picture mat (mount). Cut the paper you chose so it covers the whole frame. Center your photo, and you’re done!
The good thing is that you can change the mat whenever you like. If you use double-sided paper, flip it, and your photo will have a different vibe!
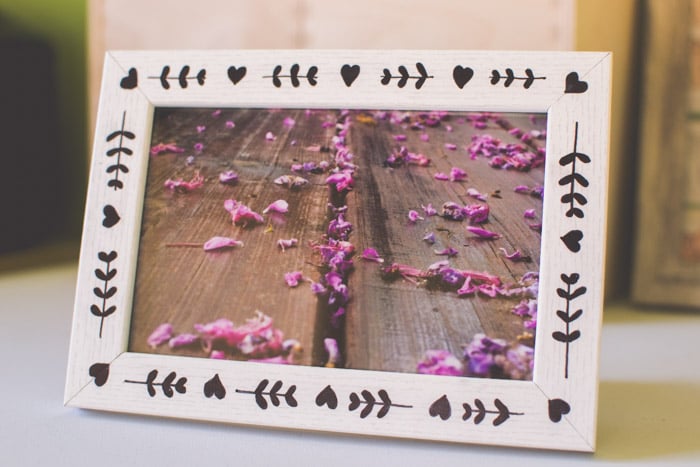
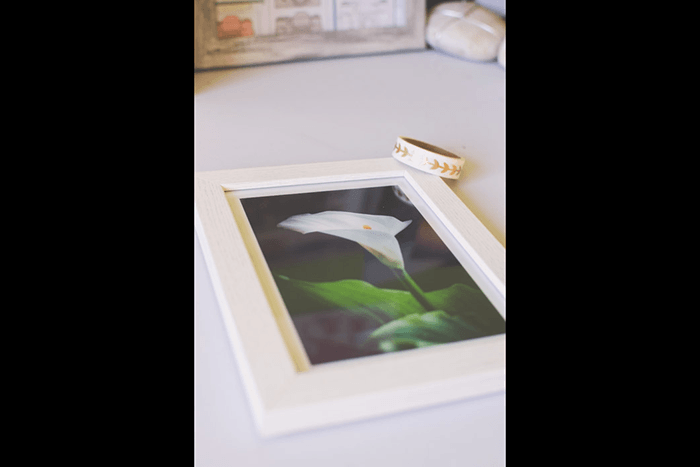
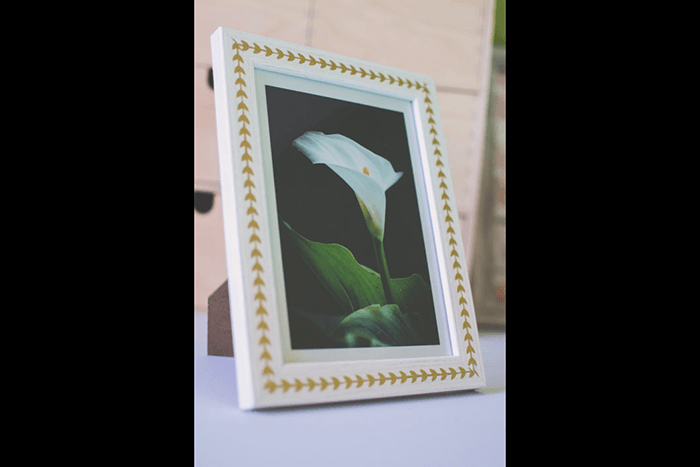
2. Put Them in Decorated Frames
There are many ways to re-purpose wood frames, but I have two favorite creative photography ideas that I want to share with you. One way to do it is by drawing on it with a marker. Simple, right?
You can keep it simple by making a geometrical shape and repeating it all over the frame. You can also get a bit more elaborate and draw a design. I usually make the template with a pencil and then fill it with a permanent marker.
Another way to decorate old frames is to add washi tape. The ones with a transparent background work well for this.
These two creative photography ideas are perfect for doing with kids because they are both fun and easy. And as you can see, creative photography ideas don’t need complicated equipment either!
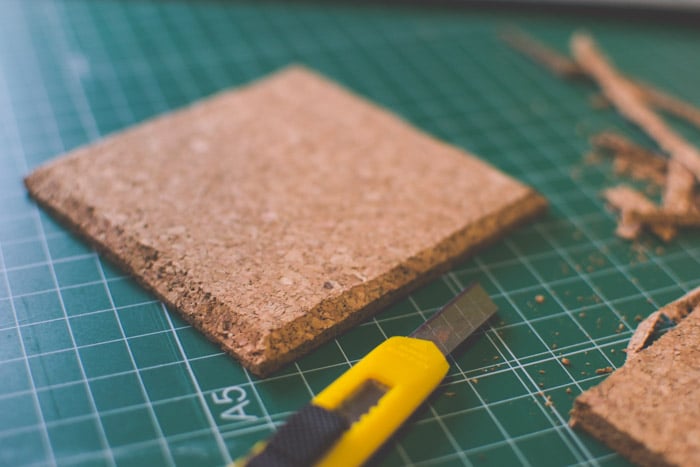
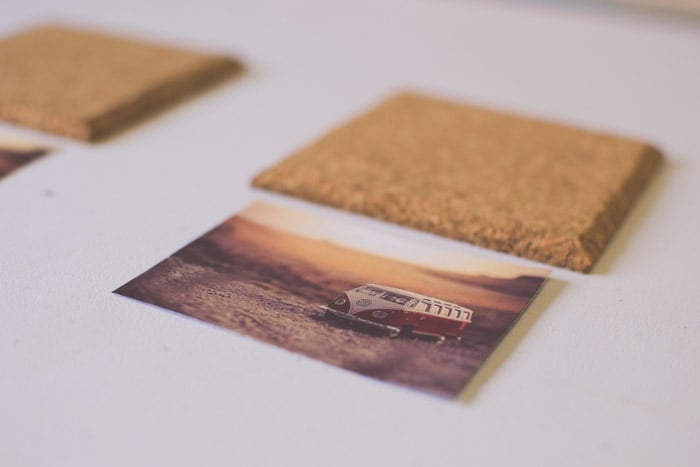
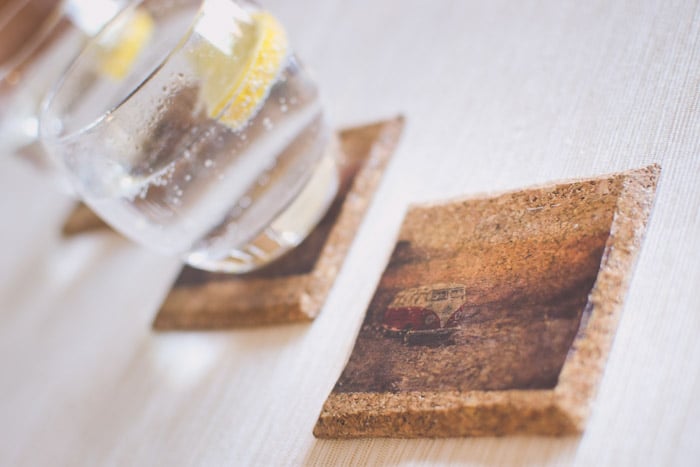
3. Make Custom Coasters
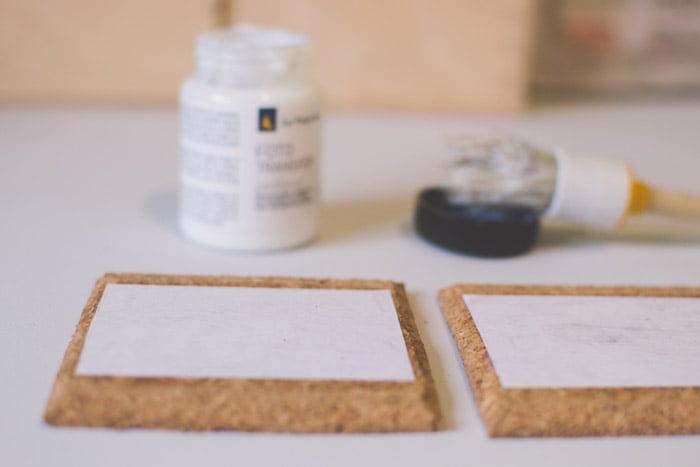
This one is a little more complicated. Here are the supplies you need for this DIY photo coaster:
- Corkboard
- X-acto knife and cutting mat
- Paintbrushes
- Photo transfer glue
- Fixing varnish
- Water
- Sponge
- Dry towel
- Photo printed with a laser printer on regular paper (important!)
First, you need to cut the corkboard into tiles. I made mine 3.5 x 3.5 inches (9 x 9 cm). But any other size works fine. Just make sure your photo fits, and use a sharp X-acto knife. (You can also buy pre-cut coasters with adhesive.)
Cut out the photo and put the transfer glue on the image using a paintbrush. You want to have a thin and equal layer over the whole surface.
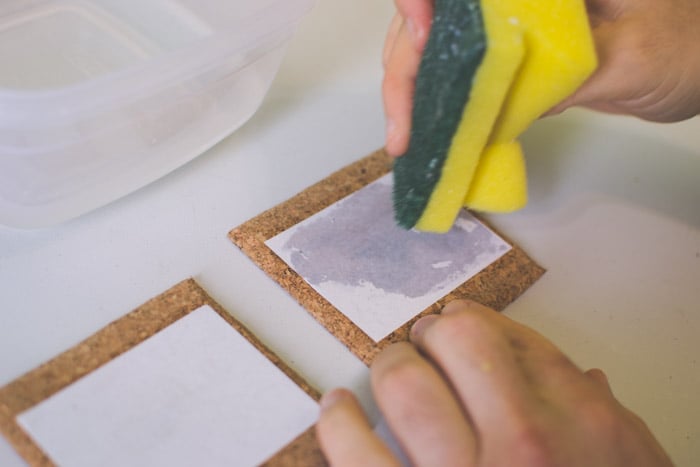
Place the photo facing down on the cork tile so that the glue connects between the tile and the photo. Then, press them firmly together.
Let the glue dry for a few hours (I waited a day). Wet the paper with a sponge. Then, gently break the paper away by moving your finger or the sponge back and forth across it.
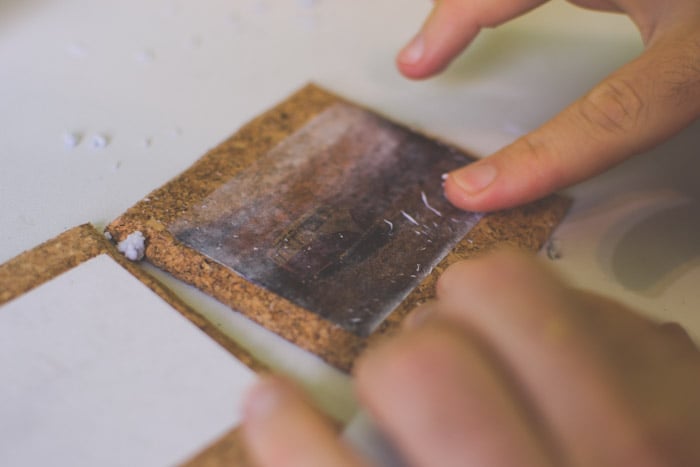
Dry the tile with a towel after cleaning all the paper away from the print. Be careful not to rip the print. Apply another layer of glue, and fix the image with varnish when it dries.
And there you have it, your very own custom-made coaster. Remember that when you transfer the photo, you flip it horizontally. So, print the photo as a mirror image. This is especially important if you have words in the photo.
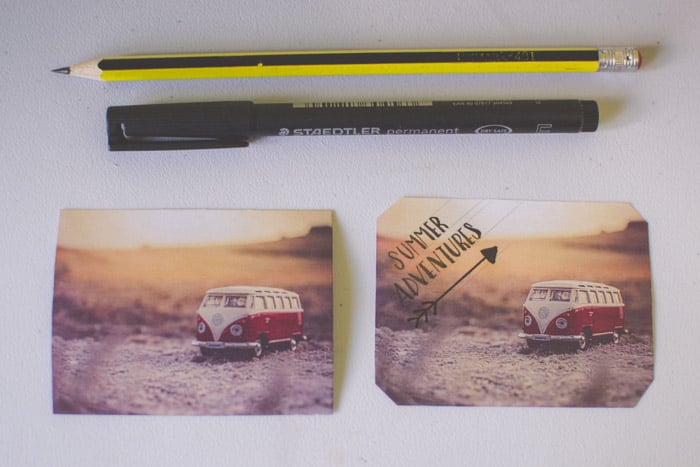
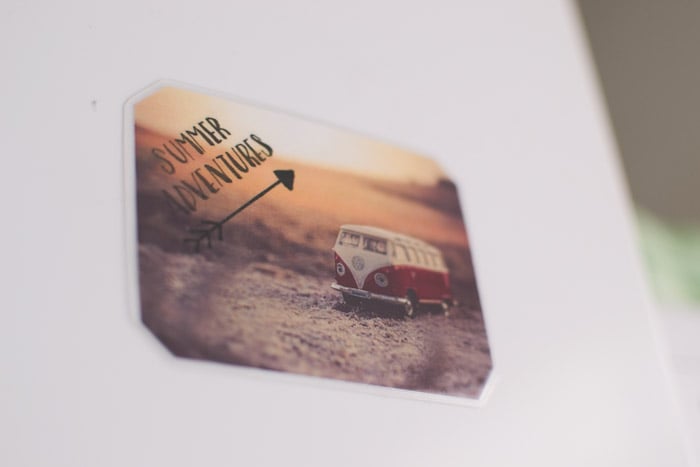
4. Fashion Photo Magnets
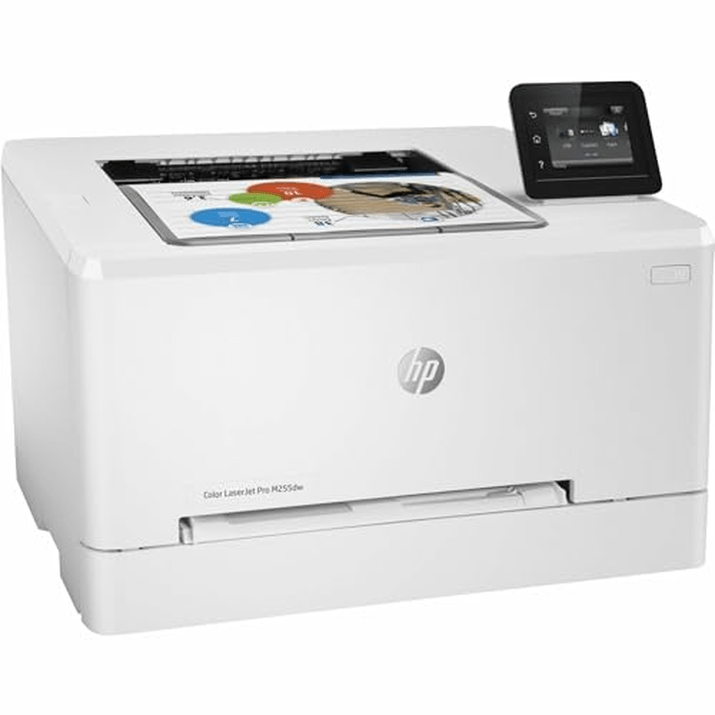
Print the photo you like with your home or office printer or at a print shop. You can keep the photo as it is or personalize it by cutting corners differently or writing some sentences or a nice quote.
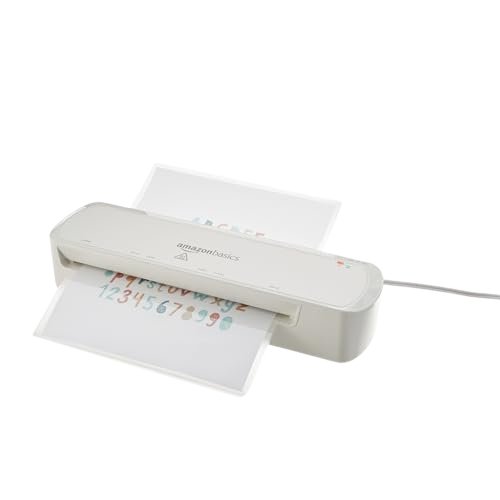
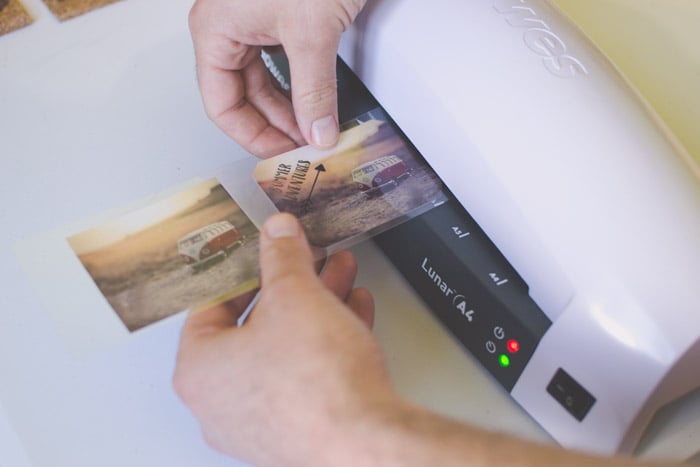
Laminating your magnet is a good idea to ensure it lasts long. I have a little laminating machine at home that is handy for this craft. But if you don’t have one, you can laminate it with a copy service or at an office supplies store.
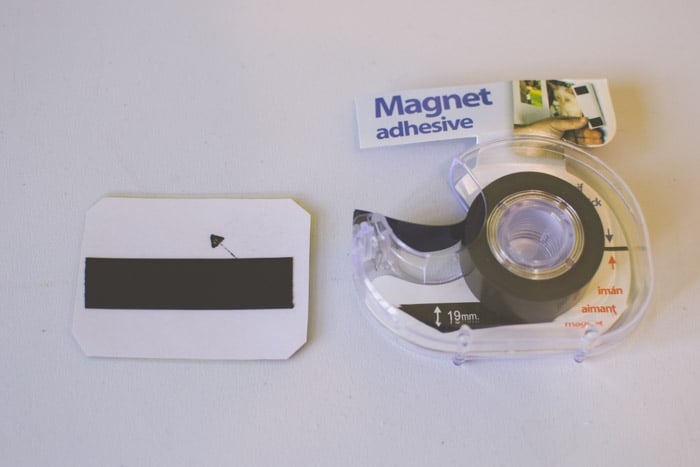
You can turn your photo into a magnet with adhesive magnet tape. A small magnet at the center of the photo should be enough if it’s small.
If it’s a big photo, add several little pieces in the corners and at the center to ensure the magnet adheres well and the photo doesn’t bend.
5. Create Stone Photo Stands
Supplies you need for this DIY photo stand:
- Smooth, medium-sized riverbed stones or pebbles
- Metal wire (I used aluminum, but steel wire also works fine)
- Wire cutter
- Needle-nose pliers
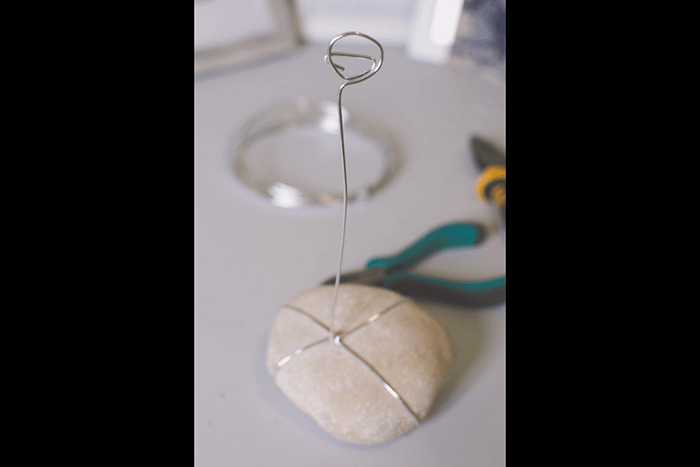
Take a stone you like and then cut a length of wire. Depending on the size of the stone, you might need a longer or shorter wire. Keep in mind that you need 4 to 12 inches (10 to 30 cm) for the “stalk” (stand), besides the length required to encircle the stone twice.
Wrap the wire around the stone twice, then tighten it so it’s firmly latched onto it. Use pliers to tighten it if needed. Ensure you have at least 6 inches (15 cm) of wire left.
Create a 90-degree angle in the wire so it stands perpendicular to the stone and the ground. With the pliers, twist two small loops at the tip of the wire (see example photo below). Ensure the loops press against each other.
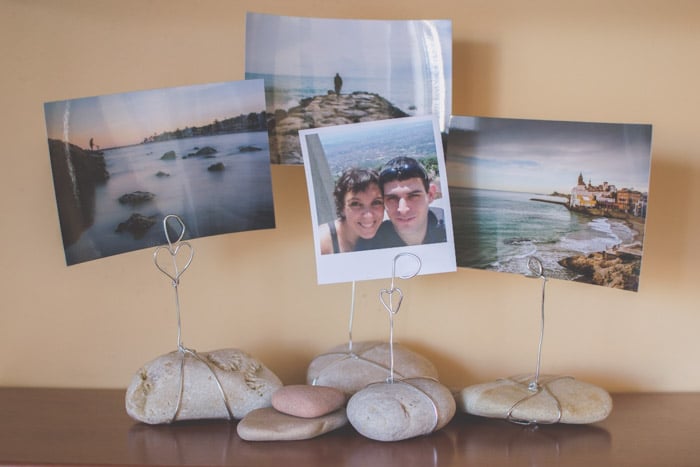
Place your photo between the two loops. There you have it—your very own stone photo holder! You might want to give the stone a wet appearance and a glossy look. Before starting with the wire, finish it with wax, lacquer, or varnish.
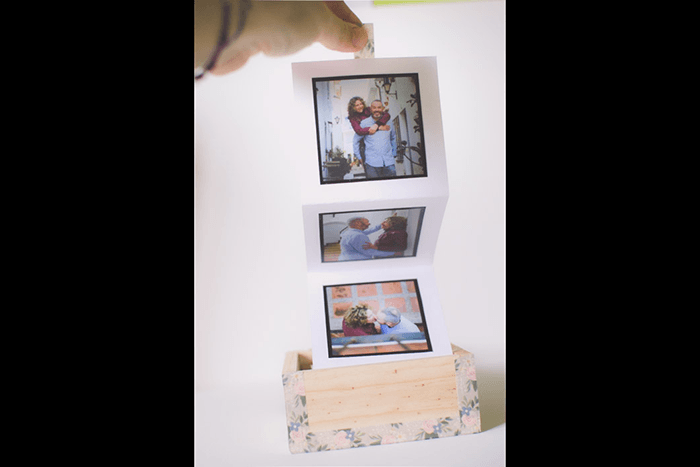
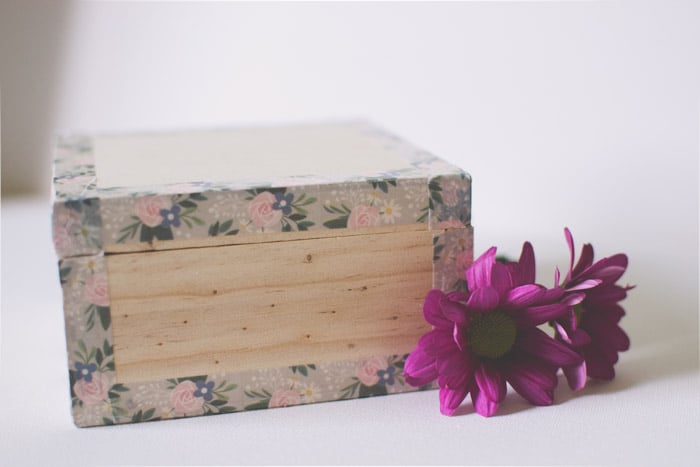
6. Make a Photo Accordion in a Box
It is quite common to keep photos in a box. But it’s a bit different to display them on a long sheet of paper folded like an accordion. (See photo the below.)
Choose a box and construction paper. Measure the inner dimensions of the box. Your paper should be slightly narrower in width and length than the box’s.
Once you have your long paper section, fold it like an accordion. After that, glue your photos in each accordion panel and place them inside the box.
To make removing the photos from the box easier, you can put a small piece of washi tape or glue a short ribbon on the first panel. Decorating the box is optional.
In my case, I decided to use washi tape. But you can also paint it, transfer a photo onto the cover, glue some scrapbook paper, etc. The options are endless!
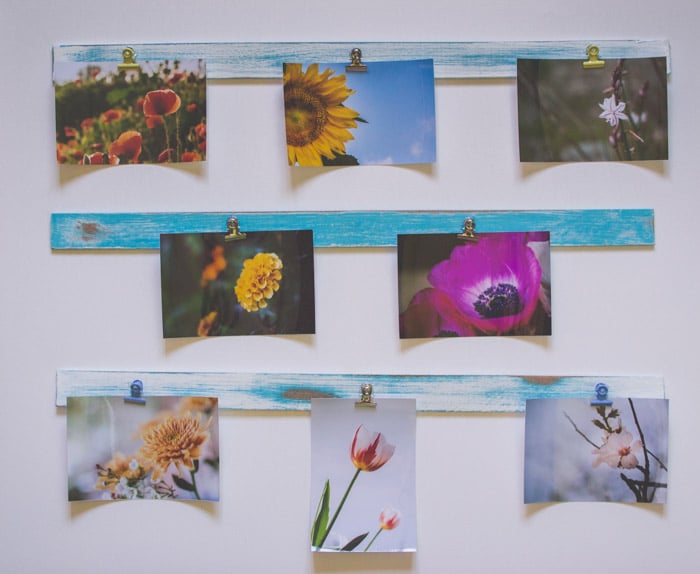
7. Turn Your Photos Into Wall Art
Supplies you need for this DIY art display:
- Thin wood or bamboo sticks
- Binder (bulldog) clips
- Hot glue gun (or nails)
- Wood paints of two colors (optional)
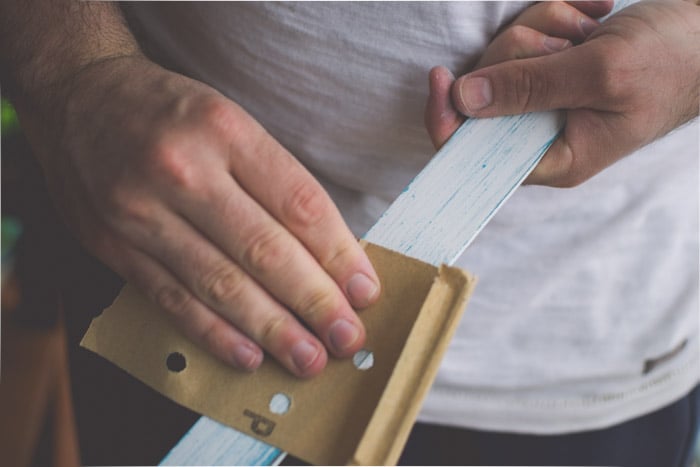
I got the plywood in a supply store, but you can reuse wooden boards. I decided to give them an aged appearance, but this is optional.
To get the aged effect, you need two paints with the same base. I used water-based paint because it’s easy to clean the brushes later. I chose blue and white because I love Mediterranean colors. But you can choose any combination of colors you like.
I painted the planks with one color and left them to dry, then with the second color.
After drying, you must pass sandpaper in some areas to uncover the lower paint and wood. After achieving the desired effect, you should apply varnish, lacquer, or oil to protect the wood and give it a shiny look.
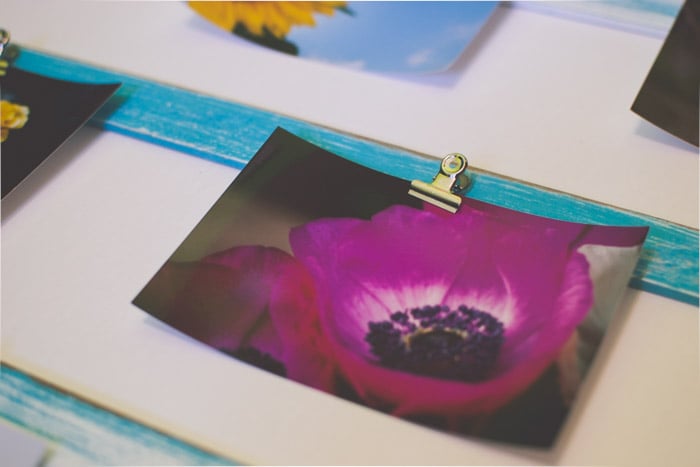
It is time-consuming because it requires several steps and waiting for the paint to dry. But it’s also a fun challenge. The last thing to do is to glue some binder clips along the boards. If you prefer, you can use nails to fix them to the planks instead.
You can hang them on the wall or use a bulletin board or canvas.
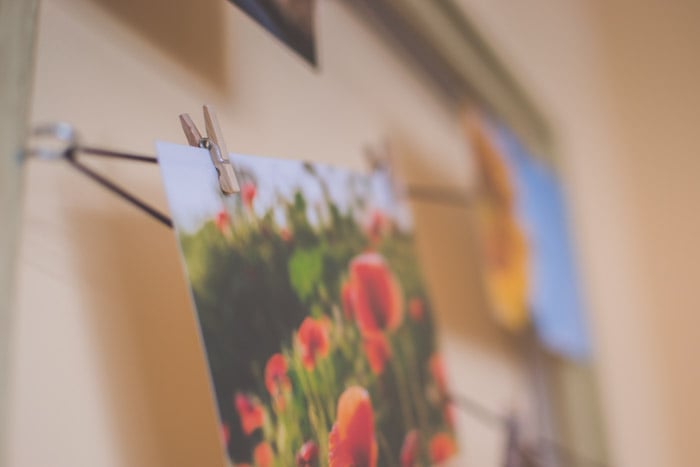
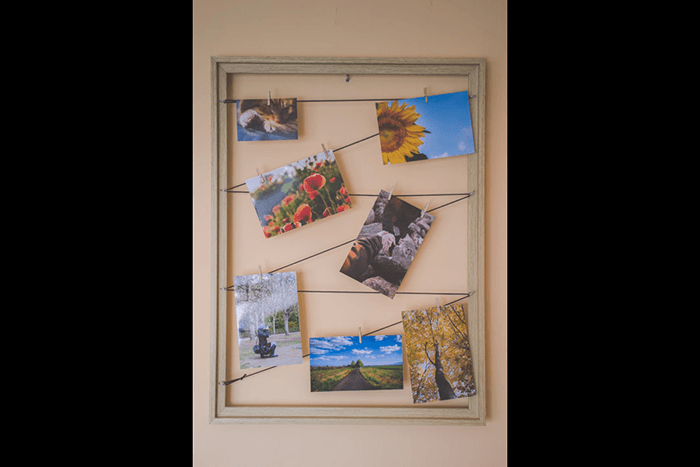
8. Display Photos With a Large Frame
Supplies you need for this DIY photo display:
You can reuse an old frame you have at home, preferably a relatively big one, to display more than one photo. The first thing to do is open the frame to remove the back and the glass (if there is any). All you need is just the frame itself.
Place some hook screws on each of the lateral sides. The number of screws and the distance between them depends on the pattern you want to make with the elastic cord. For example, I put four on one side and three on the other.
Once you have them in place, you need to pass an elastic cord through them. Start from the upper screw and cross from one side to the other as you go down.
You can also add screws at the top and bottom of the frame, and then you can build a web. Next, hang your photos using tiny clothes pegs (from craft or office stores) or beautiful clips.

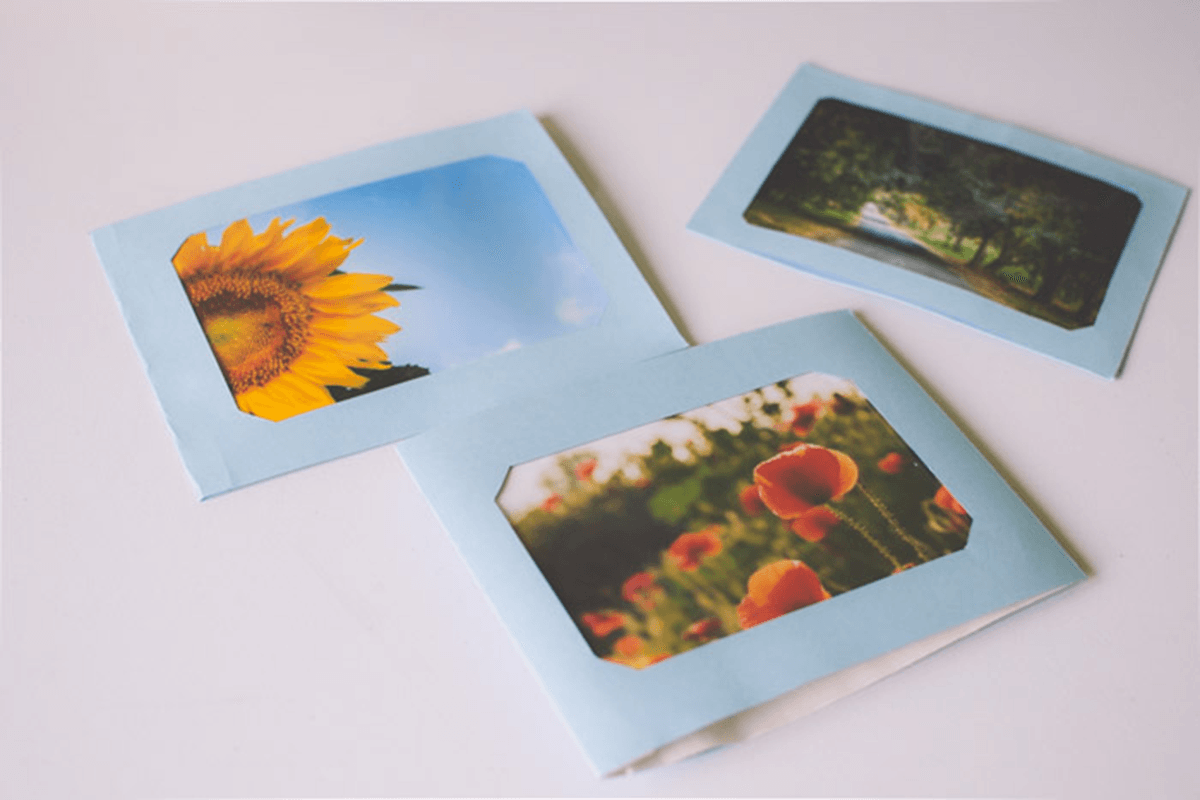
9. Make Greeting Cards
Greeting cards are always great, especially with kids. Even more so if they are handmade and have a meaningful photo. Here are the supplies you need for DIY photo cards:
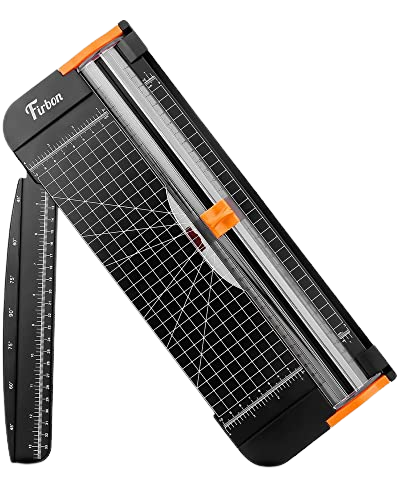
- Scissors or a paper cutter
- Glue
- Card stock
You want to make a case or frame to fit a photo onto. To do so, you first need to measure your photo. Then, cut the card stock so it’s wider than the photo’s width and a bit longer than double its length.
Fold the cardboard in the middle. Make sure that the two flaps are equal and fit each other nicely. Cut out a window in the middle of one of the flaps. It must be smaller than the photo itself—0.2 inches (5 mm) on each side should be enough.
Glue the flaps together on two edges, keeping the third open so you can slide the photo inside. And that’s all! You have your very own handmade card!
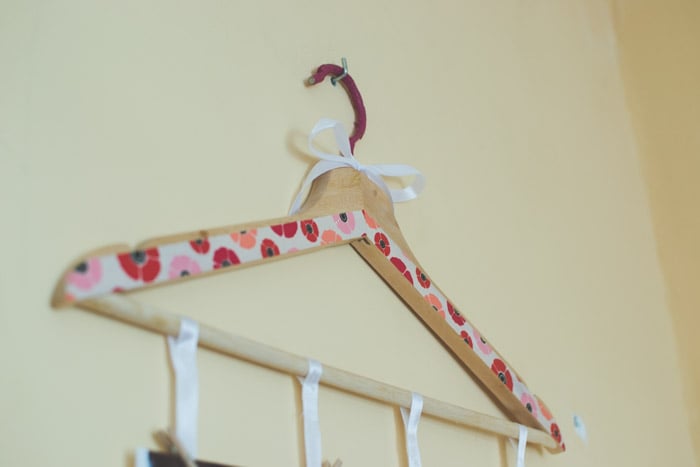
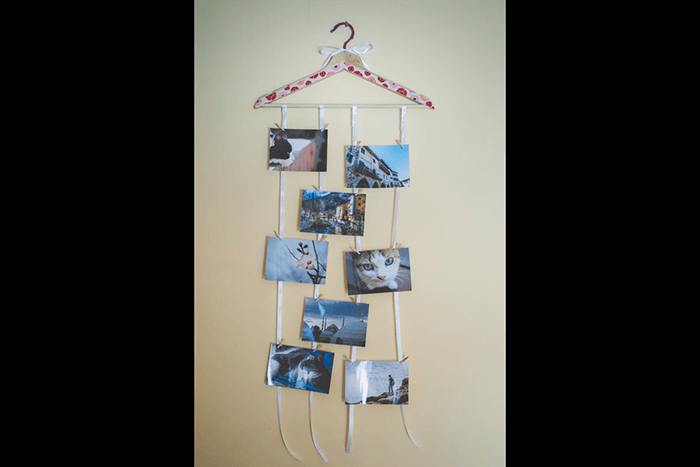
10. Turn a Hanger Into a Mobile
For this DIY photo mobile, you need the following supplies:
- A regular wooden clothes hanger (or any type you have at home)
- Some meters of ribbon
- Hot glue gun or needle and thread
- Washi tape (optional)
I started by decorating the hanger with some washi tape. I put some tape on the wood part and wrapped some around the metal hook.
I cut the ribbon into four 35-inch (90-cm) long pieces. I made a small loop in each ribbon around the hanger and closed them with hot glue. You can also also sew them.
I added a ribbon knot to decorate the hook, and that’s it! You need to place your photos using tiny clothes pegs or clips.
Conclusion: What to Do with Photos
Printing your images and doing something creative with them is an excellent way to keep your art alive. Our 10 photography ideas for what to do with photos are affordable and fun challenges.
You can spend some time making them together with your family or friends. They are perfect as gifts! Most of them also let you interchange photos easily.
This is great for your photography learning process. You can display photos from your projects or photography walks. You can then study them because you have them around and always change them for a new set of photos.
Recommended Equipment to Make DIY Photo Gifts