Broken things have their unique charm. Every broken cup or wine glass has a story to tell. Sometimes it's about their owner being clumsy, and other times it's about the forces of nature or wanderlust.
Let's see how we can create a beautiful conceptual broken glass photography!
Broken Glass Photography: What Props Do You Need?
I believe that there's power in simplicity, so the list of props and equipment we need is pretty short:
- light source suitable for shooting splashes;
- broken bottle;
- small paper boat;
- additional still life items;
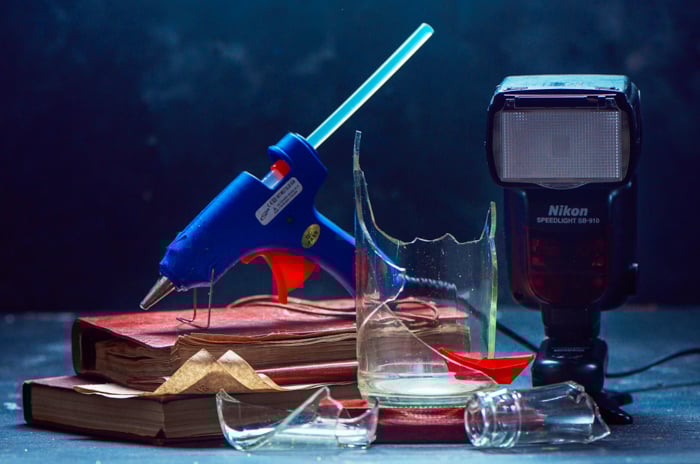
- glue gun and means to hold the glass smithereens in the air;
- a camera and a tripod.
We're going for a sea theme here. You can use seashells, maps, notebooks in leather covers that can pass as the captain's journal. Maybe add a Jolly Roger from a toy set and a compass.
Make sure that the additional objects are not too bright-coloured. So they won't distract the viewer from our main heroes.
How to Break Glass for Photography
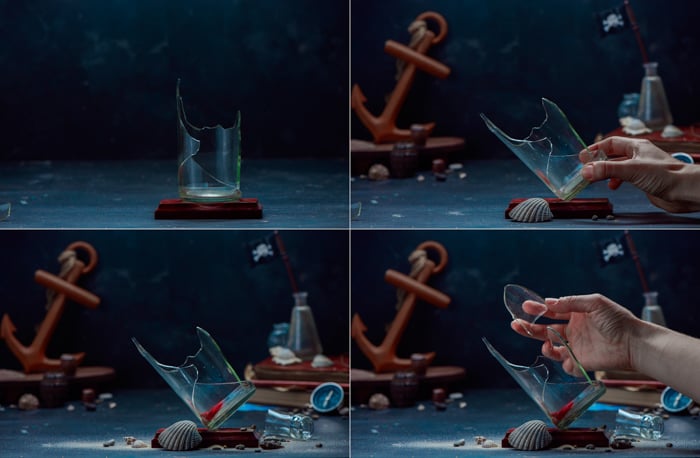
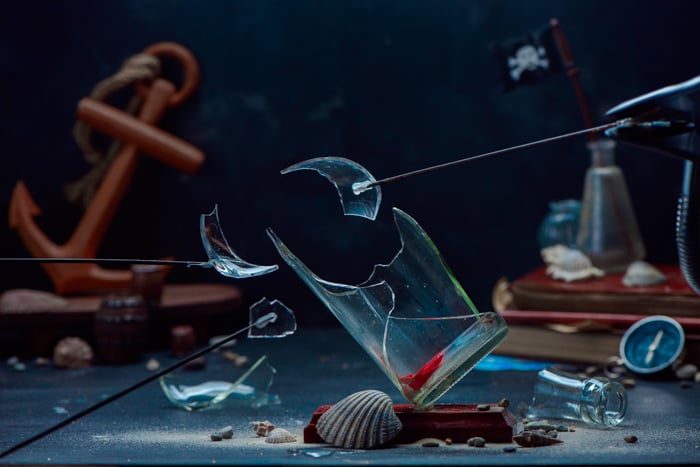
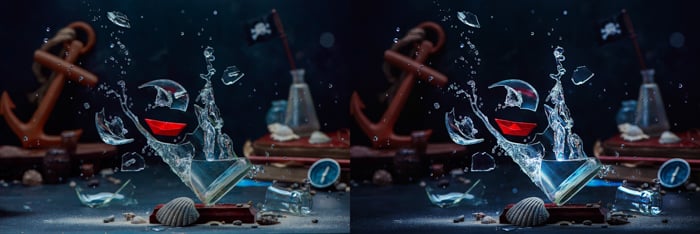
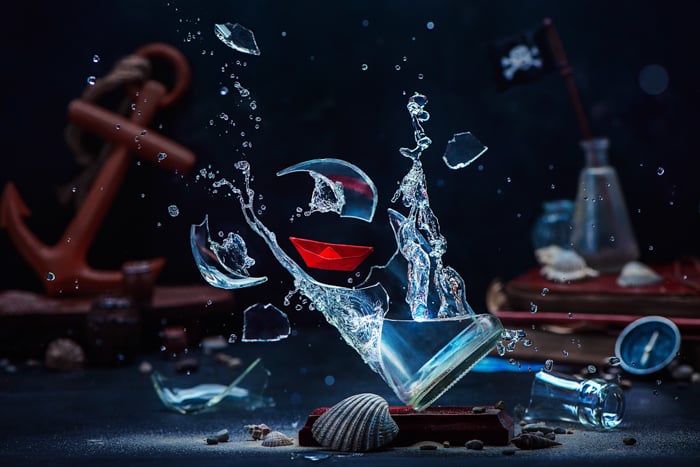
I'm planning to create an image of a broken bottle with a boat inside. This will be the main hero.
That's why I need not only a broken bottle but a broken bottle that looks interesting and has large parts intact. So, I had to break the bottle myself.
With practice, I learned that you need to apply force the right way. Wrap the bottle with a towel, press it against the wall and hit it with a hammer on the side.
Not on top! If you hit it on top, the bottle will shatter into small pieces without a hint of their original shape.

Tips to Create Awesome Broken Glass Photography
1. Keep the Composition Simple to Highlight Your Main Subject
Start with the main object and arrange the other items around it. Keep in mind that you're going to have splashes in the frame, so leave a lot of space for them.
For a shot like this, it's better to keep the composition very simple. Have the main object, a couple of items in the background to add depth and support the storyline.
And maybe some details like a seashell in the foreground.
To make the remains of my bottle look more dramatic, I tilted it to the left and glued it with a glue gun to a wooden stand.
2. Keep Flying Elements in Place With Knitting Needles and Glue
For a more dynamic shot, add a couple of glass pieces flying in the air. You can hold them separately in the air and shoot them one by one.
If you want to make sure that they interact with the splashes in a natural way, you need them right in the scene.
To do that, I fixed each shard in the air with a glue gun, knitting needles, and a clamp. And I did the same with a paper boat. This way, I have complete control over my composition. And I don't have to worry about changing anything in post-processing.
Remember to take a shot without any visible supports. This way, you can merge two images later without any trouble.
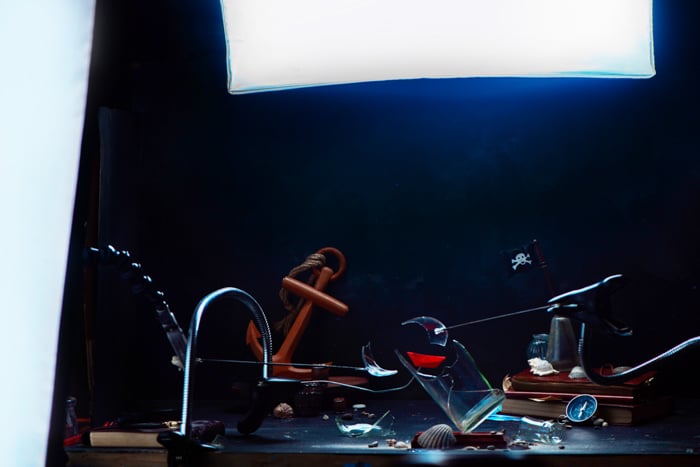
3. Set up Your Lighting for Broken Glass Photos
Backlight makes the glass look fantastic. It kills all the possible reflections that could ruin your glass photography.
That's why I set a small strip-box with a speedlight right behind and a bit above my scene. I can have light coming from behind but still, keep the black background. This is my key light.
As the fill light, I used a large diffuser with another speedlight behind it. I need this light to lift the shadows a bit.
It also increases overall illumination and allows me to keep the aperture more closed. That provides a wider depth of field, and I can keep more of the bottle in sharp focus.
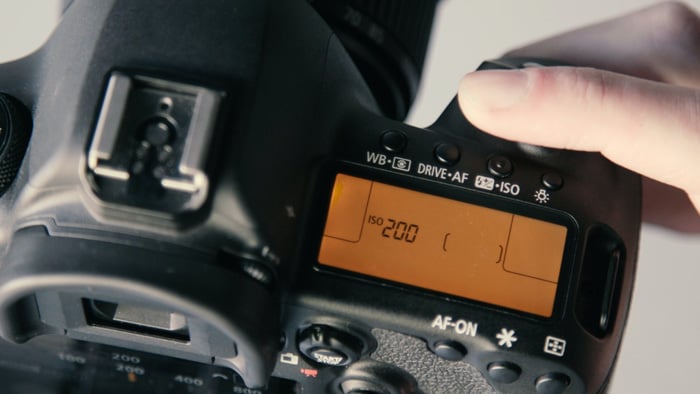
4. Find the Perfect Camera Settings for Broken Glass Photography
First of all, make sure that your shutter speed is the sync shutter speed. If you are shooting in a dark setting (and you should!) the flash duration will become your shutter speed.
The light will be hitting the sensor of your camera for only the amount of time the flash is working. It won’t matter if your shutter speed is set for 1/250th of a second or for a half a minute.
If there’s no ambient light available, the flash will be the only visible light source. The camera sensor will still only be exposed to the light for the duration of the flash.
Second, close the aperture as much as you can without underexposing the image. We need it to make sure that we have the entire splash in focus.
Making splashes by hand is tricky because you don’t have the precise control over how the liquid moves. That’s why it’s possible to get a beautiful but out of focus splash. To minimize this, keep the depth of field as deep as possible.
In my case the settings look like these: 105 mm, ƒ/7.1, 1/160 s, ISO 250.
In an ideal case, I would close my aperture up to ƒ/10 or even ƒ/16. But I wanted to keep the objects in the background a bit blurry.
5. Bring the Action and Take the Shots!
Now it's time to bring sea waves into your scene! Take a shot glass or sauce dish, fill it with water and quickly pour it on the remains of the bottle.
Take a sequence of shots. Rinse and repeat until you get the shot you really like!
To learn more about the art of frozen liquids, check out our tutorial on water splash photography.
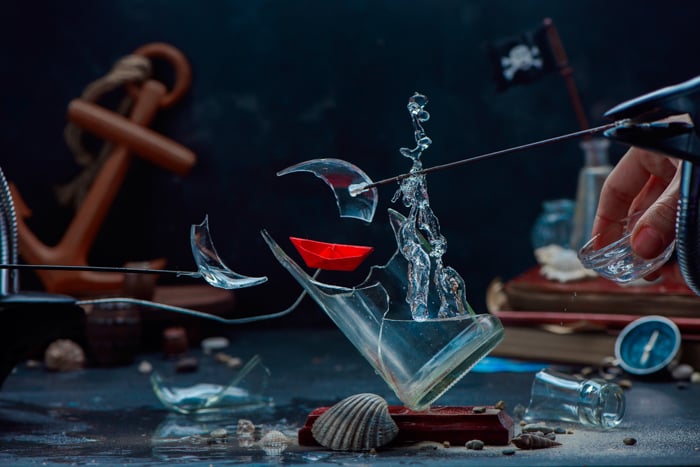
I used a small sauce dish to create splashes
6. Combine the Best Shots in Post-Processing
Now it's time to pick the best shot from the series and make it look perfect. For my final image, I combined several photos:
- the shot with a splash I liked the most;
- the clean shot without visible supports;
- a couple of photos with splashes on flying glass shards.
If you fixed your camera on a tripod during the entire shoot, merging these images together should be pretty simple. Place all of them on separate layers, like a Photoshop sandwich. Create a Layer Mask for each of them.
Then use a soft brush to paint the area you don't want visible with black and the areas you want to show with white.
Post-processing and the final image
When I finished merging splashes, I deleted all the supports, retouched the traces of glue on flying shards, increased contrast and deleted the particles of dust from the bottle.
That's all!
You can try this trick with different objects. For example, this broken coffee cup and shards of porcelain are flying with the help of the same glue gun and knitting needles.
They are non-transparent, so making a shot like this is even simpler. You don't have to worry about any visible glue.
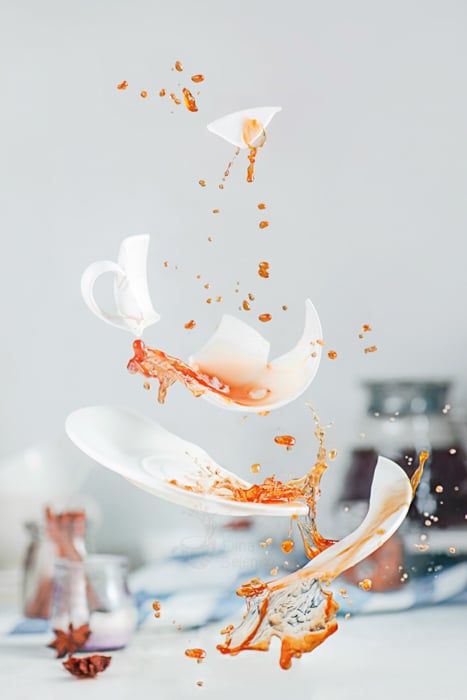
The same trick with coffee and a porcelain cup
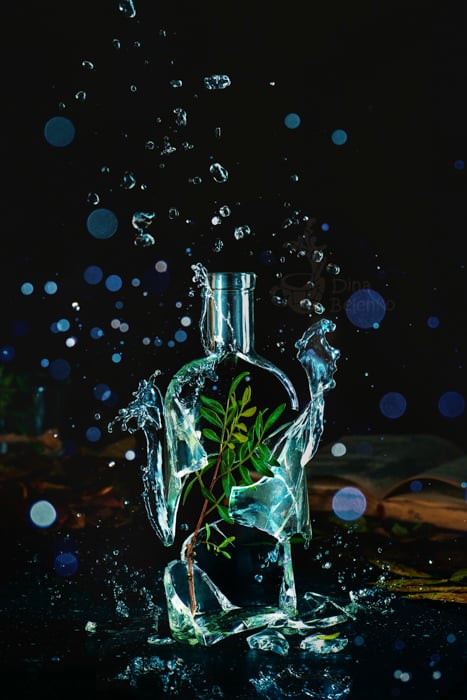
And with another bottle!
Conclusion
Sure, there are more advanced ways you can approach glass photography. But this is a simple, easy to master stepping stone.
Now it’s your turn to try this trick, adjust it and make it your own. Best of luck with your broken glass photography experiments!