Christmas is a time for family, friends, and fun. It's also a great time for taking pictures. If you're looking for some cool Christmas picture ideas, you've come to the right place.
We'll show you how to take pictures that will help you capture the spirit of the season. We'll also give you tips on how to make your photos look their best. So whether you want to take a picture of your family opening presents or of Santa Claus himself, we have the perfect solution for you.
How to Take a Christmas Picture Idea of Levitating Objects
Levitation is a great way to make your scene more dynamic. It’s like one of those circus tricks: flying objects look captivating even if you know how it was done.
It’s the rare food photographer who didn’t have fun capturing flying layers of a burger as they assemble. Or shooting chocolate crumbs above hot cocoa with marshmallow.
Today we’re going to try this trick with star-shaped cookies and some powdered sugar.
But first, let’s take a look at the most popular ways to photograph flying objects.

1. Sprinkle and Scatter
This works perfectly for powder-like substances and very lightweight objects. You can scatter any spices above your dish. Pepper, gritted cheese, nuts, sprinkles – anything you want.
You can do it with more substantial, but still lightweight objects like popcorn, coffee beans or tiny marshmallows. Just scatter them over your scene and take a sequence of shots!

Chocolate crumbs are perfect for scattering
The problem begins when you try the same approach with heavier and more fragile items. Please, don’t take a handful of cookies (however small) and simply drop them hoping to capture a beautiful moment. Levitation doesn’t work like that.
You would have to be unbelievably lucky to get a good-looking picture with a tactic like this. Not to mention, you can damage most of your cookies.
I’ve seen people trying to make a well-made macaroon fly by dropping it as high as half a meter and watching where it lands.
As far as I’m concerned, that’s just wasting a perfect dessert.
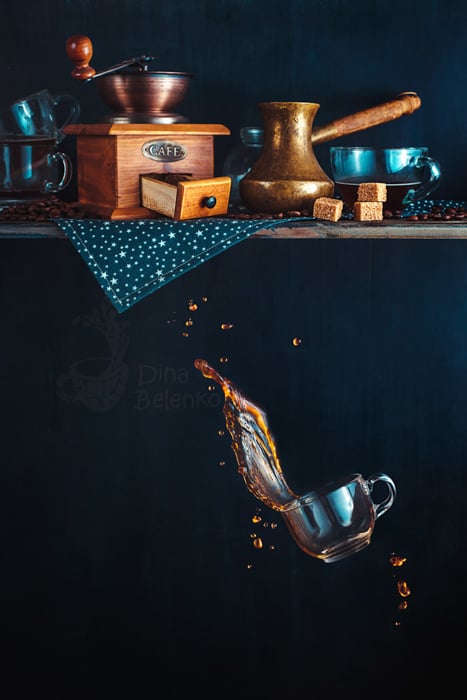
This falling cup, for example, causes a lot of questions. A majority of people tend to assume that I really tried to drop this cup and capture it in free flight. Iteration by iteration. Broken cup by broken cup. Who has time for that? And who has that many cups?
Reserve sprinkling and scattering for something very small, that won’t be damaged by falling.
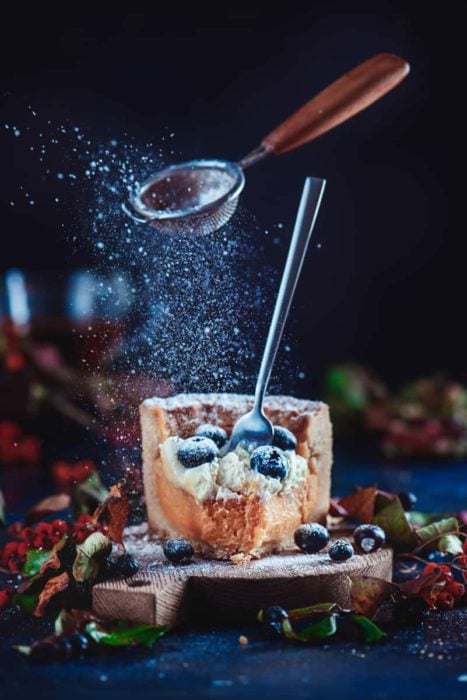
Powdered sugar looks perfect for winter and Christmassy photos
2. Hold and Shoot Each Object Separately
The easiest and most popular way to create levitation is to hold and photograph every object individually and combine them together during post-processing.
This is a great way for beginners because you don’t have to arrange a construction with holders and supports. It’s easy to put together, but the technique ends up looking intricate and advanced.
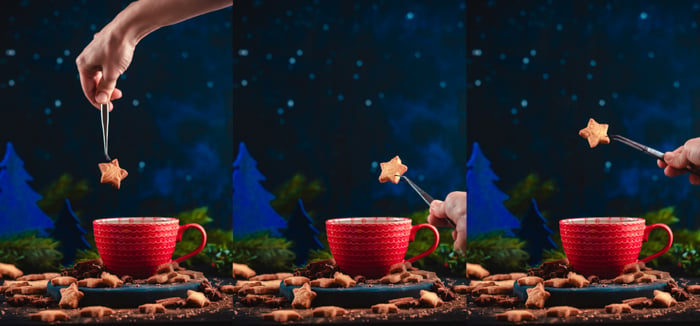
The best way to use this method is where your objects are some distance away from each other. The distance does not have to be large, but sufficient for your objects not to cast shadows on each other.
Otherwise, you would have to draw all the shadows and reflexes by yourself. And if you’re anything like me (not able to draw a straight line to save your life, that is), you’ll want to avoid that.

I shot all the cookies separately for this image. I held each cookie with tweezers in a zone of focus.
They are not supposed to be close enough to each other that they would cast visible shadows. Because of that, I could merge them during post-processing without any trouble.
3. Keep Everything in Place With Wires or Fishing Line
This is my favourite way! It’s cheap, easy to pull off and gives you a lot of control over everything that’s moving in your scene.
This approach says that you should fix every object in the air by an improvised support or holder, take a shot and remove the support in post-processing.
Every object that appears as flying is actually motionless. And deleting supports is easier than drawing shadows correctly from scratch.
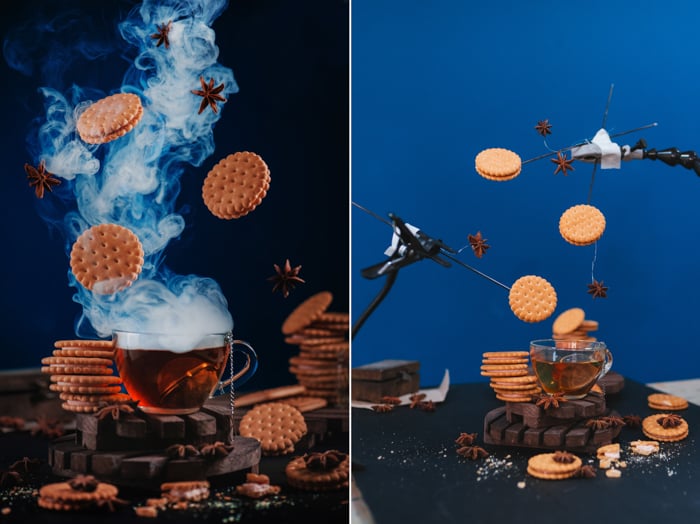
It works for cookies
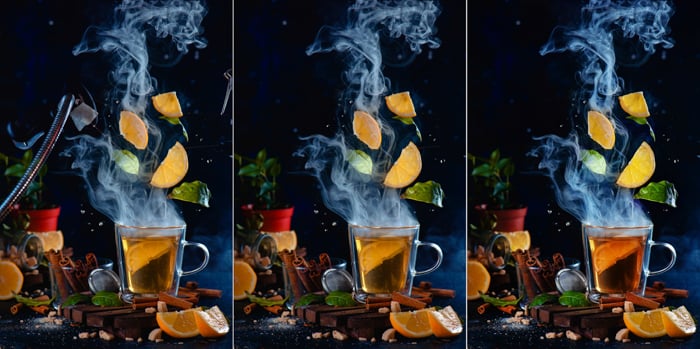
And it works for lemon slices and tea leaves
One of the ways you can suspend your objects in the air is with wire and fishing line. Be careful with that, since objects can rotate in the air. The setup doesn’t really give you a sense of control.
I would recommend using something solid like thin metal or wooden sticks. I tend to use knitting needles and wooden skewers since they are cheap and easy to find.
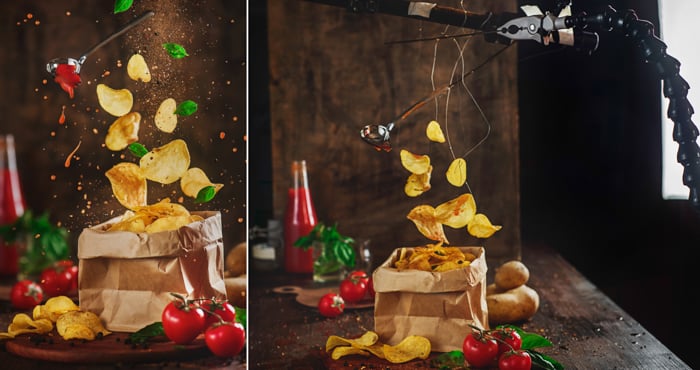
Wire can be tricky, but you can use it for scenes where you don’t need perfect control
This helps you combine levitation with the movement of many tiny objects like flour particles, spices, herbs or even flower petals.
All these objects will overlap with each other, casting real shadows and making the image look natural and believable.
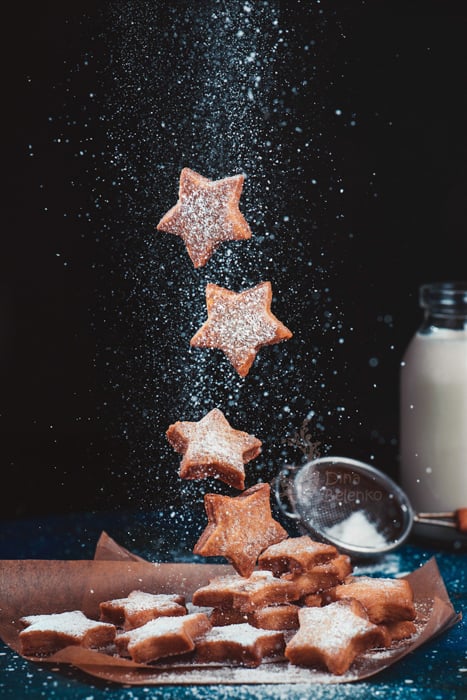
In our case we’ll combine Christmas cookies fixed steadily on motionless supports and sugar powder falling on them.
4. Use Specialised Machines
If you have access to a machine that can throw cookies or coffee cups in the air at the right time and the right angle, don’t ever hesitate to use it! Or if you’re not only a photographer but also a talented engineer, maybe you’re able to build such a machine by yourself.
I don’t have the skills to build such a machine (or money to buy one), so right now we will skip this option. But how awesome and convenient would it be!
Now that you know your options, let’s go through the step-by-step process of taking a Flying Christmas Cookie Photo!
What Props Will You Need
1. Cookies and Decorations
So, let’s collect everything you need for a Christmas photo with flying cookies. First of all, we need some cookies.
Pick something that fits with the Christmas theme. Gingerbread reindeer, snow-white icing, hard candy inserts, polar bears or snowflakes!
I’m not very good at cooking and decorating, so I settled for simple star-shaped cookies.
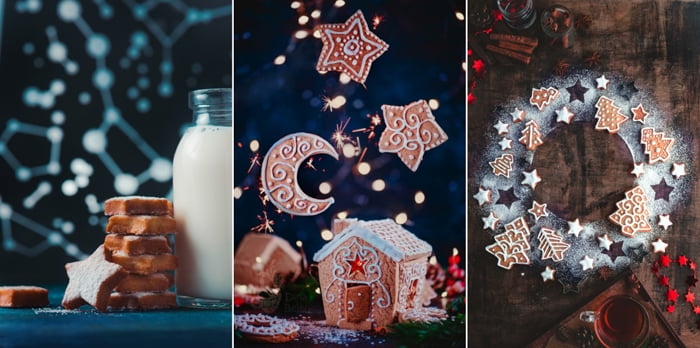
You can go for simple star-shaped cookies, or you can get fancy with icing and ornaments. You can even bake a tiny gingerbread house!
Add some traditional Christmas still life items for the atmosphere. For example, a cozy knitted scarf or a sweater, a couple of garlands or toys, a wrapped present, some cinnamon or anise stars would look perfect.
2. What to Use to Keep Your Cookies in Place
Another essential thing is holders and supports to keep your cookies in the air. For that, I used a couple of knitting needles and a simple stand.
Nothing fancy, just a stand that I unscrewed from a wooden man from Ikea. You could even use knitting needles stuck in Plasticine instead.
As holders, I used simple clamps for embroidery and scrap-booking.
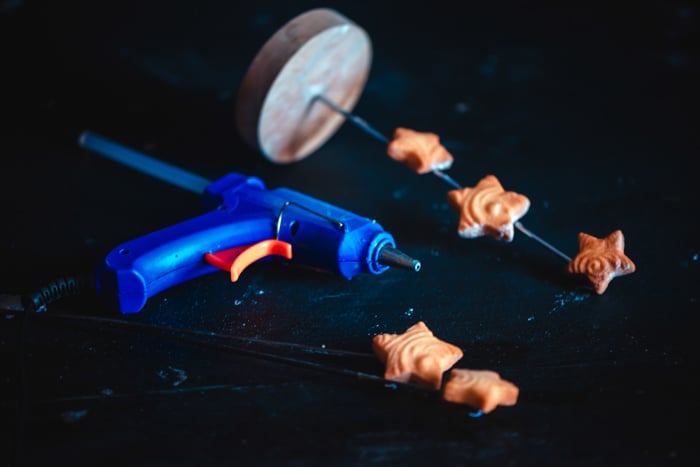
Last, but not least, get a glue gun. It will help you attach cookies to supports.
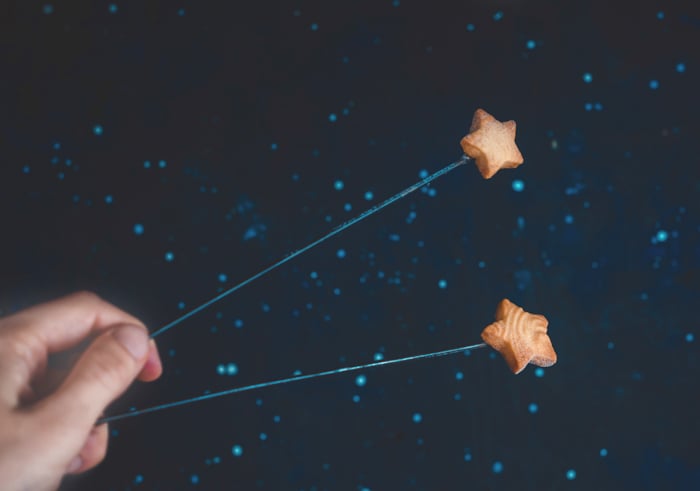
And, of course, we will need a light source, a camera, and a tripod.
How to Arrange a Composition
Start with a plate of cookies and make it your point of interest. I placed Ikea stand first, because I want to glue most of my cookies there. It will be something like an axis of falling. Then I hid the base in a wooden bowl and covered it with cookies.
After that, I added a frame with Merry Christmas lettering to the background, as well as a teacup and fir tree branches.

After that I glued three star-shaped cookies to a pole. In order to make the line of falling not too obviously vertical, I glued two more cookies to knitting needles and fixed than in place with clamps.
I know, some parts of the clamps are visible in my frame. But I plan to merge the final shot with the clean one, so there’s nothing to worry about.
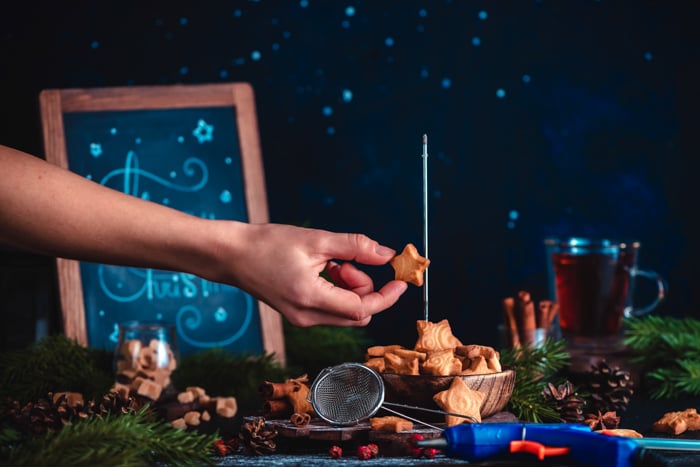
Don’t forget to take a ‘clean’ shot. This is the photo without any clamps visible. It will allow you to retouch them easily in post-processing.
What Lighting Setup Do You Need
You can shoot a scene like this with any lights you have. If you’re working with natural light (or any continuous light, for that matter), you need to keep your shutter speed as short as possible. This will make the moving particles of sugar powder sharp.
You can also set your shutter speed long and capture the long paths of falling particles. It would look like steam and can be a great creative photo.
I usually work with speedlights. Both of my speedlights have a very short impulse duration. But for that, I have to set them on a low power (from 1/16 up to 1/128 power).
It works just like with splashes: low power provides a short impulse, so it’s possible to capture movement. Using non-continuous lighting helps me capture the falling sugar powder in the air.
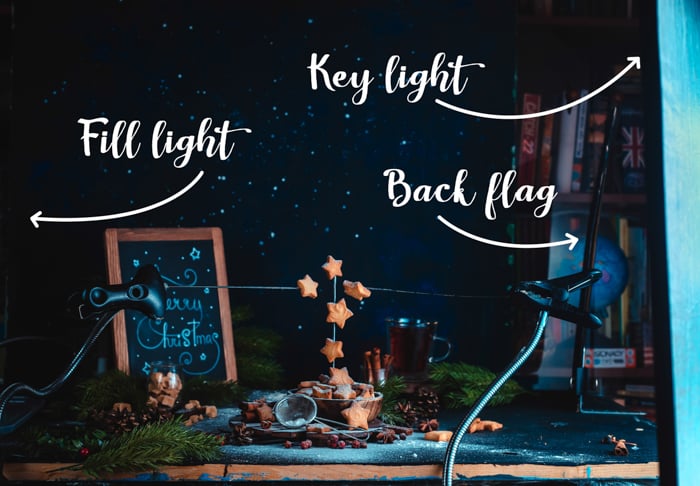
For this image, I used two speedlights. The first one (key light) is set behind a large diffuser on the right side. There’s another (fill light) in a small stripbox on the left side. This one is lighting the shadows and provides a nice shiny reflection on the strainer.
I also used a black flag between the key light and my background to make all the objects on the background stand out less. This way they won’t attract so much of a viewer’s attention.
Taking the Photo
Set your camera in a Continuous mode, so you will be able to take several shots in a row. Check if you like everything about your composition. Check if you didn’t forget to take a ‘clean’ shot.
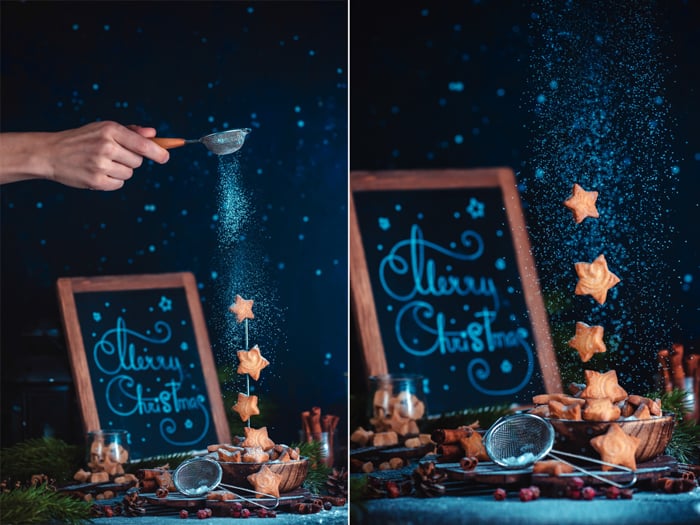
Ready? Good! Scatter some powdered sugar above the scene and take a sequence of shots.
Post-Processing Christmas Cookies Photos
Choose the shot with the most beautiful iteration of falling powder. All you have left to do is to retouch the supports holding your cookies in the air.

This is the shot I like the most from my sequence.
Now, place your ‘clean shot’ on the layer above and make supports invisible using Layer Mask. This is pretty simple: put layers one above another like a sandwich and create Layer Mask on the first one.
After that, you can use a small relatively soft brush to paint in the areas that should be hidden. In areas where the supports overlap with falling powder, use the Clone Stamp tool.
If your supports are dark (and your background is dark too), that should present no problem.
Adjust the color and contrast, and voila! You can enjoy your magical Christmas cookies!

Here I removed the supports with the Clone Stamp tool and a Layer Mask

And this is my final image! I added some contrast, darkened the edges and made the teacup in the background a little lighter.
This trick is very simple but versatile. Try it with marshmallows and hot cocoa. Or cinnamon and a hot steaming cup of tea. It’s as simple as Wingardium Leviosa, only with photography.
Best of luck with your experiments!
