Tilt-shift photography is a technique that can be used to create unique and interesting photos. In this article, we’ll show you how to create tilt-shift photos in Photoshop using a few simple steps. We’ll also provide a few tips on how to get the most out of this technique. Let’s get started with the Tilt Shift Photoshop techniques.
Choosing Tilt Shift Photoshop Images
Some images work better than others when creating tilt-shift photography. Here’s what I look for:
- High vantage point;
- Depth in the scene;
- Subjects with miniaturisation potential.
The images that work well are taken from a high angle, but not necessarily directly overhead.
There needs to be some depth in the scene. Small objects in the foreground and background are best. If all subjects are on one plane, the image won’t be effective. Be careful with images that have a dominate subject. If that subject occupies both the foreground and mid-ground or mid-ground and background, the effect won’t work as well.
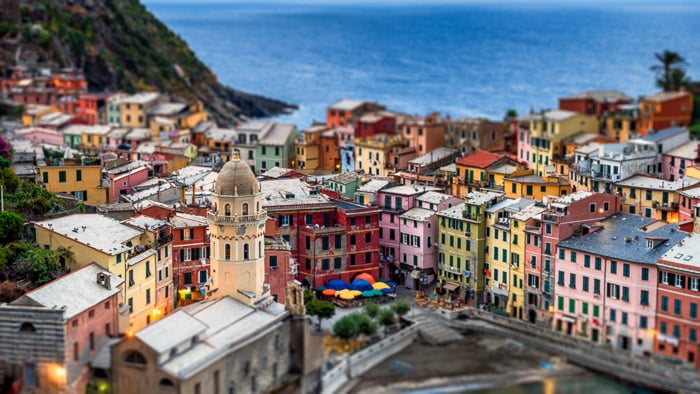
I had to be careful with the church tower. The effect would be ruined if I added blur to only part of the tower in Vernazza, Italy.
Popular subjects for this technique are cities and landscapes. Modes of transportation make particularly good subjects. There’s something about model cars and trains we find attractive.
I’ll show you two options for creating the tilt-shift effect. Both take advantage of Photoshop’s blur filters. Once you understand the concept, you can do it in Lightroom or another post-processing program.
Method 1: Graduated Filter with Lens Blur
Step 1 – Open image & Duplicate Layer
Open the image you’ve chosen in Photoshop and duplicate the background layer by going to Layer>Duplicate Layer… (Ctrl or ⌘J).
Step 2 – Create Layer Mask
Add a layer mask to the duplicate layer by going to Layer>Layer Mask>Reveal All. Or you can select the layer mask tool at the bottom of the layers window. It looks like a rectangle with a circle inside.
You can also edit in quick mask mode by going to Select>Edit in Quick Mask Mode (keyboard shortcut Q).
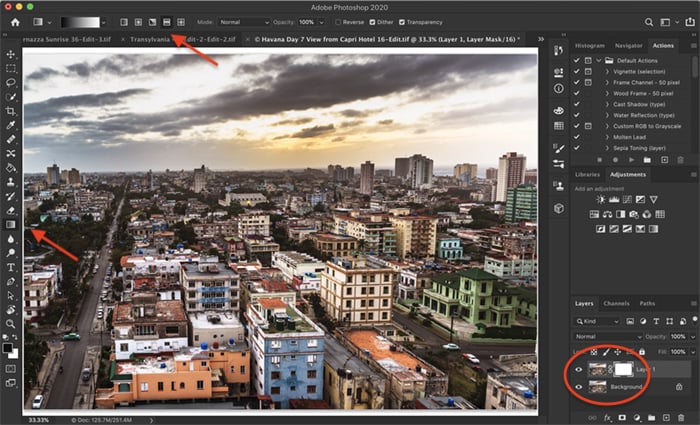
Screenshot of Photoshop workspace. Shows duplicate layer, layer mask, and graduated filter tool settings.
Step 3 – Add Mirrored Gradient to Mask
Select your layer mask and then the gradient tool in the toolbar. In the gradient menu that now appears, select a basic black to white gradient and the mirror icon. This icon has a white bar in the center and black bars above and below. This option will add the gradient to the top and bottom of your image.
Drag a vertical line down the middle of your image. Start somewhere in the middle and drag the line towards the edge of the frame.
On the layer mask, you’ll see a black bar appear somewhere near the center. This is the part of the image that will be in focus.
You may have to experiment a bit to get the gradient just where you want it. If you want more of the image to blur, draw a longer line. If you want to change the gradient, click undo and try again by going to Edit>Undo Gradient (Ctrl or ⌘Z).
I think the effect works best when the focus is just below the center. But scan across your image to see if there is something interesting in the in-focus part of your image.
Click on the layer. Or if you are in Quick Mask Mode, click Q to return to regular editing.
Step 4 – Add Lens Blur
To add a tilt-shift effect, go to Filter>Blur>Lens Blur… A radius of 20 is a good place to start, but you can play around with the settings.
The blur will be noticeable, but not overwhelm the image and draw attention.

Method 2: Tilt-Shift Filter
Option 1 works, but Photoshop has an even better tool to create the effect: the tilt-shift filter. This tool is located in the Blur Gallery. This option gives you much more control over the effect.
Step 1 – Open image & Duplicate Layer
Open the image you’ve chosen in Photoshop and duplicate the background layer by going to Layer>Duplicate Layer… (Ctrl or ⌘J).
Step 2 – Open Blur Gallery
Select the duplicate layer and open the blur gallery by going to Filter>Blur Gallery>Tilt-Shift.
This will open the blur gallery workspace. The Tilt-Shift tab will be open, but notice you have other tabs. We’re going to use Field Blur in a minute.
By default, Photoshop applies a blur of 15 pixels and places the blur in the center of your image.
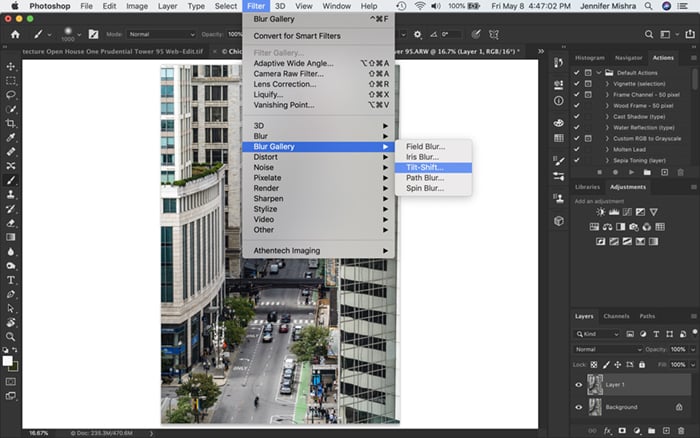
Screenshot of Photoshop workspace. Shows how to navigate to Tilt-Shift blur filter.
Step 3 – Apply Tilt-Shift Blur
Grab the pin in the middle of the image and drag it to adjust the focus area. I often place the focus area in the lower third of the image.
Grab the lines on top and bottom to extend or reduce the blur effect. The solid line is where the effect starts. The dashed line shows the maximum tilt-shift blur. I tend to like more blur in the background. Be careful not to rotate the effect.
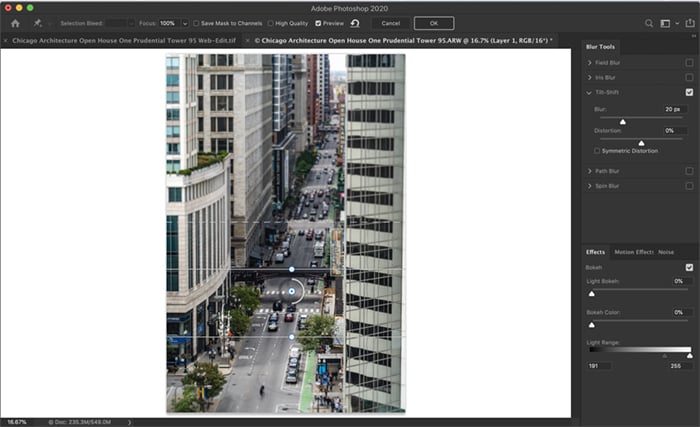
Screenshot of Photoshop workspace. Shows blur gallery workspace with tilt-shift blur applied.
Step 4 – Add Field Blur
The tilt-shift filter is easy to use. But the in-focus part of the image extends across the frame. Sometimes I want a little blur on the left or right side of the frame. To apply localised blur, I open the Field Blur tab in the Blur Gallery workspace.
By default, Photoshop applies a blur of 15 pixels across the entire image. To get a more localised blur, I drag the center pin to where I want less focus. I adjust the sider to add more or less of the effect.
I can add as many pins as I want and adjust the focus for the pins independently.
When you’re happy with the blur, click OK to close the Blur Gallery workspace.
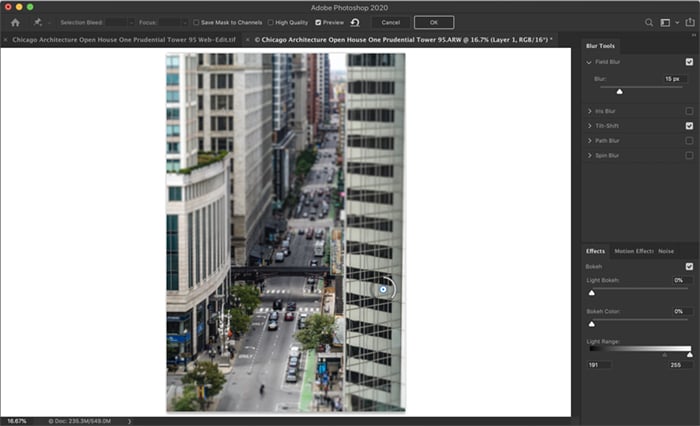
Screenshot of Photoshop workspace. Shows blur gallery workspace with field blur applied.
Finishing Up
To finish up, adjust hue, saturation, and contrast. Toys often have bold lines and are super-saturated. Increase contrast and add vibrancy and saturation. You can also add a bit of clarity to the in-focus section of the image.
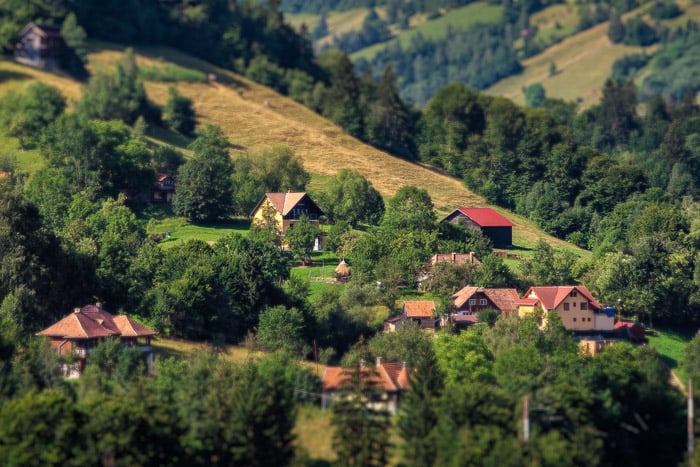
Transylvanian toy village.
Conclusion
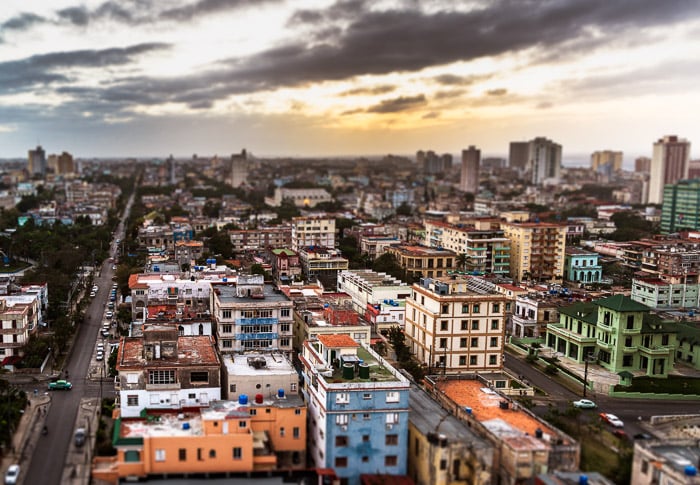
That’s it! We’ve made only a small change, but adding a blur effect to the top and bottom of the frame fools our eye. We believe that we’re looking at a miniature.
Try shooting a tilt-shift scene next time you are out and about, and share in the comments section!
Tilt-shift photography is one of the topics we cover in our creative photography course, Wow Factor Photography. If you'd like to learn more, check out the course here!