It’s easy to straighten photos in Lightroom. This can be done by selecting the Crop tool in the Develop module and then dragging the corners of the photo until it is cropped to your liking. You can also use the Straighten tool to adjust any crooked photos.
Straighten Photos in Lightroom Using the Crop and Straighten Tool
You can access the photo cropping tool by clicking the grid icon at the top of your toolbar. If you want to keep everything quick, you can press R to open it automatically.
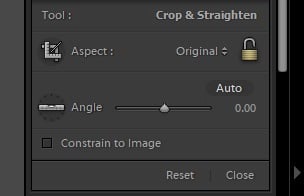
Now that the crop and straighten tool is open, let's take a look at all the settings it offers:
Aspect is what you use to change the aspect ratio of your image. The default setting is Original, but you can change it to various sizes from 1×1 to 16×10. You can also select Custom to create your own dimensions.
Angle allows you to straighten your image by adjusting the way it slants. Moving the Angle slider left or right makes the photo tilt up to 45 degrees in either direction.
Constrain to Image isn't necessary for most situations. But it’s crucial when you adjust your lens distortion, and white areas show up in the photo. Activating it allows Lightroom to leave out those blank spaces while you're cropping.
Tool Overlay is a visual guide that helps you make precise adjustments. They show up as grids, lines, and spirals to help ensure your image is straight, and your composition is spot on.
How to Import a Photo to Crop or Straighten It
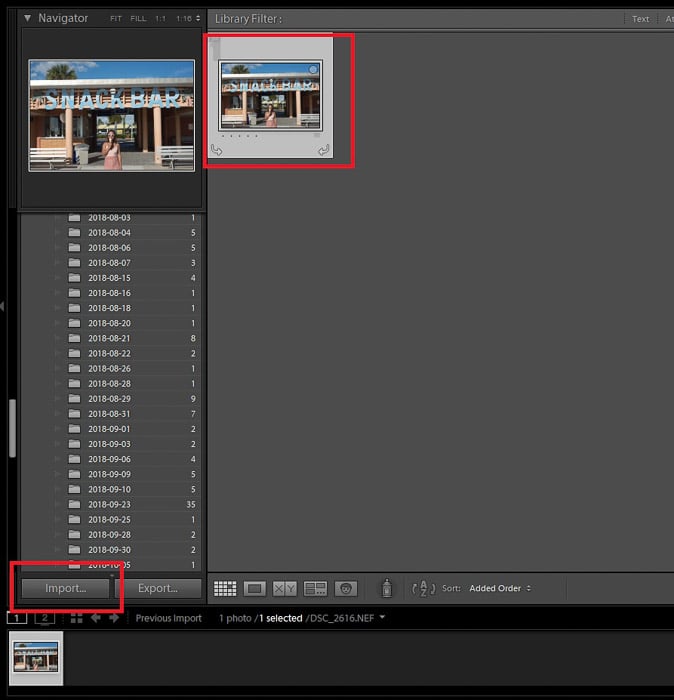
The first step in cropping your image is to upload your file on Lightroom. To import a photo, click Library on the Menu bar. Then, select Import at the bottom left of the screen.
Once a dialogue box appears, click Select a source at the top left of the screen. Then look for the folder that contains your picture and select it. Check the file you want and click Import.
To transfer the images faster, you can also drag a photo from an open folder into the Lightroom library.
Now check the thumbnail of the photo you selected. When you hover your mouse over the picture, you'll see an arrow at the bottom left of the box and another one on the right.
You can click on one of the arrows to change the orientation of your image.
If you want to add the file to your quick collection, click the small circle inside the thumbnail. This option is helpful if you're editing a bunch of images and you need quick access to them.
After you make your adjustments, go to Develop to start editing your photo.
Changing the Aspect Ratio
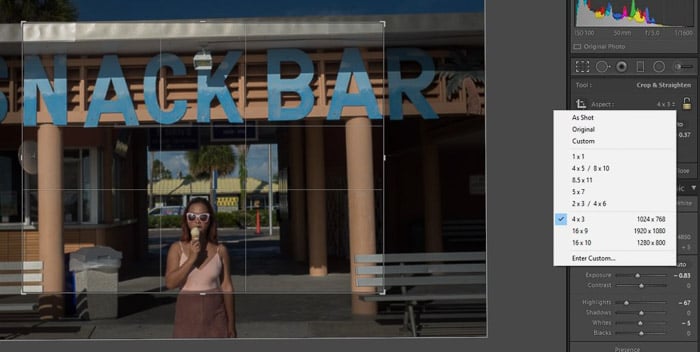
In simple terms, the aspect ratio refers to the dimensions of your image. You can change the size of your picture depending on where you plan to use it.
For instance, you can adjust your aspect ratio to match your photo paper for printing. The most common sizes include 4 x 3 and 5 x 7.
If you want to create content for Instagram, 1×1 would be your best option. And if you feel like creating a panorama, then try 16×9, instead.
Don't see the sizes you're looking for? Then you can set your own aspect ratio by clicking Enter Custom.
Or you can opt not to pick any selection and do free form cropping, instead. This option lets you trim your picture without any constraint.
Once you pick your aspect ratio, the crop tool would resize to match the dimensions you selected. So it's essential that you do this step first before you proceed to crop your picture.
That way, you'll have a general idea of how big your final image is going to appear.
Cropping Your Image
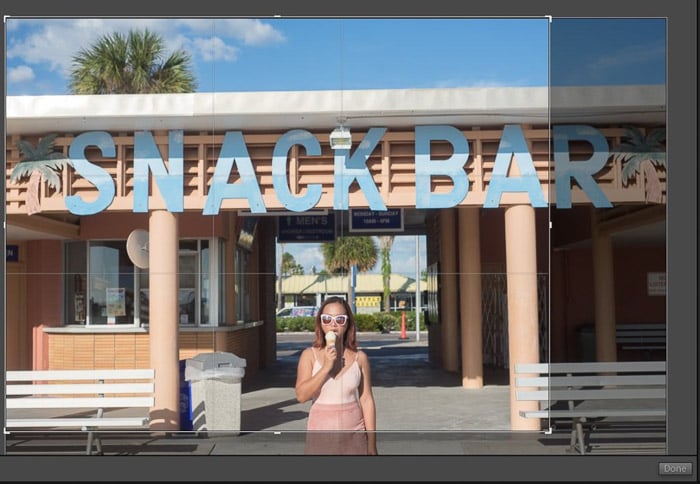
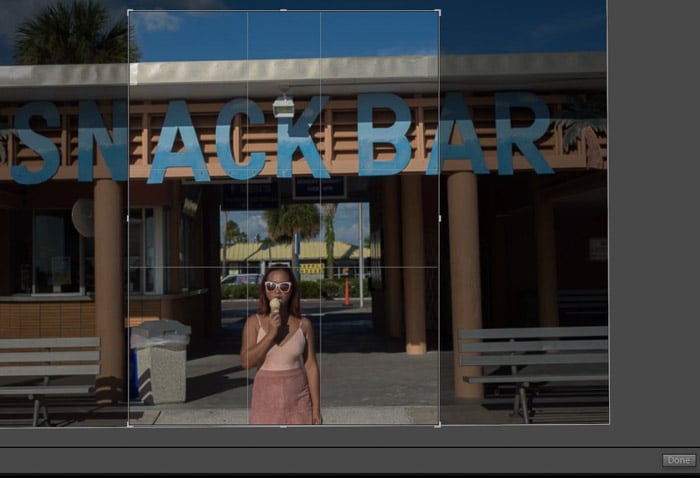
Once you activate the crop tool, a grid overlay pops up with small grey handles at the corners. Click and drag them to resize the cropping tool.
Already chose an aspect ratio? Then simply move the image around until the elements you want to keep in the photo are in the frame.
Want to make the image bigger or smaller but don't want to change the aspect ratio? Click the lock under the crop and straighten toolbox.
If you want free form cropping, select Custom in the Aspect Panel. Then make sure you unlock the lock to let you crop the image to any size you want.
Keep in mind that when you crop, the quality of the photo diminishes. The more you cut out, the more pixelated it's going to look.
The reduction of quality is especially noticeable when it comes to low-resolution images.
If your camera is about 12 megapixels or lower, don't crop too much from your photo. And even if your device has a 50+ megapixel sensor, you still should keep your cropping to a minimal.
How to Use Crop Overlay
Cropping your photo means you have to recompose your image. If you’re not sure how to rearrange your picture, you can always use Lightroom's overlays, instead.
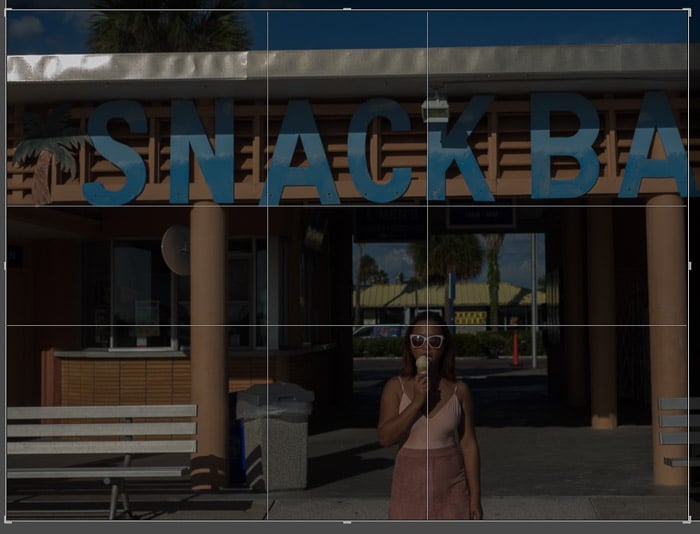
Lightroom's crop tool shows the Rule of Thirds grid by default. If you don't see it, go to Tools and select Tool Overlay in the drop-down menu.
Click on Always Show or Show Selected to make the overlay appear over your picture.
If the Rule of Thirds doesn't work for you as a composition guide, you can try other overlays as well.
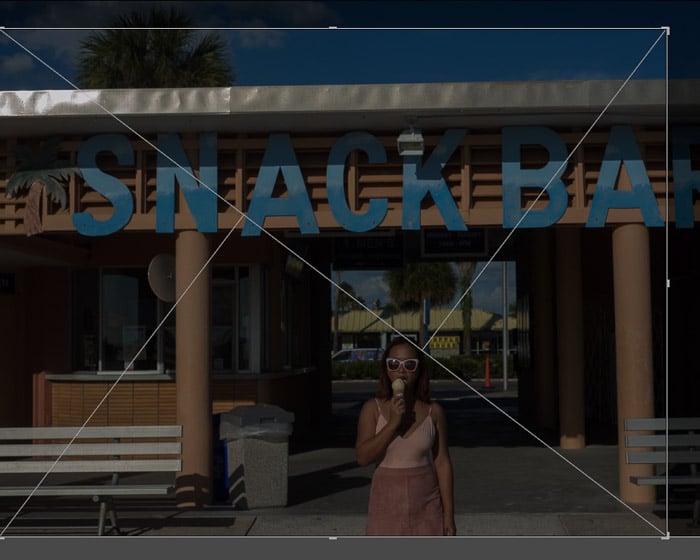
To access more options, go to Tools again and click Crop Guide Overlay in the drop-down menu. You can then select from many choices including Golden Spiral and Triangle.
You can also try pressing O on your keyboard to make the overlay selections appear over the photo. It's not only quicker, but it's more efficient than clicking around to change your grid.
Recomposing Your Cropped Photo
Once you find the overlay you want, drag the photo until it aligns with your composition guide.
What's terrific about the overlays is that they already show up within the crop tool. As a result, you can recompose your image even if you haven't cropped your picture yet.
Your overlay options may all look different. But in general, they all work the same. For the ones with grids, you'd want to place your subject where those lines intersect.
When it comes to spirals, you want your main point of interest to be where the squiggle ends.
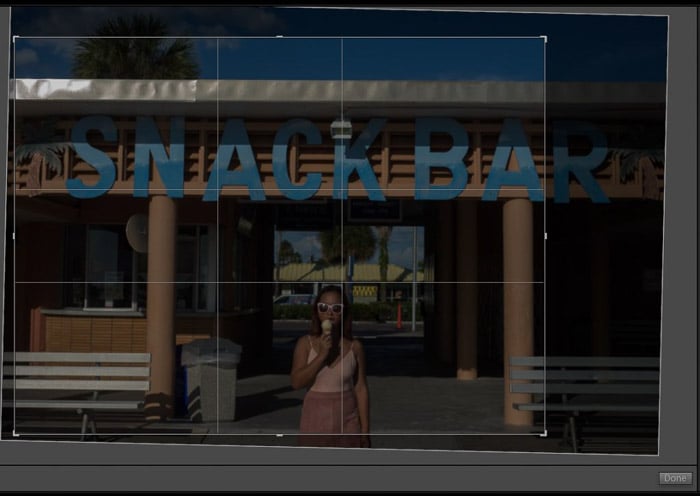
After you recompose your picture, click Done, and you have yourself a well-composed photograph. If you change your mind and want to rearrange your image, click the Crop tool again.
You'll then see the full photo with the crop overlay over it. Simply readjust and hit Done again when you're satisfied.
How to Straighten Your Image
When you take pictures, you may notice that some of them don't look straight. Thankfully, you have Lightroom's straightening tool to help you readjust them.
There are two main ways to straighten your pictures. The first one is by using the Angle slider, and the second is using your mouse to tilt the photo.
Let's talk about using the slider first. All you have to do is move it to the left to the right to make the image tilt. When you're photo looks straight, let go of the slider and click Done.
If you want more control over the process, move the photo itself using your mouse, instead. Place your mouse close to one of the image's corners. Once a curved double arrow appears, move your mouse left or right until the photo looks straight.
Always look at the overlay while you're straightening the photos. Look for the horizon or any straight line in your image and make sure they're parallel with the grid.
If not, that only means your picture is still not straight.
Switching Orientation
There are times when your photo looks better in portrait orientation than landscape.
So what do you need to do to change your cropping orientation? All you have to do is press X on your keyboard.
Once you switch your orientation, start dragging the photo around. When your main subject is in the frame, press Done and you have yourself a portrait crop.
Pressing X is necessary when working with a specific aspect ratio. But if you're doing free-form cropping, you can just drag the box around until it's vertical.
Beware that changing the orientation of your photo could affect its quality. Since you're trimming off a good chunk of the image, it could end up looking grainy or pixelated. Do it only when it's necessary.
Conclusion: Straighten Photos In Lightroom
The crop tool is an essential part of editing, and Lightroom offers one of the most accurate versions out there.
You don't need a lot of technical skills to use all that it has to offer. But it would help a lot if you know how to use those features correctly.