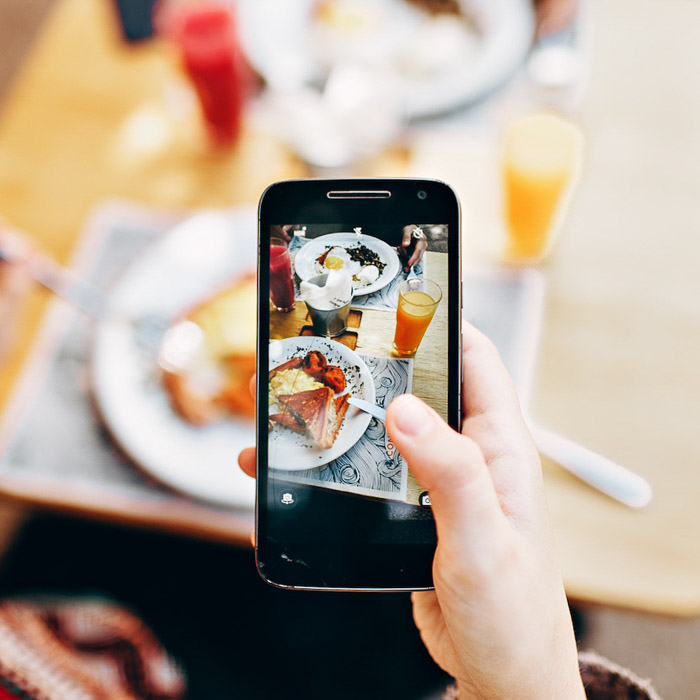
Food photography is a popular genre of photography, and for good reason – it's a great way to show off your culinary skills! But it can be tricky to get the food photography lighting just right. In this article, we'll give you some tips on how to create beautiful food photos with natural light.
Use Constant Light for Easy Food Photography Lighting
A constant light stays on. It blankets your setup with a steady light source. The advantage is that you can see exactly how the light and shadows fall onto your scene. This is especially useful if you’re shooting tethered.
Constant light can be a good choice for starting with food or still life photography. You can get a decent light at a relatively inexpensive price point. If you’re interested in shooting a video for your blog or Instagram profile, you need a constant light.
Once you have improved your skills, you can invest in a more expensive strobe light.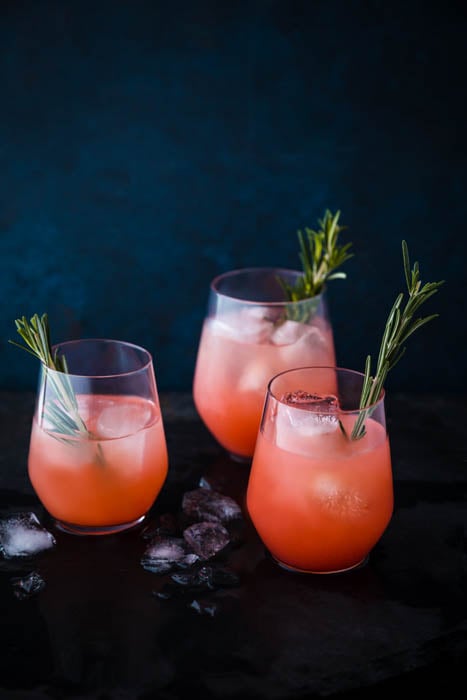
Work With a Strobe Light for Professional Results
A strobe light is more powerful than most constant lights.
You need a light with at least 300 watts of power for a food blog or editorial-style photography. Preferably you have one with 500 watts. For advertising or product photography, you need a lot more power.
Most monolights come with a modeling lamp built into the strobe head. This is a constant light source that you can turn on to give you a small source of constant light. It helps you to see what you’re doing while composing your shots.
When shooting professionally for clients, it’s best to work with strobes. It is a more professional approach. And clients such as PR or marketing agencies will expect it.
Whether you’re using a constant light or a strobe light, you have the same choice in setting up your light. What varies is the distance to your table and the height of your light.
This will take some experimenting. You must see how the shadows fall and what works to give you the results you’re trying to achieve. This can vary from image to image.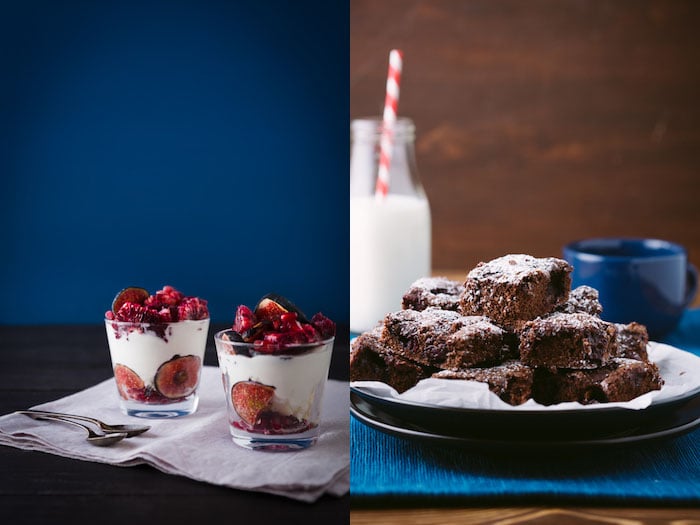
How Lighting Modifiers Can Improve Your Food Photography
Having an artificial light source is not enough. Yes, you need to get enough light onto your set. But you must sculpt and shape that light to create the dimension that best shows your food.
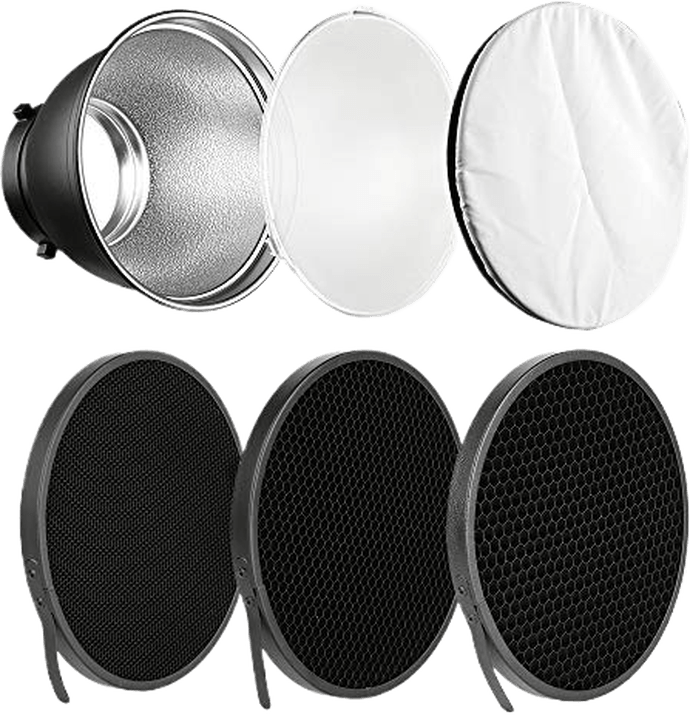
A softbox is the most common light modifier for food and still life photography. Another good modifier I use constantly is a reflector dish with a honeycomb grid.
A reflector dish is a standard modifier for a studio flash head. A honeycomb grid is placed on a reflector dish and is an accessory with a honeycomb pattern. It cuts off the light and narrows it. This creates a beautiful contrast in food photos without looking too harsh. I recommend a 20- or 30-degree grid.
Another important item in your kit is a diffuser. This is a panel of sheer white material that you place at the edge of your table to soften the light that hits your scene. A strobe light is an explosion of light. It provides hard shadows if it’s not diffused. This is rarely the desired look in food photography.
You also need some simple tools to bounce and absorb the light. You can buy a professional 5-in-1 reflector kit. It has foldable discs in various materials to use in your shoots. A silver reflector, for example, brightens your food. A gold reflector adds warmth. It usually also comes with a diffuser.
You can also use simple black or white cardboard purchased from a craft or dollar store. White brightens your scene, while black absorbs the light.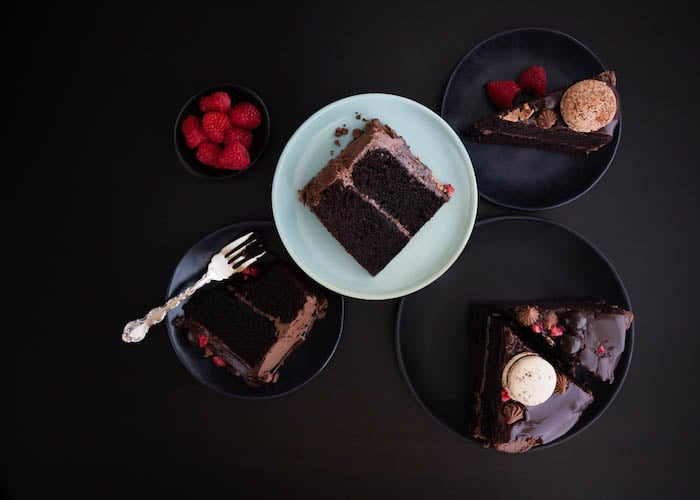
Soft vs Hard Food Photography Lighting
Before you shoot, know what you want your final image to look like. Do you want the light to look soft and dimensional, or are you looking for striking contrast?
The greater the contrast between light and dark, the more dramatic your image will be. Often, your subject will dictate the light you choose. Your choice of soft or hard light will determine which modifiers you use. As mentioned, a large softbox will give you soft light. A dish reflector will give you more contrast. Whichever you choose, the light should be diffused to give you a nice blur where the light and dark meet.
For example, when I use a dish reflector with a honeycomb grid, I shoot it through an extra-large diffuser. The diffusor becomes the light source, not my strobe. This mimics natural light closely, as if the light is coming through a window.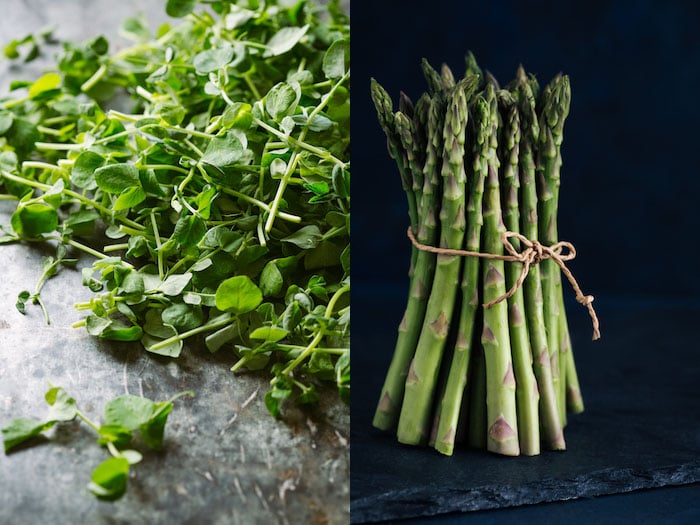 In the image of the pea shoots above, I wanted the light to glow on my surface and emphasize texture. I used soft light in the form of a large softbox. For the image of the asparagus, I wanted to highlight the texture and structure of each stalk. So I used hard light. It’s a subtle difference but an important one.
As an experiment, photograph your subject in soft and hard light the next time you shoot. And note the difference! How does each approach affect the final result? Many photographers use one or the other as part of their style.
Pull the Eyes with Side Lighting
This is when your light is coming from directly beside the food. I recommend placing your one light setup- on your left. Our eyes gravitate towards the brightest part of an image, where the light enters the scene.
Side lighting is a good approach for a lot of your food photography. It works for most setups and is easy to use.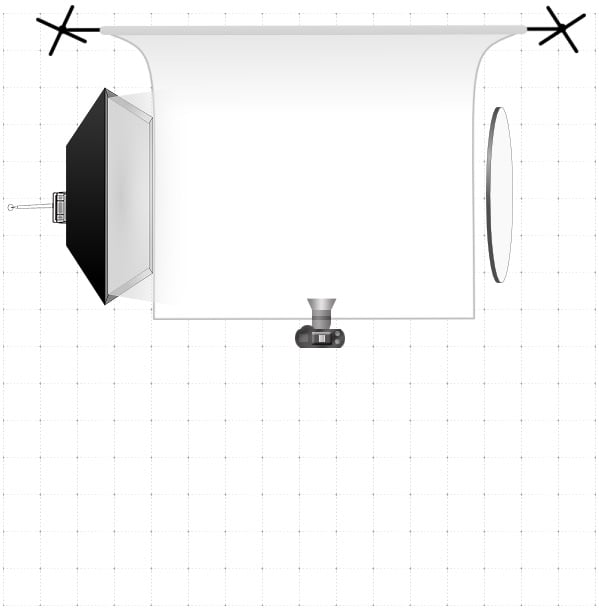
A typical side lighting setup is to work with a softbox close to your table. The bigger the light source, the softer the light will be.
This gives an image more dimension and is a sought-after look in food photography.
Place a reflector or bounce card on the opposite side of the light.
Move it closer or farther away, depending on how much shadow you want on the side of your food. Or use a smaller or larger reflector. Note that even when shooting white and airy scenes, you still want some shadow to add dimension.
Use Backlighting for Flattering Food Photos
Backlighting is when you position your light behind your food. If you imagine the face of a clock, it’s 12:00 o’clock. This is an ideal position for beverages or soups. It adds sheen and highlights the liquid properties of food.
In general, backlighting is very flattering to food. It makes it gleam and brings out its texture. But it can be tricky to work with. One issue with this kind of lighting is that it can cause your image to be too bright at the back and too dark at the front.
Too much contrast means the back of the photo is blown out, with a loss of detail blurring into the main subject. Not enough contrast means it’s a blown-out photo or looks washed out. This happens when you shoot with too much light.
And there are some foods that it generally doesn’t work for:
- Tall foods like a stack of cookies or brownies or a tall mound of pasta. Bouncing enough light back onto the front of burgers or stacks of pancakes is difficult.
- When shooting food in a vessel that is tall or deep, like a Dutch Oven
- Dark or brown foods like meat, especially if plated on white. It creates too much contrast.
Backlighting is not a good choice if you have a lot of dark/light contrast in your image. It emphasizes drastic color contrasts and can be difficult to balance.
Another issue to be wary of is that sometimes you might end up with too much reflection on top of the food.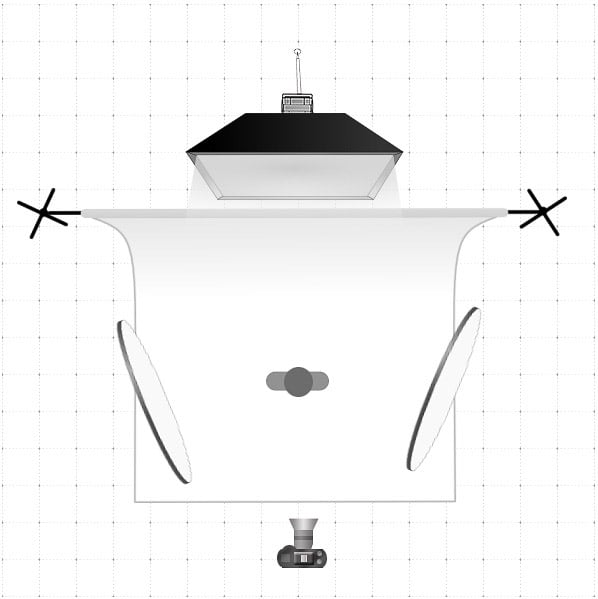
To take backlit photos:
- Set up your light, so it comes behind your food. Make sure your working table is large enough. You need to put reflectors and bounce cards around your subject.
- Place a diffuser between your table and the light source. This evens out the light between the back and the front of your setup, so your photos will not look as “blown out” in the back.
- Place a reflector on each side of your scene. You’ll need to play with the positioning of these. The light coming from the back should hit the reflector and bounce back onto the front and side of the food. Depending on your composition and subject, you may only need one reflector.
You may feed a reflector in front of your camera, placed as high as possible, without getting in the way. This will bounce more light onto the front of your food.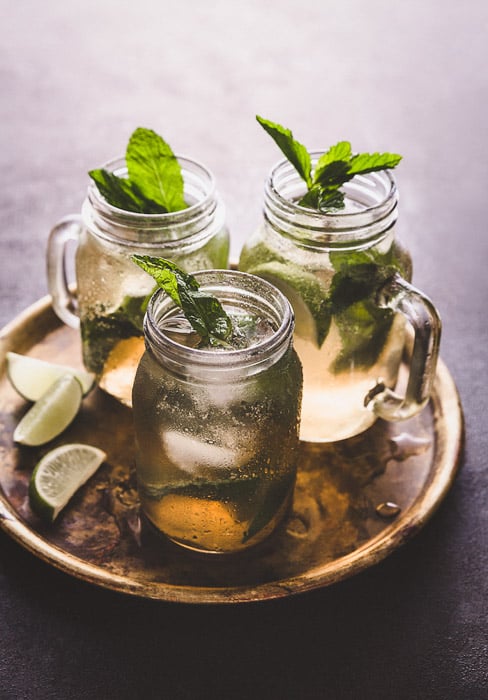
I shot the Mojitos above with backlighting. I wanted to make the beverages glow. So I set up my light as described above.
You can see how the back of my surface is blown out while the front is darker. I was careful not to blow out the whites in the glasses. The lighting on the back of my scene gives an idea of the sun coming in from a window.
For this shot, I had my camera at around 75 degrees relative to my set. Don’t shoot at a low angle when using backlighting. You end up capturing the light source in the photo. And this causes the back highlights of your photo to be very blown out.
It also creates too much contrast between light and dark. The food might also be blown out when you try to brighten it while post-processing.
How to Use Side Backlighting
Side backlighting is a combination of the first two types of lighting. It’s the best of both worlds and the easiest to work with. Here, we place our light between 10:00 and 11:00.
With this lighting, you get backlight surface shine without the risk of overexposure. You also don’t have to reflect as much light onto the front of the food because the light is coming at more of an angle.
You get some shine onto the food but don’t have to navigate around as many reflectors.
The setup is the same as for side lighting, except that your light is at an angle and placed at 10:00 or 11:00 instead of 9:00. Your reflector is opposite your light source.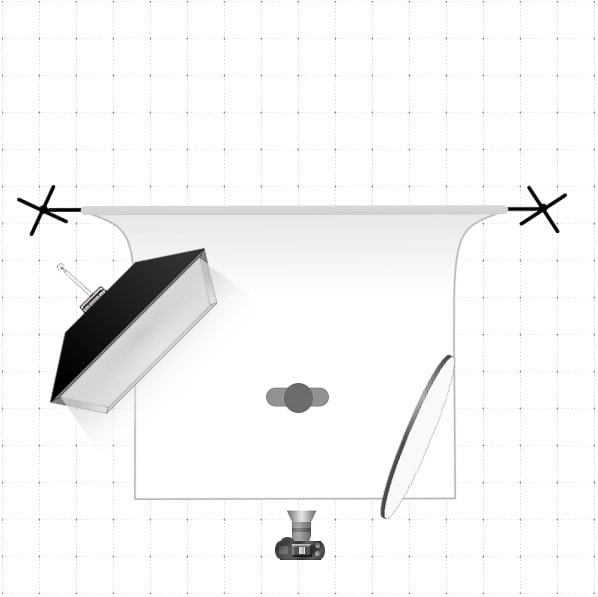
With side backlighting, you have to play around with the height of your light relative to your scene. This depends on how you want the shadows to fall.
Remember, the closer your light source is to your set, the softer the fall-off will be.
Other Lighting Styles
Two types of lighting don’t work with food photography—front and overhead lighting.
Front lighting is when your light is in front of your set, on the same horizontal plane as your camera. It’s great for portrait photography but can cast shadows on food. Your images will look flat and lack dimension.
Overhead lighting is where your light is above your set. This also creates flat images. It was once a popular lighting style back in the ’80s!
Helpful Food Photography Lighting Tips
Think of your light as a window with natural light pouring in. This will help you visualize and navigate your setup better.
- Diffuse the Light: If you’re using a strobe, you get a strong light explosion. Even if you use a softbox, you may have to use extra diffusion to soften your light even more.
- Turn Off All the Lights: This is important if you photograph with a constant light source. Indoor lights have color temperatures. And they can contaminate your images with ugly color casts. These will be very difficult to fix in post-processing.
- Give Yourself a Lot of Space: When you shoot with artificial light, you need lots of room… for your light, a diffuser, and several reflectors or bounce cards.
- Be Wary of Shine: Artificial light doesn’t fall off as quickly as natural light. There is a tendency for the light to catch even the slightest shine on shooting surfaces… especially when using backlighting. Try playing with their placement for shiny props, or use vintage items with a patina. You may also want to shoot with a polarizing filter fitted to your lens.
- Use Dark Elements: Use darker surfaces and images that fall in the midtones or dark side of the histogram. They are easier to work with when using one-light setups.
- Avoid White: If you’re a beginner, avoid white shooting surfaces or shooting images with a lot of white. First, learn how the height and distance of your light influence your final result. There will be areas that don’t get enough light. So your image will come out looking grey. Trying to fix this while editing may result in food that is not properly exposed.
Conclusion
Our tips help you understand the physics of using one light in food photography lighting.
Start with side lighting until you feel comfortable working with artificial light. Then tackle backlighting. With some practice, you will find the best tweaks for your setups. And you will consistently make great photos!