Trends come and go in the world of food photography. But moody and dark photography still shows no sign of slowing down.
So how do you take dark food photos? If you’re curious to know more, we have six excellent tips to help you get started!
What Is Dark Food Photography?
In most cases, you can divide food photography styles into two categories. Most photographers either go for bright and airy or dark and moody photos.
Bright and airy photos often feature soft lighting and well-lit subjects. This style is the most common because it’s perfect for showing all the elements of the food.
Meanwhile, dark food photography has a painterly quality. It evokes the emotions as much as it makes people crave.
Moody food photography uses the Chiaroscuro technique. It’s an Italian term referring to the contrast between shadow and light. You can find it in a lot of paintings, including Vermeer’s and Caravaggio’s.
For the most part, it’s quite easy to work with bright and airy photos. But dark and moody photography requires a lot more control and technique.
Being adept at shooting both styles has its advantages. You’ll find this especially true when shooting commissioned work.
Clients may expect you to produce whatever look and mood they envision. So it helps to know other tricks apart from the ones you usually create.
Thankfully, dark food photography is easier to do than you think. And we’ll show you all the steps you need to become familiar with this style.
 7. Work with Minimal Lighting for Mysterious Results
So how do you create dark food photography with natural light? The secret is to move further away from your window. Doing so lessens the light hitting your subject instantly.
It also helps if the room where you’re shooting is dark. If there’s too much light coming in through the window, use thick curtains to darken the set.
You should only allow enough light to illuminate your subject.
To enhance the chiaroscuro effect, try backlighting your subject. It not only creates moody lighting but also brings out the texture of the food.
As the name suggests, backlighting involves illuminating your subject from the back. That means you need to place your light source behind the food.
When using natural light, you’ll need to move your camera until the window is a few degrees behind your subject. That way it doesn’t show up in your frame.
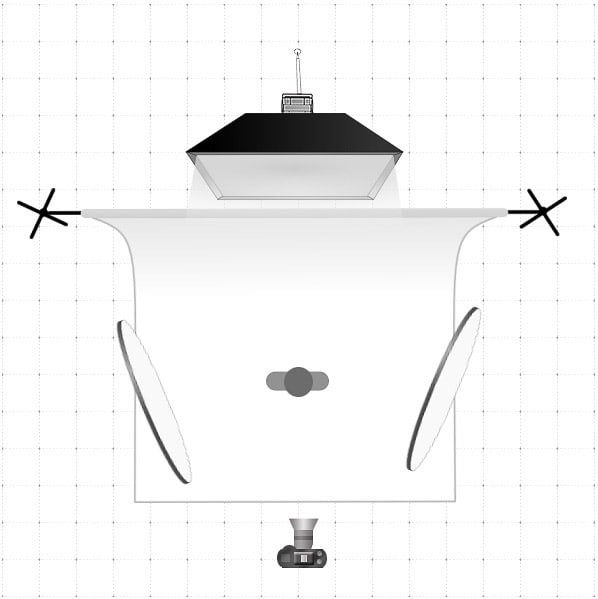
When using artificial light in dark food photography, a one-light setup is all you need. You can use any type of artificial light you want. The most common options include LEDs, flashguns, and monolights.
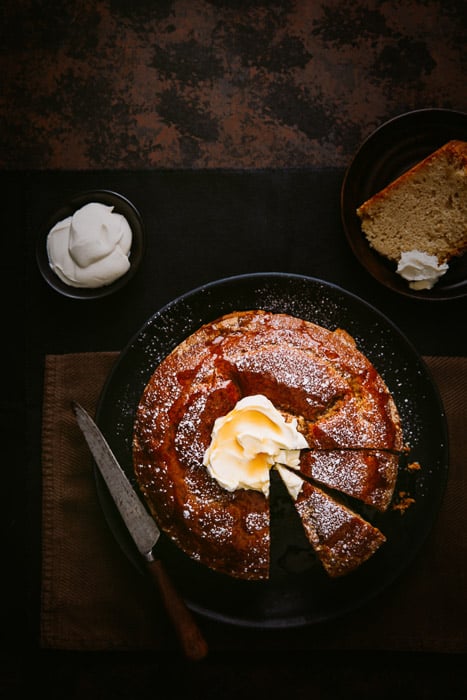
I use a monolight with a dish reflector and a honeycomb grid. I then place a large diffuser between my light and the food.
The diffuser acts like a window that softens the flash coming from the monolight. The result should look like you’re taking photos with natural light. Like natural light, you can use backlighting with artificial lights as well.
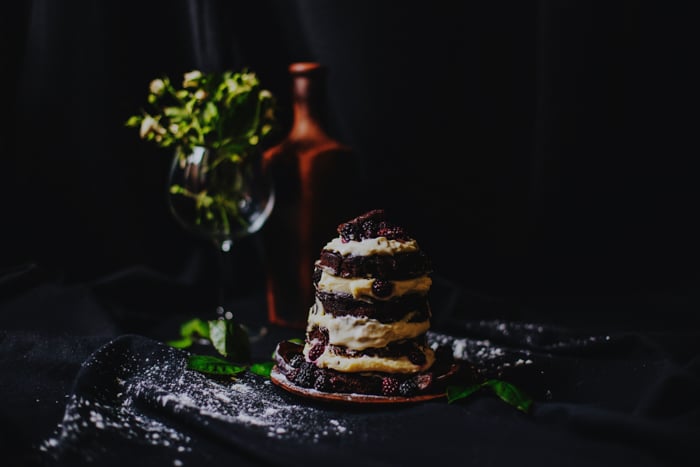
For the cake image above, I positioned my light behind my set. I then added two black fill cards to either side of the table.
Lighting from the back emphasised the crackling texture of the cake. It also ensured that the top was lit correctly.
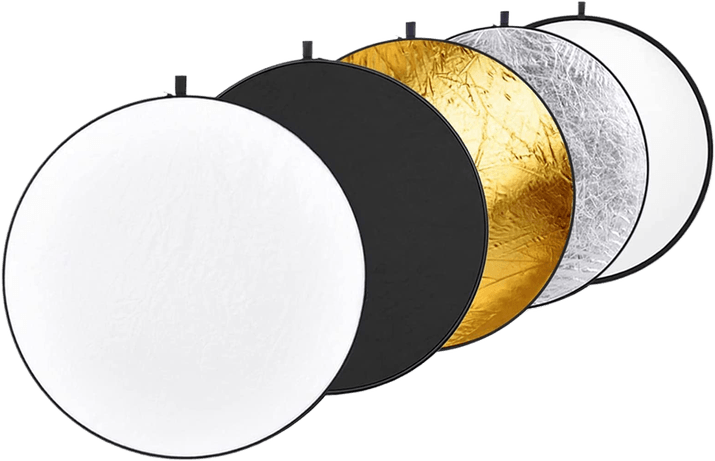
6. Sculpt the Light with Bounce Cards and Diffusers
When creating dark food photography, you need to carve and shape the light to produce shadows. But how do you take dark photos that way?
The secret is to use small black fill cards.
To make fill cards, simply cut black cardboard or poster board into squares. Then, place them where you want to increase the shadows. Just make sure they stay out of the frame. That way you don’t accidentally include them in your image.
Fill cards help cut down illumination. Since they’re not reflective, they tend to stop the light from bouncing back onto the food.
You can also block light by rolling up pieces of black poster board and staple the ends together. Once you finish, you can place them around your set like a fence.
Keep a section open for the light to come in. When you take a photo, you should only get illumination from that same opening.
5. Choose Backgrounds with Muted Colors
Don’t use bright and shiny backgrounds for dark food photography. They’ll stand out and may distract your viewer.
You can try anything from slate to mottled cookie sheets as your dark photography background. Just make sure that whichever you use isn’t shiny.
Ideal colors for dark food photography backgrounds include dark blues, dark grey, and black. But you can also try other shades such as deep espresso tones.
Feel free to use backgrounds with texture as well. Placing them in your scene helps enhance the food’s appearance.
Wood is a great textured material to use both for backgrounds and props. It’s easy to work with and lends a rustic feel. You can use weathered items such as an old cabinet door or tabletop. Also, you can make a faux picnic table with planks of 2×4.
For the image below, I bought a piece of pinewood at a hardware store and painted it black. To create texture, I used a sea sponge to dab on navy and royal blue paint.
If you want to learn more about the things food photographers use, check out our article on food photography styling tools.

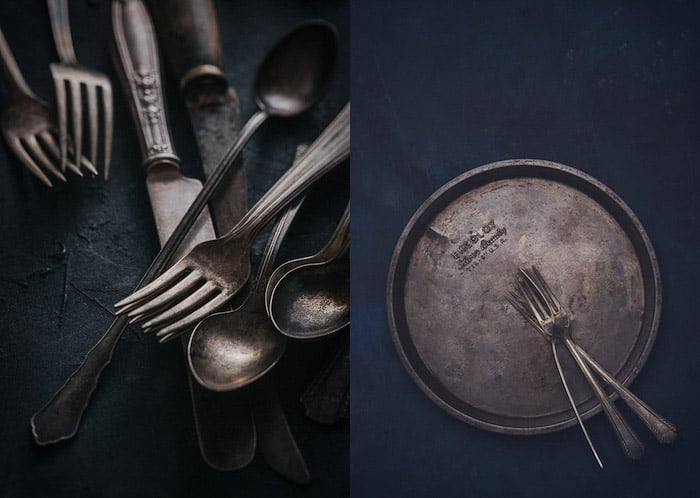
4. Source Non-Reflective Props for Clean Images
Reflections can be hard to manage in food photography. Eliminating them is especially challenging when doing chiaroscuro shots.
If possible, only use props that don’t reflect light as much. Don’t style your food using porcelain or china since they’re bright and shiny. Instead, work with matte dishware with neutral tones.
You should also look for vintage utensils and props with a patina. They look exciting and won’t reflect the light as much as new ones.
The best places to find vintage items are thrift shops and flea markets. You can buy quality items there for cheap. And did we mention that most of them already have a natural patina?
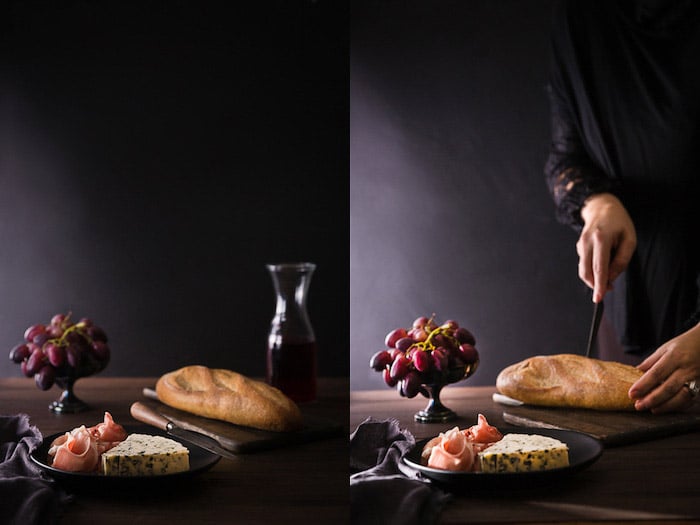
3. Use the Rule of Odds When Composing Your Shot
When composing your photo, include a couple of supporting elements along with your main subject. These objects should be dissimilar in size, so they counter-balance each other.
Pros call this technique the Rule of Odds. It involves placing several props in areas that fall on the intersecting lines of the Rule of Thirds grid.
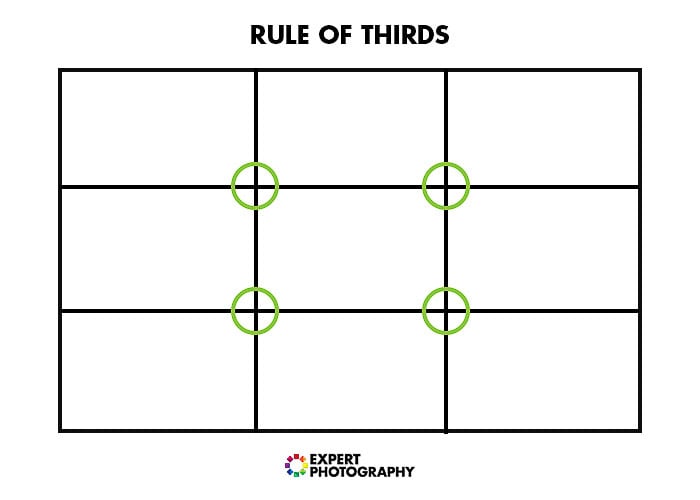
The term Odds refer to the fact that you can have three focal to five points within the grid. Just remember that the main subject must be more dominant than the supporting elements.
But you should also be careful not to make your main focal point too obvious. If you do, the viewer may lose interest in exploring the rest of the image.
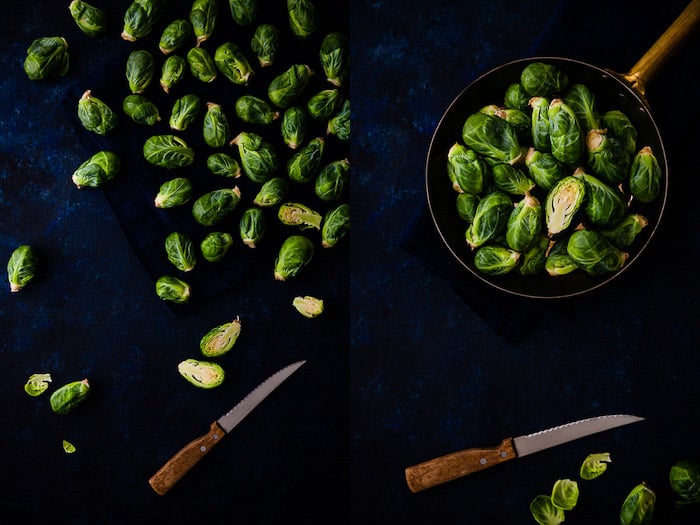
So how do you create a balance between all the focal points in your image? It will help a lot if you provide a decent amount of negative space in your food photo.
In case you don’t know, negative space refers to the blank spaces in the photo. Meanwhile, positive space relates to the areas that your props take up.
Negative space provides your photo with a bit of breathing room. Of course, it also helps direct the eyes to the main subject.
In the food photo below, I used the pan’s handle and knives to direct the eyes to the cut Brussel Sprouts. But at the same time, the props also compel the viewer to look at the rest of the image.
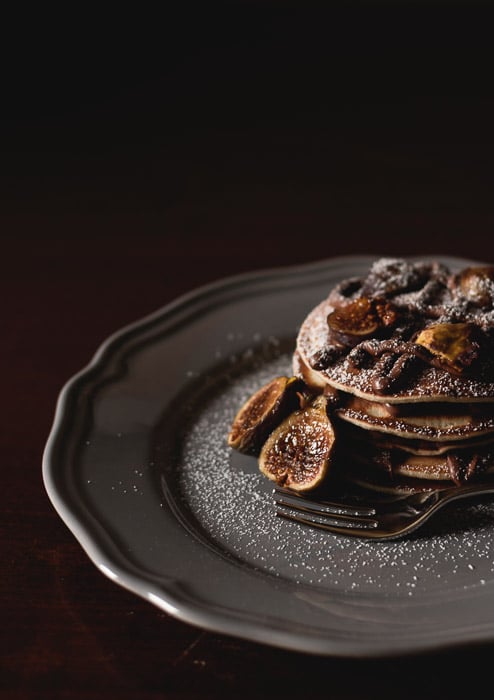
2. Underexpose Your Photos for a Dark Effect
When shooting dark food photography, it’s an excellent idea to underexpose your photo slightly in-camera.
By nature, chiaroscuro tends to increase the contrast in the image. Underexpose your shot by one or two stops. This way, you keep the details without the danger of blowing out highlights and shadows.
It’s best to work with a tripod, especially if you’re shooting in natural light. Don’t boost ISO and risk creating distracting image noise. Instead, use slow shutter speed to get the correct exposure.
As long as you have some light, long exposure allows you to expose your food pictures correctly. Using a tripod also frees up your hands and adjust the props in your set.
Use the timer on the camera or a remote shutter trigger to prevent camera shake. Otherwise, you may end up with a blurry photo, especially if you’re doing long exposures.
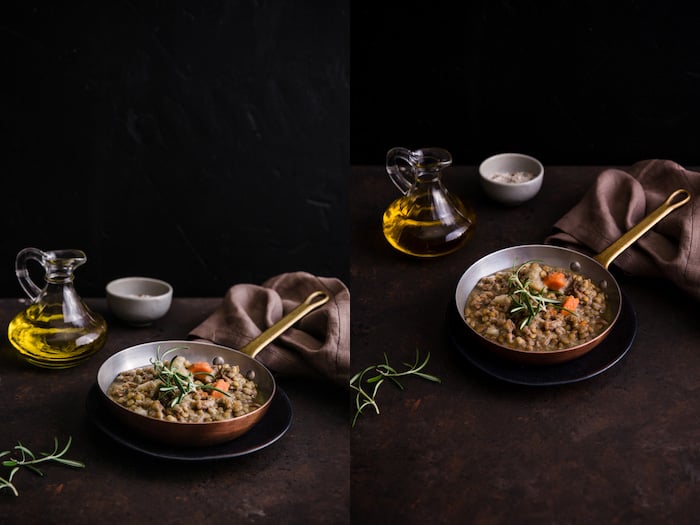
1. Take Your Photos to the Next Level in Post-Processing
Your dark food pictures genuinely take shape in post-production. It’s where you bring your underexposed images and bring them up to the correct levels.
Focus on color treatment to enhance the appearance of the food. Even if you underexpose in the camera, your final image should not look dark throughout.
Keep the food in your image bright, so the viewer gravitates towards it.
Use global and local adjustments when brightening your moody food photo. Bumping up the exposure of the whole image can cause your shadows to fall flat.
If possible, don’t use saturation sliders when making adjustments. Instead, work with the luminance sliders in Lightroom or Camera RAW. Doing so helps you brighten the colors individually.
Since you won’t be using white dishes, you can work with white balance and tint creatively. Experiment with the tones you get out of your images and see what works.
You can also use split-toning to significant effect. Of course, as long as you do it with subtlety. A balance of warm and cool tones will give your moody food images a three-dimensional feel.
Finally, I recommend adding a bit of a vignette to increase the shadows and draw the eye to the food.
Conclusion
Dark and moody food photography can be challenging. Unlike bright and airy photography, it takes a lot of preparation.
But to grow as a photographer, you should be open to learning new techniques. And creating chiaroscuro images lets you do just that.
So give it a try and learn from it. Once you understand the basic principles of dark food photography, you’ll see how easy it is to do.
Want to learn more about awesome food photography techniques? Check out our ebook Edible Images next!