ON1 Photo RAW is RAW editing software that sees itself as a game changer in photography. Its aim is simple—to provide its users with approachable software. You don’t have to learn a range of specialized skills to achieve complex and beautiful edits.
ON1 is a company developed and owned by photographers focusing on their flagship Photo RAW program. It hit the web in 2017 and has been at the forefront of technological developments since its release.
ON1 is aware that most experienced photographers use Adobe or Capture One products. So, they also provide their unique functions as plug-ins.
A standout quality of ON1 Photo RAW is its adoption of AI to identify key features in your photographs. With this intelligence to read photos, ON1 Photo RAW gives you more control while potentially saving hours in creating masks.
You can select specific areas in seconds. Or you can apply presets that affect only a portion of your images.
With these points in mind, let’s see how ON1 Photo RAW functions as a photo organizing and editing software. I’ll dissect every part of the program. We’ll see if beginners and professionals have a new application that makes their process easier, faster, and better!
I have used Adobe Lightroom since its first iteration and have experience with various editing software. I have tested the top options available on the market. This testing has included everything from high-end software to entry-level programs.
Read all our other reviews to find the best editing software for you!
ON1 Photo RAW Review: Key Features and Benefits
ON1 Photo RAW is a non-destructive RAW processing program. This means any adjustments you make in the application will not modify the original image.
The software doesn’t require an import process. Instead, you can locate your images through a basic file management system. ON1 can read RAW files from over 900+ cameras, covering a vast majority of modern digital cameras.
The greatest strength of ON1 Photo RAW is its ability to apply heavy photo manipulations easily and accurately. ON1 has put its primary focus on developing its AI functionality. This comes to light in many ways.
But its ability to read different sections in a photo is its most versatile development. With this, ON1 saves masking time and allows various options to make unfavorable photos more dramatic and dynamic in seconds.
Another noticeable strength is the range of preinstalled presets found in the program. This is particularly useful for beginner photographers who want to achieve drastic effects in seconds.
On top of this, ON1 provides an easy way to fine-tune these presets. You can stack a range of presets and adjust the finer details in each preset.
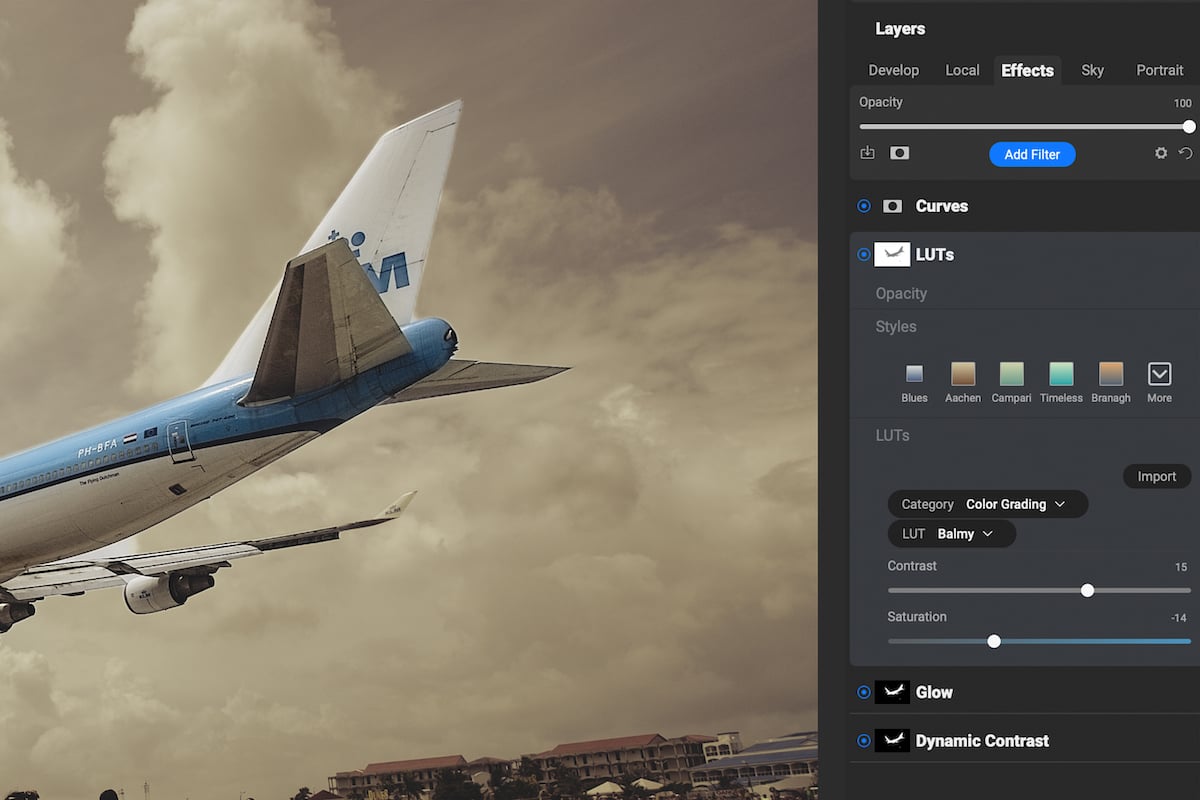
The layering system found in ON1 Photo RAW is another highlight. Its approachable and simple system is easy enough for beginners to pick up with only a short demonstration. Experienced editors will understand it almost immediately. Layered editing allows for finer controls in photos.
Presets, local adjustments, a sky swap, and others exist using the same layering system. But Photo RAW splits these to ensure everything is clear. This system works very well. It is ideal for getting inexperienced editors into industry-standard methods.
ON1 Photo RAW has also spent time developing its Healing Brush technology. You can now perform advanced healing techniques to make your photo exactly how you want it.
This new technique lets you scale and rotate the healing brush. It even lets you flip your selection for perfect symmetry! On top of this, Copy and Move actions let you reposition and add more objects to your photo.
Newer additions to the software include a greater focus on image quality. This includes developments in their Resize function as well as their NoNoise AI.
AI’s ability to push these functions to new heights is evident across the most recent photography software. ON1 has adopted these functions and added them to its stunning lineup of AI abilities.
Overview of Specifications
| Minimum Computer Requirements |
Minimum Computer Requirements
8 GB RAM (16GB if shared with GPU), 6 GB disk space
|
| Minimum Software Requirements |
Minimum Software Requirements
macOS 11 (Big Sur), Microsoft Windows 10
|
| Tethered Shooting |
Tethered Shooting
Yes
|
| Mobile / Tablet Option |
Mobile / Tablet Option
Yes
|
| Keyword Tagging |
Keyword Tagging
Yes
|
| Camera and Lens Corrections |
Camera and Lens Corrections
Yes
|
| Brush Tools |
Brush Tools
Healing Brush, Perfect Eraser, Retouch Brush, Clone Stamp, Push Tool
|
| Layered Editing |
Layered Editing
Yes
|
| AI Editing |
AI Editing
Yes
|
| Noise Reduction |
Noise Reduction
Yes
|
| Export Options |
Export Options
JPEG, TIFF, DNG, PNG, PSD, Original
|
| Best For |
Best For
Amateur photographers who don't want to spend too much time behind a computer. Or it's for anyone who wants to make dramatic edits easily without having to learn Photoshop
|
ON1 Photo RAW functions as stand-alone editing software. It supports the whole photographic process from upload to export. It deals with RAW processing, file management, editing software, and exporting in multiple formats.
Add a couple of AI features that allow for plenty of enhancement to your photos, and you get extremely attractive software. Instead of focusing on the strengths of Lightroom and trying to catch up, ON1 Photo RAW sets its own path in the software market.
It has perfectly predicted the future of photographic editing and is ahead of some of the bigger software companies in its AI abilities. This not only tells us their software has advanced features. It also tells us the company has a fantastic vision for the future developments of photography.
Along with these features, ON1 also provides improved usability and accessibility. This is noticeable in several areas. It has improved RAW processing times, tethered shooting, and a phone and tablet application.
One big point ON1 decided to employ is its own dedicated cloud service. The cloud service gives you secure storage space accessible across multiple devices.
There have been reports of the program needing to be faster. I have yet to experience this, but I run ON1 Photo RAW on an up-to-date Mac.
Main Strengths
ON1 is on a mission to simplify the toughest and most time-consuming functions in digital photo editing. And with the organizational aspect of this application, it can function as the sole software for many photographers.
It’s best for those who like unlimited creative control rather than those who like more natural-looking images. This is thanks to the incredible way you can simply change the atmosphere of a photo.
On top of a simpler way to perform tasks, the tools ON1 created are designed to save you time. If you’re a photographer who doesn’t have time to edit for hours, Photo RAW may be for you.
Workspace and File Management
Importing and Organizing Photos
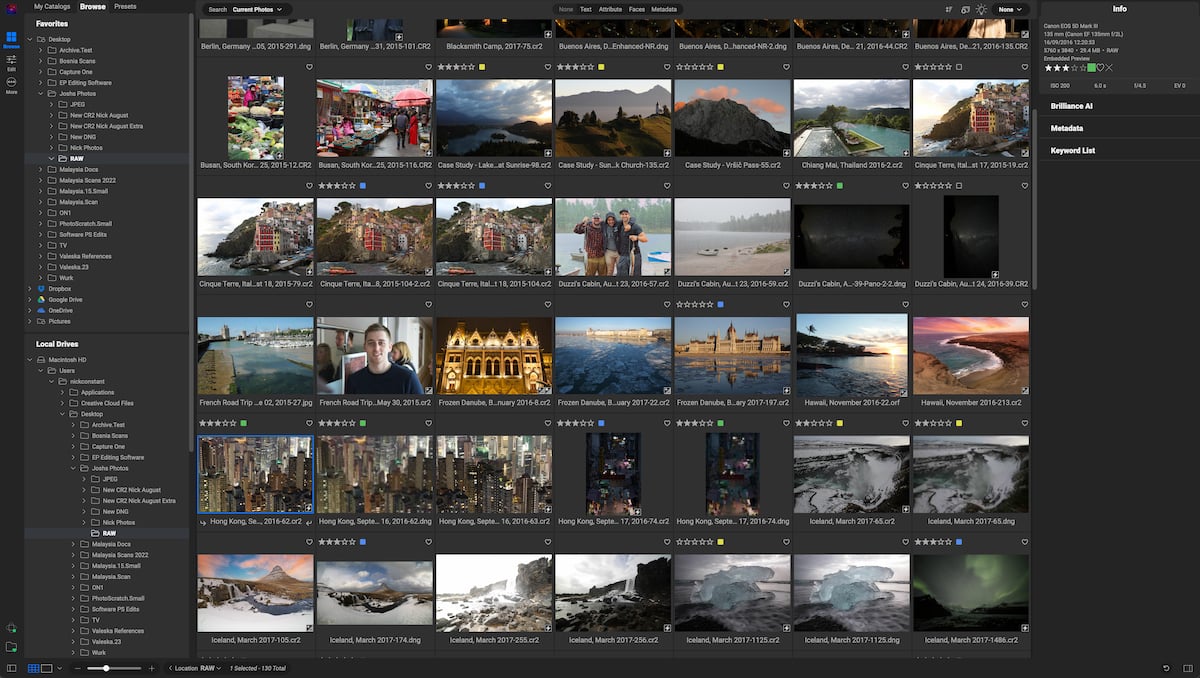
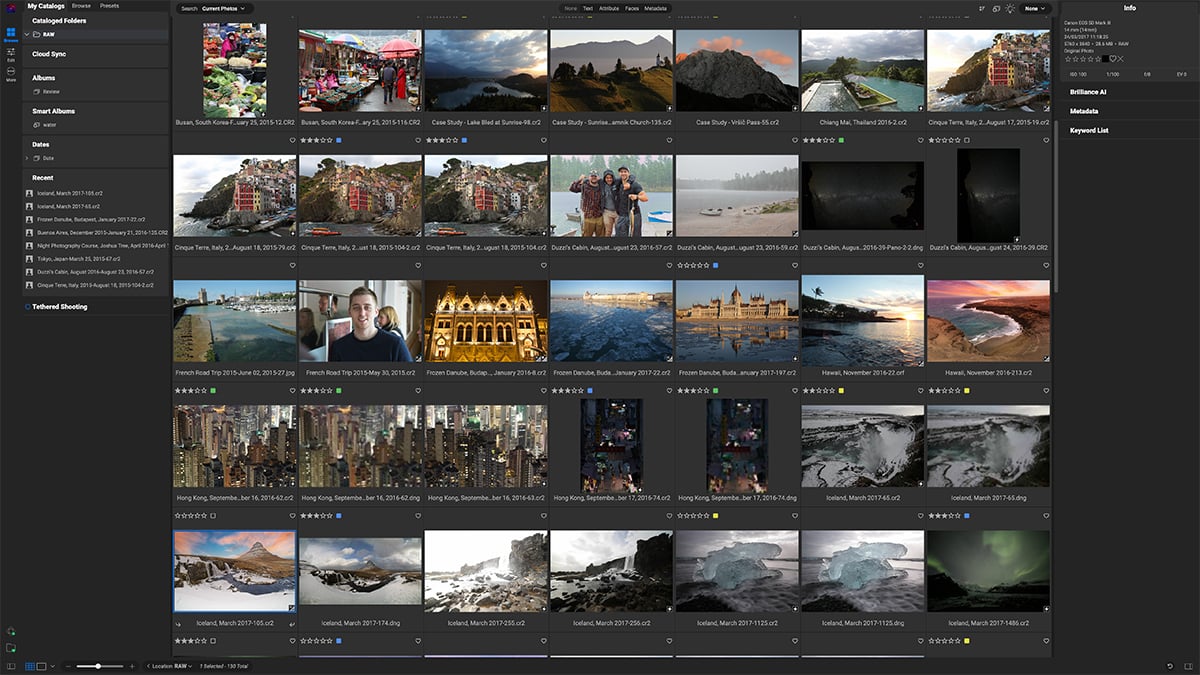
ON1 Photo RAW does an excellent job of keeping the interface simple and clear without hiding key features. This includes easily identifiable icons to take your images to the next step of the editing process. It also shows each image’s relevant info and metadata.
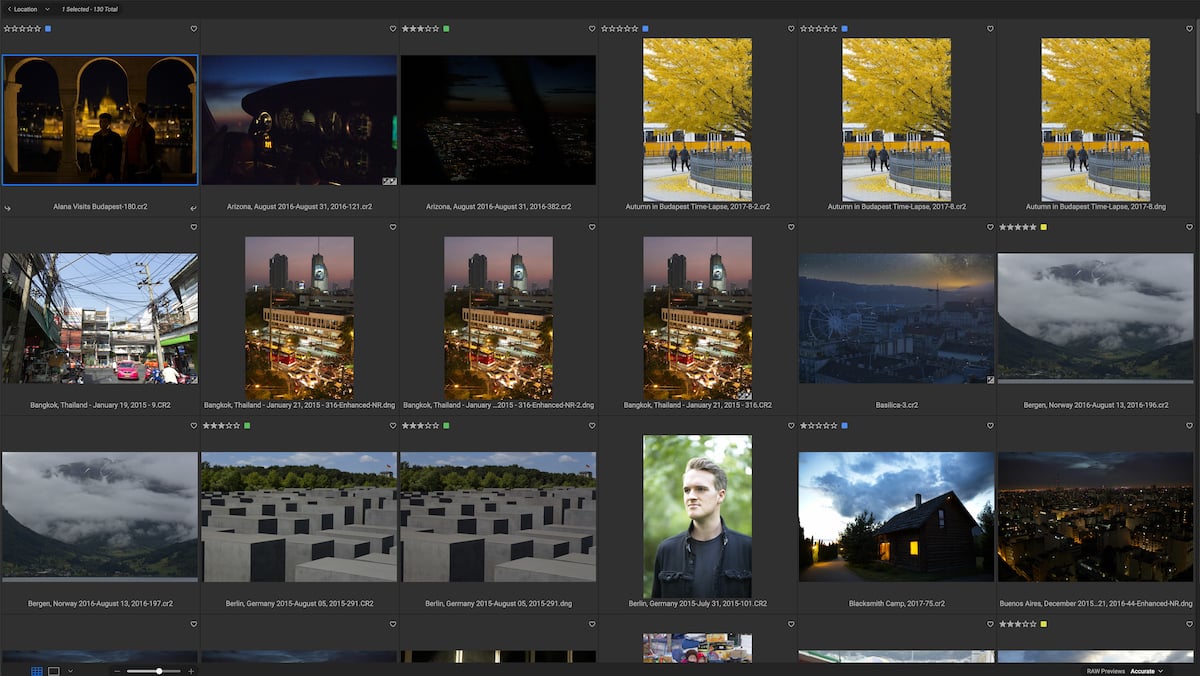
File browsing is as simple as any folder structure found on any computer. You use the Browse section to sort through this material. The Browse section also lets you search through Dropbox, Google Drive, and One Drive files.
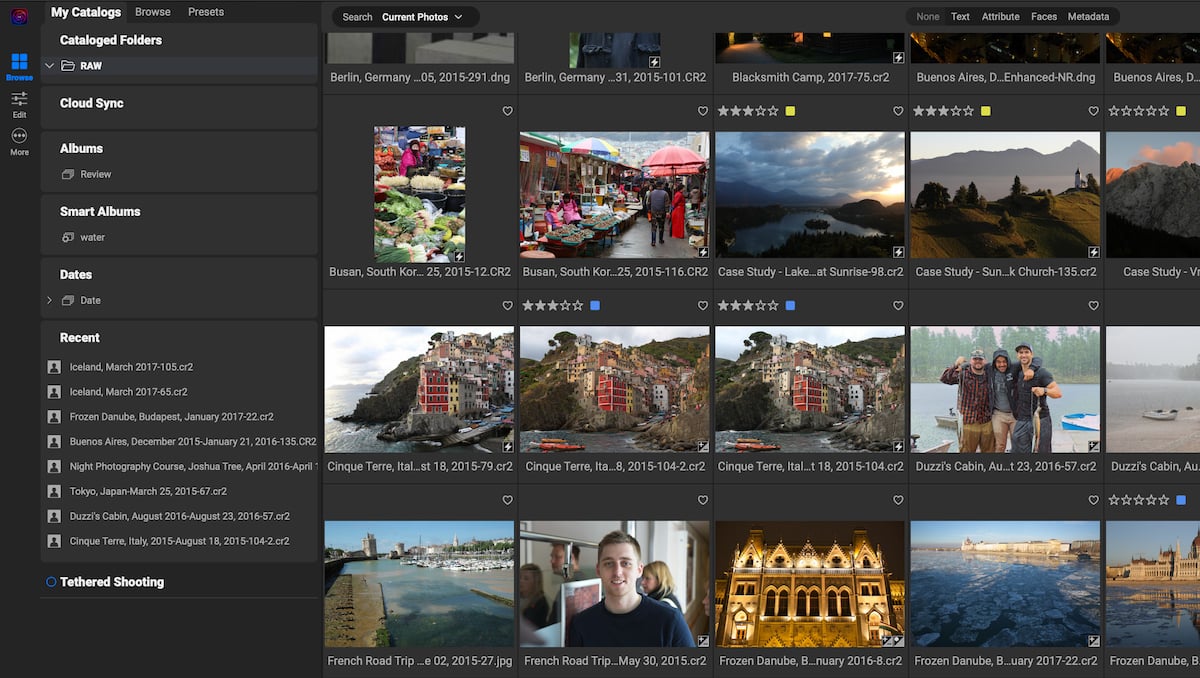
You must make it a cataloged folder if you want access to the Cloud Sync, Albums, and Smart Albums options. You can do this by right-clicking the folder and choosing Make Cataloged Folder. This opens a duplicate folder inside the My Catalogs panel.
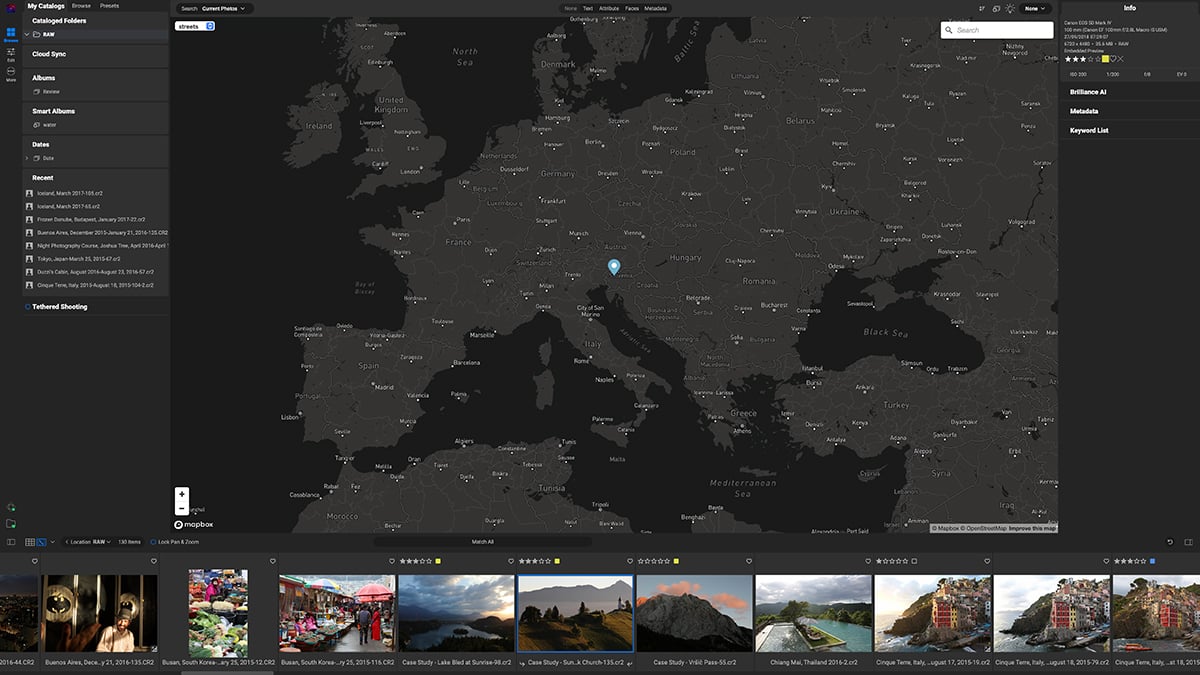
Smart Albums are a brilliant addition. They allow the program to create albums from a set of rules you can input. The rules range from camera or metadata settings to locations and seasons! I was even able to gather all my images containing water.
Overall, ON1 Photo RAW’s basic organization is simple and well thought out. And ON1 provides plenty of video tutorials to assist beginners.
Viewing Photos
ON1 Photo RAW’s Browse section prioritizes seeing your images clearly. This is the most helpful aspect when sorting through hundreds of images.
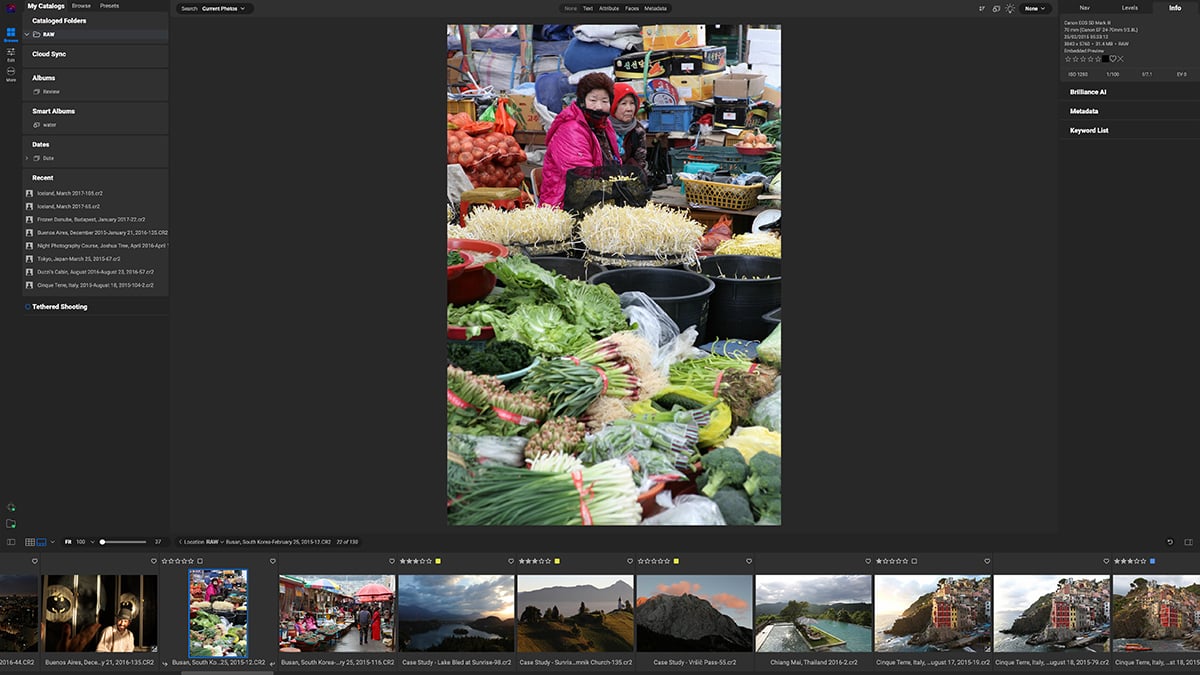
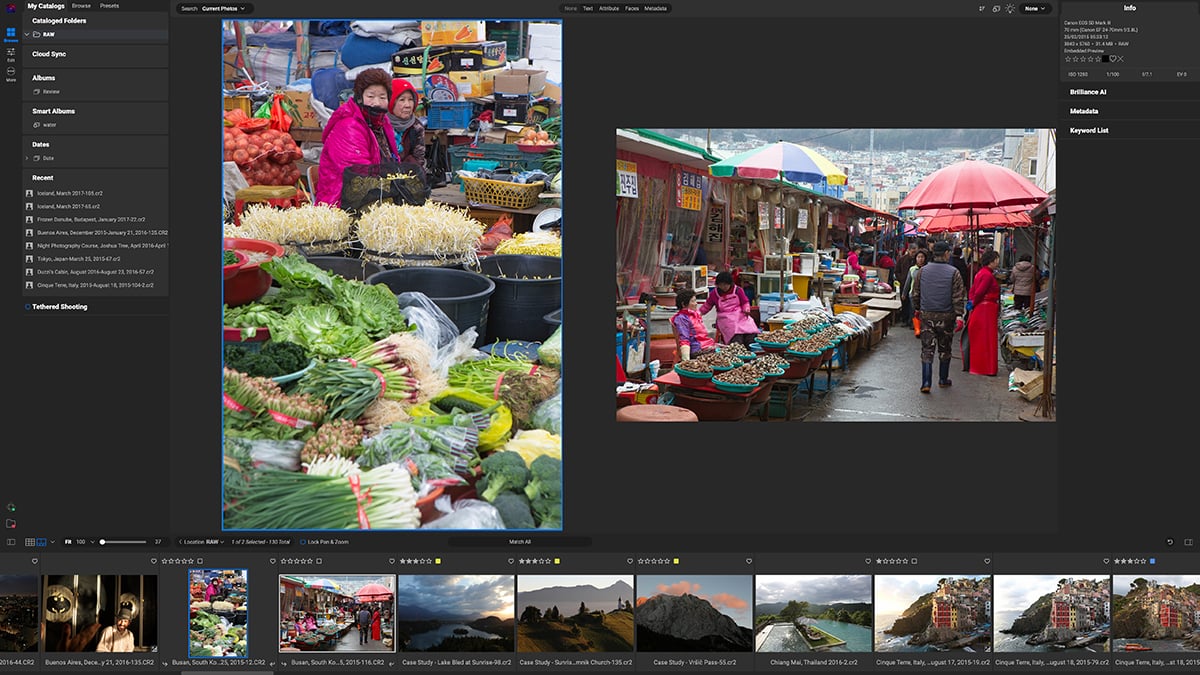
The interface has plenty of customization options. You can flip between a few viewing options, like Fullscreen, Filmstrip, Compare, and Map View.
You also have the standard thumbnail size adjustments. There is even an icon to access a dual-screen mode quickly. ON1 did a fine job identifying the most valuable viewing options and giving us quick and easy access.
Everything has been thought through for maximum attention and focus on the photos. At the bottom left and right of the application are icons to collapse each panel for an uninterrupted editing experience.
Photo RAW also lets you create virtual copies of an image to try out different editing styles. They are referred to as “Versions.” You can create several versions without ever tampering with the original RAW file.
Search and Sorting Tools
I was pleasantly surprised by ON1’s approach to searching and organizing photos on a large scale. Any photographer with a couple of years of photos will understand the difficulty of finding a single photo quickly.
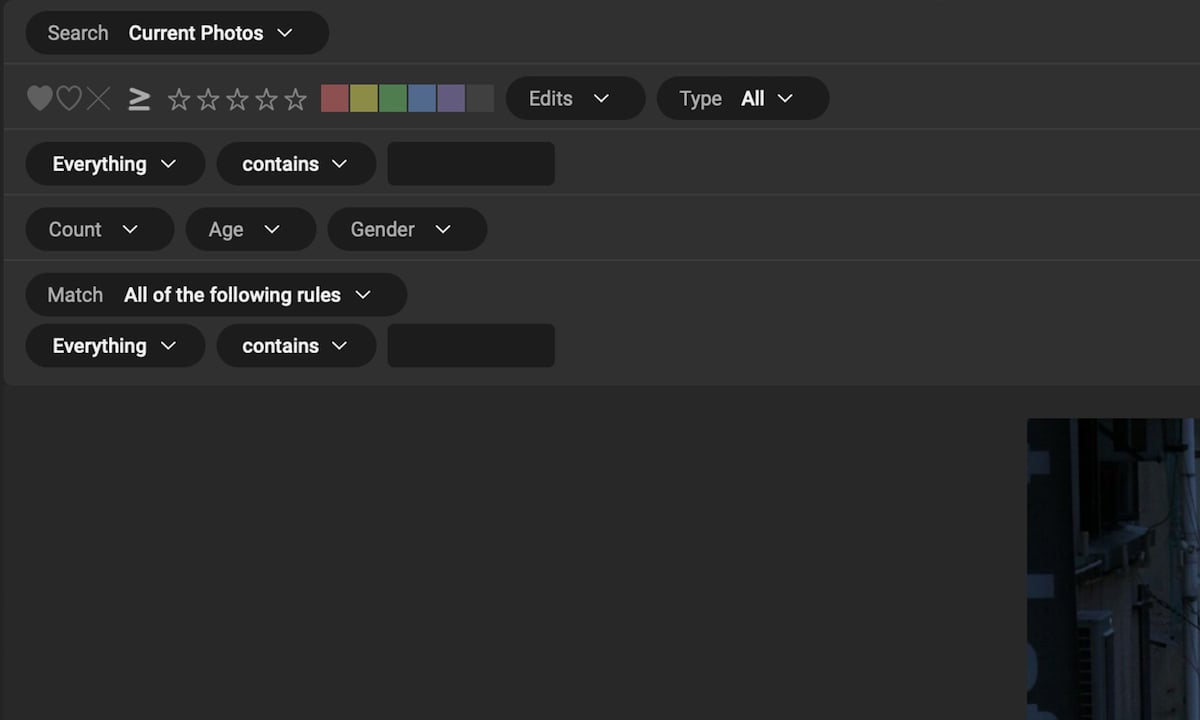
First, the search functionality is split up into Text, Attribute, Faces, and Metadata options. You can find this at the top. You can either search using one of these options or all at the same time.
The search lets you sort through several criteria and fields. It lets you find specific keywords, ratings, and other elements you may have attached to the photo. It even lets you search through people within an age range and by sex through the Faces option! This method easily reduces large sections of photos.
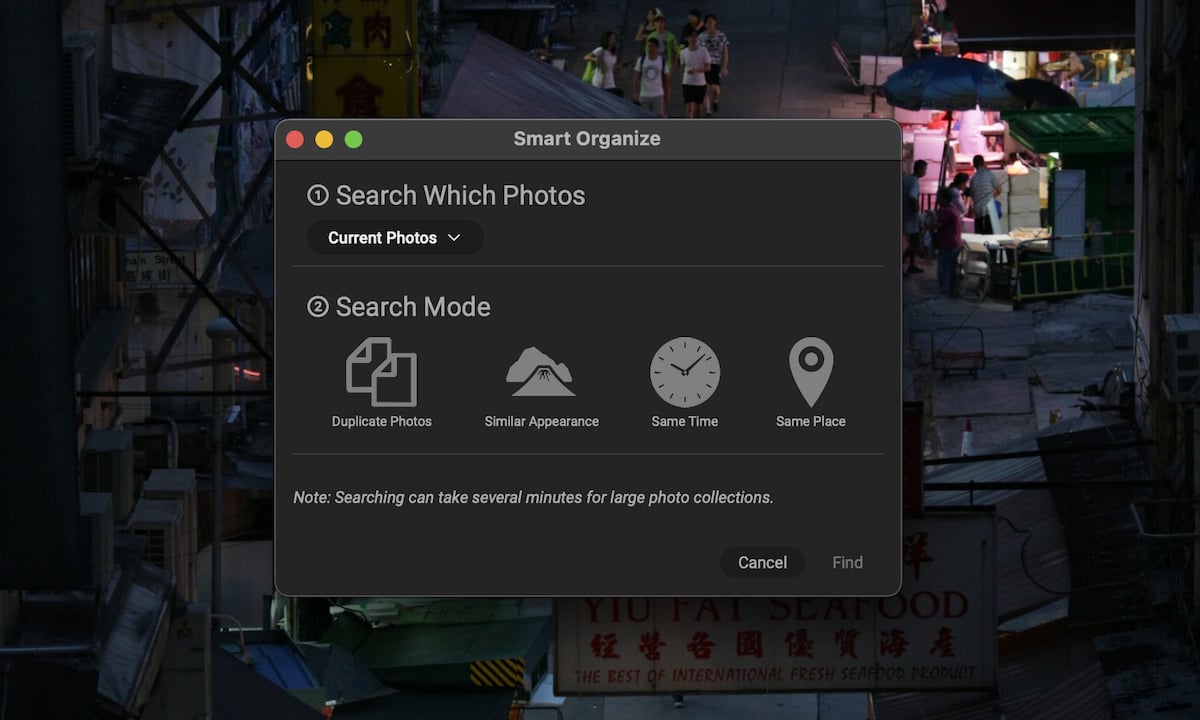
The best organizational feature ON1 provides is the Smart Organize feature. The program searches through your images. It finds images taken simultaneously, images that look the same or were taken in the same place, and duplicates.
This is incredibly helpful on multiple levels. First, if you have some photos taken in quick succession, you may only want one as your final. With Smart Organize, you can isolate these images to help pick your favorite and remove all other options.
Another strong positive of the Smart Organize feature is that it easily eliminates duplicates. Disorganized photographers will rejoice at this feature.
There, you can see each photo’s duplicates in a single area and delete irrelevant ones. This feature is fantastic for spring cleaning your digital archive.
Image Development
RAW File Processing
Let’s start by discussing how ON1 Photo RAW reads our files through RAW processing. It automatically translates your RAW files into visual material when importing your images.
The results ON1 Photo RAW produces are up to a very high standard. They can draw a great amount of detail and contrast from your photo. It picks up smaller details in the tonal range, ensuring no bits of information are lost in the process.
ON1 Photo RAW has recently advanced its details in the highlights. This means the tonal and color ranges are stronger in these areas. The RAW processing just about holds up when comparing the results to Lightroom. But the difference in detail and contrast are apparent.
The unedited ON1 image is quite flat, which professional editors will prefer, but not casual or amateur photographers. The Lightroom image is more pungent with color, especially in the shadows.
Basic Editing Tools
To access the editing tools, you must use the icons on the far left to switch between the Browse and Edit workspaces. The editing process is split into five sections—Develop, Local, Effects, Sky, and Portraits.
Splitting different editing tools between these sections is helpful for several reasons. Primarily, it lets you find the specific tools you want as quickly as possible. It also simplifies the workspace, making for an uninterrupted editing experience.
First, we look at the Develop section. ON1 splits the development process into “Tone & Color” and “Noise & Sharpening.” These sections contain a few easy sliders that cover basic adjustments.
If you’re looking for a wide range of sliders to fine-tune every tonal feature, ON1 Photo RAW is not for you. Instead, these adjustments fit along with the AI adjustments that come later.
The Tone & Color section lets you select from a range of Camera Profiles. You can pick from various color profiles, including ones specific to your camera. These are an excellent starting point for photographers who don’t know where to begin their editing process.
The Exposure Compensation tool is more balanced than ON1’s previous iterations of Photo RAW. It lets you adjust the photo to five stops of compensation, like Lightroom. When looking at both ON1 Photo RAW and Lightroom at -4 stops, you can see they are both relatively similar.
ON1 Photo RAW applies a blanket darkness rather than reading where the highlights and light sources come from. This means that the darks are less affected than in Lightroom. You get more detail in the darks at -4 on ON1. But the color retention isn’t as accurate.
Looking at other basic tonal tools (like shadows), we can see that ON1 keeps a similar approach to these basic adjustments. This approach could be better at identifying the different tonal ranges.
ON1 does make more drastic changes compared to Lightroom. This may be because ON1 only provides a few other avenues for tonal adjustment, unlike Lightroom.
Both programs reach -100, but -75 in ON1 is closer to -100 in Lightroom. Pushing the shadows in ON1 isn’t a good idea. As you can see from this photo, ON1’s Shadow tool doesn’t just darken areas. It also adds a softness to the image.
ON1 has recently added a Tone Curve tool. Unlike Lightroom, you won’t find this in the same Develop section. You need to go to the Effects section and then add another filter.
There, you can select “Curves” and find the tonal curve. This is an important addition that more experienced photographers will appreciate.
Other basic edits that ON1 has put in Photo RAW have all been thought through and provide helpful tools. This is especially true if you take a creative approach to photos.
One of these simple additions is found in the Crop section, which is located on ON1’s far-left Tool panel. You can set crop overlays to help with your compositions, even overlaying the golden spiral.
Preset Support
ON1 provides an incredible approach to presets. So, if you use them often, ON1 Photo RAW could be your program.
One unique feature ON1 employs is treating each preset as having multiple layers. This means you can go into and edit each aspect of the preset to meticulous detail. You can even add more filters or take some away. And you can always save your new preset once you have it perfectly fine-tuned.
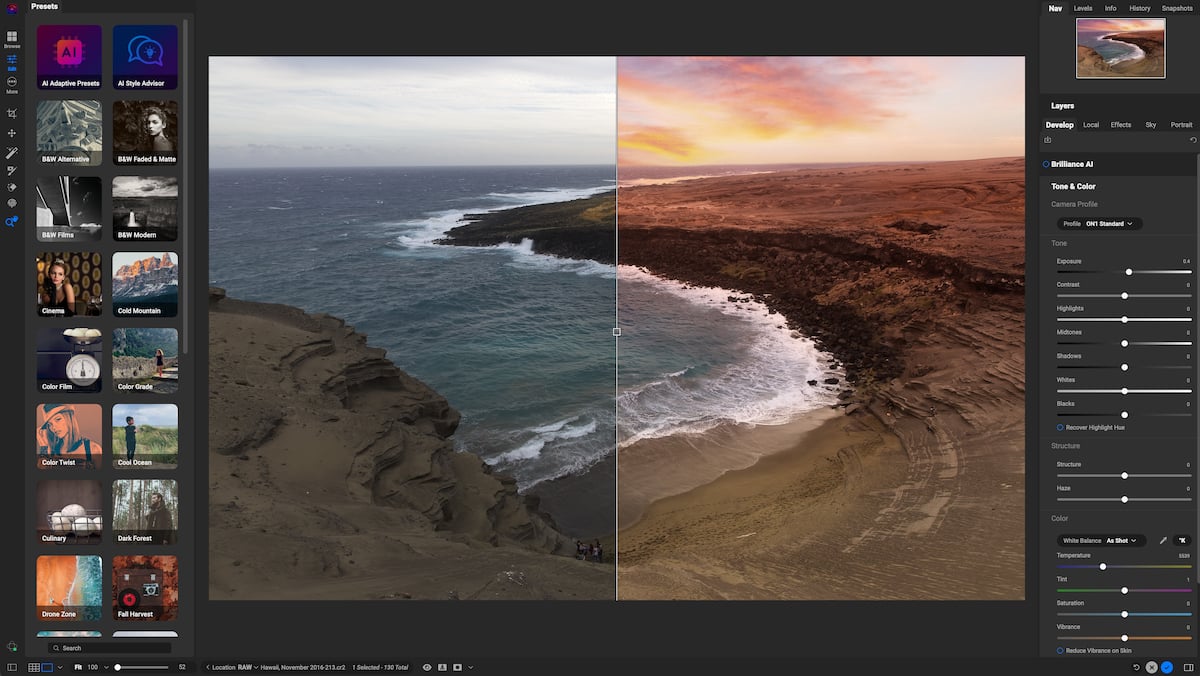
Presets are front and center in the Photo RAW workspace. You can access them from both the Browse and Edit workspaces. ON1 provides excellent viewing options for preset selection. After you click on the preset you want, you see your current selected image with each preset variation.
From there, you can click the thumbnail button up top, which shows you all these in full-screen mode. This is an incredible way to see each preset variation quickly and in fantastic detail.
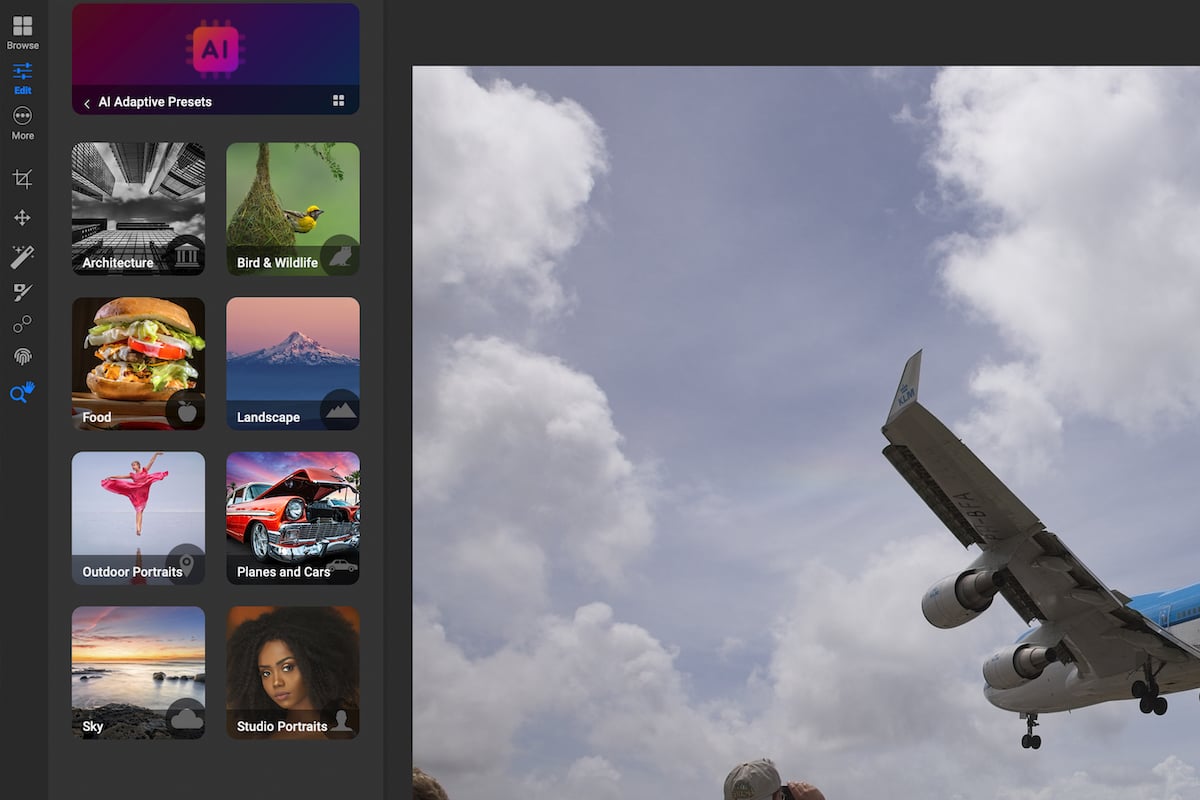
Another unique feature that ON1 uses is AI adaptive presets. These are a game changer for presets. They allow for incredible control with minimal input from the user. I will cover this section more later on.
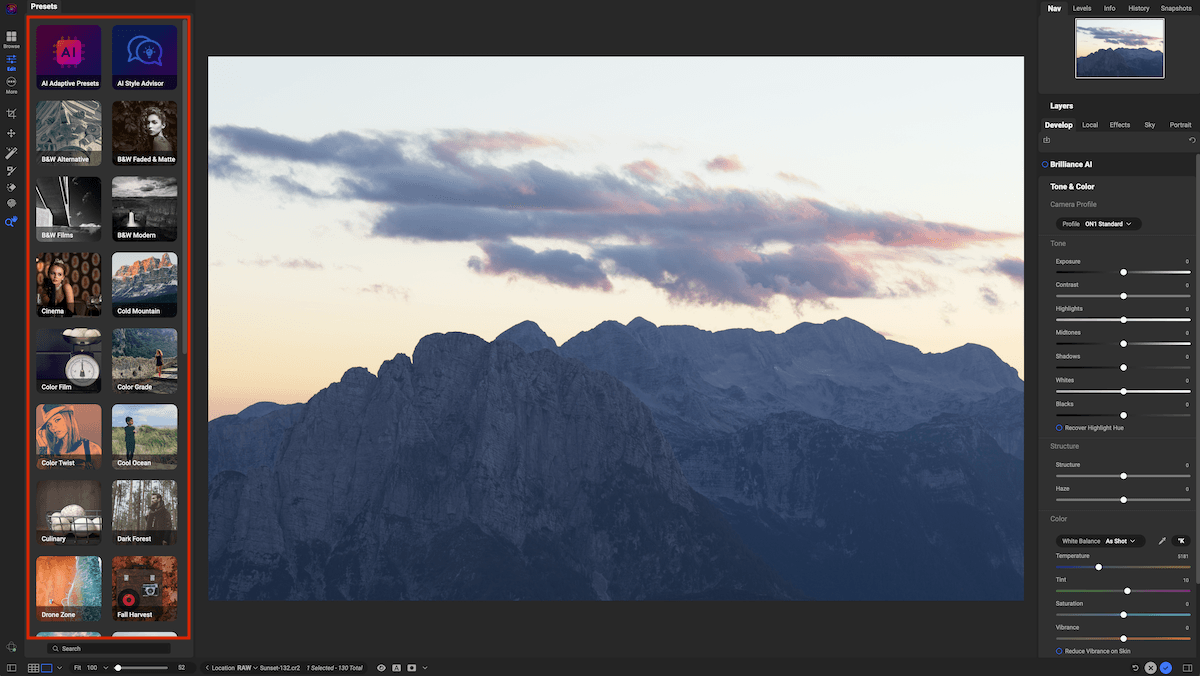
Highlighted Preset panel
Photo Manipulation Tools
ON1 Photo RAW provides users with a great introduction to important manipulation tools. You get quick and easy access to local adjustments, which use simple masks to apply adjustments to specific areas.
You also get quick and simple access to the Retouch tool. This retouching tool is why many people use programs like Photoshop. By providing this in ON1, you might never have to purchase Photoshop.
The Retouch tool includes four modes—Healing Brush, Perfect Eraser, Retouch Brush, and Clone Stamp. Each of these brushes corresponds to tools you can find in Photoshop. Swapping between the brushes is done by moving your cursor to the top of the screen.
These brushes all perform well, but sometimes the Perfect Eraser takes a while to load its results. This isn’t often the most accurate manipulation, but it does produce okay results in certain situations. It performs best when a simple background is behind the subject you’re trying to erase.
These brushes can malfunction slightly, adding extra information not in the mask. But this is easily reverted by going back a step.
Photo RAW also provides quick access to a liquify tool, now named the Push Tool. This tool is rare for editing software like this.
The Push Tool is a fun way to warp your image. If you use it well and with care, you can dramatically improve an image. You can also use the Push Tool creatively, so it goes hand in hand with ON1’s creative ethos.
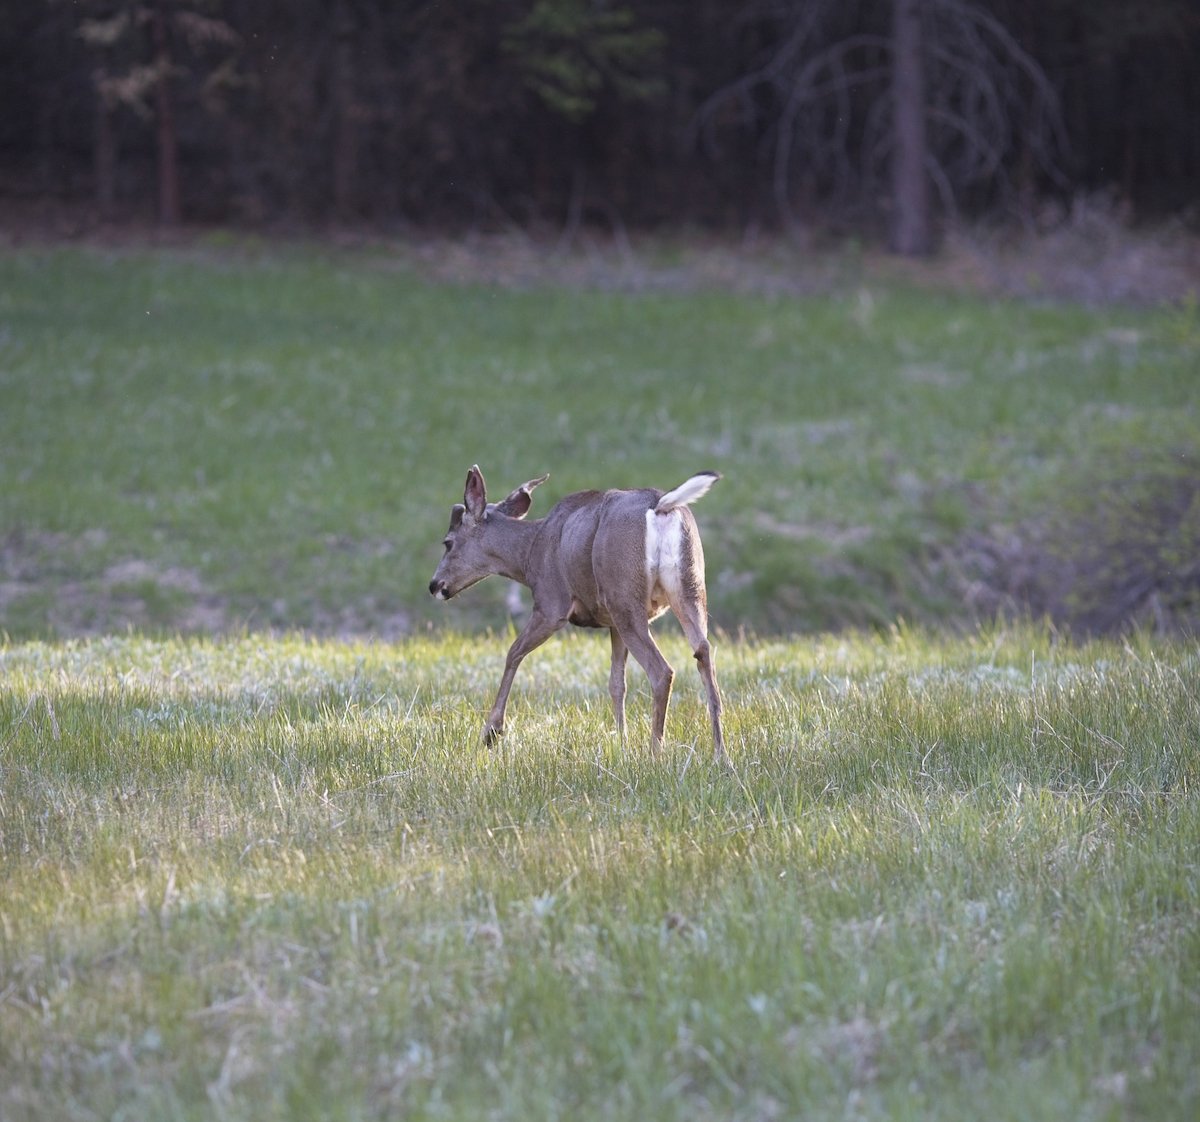
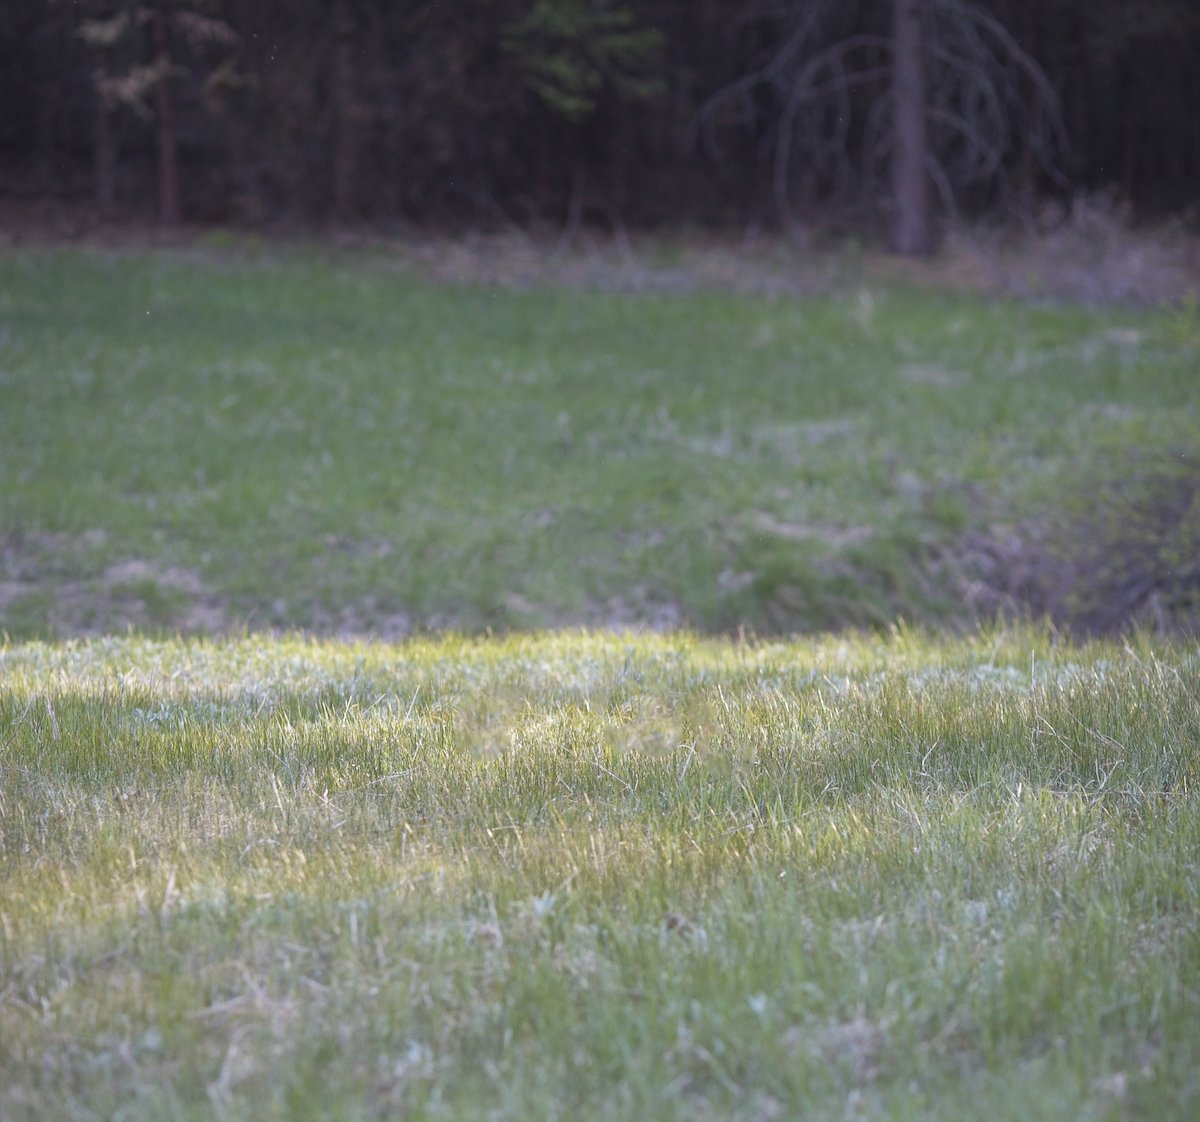
Here is a quick example of the Perfect Eraser in action. This edit took me a few seconds!
Variety of Image Editing Views
ON1 Photo RAW has added some new specialist viewing options to its new software version. You still get the same Preview button that shows the original image when you press it. But you now also get a Slider Compare view and a Mask view. These views don’t show the image.
There is also a Dual Screen mode, which opens a separate page. This lets you browse, organize, and rate your images in a separate workspace.
Thus, you have one Edit workspace up while also seeing the Browse workspace. This opens up many possibilities for your editing process or even for presenting your photos to clients.
Advanced Editing Features
AI Masking and Super Select AI
ON1 Photo RAW’s most attractive feature is its AI masking. With the Super Select AI tool, you can choose the area you want to edit by clicking on the relevant section. ON1’s AI reads the image and assesses similar objects to understand what can be grouped.
This is far more accurate than the Magic Wand tool found in Photoshop. That’s because the AI reads the image, not just the change of tones and textures.
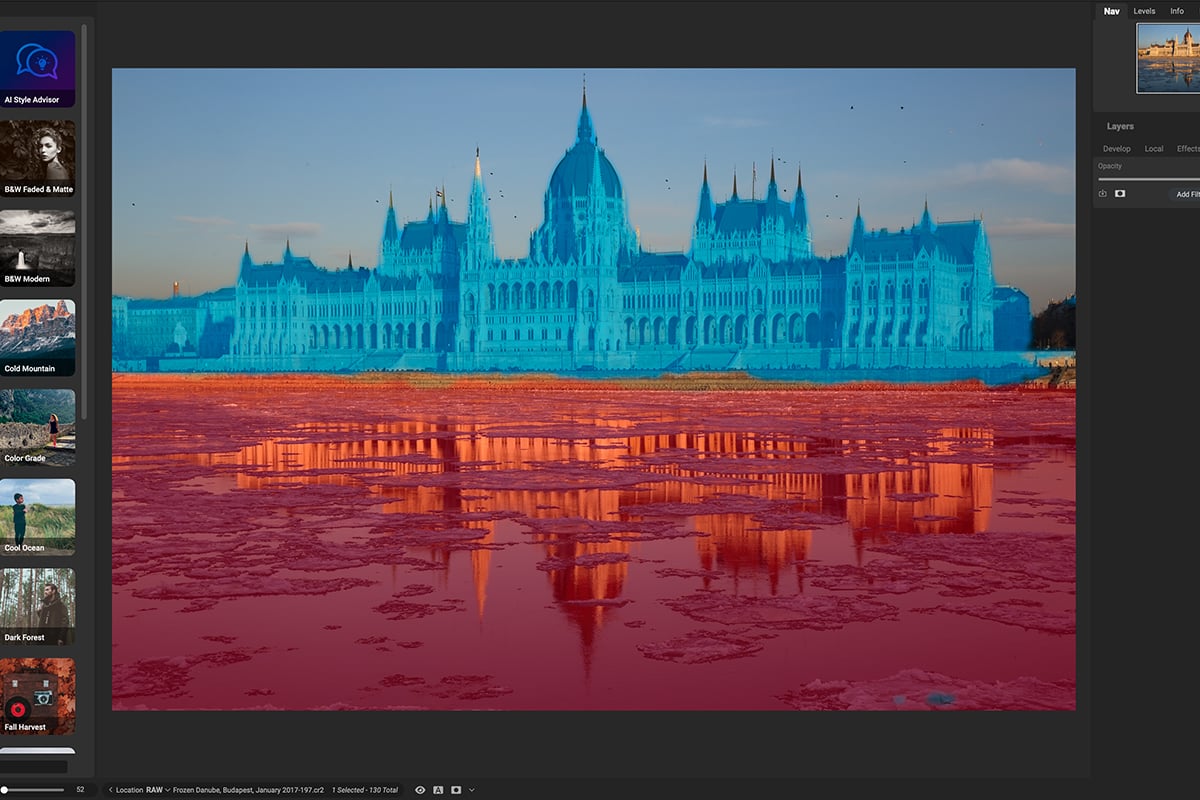
The Super Select AI tool can be found in the far-right toolbar. To use this tool, you simply hover over your image. Relevant areas turn red if they are deemed to be the same object. Your selection turns blue once you have clicked the relevant area.
From there, you can right-click and add all the adjustments Photo RAW offers. The program then makes a mask layer where your adjustment is fully customizable.
The tool works incredibly well. I normally spend hours creating paths for particular objects in Photoshop. This tool can do it in seconds! It is less accurate than producing your own paths, but for the time it takes, I was blown away.
Tools like this completely change the photographic experience. It lets beginners perform complex edits. ON1 has progressed far with this technology. It is as easy as identifying a section that needs refining, clicking on it, and selecting the relevant adjustment.
This tool alone makes the software worth buying if you don’t have time to learn complex editing processes.
Blue indicates areas that have already been selected for the mask. Red indicates the area your mouse is hovering over.
Sky Swap AI
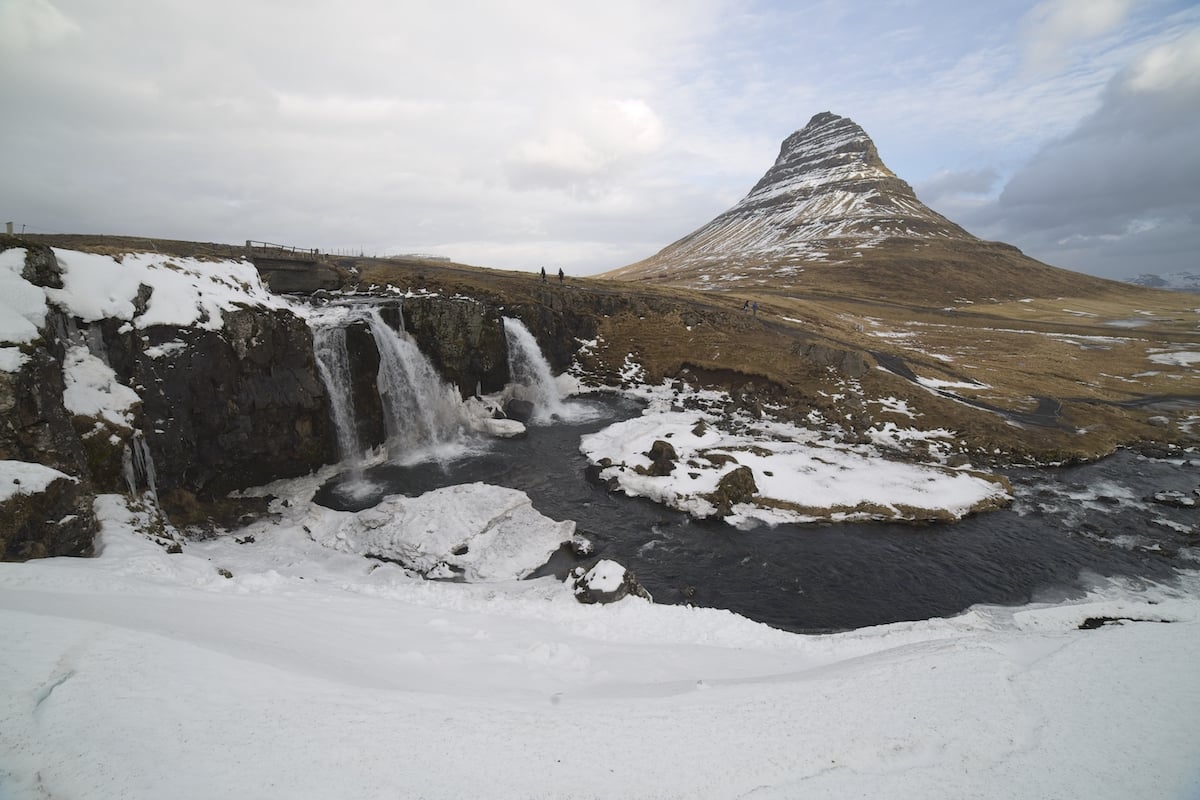
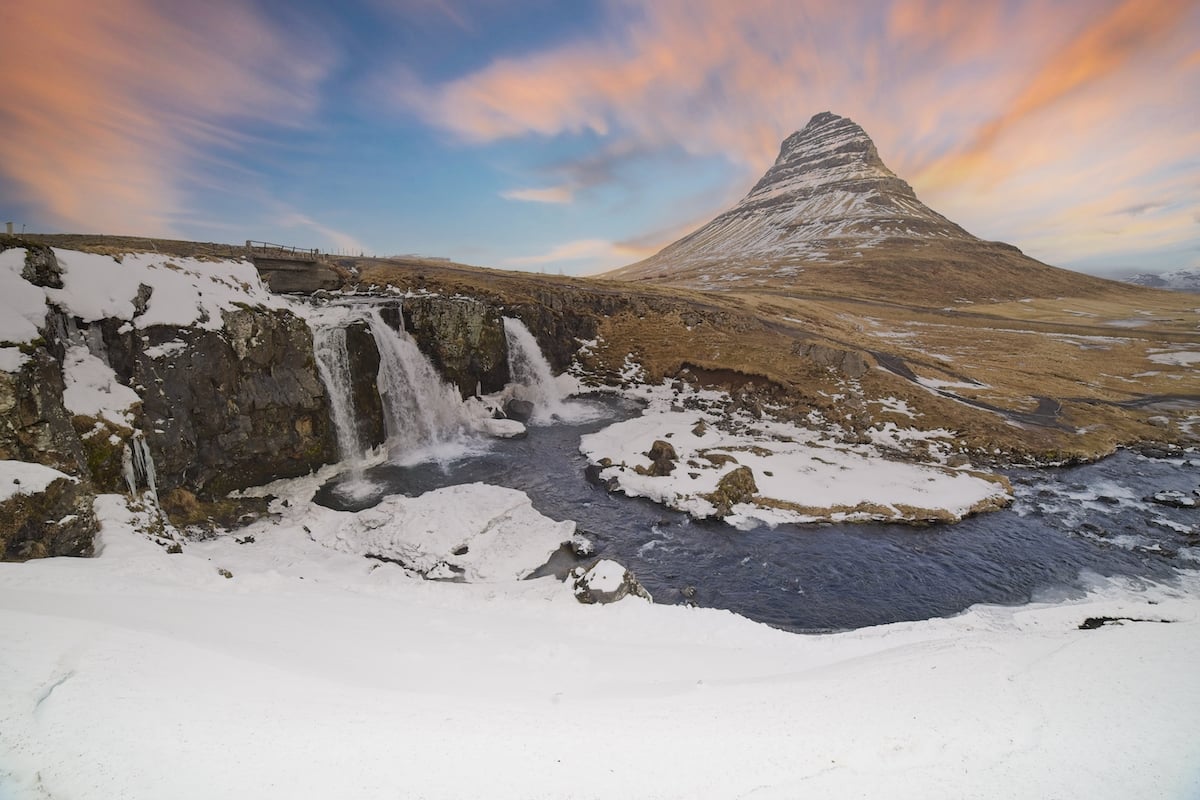
Sky Swap AI is a feature that continues to blow me away. Thanks to ON1’s development, you can completely change an image’s atmosphere in seconds.
Commercial photographers often keep their own “sky library” to edit their photos with unfavorable skies. ON1 gives you your own library with a huge range of options from stormy skies to the aurora borealis!
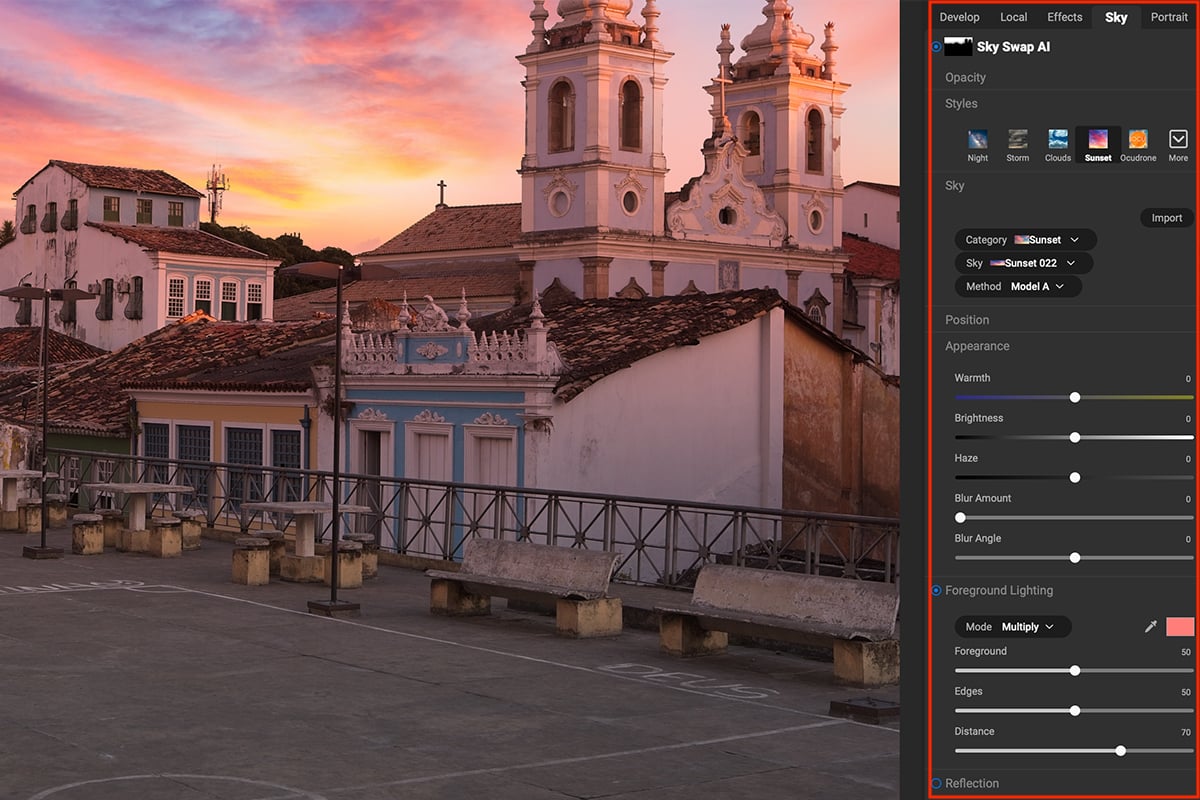
To use this tool, just find the Sky section in the Edit panel on the right of your screen. When you click there, the program automatically detects the sky in your image. You then get a layer that contains all relevant customization for your new sky.
A standout feature for me is how it automatically adjusts foreground lighting. This is an element that photographers overlook when adding a new sky. It makes the difference between a believable sky and a bad Photoshop job.
Sky Swap AI lets you adjust the horizon level and fine-tune the edge of the sky to the rest of the image. These adjustments are important to make it as believable as possible.
ON1 even gives you the choice of uploading your own sky images. This is great because you can still access all the fine-tuning edits after placing the sky in your image.
This feature has blown me away. Expert photographers will be able to tell some of the skies are edited. But if you use a believable sky, you may trick even the most experienced photographers!
A feature like this can be useful for endless reasons. It works best for those working commercial jobs where a dull sky ruins an image. This is particularly true for real estate or architecture photography. But it can be used for most commercial genres!
Brilliance AI
Brilliance AI is the new flagship feature for ON1 Photo RAW. It is a tool that aims at producing a one-click edit for your photographs. I have found the tool to make sub-par edits, leaving you with a need to fine-tune the adjustments.
Inside the Brilliance AI tool, you can control the “Amount,” specifically Tone Amount and Color Amount. These are all done through a simple slider.
The Brilliance AI tool also opens up the Local Adjustments section. This section uses AI to detect different regions in your images. The local adjustments are great, as they let you control specific sections of your image with a simple slider.
You can also add in more regions than the ones ON1 suggests. These same masks can then be found in the Local panel.
Brilliance AI has batch adjustment ability. This means you can select a range of images and apply Brilliance AI from the Browse section. This tool also automatically adds noise reduction, so it does more than edit tones and colors.
A majority of the results you get are saturated and appear similar to an HDR aesthetic. Personally, I am not a fan of this. Many of the results are also quite dark. I had to fine-tune each image to reduce saturation and lighten the tones.
Brilliance AI isn’t a game-changer. But it could be a good starting point.
AI Style Advisor
Another new feature in ON1 Photo RAW is the AI Style Advisor. This feature is in the Presets panel.
AI Style Adviser uses AI to read your image and then produces a range of edits that could best suit your specific photograph. There is a My Style section where ON1 learns your editing patterns and produces styles based on your favorite adjustments.
Like Brilliance AI, AI Style Adviser doesn’t produce edits that work well as final images. Instead, AI Style Adviser works best as a jumping-off point, even better than Brilliance AI. You can see how different editing approaches can affect your photo.
A feature like the AI Style Adviser is particularly useful for beginners who are not sure of the power of photo editing. Sometimes, it can be hard to realize the potential of a photograph when looking at the RAW file. Thankfully, ON1 has included this feature to help us see these possibilities.
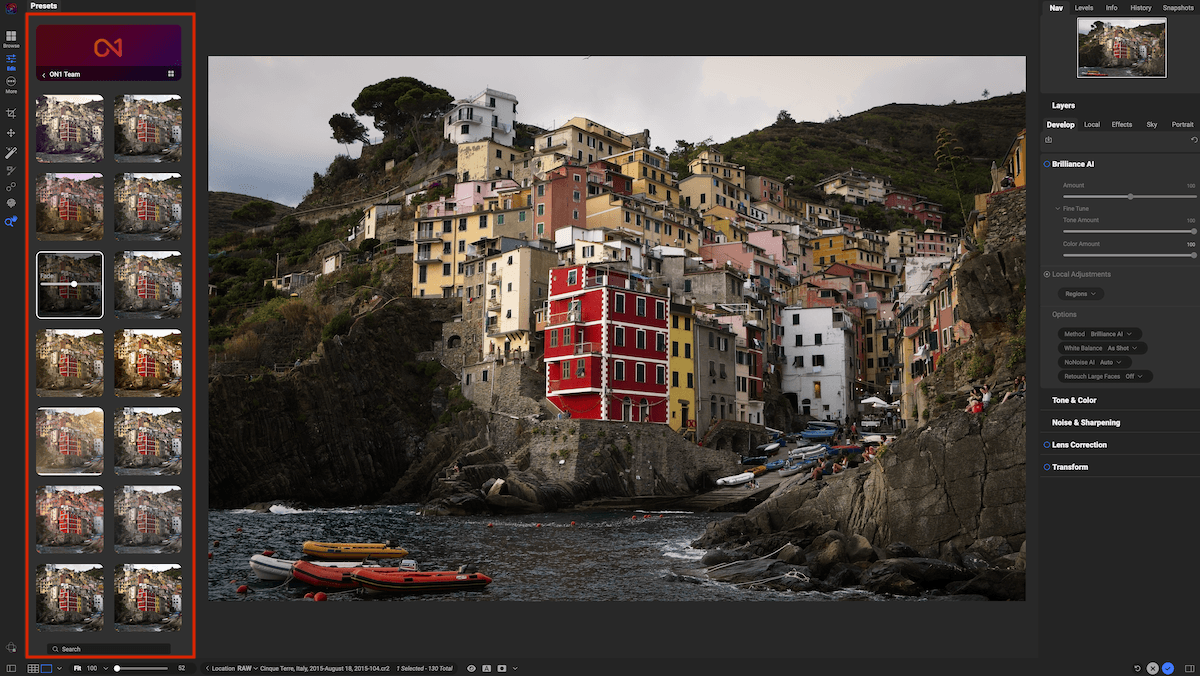
Example of some AI Styles
NoNoise AI
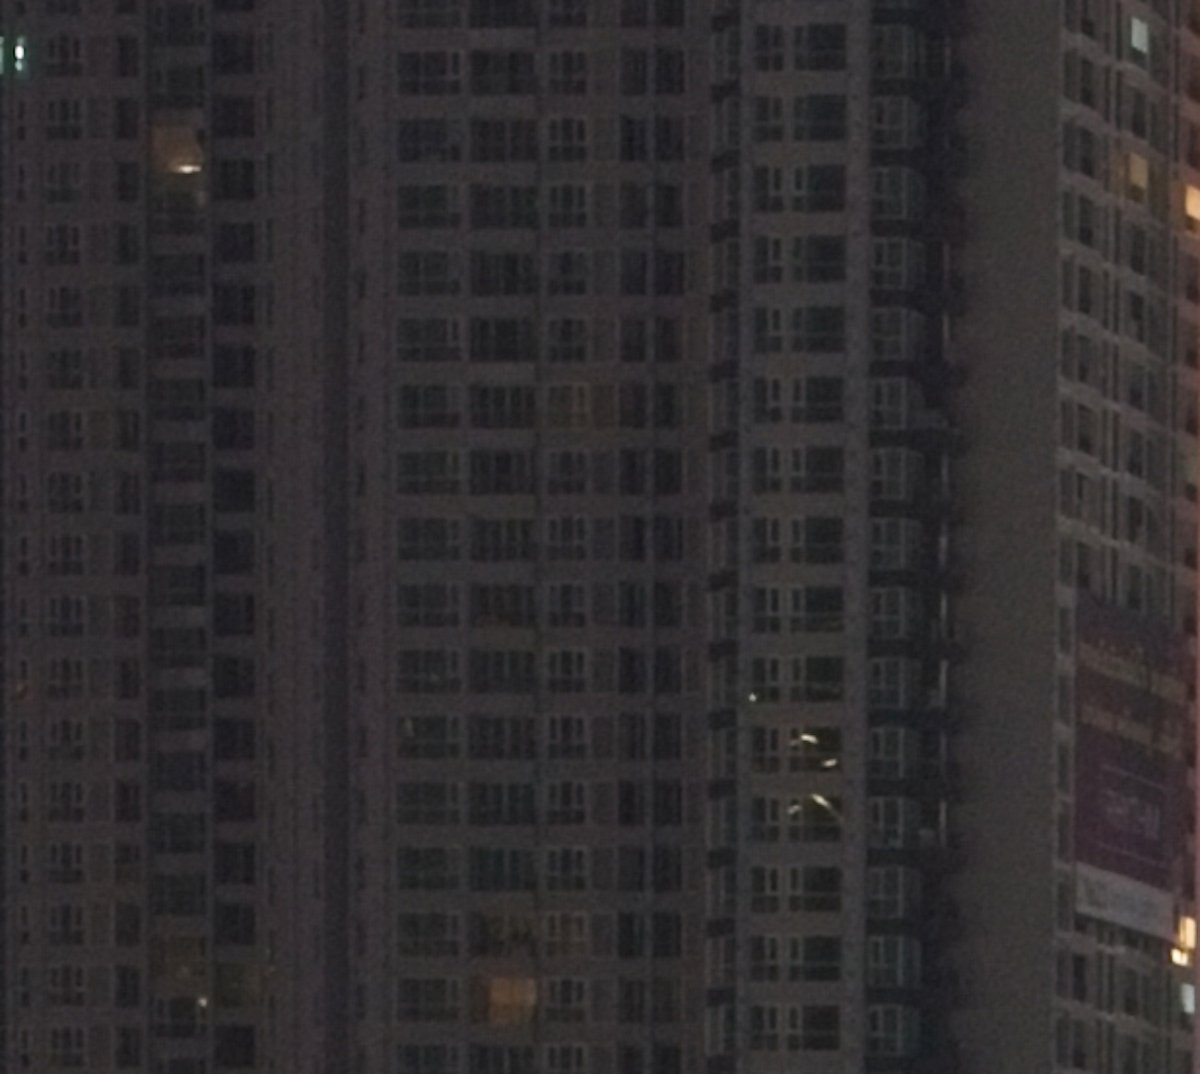
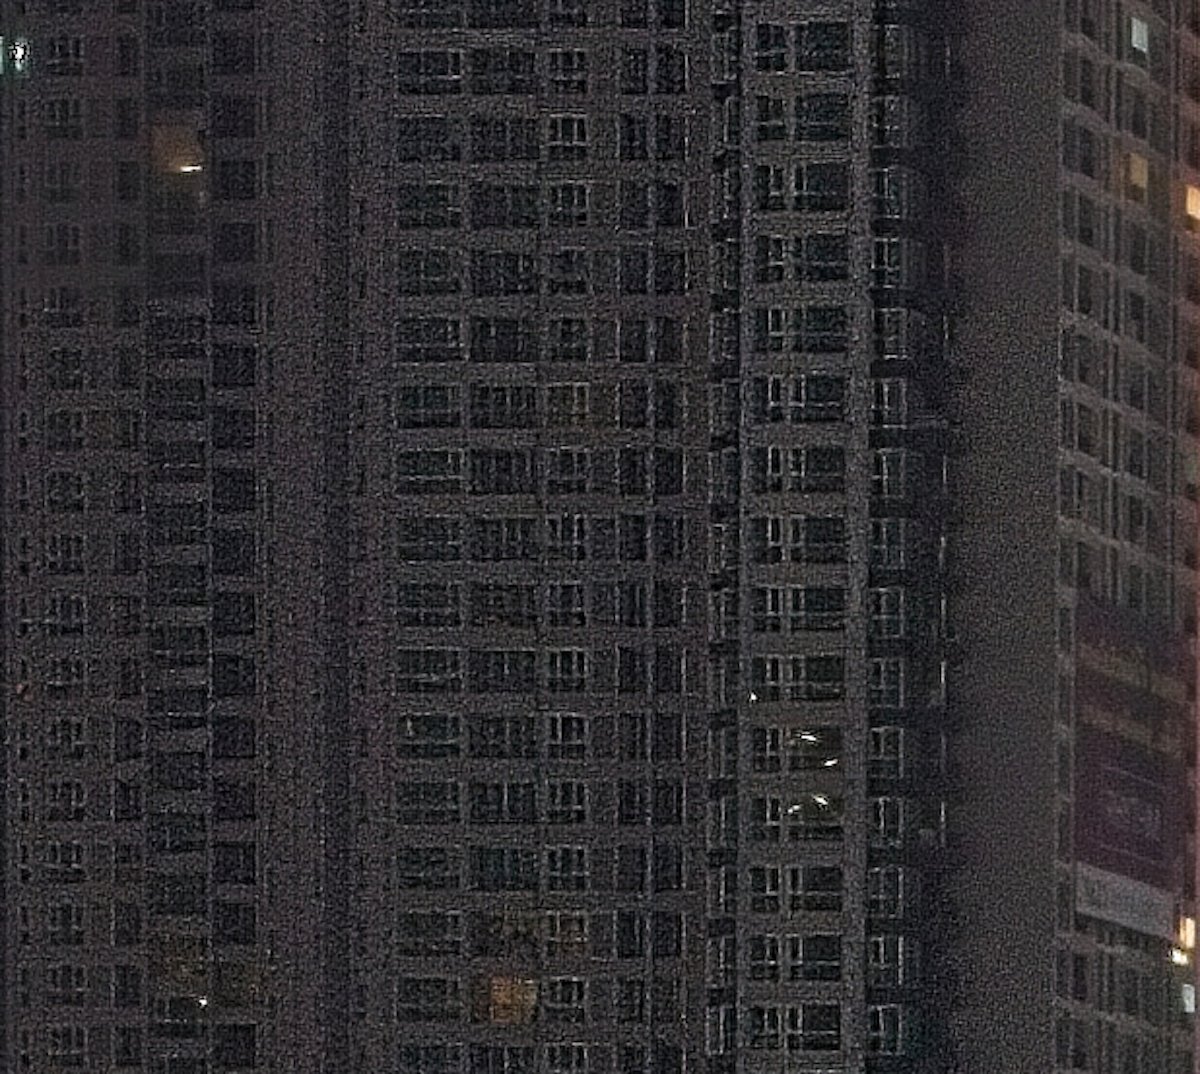
NoNoise AI is ON1’s noise reduction software that uses AI for better results. As well as reducing noise, it also does a good job of sharpening and refining details in shadows and low-light areas. NoNoise AI is in “Noise & Sharpening” in the Develop section.
On the whole, the noise reduction does an okay job. It tries to apply too much sharpening or “Enhance Detail,” so I had to tone this down.
Even with these toned down, this software still put a lot of sharpening in. This is great for certain pictures but can look fake on others, especially if you plan on printing your images.
The NoNoise AI also tends to smooth over wide noise areas on a plain background. This is how most noise reduction systems work, but I feel ON1’s system can make certain sections look too soft.
Again, this works well if you use your images for the web. But if you plan on printing them out, it does not hold up either.
NoNoise can be used simultaneously with Tack Sharp AI to give you more detail and sharpness in your image.
Tack Sharp AI
Tack Sharp is a sharpening tool powered by AI. It aims to give you more clarity in your images. I am not impressed by this feature. As I said, it tries to do too much with the sharpening and gives a rigid, over-pixelated look.
This is only really evident if you are zooming into the image. So, it is like noise reduction, which won’t hold up on large prints.
ON1 claims unsharp images can be saved with Tack Sharp AI. And this is true to a certain extent. Tack Sharp AI works best on slightly soft images from either camera shake or a fast-moving subject.
The program’s strong point is that it can take soft lines and make them more definable. It won’t fully save an image when blown up, but it will make it look sharper online.
I found I was turning down the main Deblur slider almost three-quarters of the way on images that were shot in low light. This is due to the pixelation and added noise in these situations. For the example below, I did not touch any of the sliders.
Resize AI
Resize AI is Photo RAW’s photo enlargement software. It uses AI to blow up images that may not have the quality to withstand large prints. A program like this is extremely helpful. It lets you use images for situations outside your abilities.
There isn’t much to complain about this application. It is a huge win if it gives us more detail than the original image. And from my tests, the Resize AI performs this task well without damaging the original results.
You also won’t find the over-sharpening and noise that comes with the Tack Sharp AI program. It is actually better at sharpening than the sharpening tool ON1 provides!
AI Adaptive Presets
AI Adaptive Presets are a game changer for those who like to use presets in their editing process. Presets are helpful because they allow detailed edits to be done to an image in seconds.
ON1 Photo RAW’s adaptive presets now take this one step further. Not only can you apply adjustments, but you can also apply masks without any intervention.
A feature like this is extremely useful for photographers who work in a studio. Or it’s helpful with a repetitive subject matter that needs masking.
Other uses would include landscape, architecture, and car photography. AI Adaptive Presets can separate the subject and apply select adjustments to the background or subject of your photo.
Although these presets can save hours of editing, you must be careful about using the same one on every photo. For instance, if you use a Sky Swap adaptive preset, you may have the exact same clouds in every shot. People would quickly catch on that these photos are edited.
The preset options are great, but they work best if you tweak them to your preferences. Luckily, ON1 makes this extremely easy to do. You can even make your own AI Adaptive Presets from scratch. This may take a while to set up, but it could save you hours down the road.
Exporting and Sharing Images
Exporting in ON1 Photo RAW is straightforward. It doesn’t let you export as many file types as Lightroom. But it offers a nice amount of control over the image regarding metadata and watermarks. You can even apply sharpening and resizing at this point in the editing process.
ON1 Photo RAW performs its exporting through the use of presets. It has some already, but you can also create your own to keep your files uniform whenever you export.
I see how this makes sense. But, in practice, photographers always need different file sizes and restrictions. It was slightly annoying that it asked me if I wanted to save this preset whenever I adjusted the exporting file.
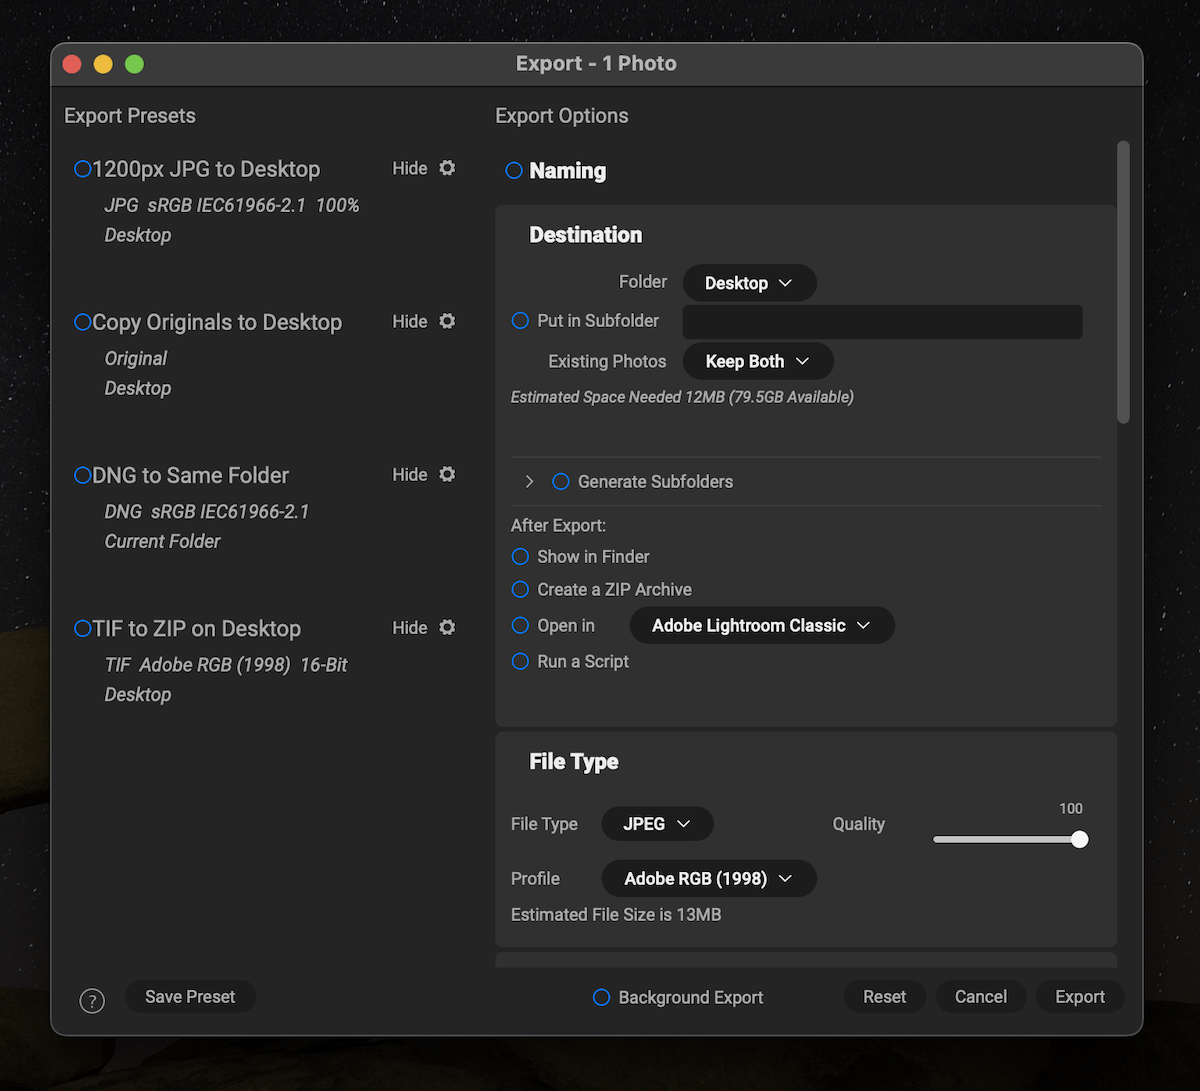
ON1 Photo RAW export window
Smartphone and Tablet Compatibility
ON1 Photo RAW solidifies itself as an all-encompassing photo editing software with an app for smartphones and tablets. You get a wide range of the same features in the app that are on their desktop app.
You can’t perform most of their AI actions on the application. But this makes sense as these are powerful tools. But it does feature a wide range of RAW photo processing edits from exposure control to presets.
On top of the basic adjustments, the app lets you perform more complex controls. This features great masking and local adjustment actions designed with touchscreens in mind. The app even lets you stack multiple filters and actions. This lets you use the app similarly to Photoshop.
The app also brings you many more useful features besides photo editing. You get access to the organizational side of the app. If you get the ON1 Everything subscription plan, you can access ON1 Cloud Sync.
Cloud Sync lets you access your photos, edits, presets, and other extras from any device. This means you can continue to work on the same projects without sending images over email or other file transfer services.
If you like to use your smartphone or tablet as a camera, the ON1 app comes with a camera that gives you pro-level controls. It lets you control the ISO, exposure, white balance, and more. It also saves your images as RAW files, giving you more flexibility in the post-processing stage.
Overall, the smartphone and tablet application is a great extra feature. It feels like an extension of Photo RAW rather than an afterthought. But it is a bit unrefined in certain sections. I found the uploading to not have the simplest and most accessible approach.
With the amazing capabilities we now get from smartphones and tablets, working on the go can be crucial for many photographers. This application may be another reason someone wants to choose ON1 Photo RAW.
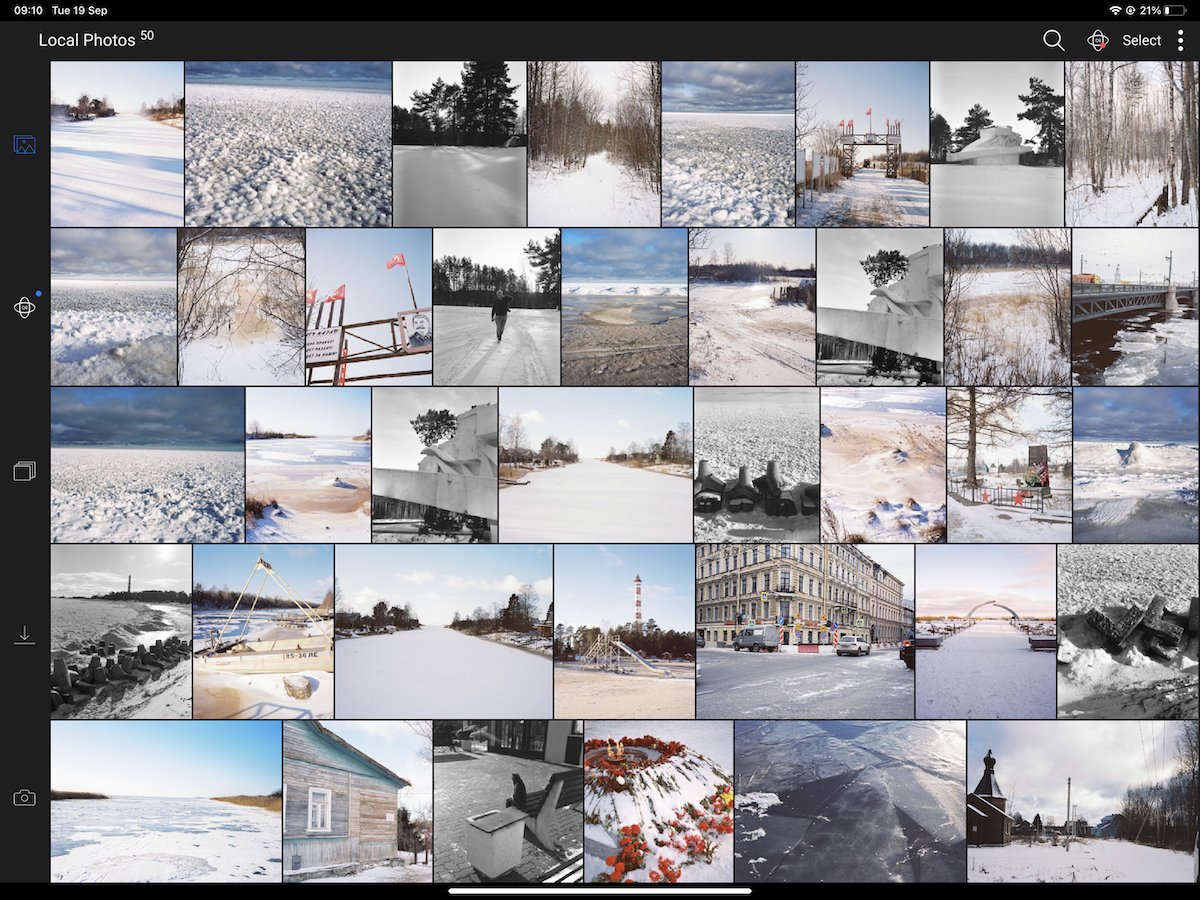
ON1 Photo app on a tablet
ON1 Photo RAW Pricing Plans
ON1 has various options to accommodate different payment styles for their app. They offer both a monthly or yearly payment option and a one-off payment option. This satisfies all styles and periods people may want to use their application.
ON1 also gives you the option to buy their plug-ins separately. This is ideal for Adobe users who may want a specific action that ON1 performs. You can also buy cloud storage for ON1 Photo RAW to accompany your purchase. This comes in either a 1 TB or 200 GB option.
The flexibility ON1 Photo RAW offers means you should be satisfied with one of their options. New users can buy the stand-alone app, while ON1 owners can upgrade for a little less. New users can buy ON1 Photo RAW MAX, which adds the plug-in feature, for a sale price.
The pricing isn’t the cheapest, but it won’t break the bank. Photo RAW is fairly priced for all the features you get. But remember that many of the features we have covered in this article come under the ON1 Everything subscription.
Alternatives to ON1 Photo RAW
Adobe Lightroom
After exploring ON1 Photo RAW, I can see how some photographers find it their ideal editing software. I wouldn’t be surprised if some are even tempted to stop using Adobe products altogether! This is because ON1 Photo RAW is designed for, and will attract, a particular type of photographer.
Adobe Lightroom has more in-depth and professional controls for organization and photo editing. It caters to the higher end of the photographic spectrum. Many features might only be used for specific niches. So, you might be paying for advanced features or controls you may never use.
ON1 aims to provide the most crucial photographic actions in an accessible way. And it doesn’t have as much of a learning curve as advanced features found in Photoshop.
This tells us that ON1 isn’t trying to replicate Adobe products. It’s bringing its own approach and ethos to the photo software market.
The main difference between ON1 Photo RAW and Adobe’s Lightroom is the control you get over the organization of your photos. This is not just in file navigation but also in general navigation around the application.
This results in Lightroom having a more archival feel to the application. This is reinforced by the many other ways to organize and catalog your photos in Lightroom.
The programs approach editing in different ways. They function using simple sliders, but you will find more in-depth controls in Lightroom. Most people making these in-depth changes want to perform them on dedicated programs like Photoshop.
Even though Lightroom is more in-depth, ON1 Photo RAW contains a great layered editing system that is missing from Lightroom. So ON1 Photo RAW functions better as an all-inclusive editing software without the same attention to detail.
You can read our full review on Lightroom.
Final Verdict for ON1 Photo RAW
[scores price="no" product="30846″ tag="expertphotog-20″ toc="no" left_title="Measurement" right_title="Score"]
ON1 Photo RAW is a fantastic program. It’s photography software to consider, thanks to its unique approach. The software positions itself as an application heavily reliant on AI abilities.
AI actions let computers read photos like never before. Thus, it performs advanced edits automatically. ON1 has harnessed this power to its advantage and has devised innovative ways to shake up the world of photo editing.
An automatic approach often means sacrificing control. However, ON1 has ensured this is not the case with their AI features.
Using layers, the software gives you automatic actions but lets you go back into the edits and fine-tune them to your desired effect. The use of layers is a defining factor of the software and is a great stepping stone between Lightroom and Photoshop.
All these features and approaches tell us that ON1 is ideal for photographers who may not have the same computer literacy as others. Many know that learning a new software can be like learning a new language. The inaccessibility can be a huge turn-off to get to perform advanced edits.
ON1 caters to people who can’t put in the time. Now, you can achieve similar levels of control without needing extensive knowledge of how to use each tool.
The addition of AI features is great. But in terms of professional photographic performance, ON1 Photo RAW’s adjustments are not up to par. This begins with the RAW processing and is seen in most basic adjustments.
Sometimes, even the AI adjustments can be sloppy. This isn’t surprising considering the early days of AI photo editing. But it is something to note when considering the software.
I recommend ON1 Photo RAW to many photographers. It’s particularly good for those who are getting into photography late or those who aren’t computer savvy. Or even those who have short attention spans.
The program takes some time to learn advanced features. But ON1 provides a wide range of video support to help.


