Photo journals are an awesome combination of a photo album with a diary. You can use both words and photos to document life events.
Here’s how to make your own photo journal.
What Is a Photo Journal?
A photo journal or photo diary is a record (usually done daily) of what you have experienced over a period of time.
Just as in regular journals, the entries depict both routine and extraordinary occurrences. They can include not only what happened, when and where, but also opinions and emotions.
The difference between a photo journal and a normal journal is that your written entries also have relevant photos.
How much to write versus how many photos to put in your photo journal is very much up to you. The distribution is more or less mixed, with a few sentences or a paragraph per photo or two.
Photo journals are very relatable and informative for the viewer/reader. They give both visual input and verbal descriptions that provide context.
Taking photos as part of your record helps not only the future reader but also to you as the writer. Writing about an event takes time and requires attention. The actual process will normally take place after the event has ended.
Having photos from the event to look at while writing about it can help with specific details.
There are many different styles and formats. If you are interested in making one, you can look up photo diary ideas for even more inspiration.
How to Create a Basic Photo Journal
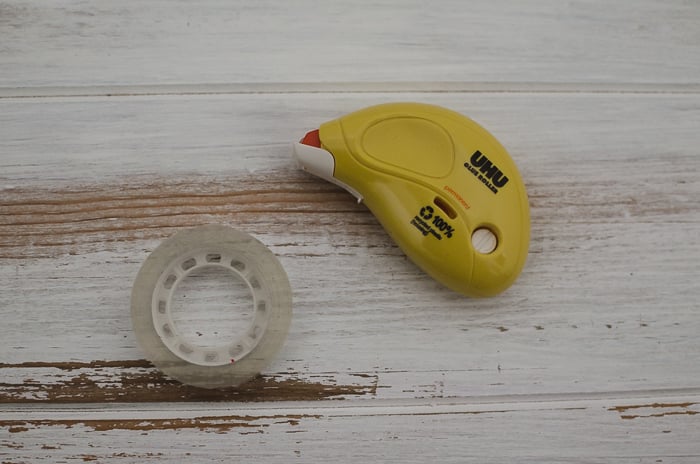
Photo journals and photo diaries can as elaborate as you want them to be. For a basic photo journal, all you need are a blank book or even a notebook, a pen, and a camera. Later on, you’ll need some type of glue to attach your printed photos.
I recommend using double-sided sticky tape or a roller glue. This will keep things clean, especially when your entry is longer than one page.
You can use any type of camera you want: your mobile, a compact, a DSLR, or even an instant photo camera. With an instant camera, you don’t need to send the photos to print (although it is more expensive).
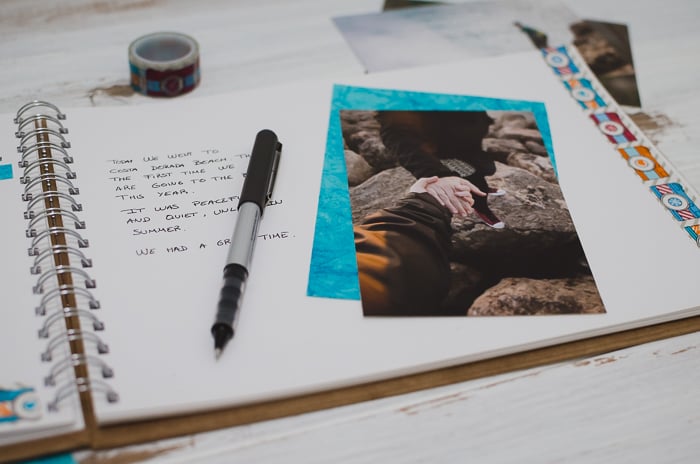
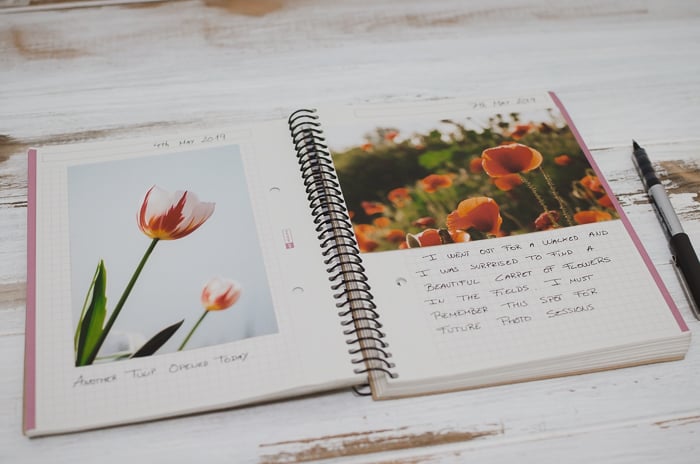
The basic photo journal is quite plain and functional. It’s perfect for daily use and especially for travelers. All you need to do is take photos during the day of moments you want to commemorate on paper. At the end of the day, you should go over the photos you took and write down entries about them in your journal.
Make sure to come up with a system to know what photo should go where after they’re printed. For example, you can leave a space on the page and write the relevant photo’s file name over it.
Develop Your Creativity With a Scrapbooking Photo Journal
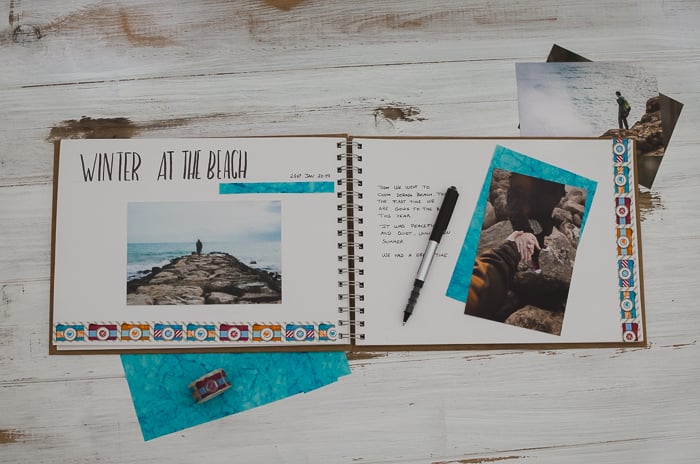
If you are a creative person that likes crafts, I recommend you to create a scrapbooking journal. Scrapbooking is a way of keeping memories. You glue photos on a blank album or notebook and decorate it with colorful paper pieces, washi tapes, stripes, stamps or other embellishments.
This artsy style of journal keeping is time-consuming though. You need a large variety of craft materials too. It isn’t the most suitable journal to have if you are traveling or if you don’t have a lot of time to invest in it.
If you enjoy crafts and appreciate hand-made things, you can create a really beautiful and fulfilling photo journal.
To start your scrapbooking project, follow these steps:
Choose a Theme
Scrapbooking can be a bit overwhelming at first with all the many elements, materials, and details involved. For your first scrapbooking model I recommend choosing a small and specific theme.
For example, you can make a small journal dedicated to your holidays, a trip or a particular event. Once you are ready for bigger projects, you can scrapbook your pregnancy, the first year of your kid’s life or even a 365 photo project.
How to Choose the Style That Fits You Best
Before you run and buy out the arts and crafts store, choose a scrapbooking style. There are as many styles as there are scrapbookers, but you can classify them under three main groups:
Vintage
For a vintage style you want the journal to look aged. You’ll use mostly brown and cream papers and washi tapes, and vintage embellishments. Color photos work well, but black and white or sepia are better.
Romantic
This style uses a lot of embellishments and papers with a lot of patterns. Decorations are the main focus, sometimes even taking importance over the photos.
Clean and Simple
The important element in this style are the photos, so the rest is quite simple.
Embellishments and other elements are used in moderation. Colors and patterns are not meant to stand out but to emphasize and bring out the photos and the text.
What Album Should You Use for Photo Journaling
Scrapbooking is usually done in albums. Your first step should be to select the album that will serve you best. You can find them in your local crafts store or order one online either on Amazon or a crafts website.
There are two things I consider when getting an album. Number one is the size because it will determine the size of the photos that can fit in it.
The standard sizes are 12 by 12 inches and 8,5 by 11 inches, but you can find a lot of other sizes.
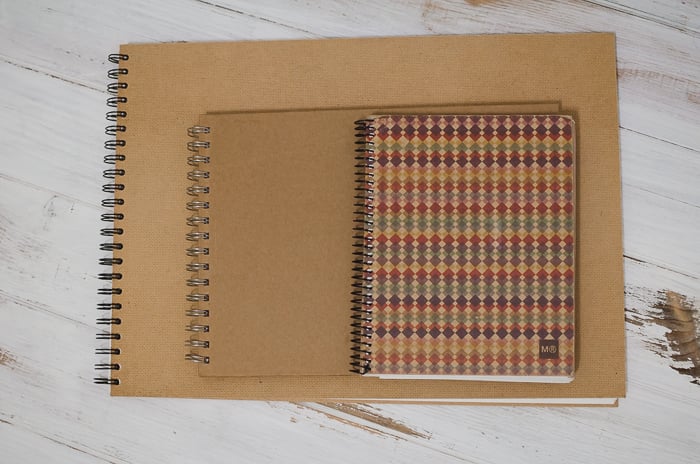
You can also get a non-scrapbooking album or a blank notebook that you like. But then, make sure to check the paper quality.
Scrapbooking albums usually have thick pages. These are less likely to break or get wrinkled when you glue photos, papers and other decorations onto them.
When buying a journal, make sure the paper is thick enough for your project.
What Other Supplies Will You Need for Your Photo Journal
Depending on the scrapbooking style you chose, you will need different types of supplies. You can get them from the local crafts stores or online.
There are specific scrapbooking papers, stamps and washi tapes that you might want to look into. It is easy to get excited and buy more things than needed or supplies that don’t fit with the journal project.
To avoid overbuying, make a list of the things you need before going to the store and stick to it. If you have the time, I recommend going to the crafts store without buying anything, just to see what they have.
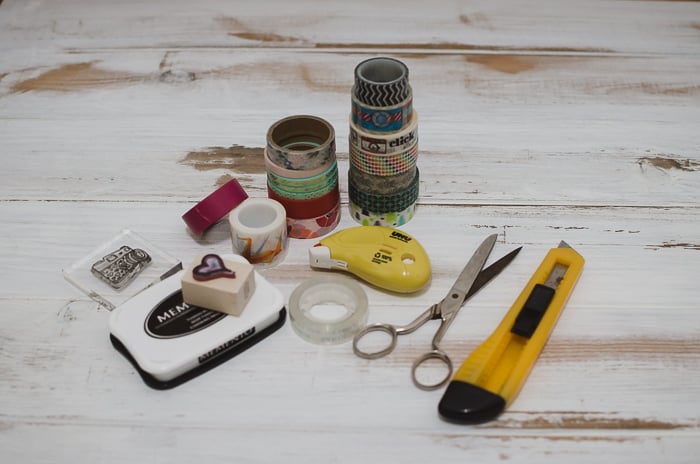
For creating a scrapbooking photo journal you will need a lot of supplies: stamps, washi tapes, glue and scissors are just some of them.
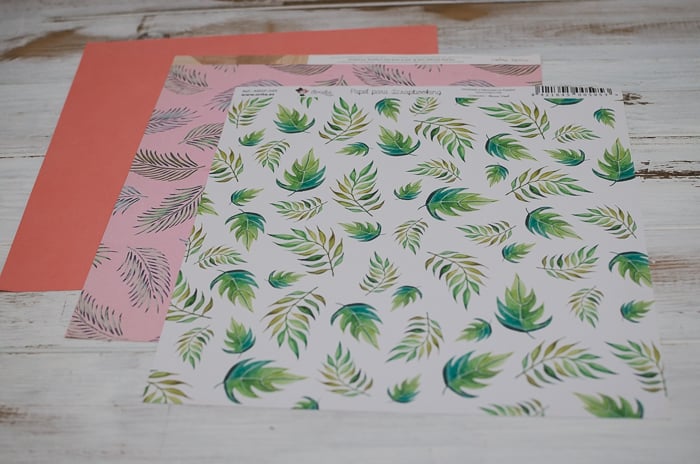
Colorful papers are widely use in scrapbooking creations
Scrapbooking materials usually come prepared and cut in the right size.
If you don’t want to spend too much money on supplies, you can also recycle things you already have at home. Use wrapping paper or recycled newsletters for example. Or you can decorate the journal with beautiful letters instead of buying stickers.
You can also use old stamps you already have at home. Use your imagination and experiment with all types of materials you find around!
Things to Consider when Building Your Journal
Once you have the album, the supplies (both new and recycled) and you have printed your photos, it is time to put them all together.
Before gluing things on the blank pages, think a bit about the layout. Consider which photos are you going where and the decorations that would go along with them.
Keep to one style along the journal to make it uniform. Changing styles from page to page will not give a sense of continuity. It’ll be as if the events you are describing are separate.
You could use this effect if you want to differentiate between days or emphasize specific anecdotes, but don’t overdo it.
Use Your Social Media as a Photo Journal
If you would like to share your journals, a really easy way to do so is to use your social media accounts for journaling. This option has other advantages too. Social media is free and if you are already using it, you won’t need to learn how to use a new digital platform or system. It is also a great way of having a backup of your work.
The disadvantage is that it is easy to get distracted on some of the social media platforms. You might start sharing other things besides the photos for your journal. To avoid this, consider creating a separate account for journaling.
A great social media platform for photo journaling is Instagram. It gives a lot of importance to the photos. But you can use whichever suits you best.
One thing keeps in mind is that social media platforms are not under your control. Although they seem stable at the moment, they might disappear in the future. If this happens, your journal will disappear too.
For that reason, you should make security copies of all your photos and texts. Make sure to update these copies from time to time.
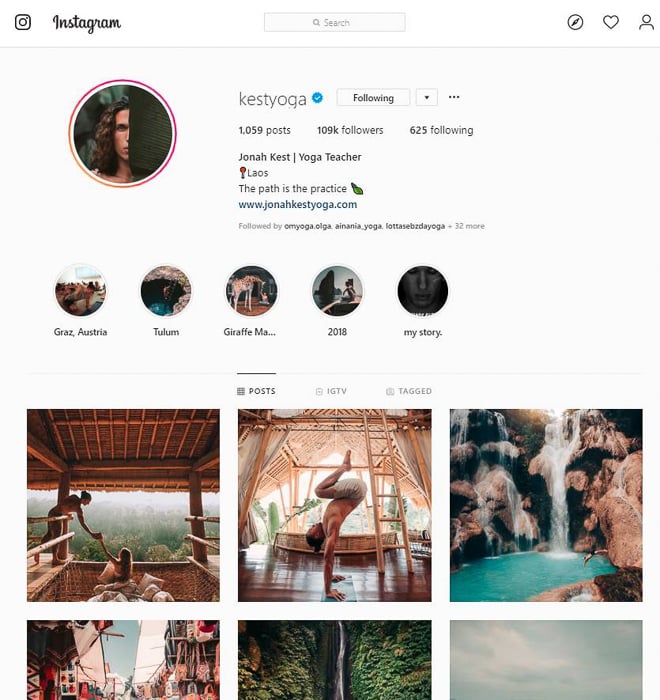
Jonah Kest (@kestyoga) is aYoga Teacher that uses Instagram as a journal. He talks about his travels and his yoga practice.
Use a Photo Journal Box
If you are looking for an easy system for photo journaling, you can try a photo box. You barely need any materials or extra time to create one. In fact, all you need is a box and a pen!
The first thing you need to do is decide what size your photos are going to be and get a box accordingly. I like the photos to be arranged standing up in the box, like in old phone number organizers.
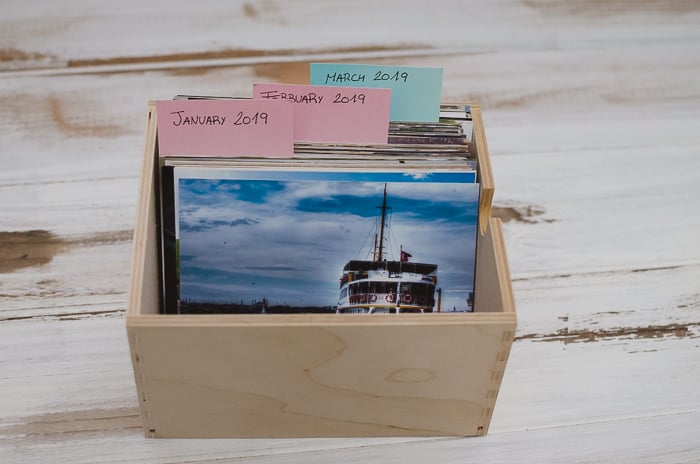
Once you have your box, print the photos and write your thoughts on the back, make sure to include date and place. The last step is to put the photos in the box by order. You can keep them organized by date, subject or any other system that you like.
It will be easy and enjoyable to raffle through your journal. You can even make some dividers by simply cutting pieces of cardboard and labeling them.
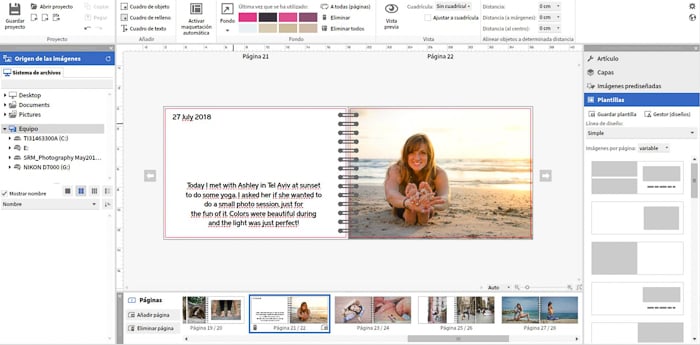
Print Your Digital Photo Journal
If you are not much of a craftsperson, you have no time or you prefer working with your photos in a digital format, create your photo journal on the computer. Then you can send it to print at a photo lab.
First of all, you need to choose the lab you want to work with. I usually work with Saal Digital, but you can choose your favorite one. Do a bit of reading about the lab you are interested in, especially customer reviews before deciding.
The idea here is designing the journal using the tools for creating Digital albums. Usually, photo labs provide an easy to use software to build them. Saal, for example, has its own software. You can either use templates or build your own layouts.
Software is great for photo journaling because you can add both photos and as much text as you want. They also allow you to start a picture journal project and save it in a file.
You can come back to your journal file at any time you want to add more photos.
The software for building your photo journal is different in each lab, but they are usually easy to use.
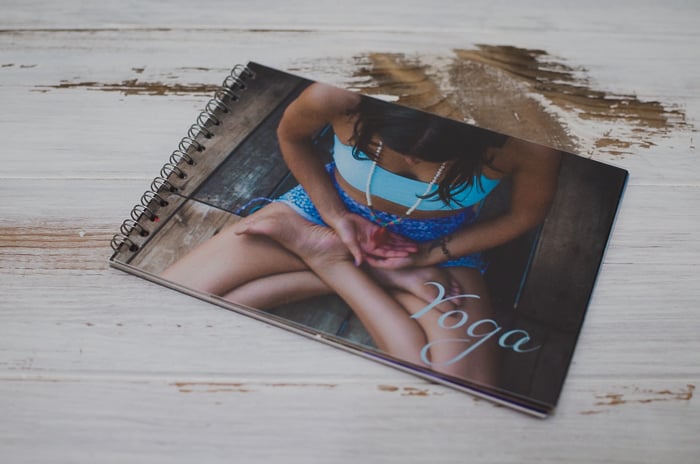
Then you just need to send it to print! Depending on how much you want to spend on your printed photo journal, you can either order it as an album or photo book. You should also check if there are more affordable options.
With Saal Digital, for example, they have photo booklets that have high-quality prints but are also affordable.
Conclusion
Whether it’s for a daily diary, a travel journal or a special project, keeping a photo journal is a great way of recording your life events and experiences.
Choose a style and format that suits you. Make sure to be constant both with your entries and your style to give it a uniform look.
And most importantly, have fun and enjoy both the process and the result of your creation.