As a professional photographer, delivering your images in a timely manner that matches the quality of your photos is essential. That’s where Pixieset comes in. The platform allows you to easily share large files with your clients for a monthly fee. This means your clients will be happy, satisfied, and likely to work with you again!
It’s definitely one of the top options for file sharing. But let’s take a closer look at Pixieset and all that it has to offer! By the end of this review, you’ll be as excited as we are about Pixieset!
Simply put, Pixieset is an online platform for delivering photos to clients. Your photography website is the place for showing your past work to potential clients, but what’s the best way to share photos with clients? In Pixieset, you can set up galleries for each shoot, and customize them to fit that client’s needs.
Pixieset allows you to use these galleries for delivering proofs or final images for download or purchase. To make all this even easier, Pixieset has a plug-in that works with Lightroom so that you can directly load photos from Lightroom to a gallery on Pixieset!
First things first, you need to open an account. You can do this easily by clicking ‘Login’ on their website. Once you create a Pixieset login, free accounts are available, but do have limitations. With a free account, you have limited storage and aren’t able to customize the url or gallery branding.
Once you upgrade to a paid plan, your storage increases and your ability to customize also increases. Plans can be upgraded at any point, so the great thing is that you can try it out for free and then upgrade as your needs grow.
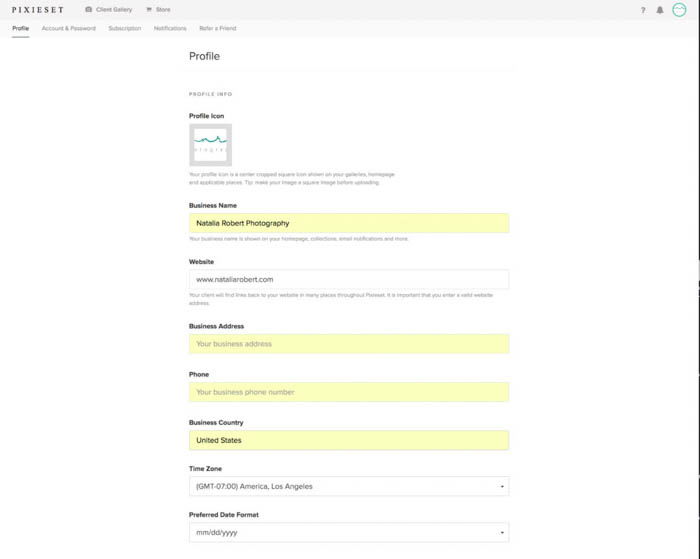
Once you create an account, you’ll want to begin by filling in the profile information and the general settings for galleries. The gallery settings is where you customize what the client sees, but the profile information will provide links back to your website and social media.
If you offer prints to your clients, you’ll also want to take some time to set up the store. This is where you set pricing, size and format options, tax collection, and delivery options for your prints. Pixieset does a great job of walking you through each step of the process since this section can be overwhelming to many.
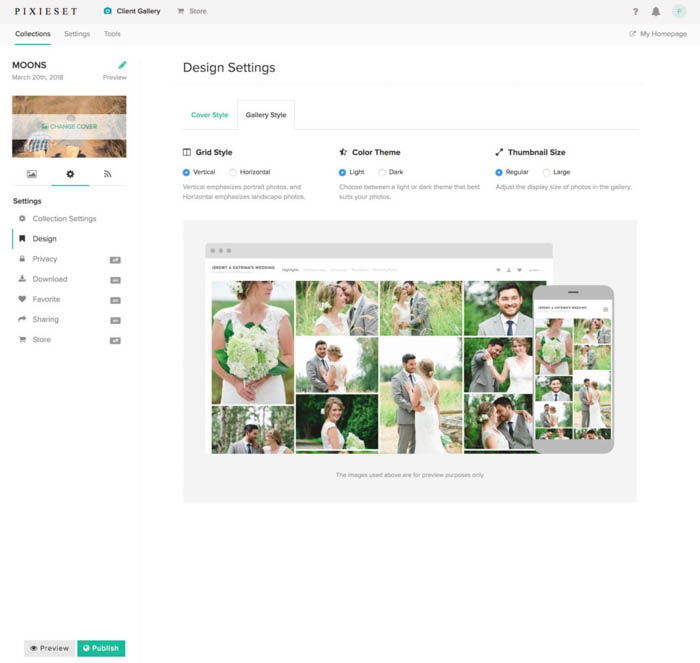
Each client gallery is called a collection. Within each collection, you can set up multiple sets. These are essentially albums within a collection.
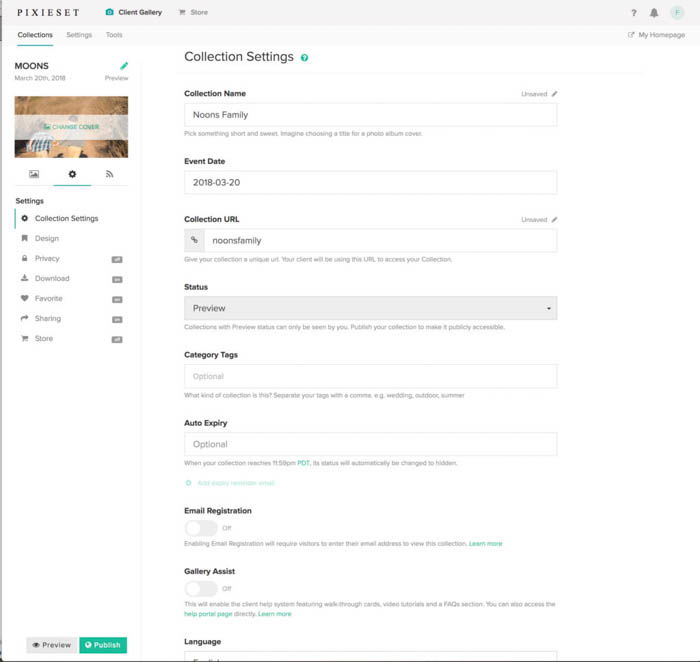
Pixieset provides a very clean, crisp, and professional look to their collections. It allows you to set an expiration date for that collection so that you don’t have to remember to take photos down and it automatically frees up space on your account.

Client view of a collection.
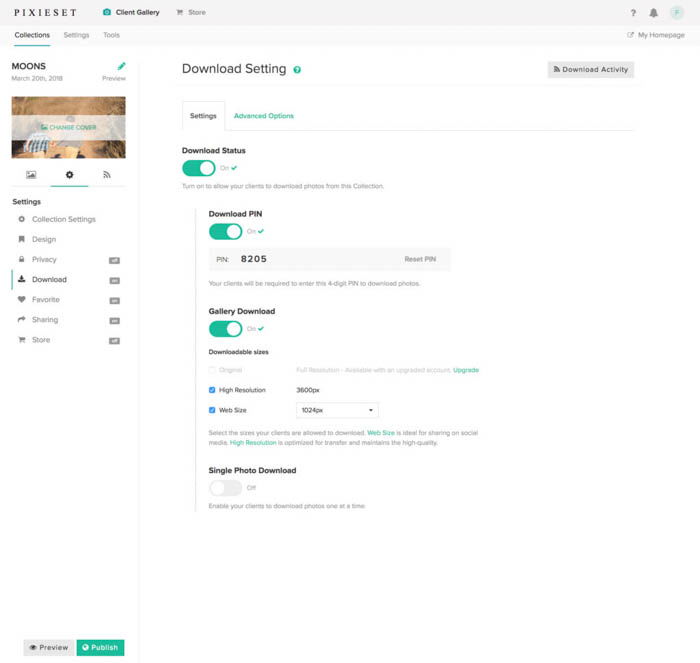
The store is where all the commerce settings are set. This is where orders for prints and downloads are placed, tracked, and customized. The user interface for this section is fantastic, in my opinion. It makes a complicated matter much less overwhelming.
Once in the store, you have sections for orders, products, taxes, shipping, coupons, and settings. On the far left, though, is a ‘Get Started’ section that walks you through the setup very easily.
The products section is most likely the first one you’ll want to customize because this is where you create the options for prints and products that your clients can purchase. There are default items listed, but these are really meant as starting points for creating your own items.
Within each item, you specify size and material for each item, as well as how that order is fulfilled. For fulfilment, there are four print labs that work with Pixieset already. You also have the option to do self-fulfilment for full control.
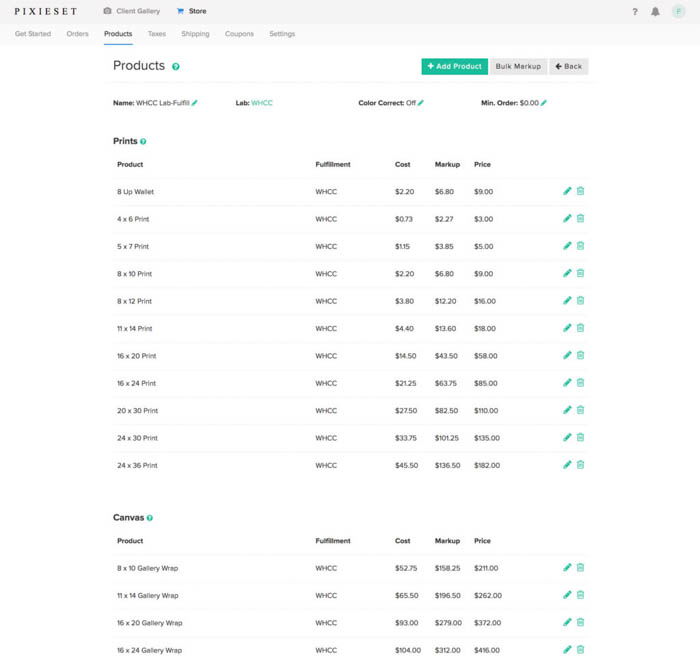
You can set the taxes section on auto-pilot. This allows Pixieset to calculate local taxes for you. Or you can set your own rates. Having the option to automate this is fantastic because tax rates can vary greatly from town to town!
The shipping section has shipping methods and costs that you can set for self-fulfilment and for lab fulfilment. Again, there are default rates listed for major shipping methods, but these should be treated as starting points.
The coupons section is where you can set up discount codes and gift cards. This is especially helpful for those busy holiday seasons that tend to be full of discounts and promotions!
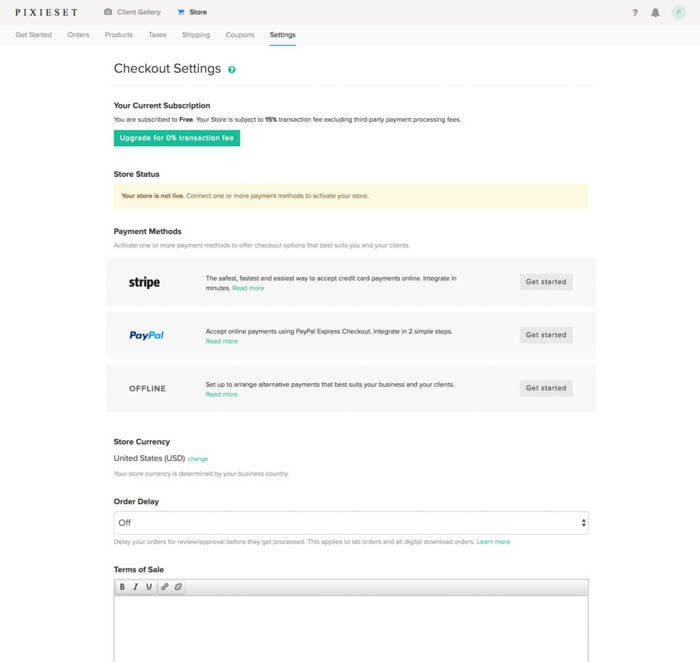
The general settings section for the store goes over items like transaction fee, store status, currency type, methods of payment accepted, and terms of sale. One great feature that Pixieset offers is the option to take offline payments for orders.
This allows you to arrange cash or check payments with local clients, and is especially ideal for folks living in countries where online payment methods are not yet available.
Pixieset is a wonderful tool to add to your business if you don’t yet have a platform for delivering galleries and offer prints to clients. While it doesn’t cover your entire workflow, it does a wonderful job of offering beautiful and easy-to-navigate pages for both you and your clients.
The free account option lets you try it out as you begin working with clients, and then the tiered paid plans let Pixieset grow with your business.
The one negative to Pixieset is that it doesn’t offer anything beyond handling photo collections. This means that contracts, contact management, session invoicing, and email templates would need to be handled separately.
Other sites like Shootproof offer a fuller workflow management platform. You can also use Pixieset in conjunction with a project management system such as 17Hats.
Personally, I feel that a platform like Shootproof is ideal when you’re still small, but using Pixieset and something like 17Hats together is ideal when you have more volume of clients to manage. For an in-depth comparison of the two, check our post on Shootproof vs Pixieset! Overall, Pixieset is an amazing option for professional photographers! It’s easy to use, beautifully-designed, and very easy to customize for individual clients and your branding.