How to Create a Cool Matte Photo Effect in Lightroom
Matte photo editing is a great way to give your photos a unique and stylish look. Here are four easy steps to create a matte photo effect in Lightroom.
What Is Matte Photo Editing?
A matte effect in images used to occur in the old film days. If an old film image became underexposed, it would have a faded or as I like to say ‘grungy‘ effect. You can create this matte effect by rendering the blacks in an image grey instead of pure black.
Most of us don’t shoot in film anymore, but sometimes having that film emulation is a great way to experiment. You can get the look of film without having to invest in a film camera, or pay for processing and scanning.
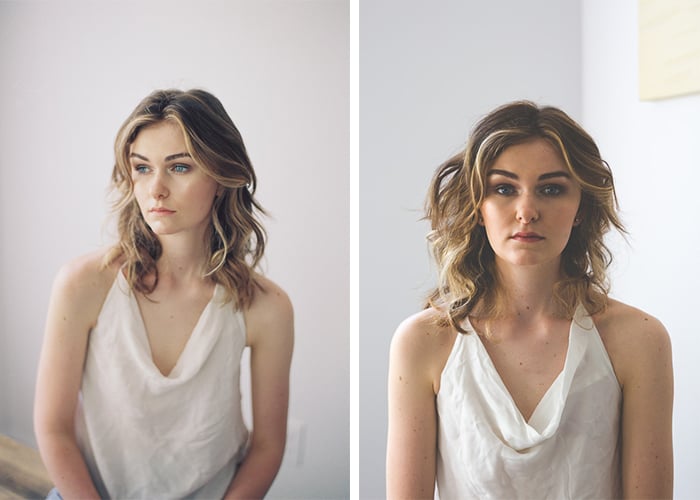
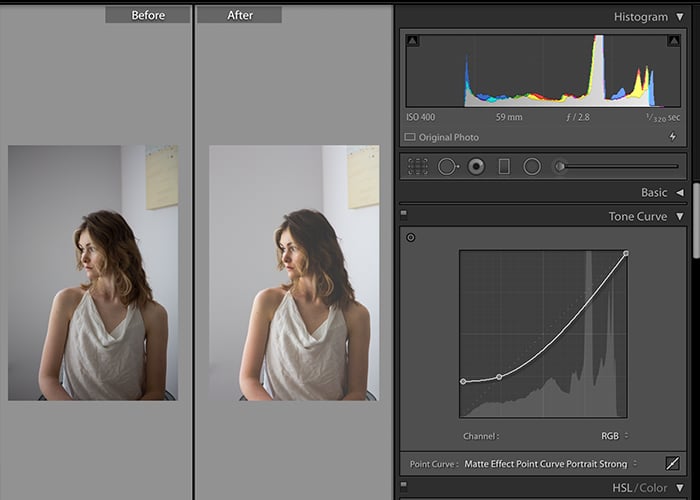
The image on the left is from a film camera. The image on the right is from the Lightroom matte effect. The image on the right has a pronounced matte effect for this tutorial.
Using Tone Curve to Create a Matte Effect in Lightroom
You can achieve the matte effect in Lightroom by using the Tone Curve in the Develop module. This powerful tool can impact the brightness and contrast of an image.
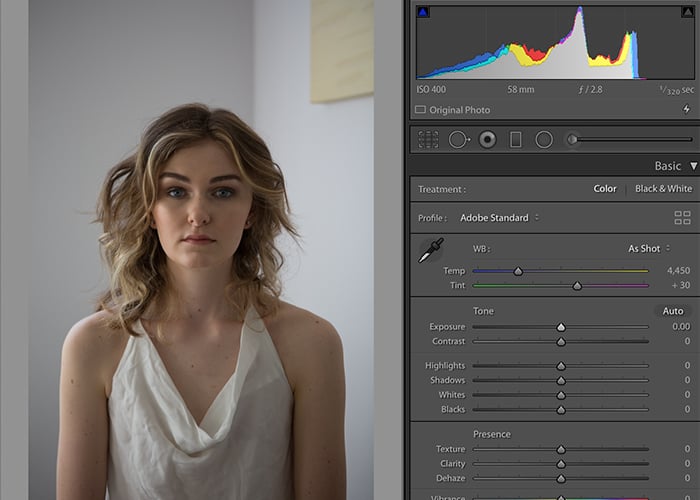
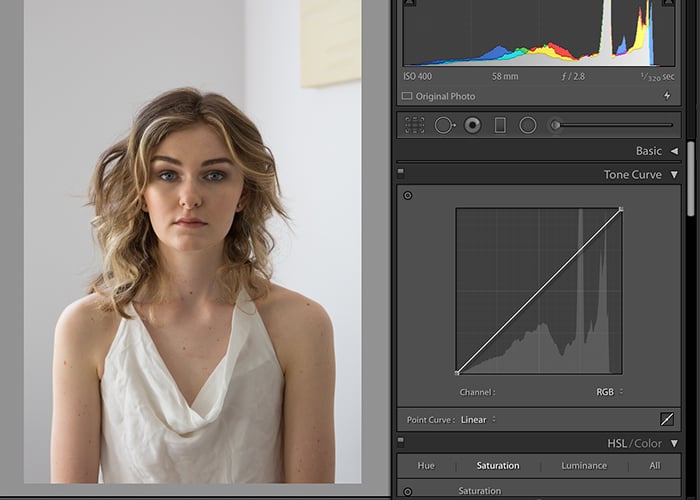
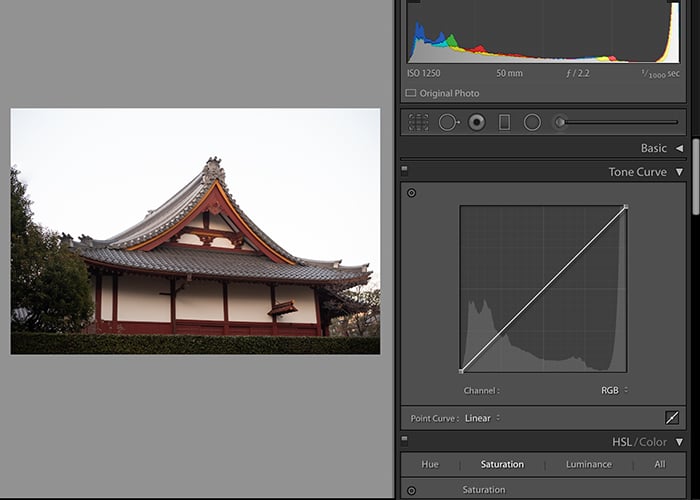
The original image we are going to edit for a matte effect.
Before you start adjusting the Tone Curve, I recommend that you do some basic editing. I like to adjust the brightness, contrast, and temperature/white balance for my images. This way, I have a clean image to work with, and the matte effect can be the final step in the editing process.
This process also helps if you are an advanced Lightroom user and have presets applied upon import.
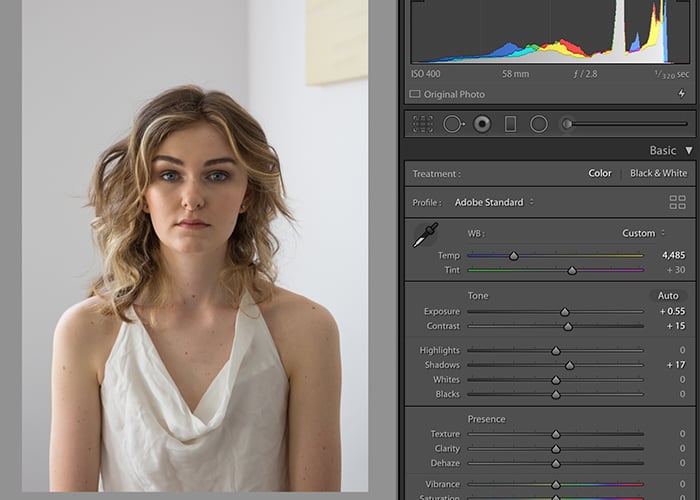
Basic edits performed on the image.
Simple Steps to Create the Matte Effect
-
Select the Tone Curve tool in the Develop module of your Lightroom catalog. The Tone Curve sits below the Basic panel. To avoid confusion, close the Basic panel. You can close this panel by clicking on the arrow button right next to the word ‘Basic’.
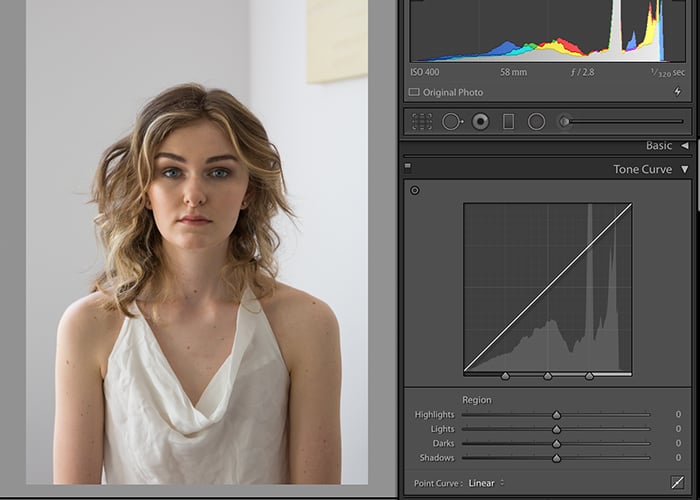
- Click on the bottom right-hand side of the Tone Curve and change the curve from a linear to a point. The Highlights, Lights, Dark, and Shadows sliders under the word ‘Region’ will disappear. This gives you a cleaner less-confusing tone curve to work with.
- Imagine the Tone Curve as having four quadrants with the middle of the curve as the center. Once you convert it to a Point Curve, you need to mark your first control point.
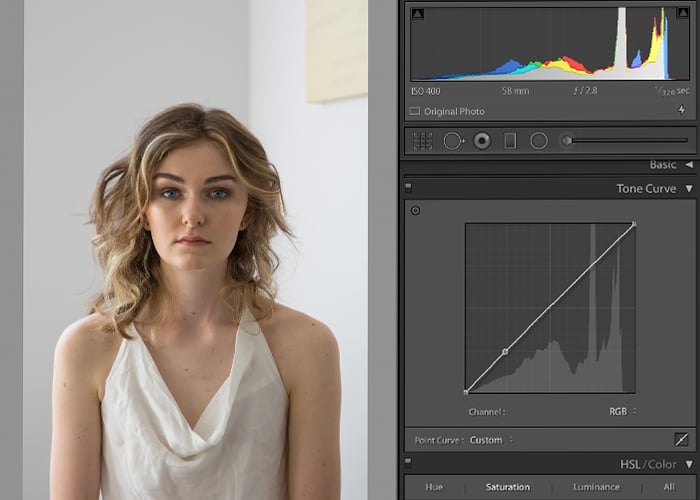
- Place a point on the curve close to the bottom left quadrant. It can be anywhere in that area. This quadrant controls the black tones in the image – muting them and adding haze as you pull the curve up.
- Select the point that is at the intersection of the X-axis and the Y-axis and pull the curve up. You will notice the blacks becoming grey and the image taking on a matte effect.

- If you lift this point on the curve above the diagonal dotted line of the actual curve, it will create a hazed effect. The actual curve is the dot you placed in the bottom quadrant in the earlier step. Lifting this point higher will lighten the matte effect, as you can see in the image below.
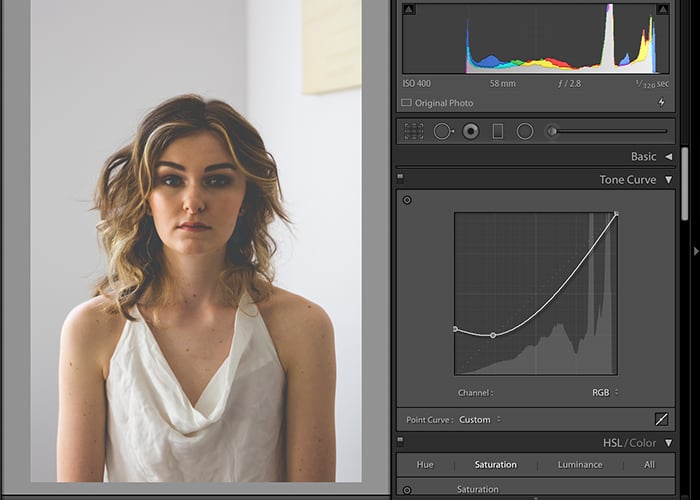
- Pull the point under the diagonal dotted line for a deeper matte photo.
- You can pull down the point on the top right-hand side of the image to bring down the whites and give those a matte look too. This dulls down the whitest areas.
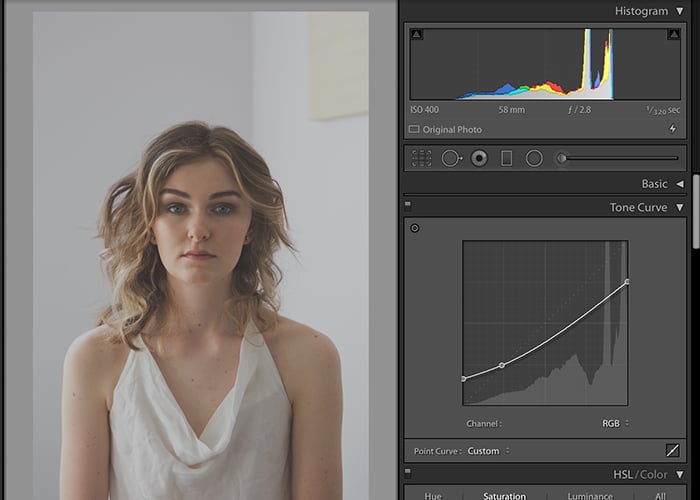
- Keep tweaking until you get a pleasing result. A little tweaking of the Tone Curve goes a long way. Find a happy medium and select a look that works well with the image. The matte look, as with any editing, is a matter of personal preference. There is always a market for any photography type, so find one that works with your style aesthetics.
- Some people prefer the blacks toned down, and the whites toned down as an S-curve. The Tone Curve in such cases resembles a side-ways S and hence the name ‘S-curve’ matte look.
Images That Work With a Matte Effect
The matte effect works well for black and white photos. It does not always work well for photos that have a lot of color and saturation. These images tend to look too washed out and faded to my liking. But again, this is personal preference.
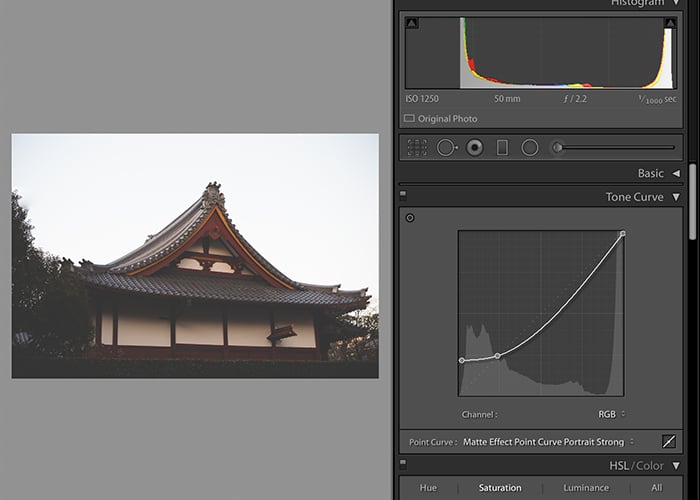
The matte effect also tends to work well with images photographed in full sun – a super bright image. You can tone down the whites or bright parts of the photo by using a matte effect.
If your image is already dark, a matte effect might make the image too moody. But this is my opinion. If that is your photography style, then rock that look.
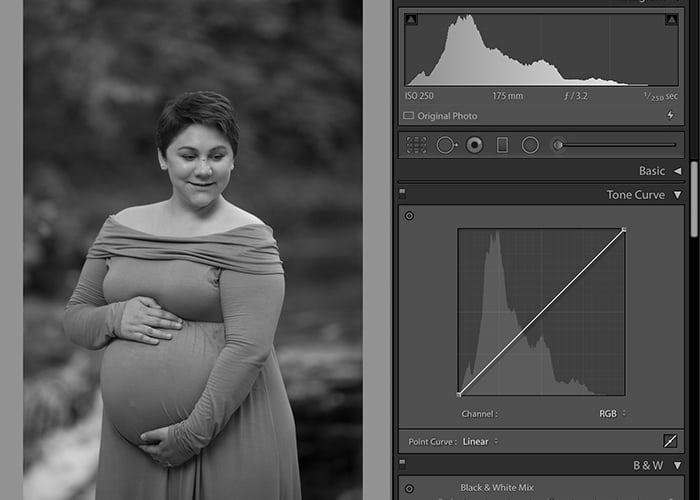
Black and white before the matte effect on the Tone Curve

Black and white image after the matte effect on the Tone Curve
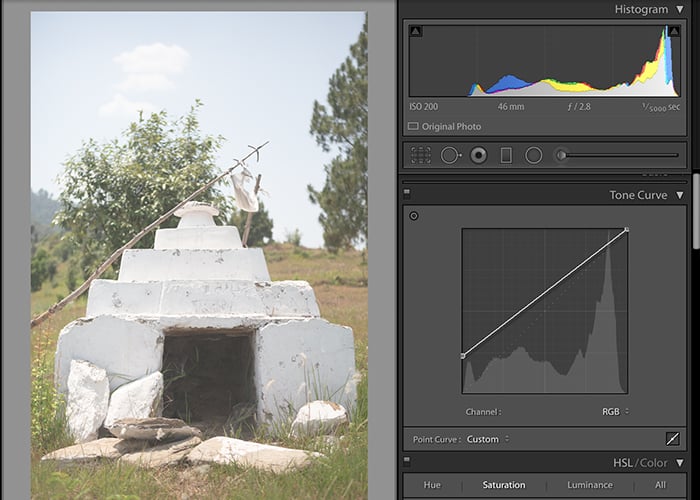
A colorful image without the Tone Curve matte effect.
After the matte effect on the Tone Curve. I don’t like how the colors are so toned down.
Creating a Preset for Faster Editing
A lot of us prefer to be out there taking photos over editing images all day. That is why batch editing and creating systems are a photographer’s best friend.
Once you find a matte effect that you like, you can create a preset to make matte editing easier. Doing a basic edit on your images before applying the matte preset comes in handy.
Select the ‘Save’ option from the Point Curve drop-down box in the Tone Curve
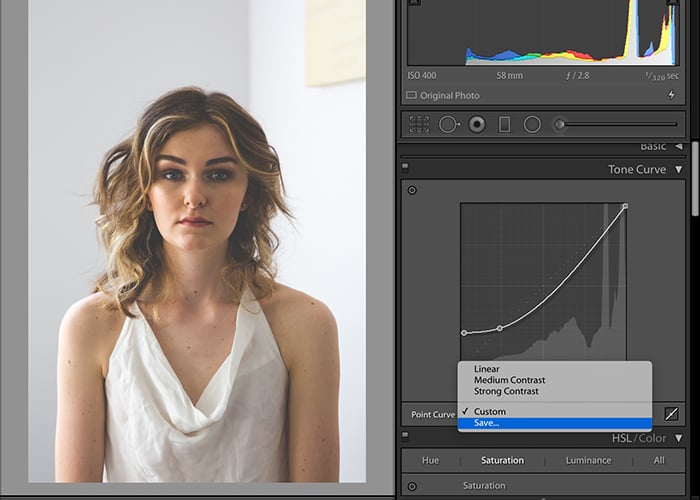
Name your Tone Curve presets to something intuitive. You can then access the presets within the Tone Curve section. You can even export your preset and share it with your friends.
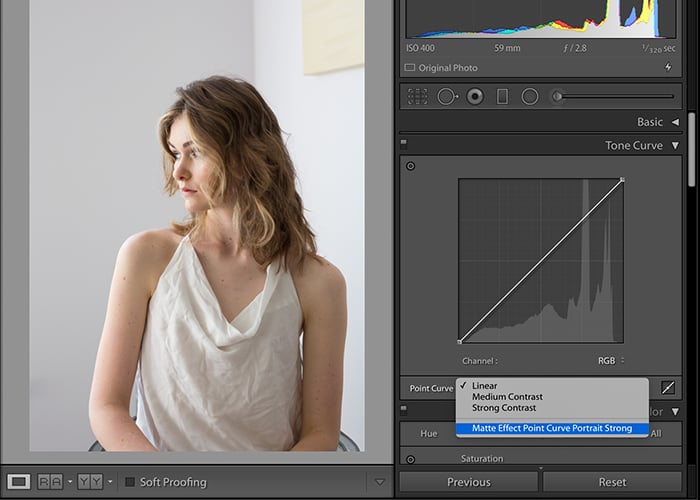
Applying the matte effect on the Tone Curve is as simple as selecting the curve from the Point Curve drop-down box. You can always edit it further by playing with the sliders.
To see the effect before and after, you can use the X|Y (before and after) option in Lightroom.
Things to Note When Dealing With Tone Curves
- If you don’t place an anchor point for the Tone Curve before moving it, the entire curve will shift. This can cause an undesired effect. As you can see in the image below, the whole curve moved upward, and the picture looks washed out.
- You can also create matte effects for individual channels of the RGB Tone Curve. When you drop down the Point Curve, you can select individual channels of red, green, and blue. The default is RGB (a combined channel of all three colors). You can select each color and add a matte effect for only that specific color in the image. This step might not be something you will use for editing all your photos, but it can be interesting to try.
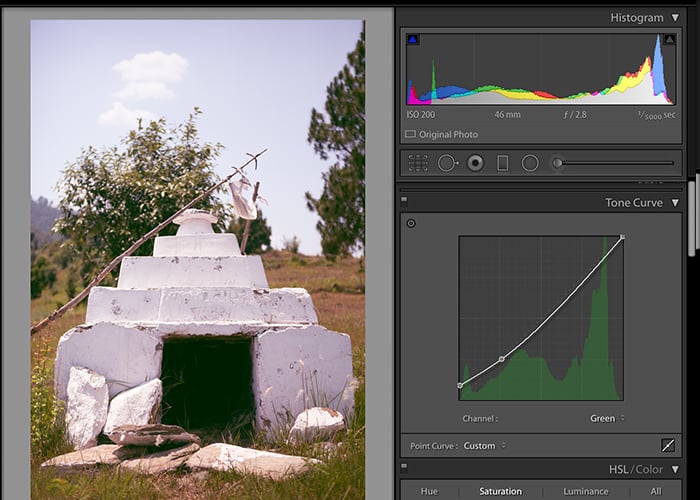
A matte effect for the Green tone curve only.
Conclusion
As you can see, adding the matte effect with the Tone Curve is an easy way to add a little character and fun to your images. You may not use this effect often, but I like to include some matte effect photos in my client gallery.
My photography style is light bright and airy, but a little deviation keeps me on my toes. It also helps me learn new editing tricks that I might use in the future.
Check out our post on creating a matte look in Photoshop or how to install Lightroom presets next!