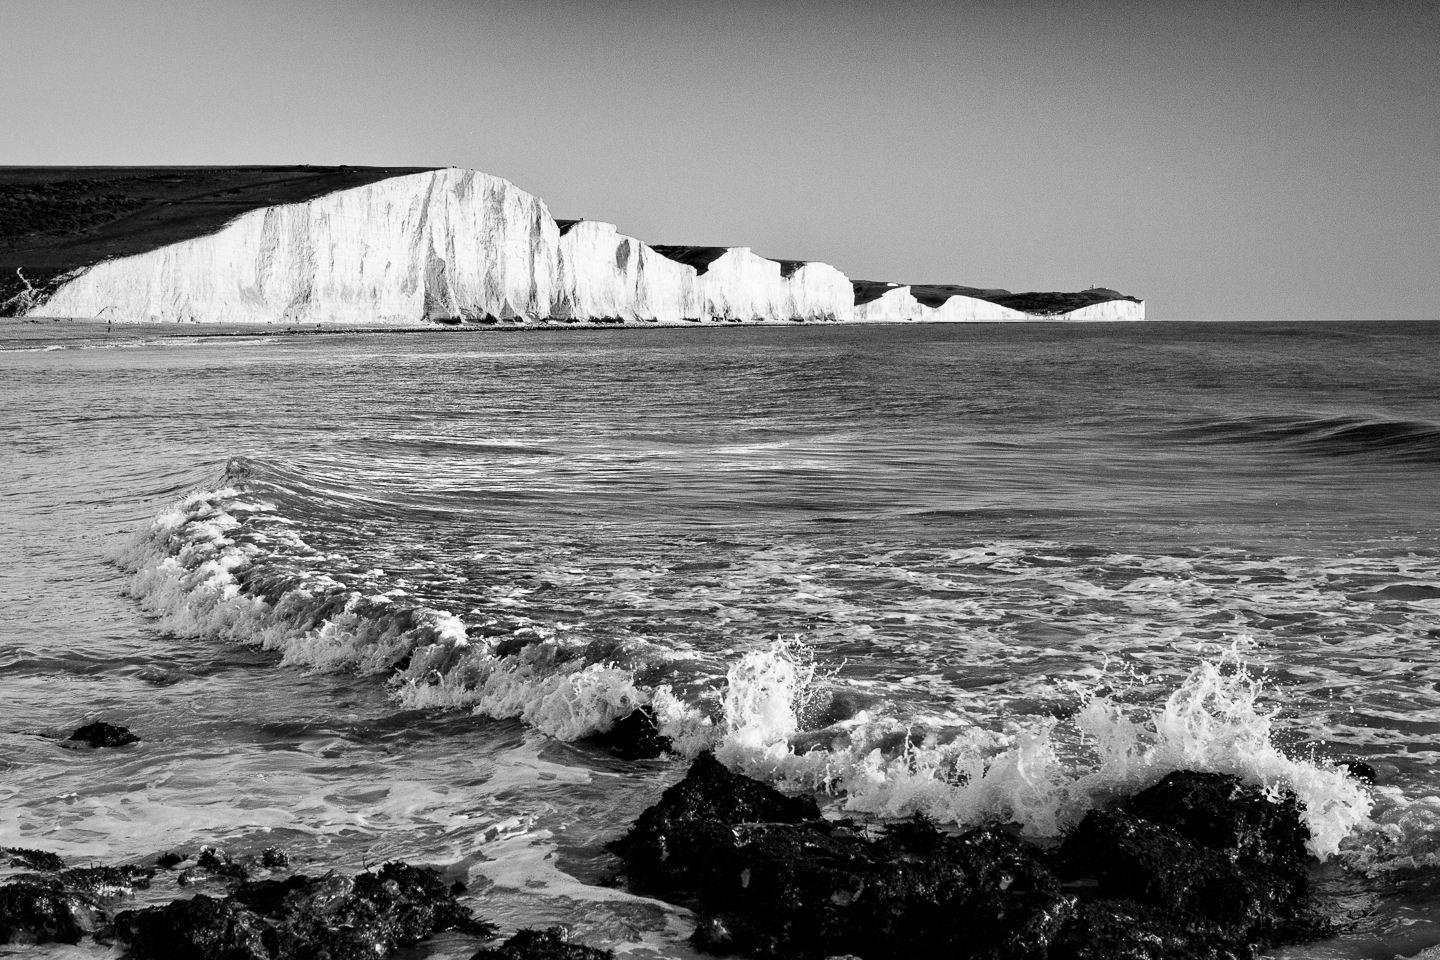
Lightroom is a great program for photographers of all skill levels. It offers a wide range of features and tools that can help you improve your photos. One such feature is the ability to create a film look in your images. This gives them a more classic, timeless feel that can be really appealing. In this article, we’ll show you how to create a film look in Lightroom using the built-in presets and some tips on how to customize them to get the best results for your photos.
Where Should I Begin With Film Look In Lightroom?
First, Create an Inspiration Board
Film photography comes in a variety of styles, which is why it’s important to figure out exactly what type of film look you’re after.
The best way to do this is to create an inspiration board.
Inspiration boards can be created automatically or manually. If you want to create a custom collage, you can do so in an editing program like Photoshop.
If you want something quick and easy, a website like Pinterest will do the trick.
Analyse Your Favourite Photos
In addition to collecting inspiration, you should analyse your favourite selections. Pay attention to the brightness and colors in the images.
Do the shadows have a specific tint? How muted are the highlights? This will help you pinpoint the film photography look you’re going for.
You don’t need to be extremely detailed when it comes to these answers. A few simple notes will be enough to help you recreate your favourite looks.
Here are a few examples of quick observations.
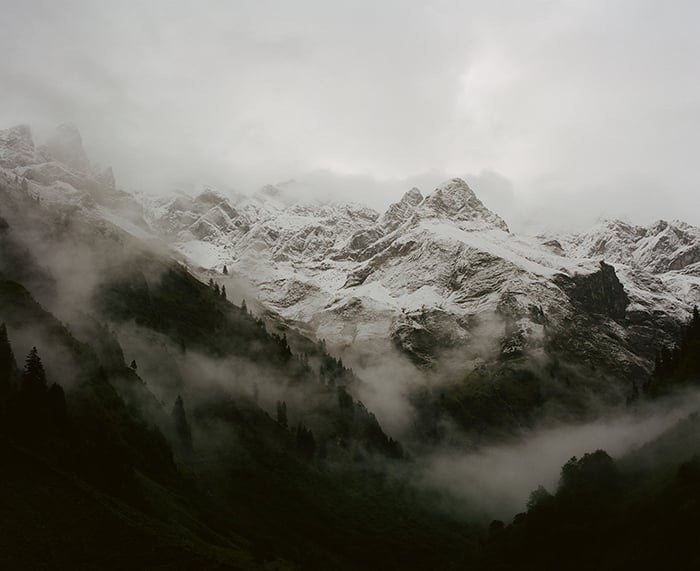
This analog photo has desaturated colors, muted highlights, and dark shadows that have a greenish tint.
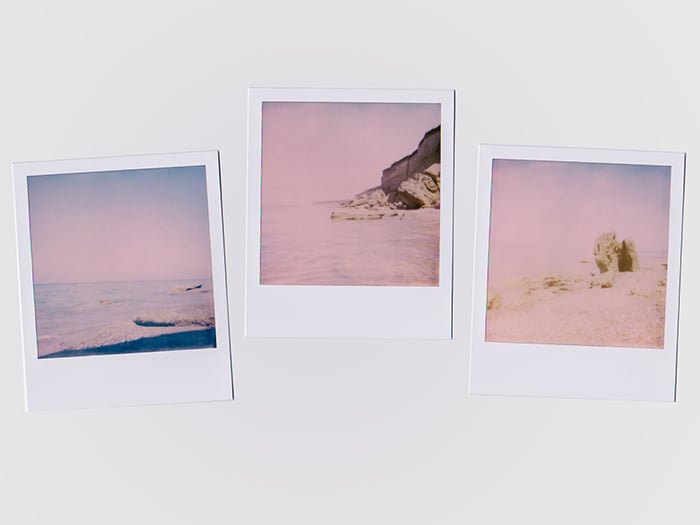
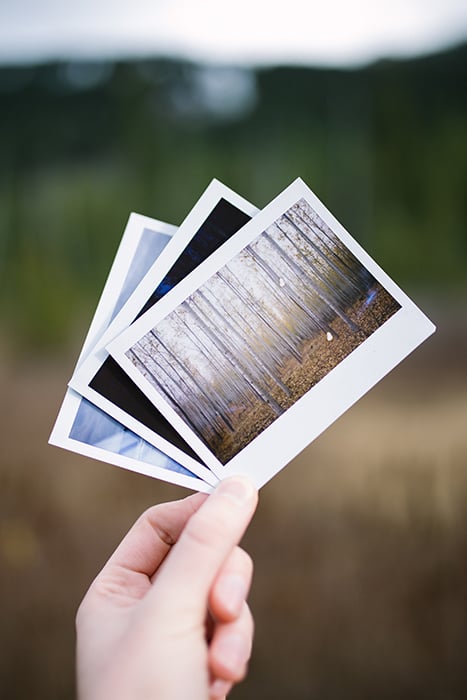
These Polaroids have a washed out effect, pink highlights, and blue shadows. They also have very little clarity and sharpness.
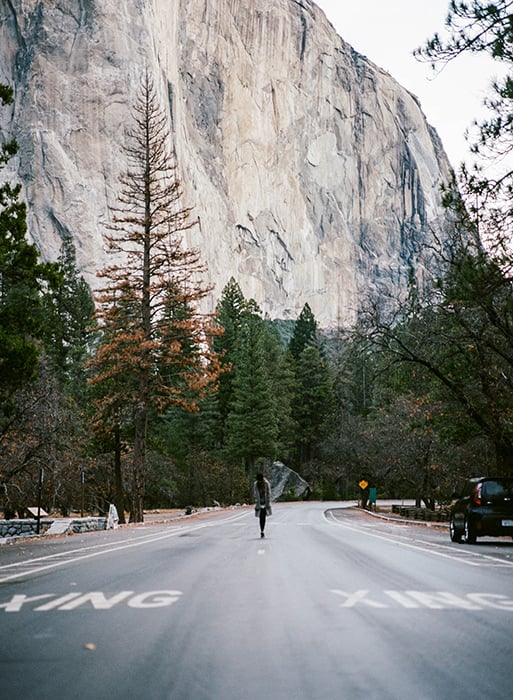
This landscape image has subtle yellow highlights and greenish/bluish shadows. It also has a moderate amount of film grain.
Connect With Film Photographers
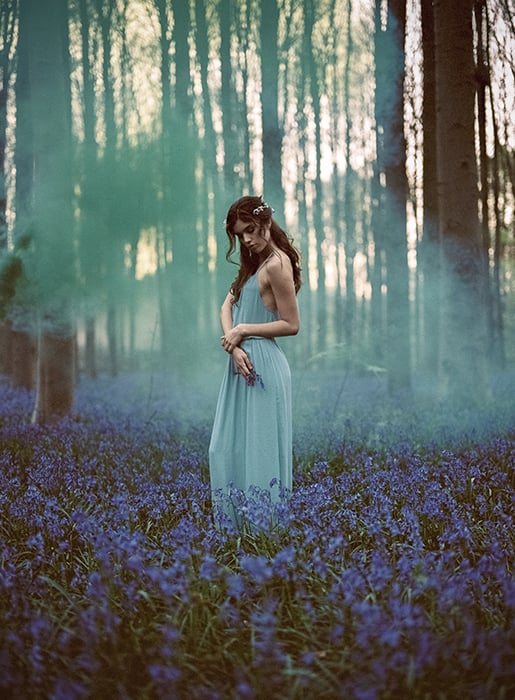
To get the proper film photography experience, connect with professionals. Find an online community that (re)creates film photography styles.
Some Lightroom preset companies have their own Facebook groups where members can ask questions, share their work, and receive constructive criticism.
All of this exposure can greatly enhance your film photography knowledge.
If you don’t know where to start, check out these talented film photographers:
Use These Lightroom Panels to Achieve the Film Effect
Basic
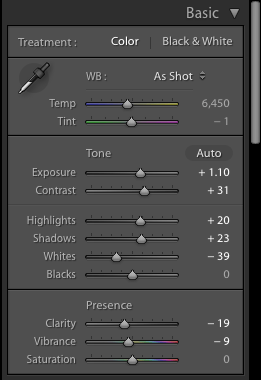
Many film photos, especially Polaroids, lack sharpness. You can recreate this by moving the Clarity slider to the left.
You can use the Basic panel to control the general highlights, shadows, and contrast in your image.
This can be the foundation of your work or the last step of your editing process. Either way, you won’t lose.
Tone Curve
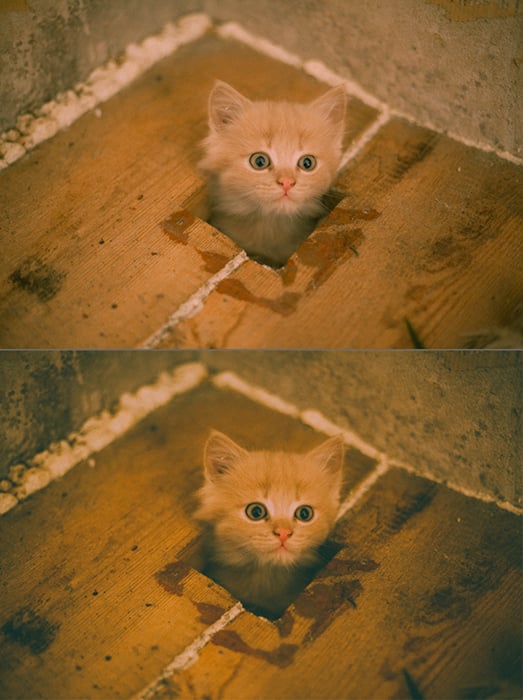
This look was created with just the Tone Curve. This panel usually plays the most important part in the film editing process.
The Tone Curve panel is an advanced version of the Basic panel. It will let you control the reds, greens, and blues in your image. You can use these sections to create very specific film looks.
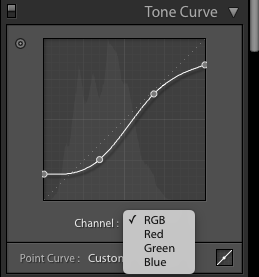
Make sure you experiment as much as you can and move the curve gently. The more crooked your curve is, the more dramatic your photo will look.
Color
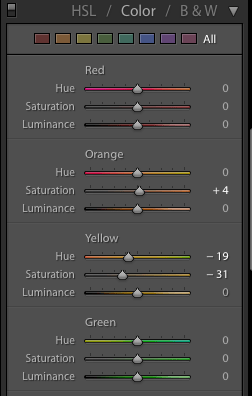
The HSL/Color/B&W panel will let you control the hue, saturation, and luminance of different colors.
You can use this to darken, lighten, alter, and desaturate very specific parts of your photo. Use this if you’re after particularly vibrant colors or more subdued tones.
Split Toning
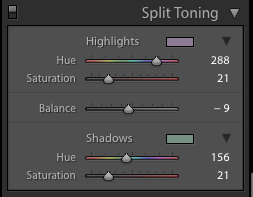
As its name suggests, Split Toning will split the tones in your images. You can use this to change the color of your shadows and highlights.
This is the perfect tool for creating nostalgic, vintage atmospheres that are present in old film photos.
Effects
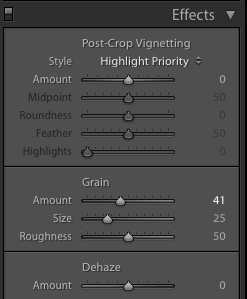
Most film photos come with a significant amount of grain effect. The Grain slider in the Effects panel will help you control your grain’s size, amount, and roughness.
The Results
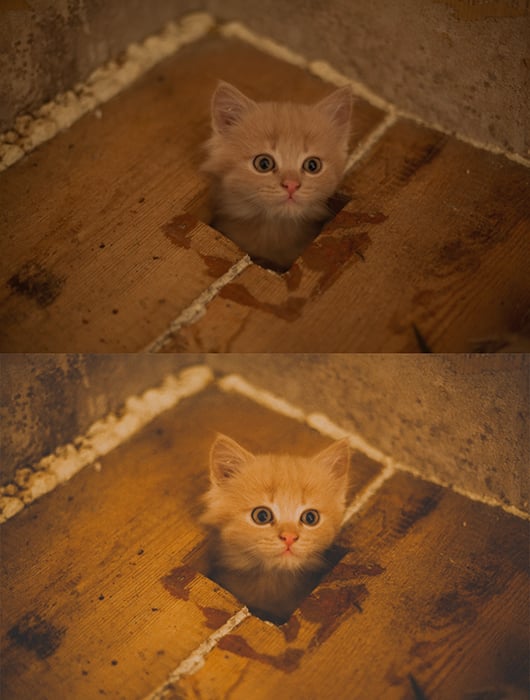
Using the settings in the screenshots, I created this subtle film photography look.
The best thing about Lightroom is that you don’t have to follow a specific set of instructions to recreate an analog style.
Don’t be afraid of playing around with any panels that I didn’t mention here, like Camera Calibration and Sharpening to fine-tune your image.
With time, you’ll learn what works best for you. The more you practice, the easier it will be to develop your skills.
How to Save Your Style as a Preset
Once you’re happy with your results, you can save them as a preset. Lightroom presets are ideal for editing multiple photos within seconds.
In addition to enhancing your photos, they’ll save you lots of time.
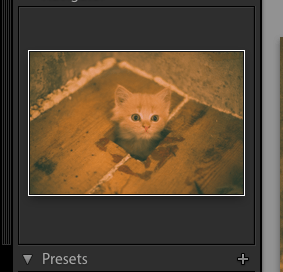
Click on the plus icon right next to the Presets tab.
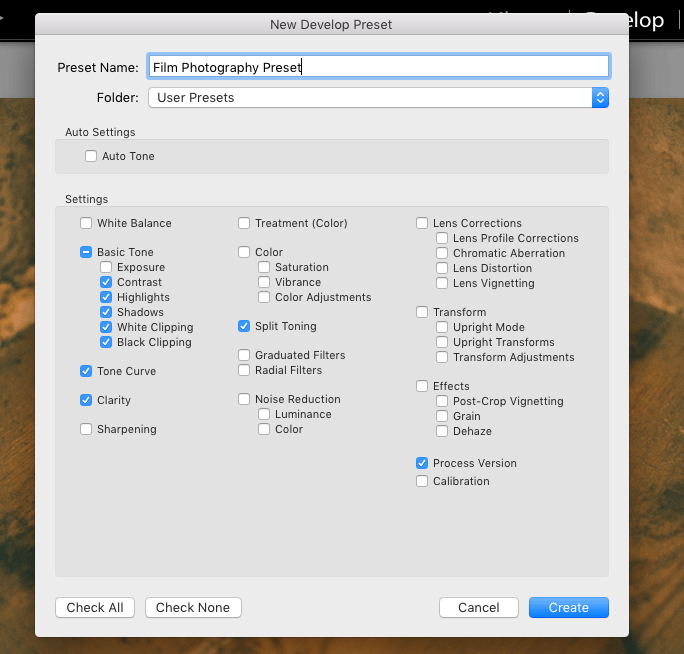
Give your preset a name and select the tools you want to save. I don’t recommend selecting exposure because it will dramatically alter every image.
I also don’t recommend selecting grain unless you want every photo to have a very specific amount. Everything else you select depends on what you changed in your image.
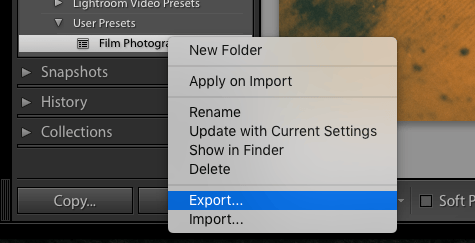
Once you create your preset, it will appear in the folder you chose. Now you can apply it to any image you want. If you want to share your preset with someone else, right-click and select Export.

You can also find all of your presets in Lightroom > Preferences > Presets > Show Lightroom Presets Folder.
How to Create a Light Leak in Lightroom
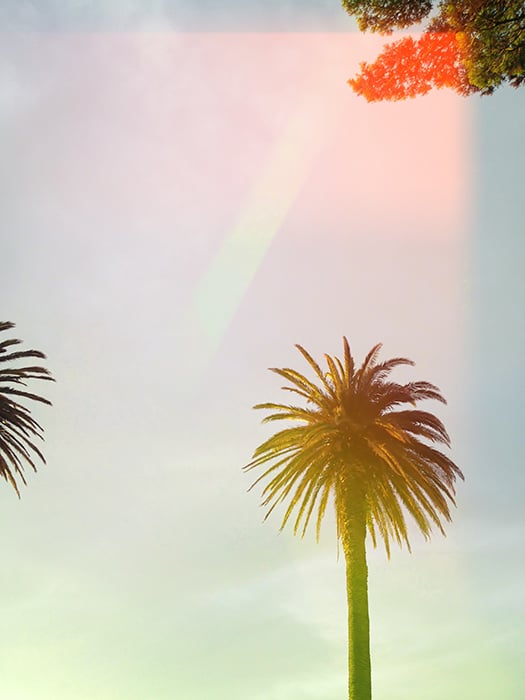
Including light leaks in your photos will give them a strong film photography look. You can easily recreate them in Lightroom using Graduated Filter.
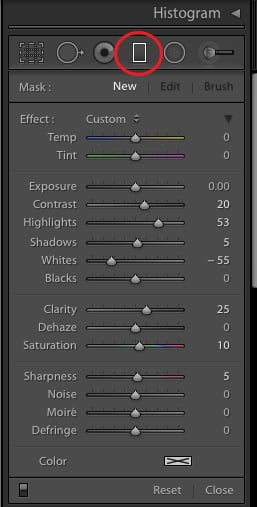
The Graduated Filter is located right under the Histogram panel. Clicking on it will open a new window with sliders similar to the one in the Basic panel.
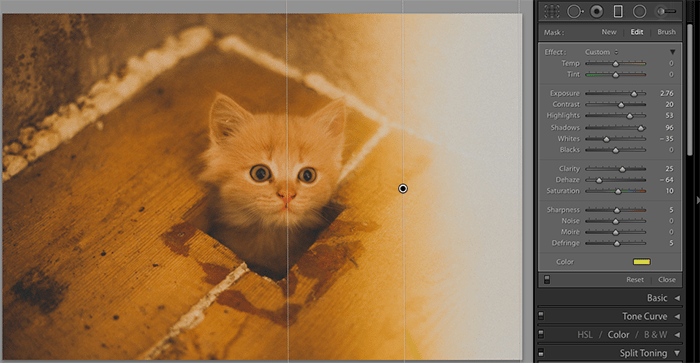
Drag your mouse horizontally. Your starting point will be the source of the light leak, and your end point will be the point where it fades away. You can control the intensity of these points by dragging them away from each other.
You won’t see any effects until you experiment with the sliders.
The tools that will help you create a realistic light leak are Exposure, Dehaze, and Color. Exposure will brighten your image, Dehaze will get rid of any background distractions, and Color will give your light leak a subtle hint of color.
Once you’re happy with your final image, click on Done at the bottom of your photo.
If you want to go back and delete a light leak, click on the Graduated Filter icon, select the dot that represents your light leak, and click on Reset.
Conclusion

Adding an analog film look to your digital photography will not only help you perfect your images, but improve your knowledge of Lightroom.
With the right tools and knowledge, you’ll be able to make almost any digital image look film-like. You’ll have enough skills to transform simple photos into vintage, nostalgic, or soft artistic pieces.
These skills will give you more room to express yourself and explore all kinds of ideas.
If you’re looking for more free Lightroom preset packs, check out these 21 Best Resources for Free Lightroom Presets.

