If you’re looking to add some creative flair to your photos, you may be wondering how to create light leaks in Lightroom. It’s a fun and easy process that can add an interesting element to your images. In this tutorial, we’ll show you how to create Lightroom light leaks.
What Are Lightroom Light Leaks?
Light leaks occur when unwanted light affects the camera sensor or film. They are more common with film photography.
If your camera becomes damaged somehow, you may experience light leaks. When there's a hole or gap in the camera body or between the lens and camera, light leaks can occur.
With film, light leaks happen when a film is loaded into the camera and not advanced sufficiently. Putting a new film in a camera, it’s good practice to waste a few frames. Advance the film past the part that was exposed to light when you were loading it.
Roll film is probably the most susceptible to light leaks. 35mm film comes in sealed canisters so there's little chance of light entering the casing.
With roll film, you must take more care when loading and unloading the film from the camera to avoid light leaks. This type of film has a paper backing that must be rolled tight with the film to keep the light out.
If the film and paper are not rolled tight enough, light can leak in and damage the film.
Here is an example from a roll film that I damaged because I was not careful enough loading and/or unloading it. This was the first roll of film I ever exposed.
Creating a light leak is different than creating a lens flare in Lightroom. Lens flare happens for different reasons. You can read more about this here.
Keeping Your Light Leaks Looking Real
Light leaks very rarely happen with modern digital cameras. They are well constructed and, unless the camera has been damaged, will not leak light.
Damaged canisters or poor film handling are the most common causes of light leaks.
To simulate a realistic light leak look, you need to have some understanding of the circumstances that bring them about.
Not advancing a film far enough when loading it into the camera results in a light leak along the right edge of the frame. This is because in most film cameras the film advances from left to right.
Light leaks can occur with roll film, or 35mm film from a damaged canister, along the top and bottom edges of the films. You can see this in my example above.
With sheet film, light leaks can happen when loading the film in a situation that's not completely light sterile. These can appear as completely random blemishes on film.
Making Cool Light Leaks in Lightroom
Using the grad filter in Lightroom is the most effective way to create light leaks. With this filter, you have a lot of control and can manipulate the look to get the style you want to achieve.
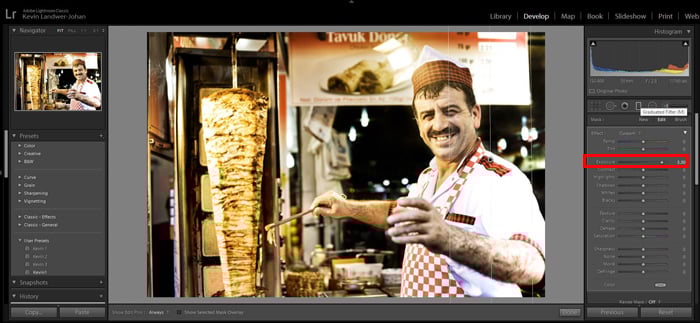
Step 1: Create a Graduated Filter
Choose the edge of your photo where you want the light leak to appear.
In Lightroom, drag the graduated filter from that edge as far into your photo as you like. You can always adjust this later.
Step 2: Adjust the Exposure
Next, you can begin to adjust the various sliders that control the look of the filter. I typically start by dragging the exposure slider to the right.
This increases the exposure in the area affected by the filter along the edge of your frame.
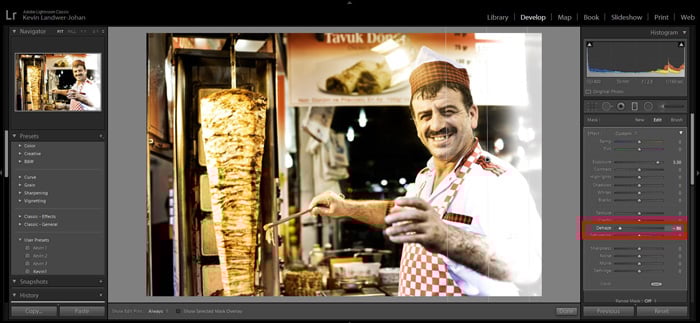
Step 3: Dehaze Slider Adjustment
The Dehaze slider makes a significant change to the look of your light leak filter when you drag it to the left.
As you make this adjustment you will begin to notice the effect more.
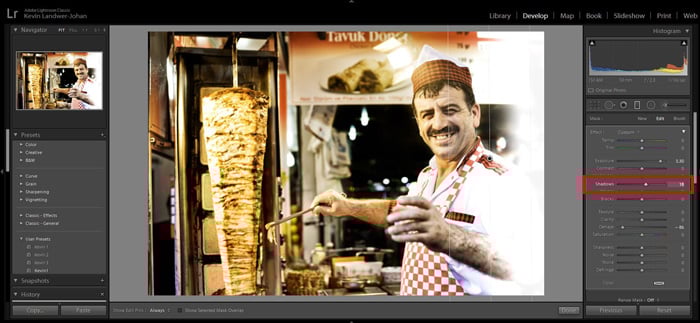
Step 4: The Shadows Slider
Reducing the level of the shadows in the area covered by the filter will further heighten the effect.
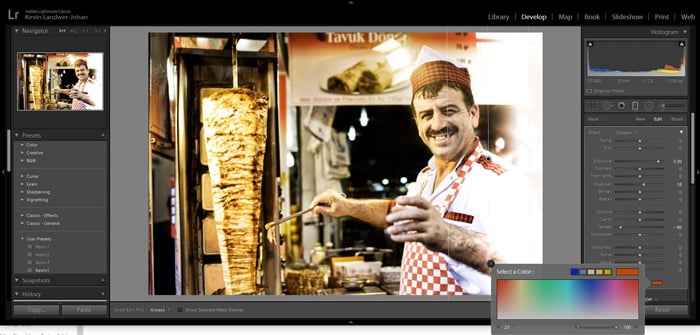
Step 5: Introduce Some Color
Often light leaks on film appear a reddish-orange color. To add color to your grad filter click on the Color box at the base of the filter adjustments panel.
Place the eyedropper over the color you wish to use and click on it.
Now your filter should be giving a realistic impression of a light leak.
Step 6: Add Another Grad Filter (optional)
To enhance the look even further you can add another filter over the top of your first one.
This is helpful if you want to introduce more color to the light leak.
Another Style of Light Leak
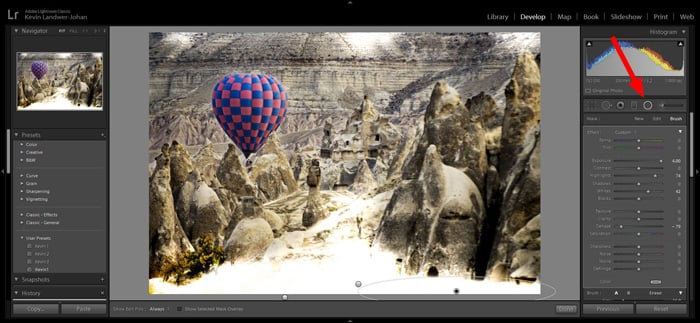
To create the style of light leak that can occur with roll film, you can use a similar method. But instead of using the Lightroom Graduated Filter you can use a series of Radial Filters.
This type of light leak happens with roll film and appears along the top and bottom edge of the film. This is where you will want to place your filter effect if you want it to look as authentic as possible.
Using the Radial Filter tool click and drag along the edge of your photo. It's completely up to you how big you make the size of the filter. You can always make further adjustments to the size later.
At the bottom of the panel, you will need to click on the Invert box. The adjustments you make will happen inside the area.
Follow the steps I've outlined above to get the look you want for the radial filter.
Add more filters by clicking New at the top of the panel. You can also click on the Brush and use this to further change the shape of your filter mask.
Conclusion
As with all things Lightroom, there are many ways to achieve a similar-looking result. The key is to experiment with the basics. Make adjustments to each slider in a different sequence. You will see the results appear differently.
Try creating light leaks and various types of photos. Like any image manipulation, the more careful you are the better the results will be. Some photos will look better than others with a light leak filter apply. It is up to personal taste as to what you think looks good.
Light leaks being based on an actual technical problem will look more realistic the closer you can mimic the real issue.
For more great Lightroom tips, learn about soft proofing or how to enhance eyes next!