Most people think of Lightroom as a tool for adjusting exposure, white balance, and color. But it can do so much more than that. One of the most powerful (and often overlooked) tools in Lightroom is the Tone Curve.
The Tone Curve in Lightroom allows you to adjust the tonal range of your photos. You can make them brighter, darker, warmer, cooler, or anywhere in between. You can also use it to create custom curves that are specific to your own style and taste.
What Is the Tone Curve in Lightroom?
The tone curve is a way of making global adjustments to your photos. It affects tone and contrast, which are two major components of an image.
Digital files are naturally quite flat, so they almost always require at least a bit of tweaking in these areas.
With the Tone Curve, you can adjust the value of your tones. It increases or decreases the number of pixels of a given tone. Even small adjustments can have a big effect.
While the Histogram gives you information about the exposure and colors of an image, the Tone Curve controls luminosity.
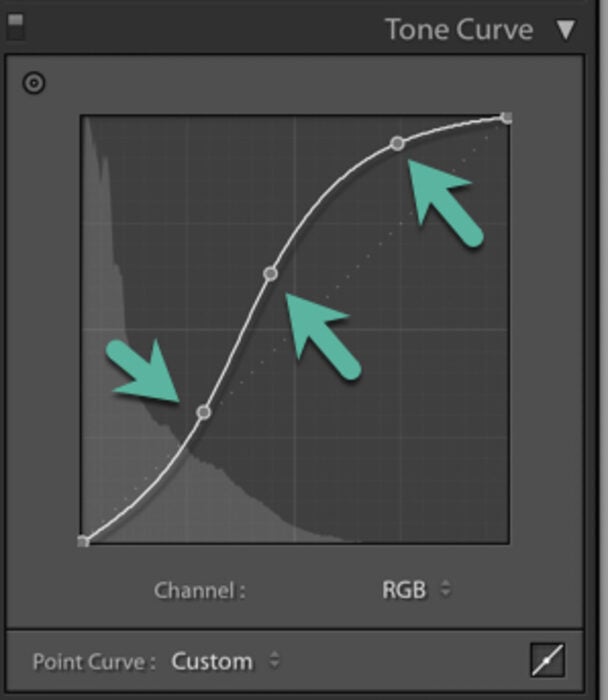
The horizontal axis represented at the bottom of the curve shows the shadows on the far left through to the mid-tones and then highlights on the far right.
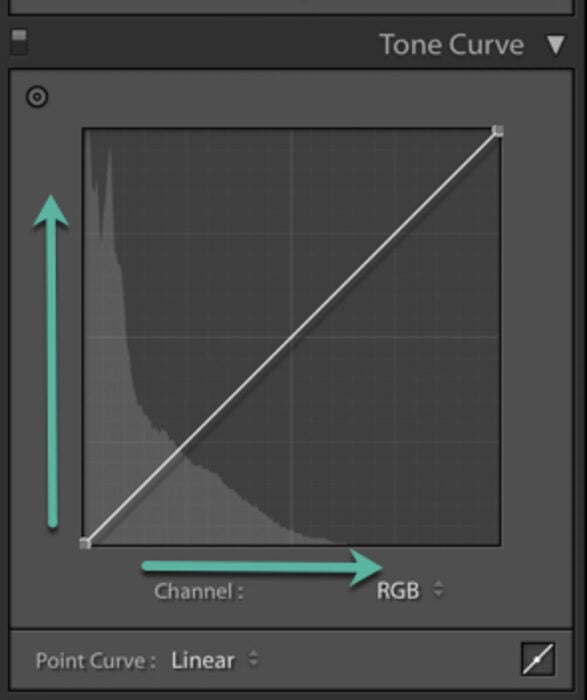
The vertical axis represents the brightness of a given tone via the darks and lights. Pulling it up increases brightness, pulling it down darkens the tones.
The Tone Curve is manipulated via the Point Curve or Region Curve.
What Is the Region Curve?
If you’re new to Lightroom or to using the Tone Curve in Lightroom, the Region Curve is a good place to start. It works on a slider system, as do most of the tools in Lightroom.
The Region Curve is adjusted by using the sliders that correspond to each region of tones. It’s more forgiving and has less dramatic contrast changes than you have with the Point Curve, which will get to next.
We can drag the curve itself, or use the sliders to make adjustments.
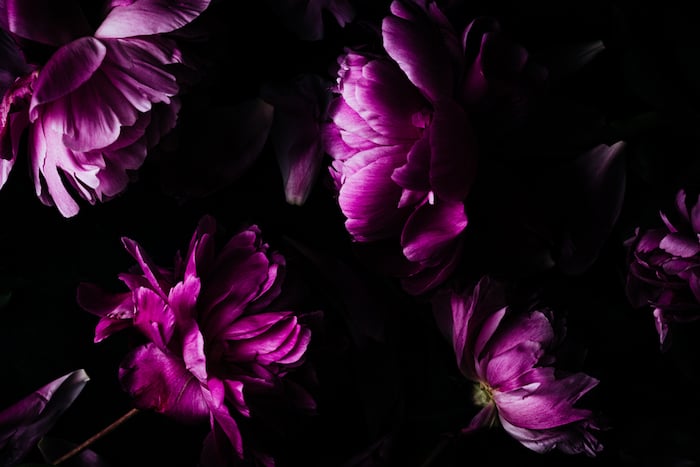
In the screenshot of my Lightroom workspace below, I have a shot that I haven’t made any adjustments to. The image lacks contrast and the vibrant color that you’d usually associate with florals. So I obviously wanted to bring this out in post-processing.
Also, note that the image is a bit underexposed. When you shoot dark and moody photography, I recommend that you underexpose your images slightly in camera. This will give you more leverage while editing, and ensure that you don’t lose highlight detail.
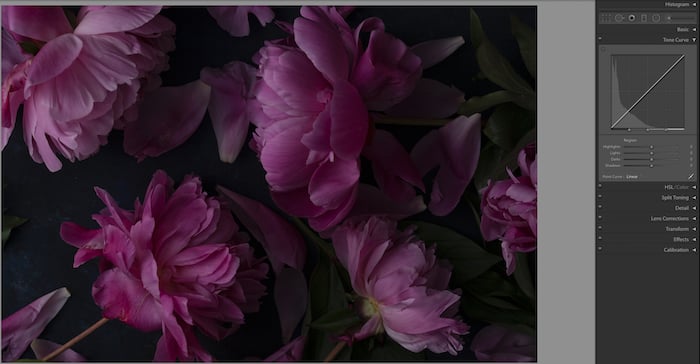
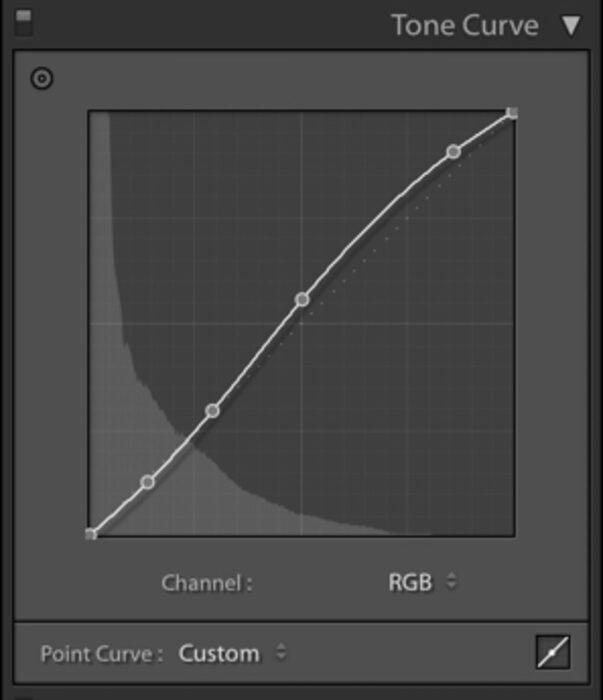
In the following image, I made a few tweaks in the Basic panel, before moving on to my Tone Curve. This brightened up the image and gave it some contrast, but I wanted more control over my final look of highlights and shadows.
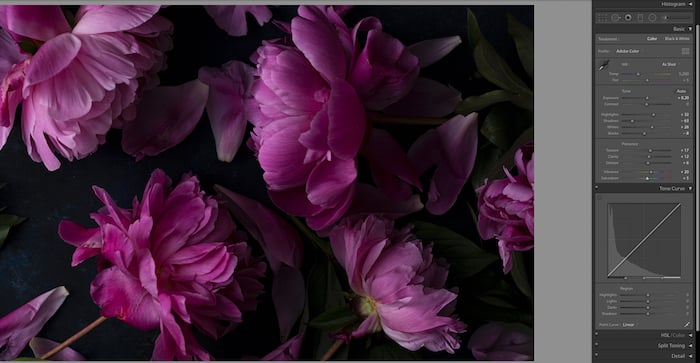
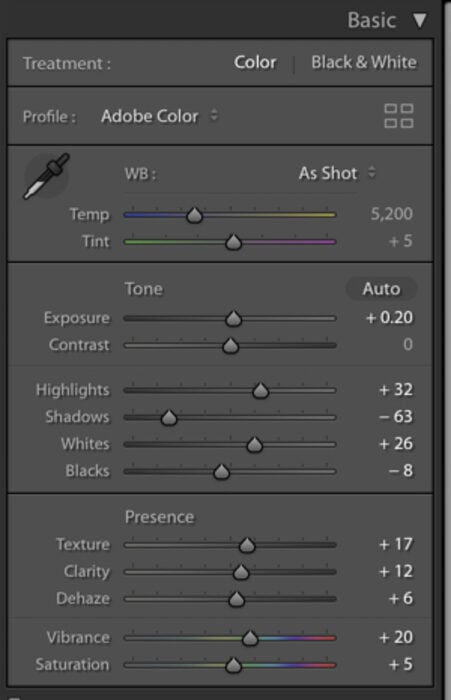
I played around with the sliders, watching how each one was affecting the tones in my photos.
You can definitely see that my image is now more vibrant, with deeper shadows and higher contrast.
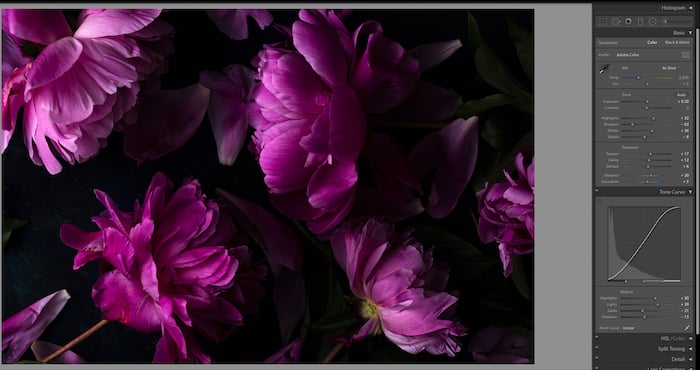
From the information on the sliders, you can see that I tweaked the darks and shadows a bit, but increased the highlights and lights more dramatically. This is evident in the curve itself, which slopes into a gentle S-curve.
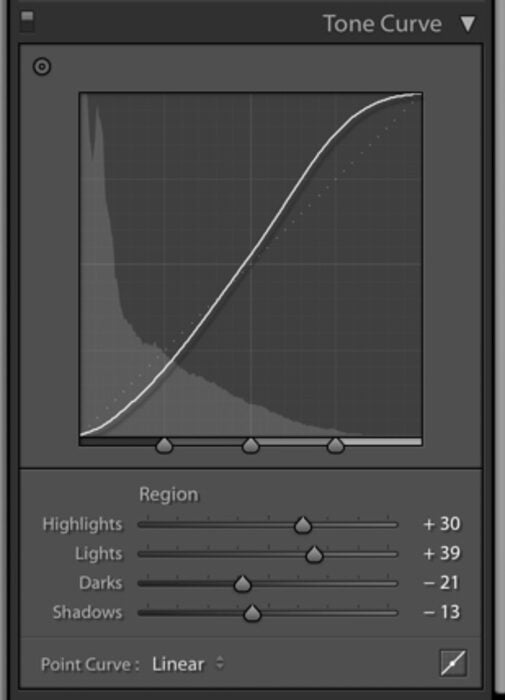
While you’re retouching, it’s useful to think about adjusting regions of tone; either the shadow region or highlight region. You can also change the regions on the bottom of the curve, where there are individual sliders for the shadows, mid-tones, and highlights as well.
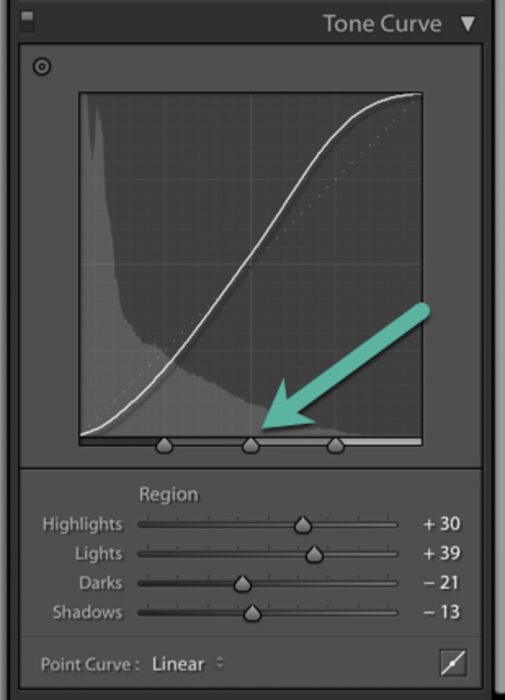
You can also use the Targeted Adjustment Brush tool in the Tone Curve panel to analyze parts of the image. This will give you a set of crosshairs that you can pull across the image to see which part of the curve is being represented and adjust accordingly.
As you can see, Lightroom gives you a lot of options for retouching the tones in your photography.
What Is the Point Curve?
The Point Curve is adjusted by adding anchor points to manipulate the curve with full control. It makes calculated adjustments to certain parts of the image.
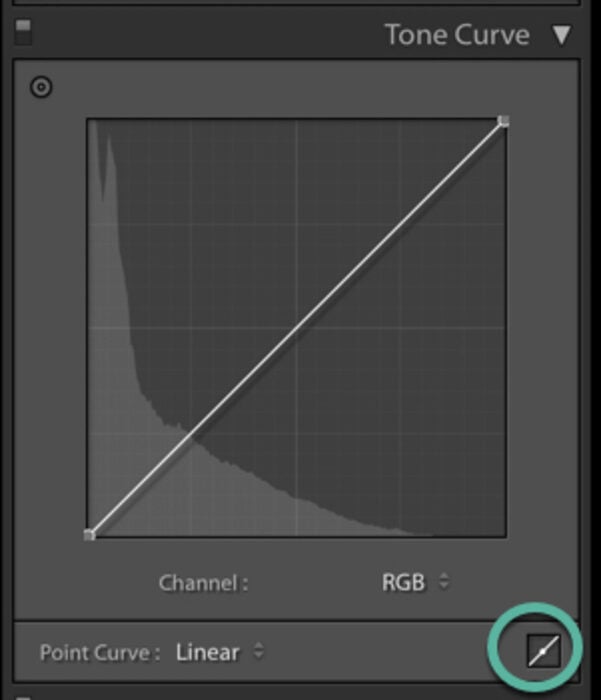
To access the Point Curve, click on the Point Curve icon in the bottom right-hand corner of your tone curve panel.
To select a point you wish to adjust, click on the Point Curve to create an anchor point and lift it up to brighten, or down to darken the tones. Watch how the image changes. Sometimes micro adjustments are all that are needed here.
I usually start with mid-tone lift on my work, which means grabbing my curve right in the middle and pulling it up a bit. I then add contrast by making the lights lighter, and the darks darker.
You’ll also notice that beside Point Curve in the bottom of your panel, you have the options for Linear (straight across), Medium Contrast, or Strong Contrast.

This will give you a base to start from and you can adjust from there. It’s not necessary to use it, but it can be helpful.
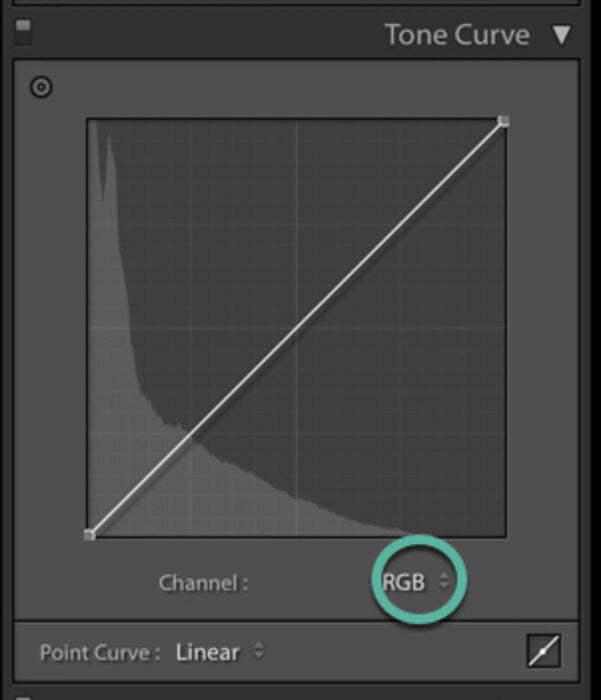
You’ll also notice that there is an RGB (red green and blue) option when you’re in the Point Curve panel.
This is because you can not only adjust the tones in your image in the Point Curve, but you can also adjust individual colors.
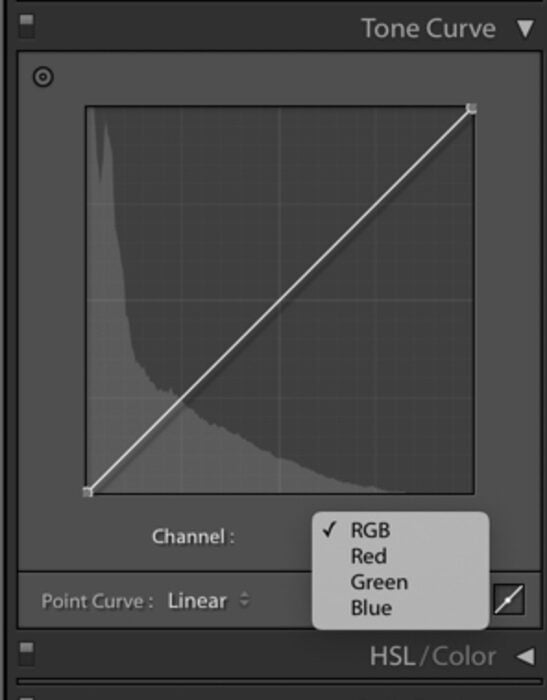
For example, if I want to work separately on the Blues in my image, I can click on Blue and access a blue-yellow tone curve. If I lift it, I’ll bring up the blues. Bringing it down will adjust the yellows.
Similarly, if you pull up the tone curve while in Red, you’ll bring up the reds. Pull it down, and you’ll affect the Cyan.
In the Green channel, pulling the curve up will intensify the greens, while pulling it down will adjust the magentas.
So why would you want to work on individual reds, greens and blues in your image? Simply, it’s just another way of adding color in Lightroom. For the best retouching in Lightroom, you’re always better off layering your effects with different tools available.
One thing to note is that if you like to create presets of your work, using the Tone Curve is a great way to do this because tone curve adjustments don’t affect basic panel adjustments when applied across images.
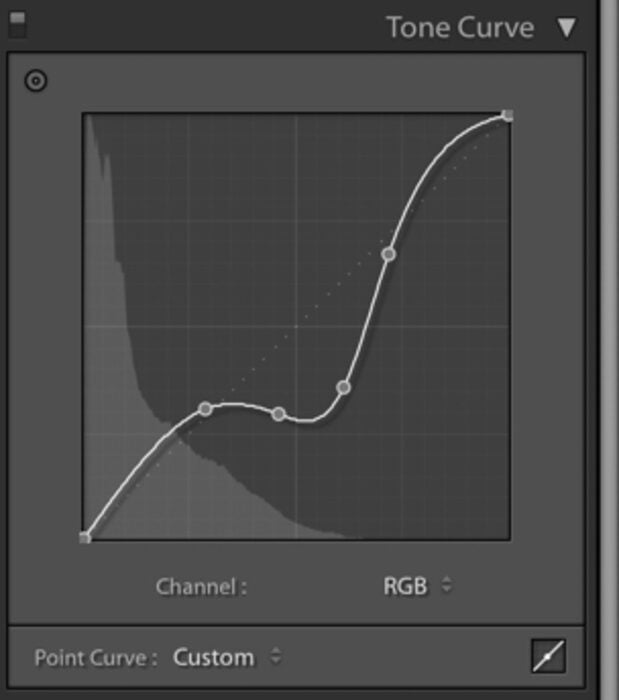
Here is my final image, with the corresponding Point Curve.
What Is the S-Curve?
The “S-Curve” is the most common “curve” in the Tone Curve. When you start learning about post-processing digital files, you’ll invariably come across the recommendation to edit your photography with an s-curve.
In a nutshell, the s-curve gives your photo contrast by making the lights lighter and the darks darker. It adds contrast to the mid-tones at the expense of highlights and shadows. This is why, despite well-meaning advice, you might find that a gentle s-curve is usually better.
The s-curve can be a good place to start, but it will really depend on what you shoot and your post-processing style.
For example, as a food, product and still life photographer, my images are required to look quite natural. However, a landscape photographer can get away with much more contrast and vibrancy.
One important thing to note when you’re creating an S-curve, that your lighter anchor points cannot be lower than the dark points, or your image will look very strange.
Common Lightroom Tone Curve Questions
Where Is the Tone Curve in Lightroom?
The tone curve is found in the Develop module, right under the Basic panel. You can decide whether you want to use the Region Curve or Point Curve within the tool, depending on how you wish to edit your image.
What Is the Tone Curve?
The tone curve is a graph that represents the various tones in a given image. It is a global adjustment that affects the contrast and multiple tones in a given image. It’s one of the most powerful tools in Lightroom for controlling luminosity in a photograph.
How Do I Make Curved Tones in Lightroom?
For maximum control over your tones and colors using tone curves, you should use the point curve. This will allow you to create anchor points in the exact areas you wish to affect your image. By moving the anchor points, you can observe how each tone is changed and make creative decisions.
How Do You Adjust the Color on a Curve?
You can adjust colors in two ways: with the Region Curve or the Point Curve. You can work on the tones in your images as a whole, or work on individual colors via the R/G/B channels. The Region curve allows you to make changes via sliders that control the highlights, lights, dark, and shadows. The Point Curve gives you more precise results by allowing you to create anchor points on the curve for very specific adjustments.
Conclusion
A big part of shaping light and color happens in post-processing photography.
Hopefully, this primer on the Tone Curve in Lightroom has given you enough to get you started on using this powerful tool in Lightroom. A little goes a long way with the Tone Curve. A little bit of tweaking will give your photography a lot of that special something.


