Inspired by crime movies from the 1940s and 1950s, film noir photography is a very specific and creativity-boosting genre.
You can use this genre’s techniques to take atmospheric, cinematic, and mysterious photos.
Characteristics of Film Noir Photography

- Always black and white or monochrome. Film noir photos are typically black & white, but some photographers prefer tinted photos as they create a vintage feel.
- Moodiness. Film noir photos are rarely faded or light. They’re often dark and high in contrast.
Every other aspect of film noir photography is completely up to you! Whether it involves aperture, shutter speed, or any other technical setting.
Tips for Film Noir Photography
8. Find Inspiration in Crime Movies
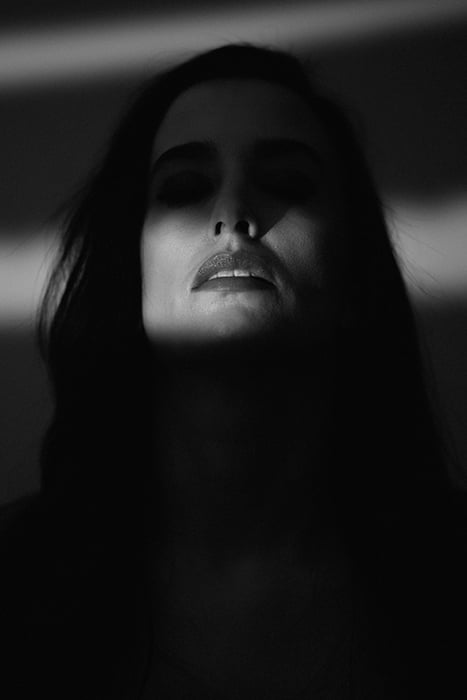
Film noir photography focuses strongly on mystery. This model’s eyes are naturally concealed by dark shadows to create a spooky and intriguing atmosphere.
The best way to find inspiration for this style is to look at its source: film noirs. Some of the most popular ones are Double Indemnity, The Big Sleep, and In a Lonely Place.
You can start practicing by re-creating your favorite scenes from film noirs. You can also take note of elements that make this style so alluring.
Pay attention to lighting, location, and focus in every scene.
Most actors in such films usually have fierce or somber expressions. The lighting is natural. It often features intense shadows that cover the actors’ faces.
Every element is used to create tension and intrigue.
7. Use Side Lighting to Create a Dramatic Gradient
Side lighting is perfect for highlighting specific parts of a model’s face. You can light your subject in various ways. One of the best methods involves window light.
Ask your model to stand next to a window. The smaller the window, and the gloomier it is outside, the easier it will be to re-create the film noir effect.
Don’t photograph them from an angle that highlights their entire face. Instead, experiment with unusual angles so that only a part of their face is visible.
6. Create Stunning Portraits Using See-Through Material
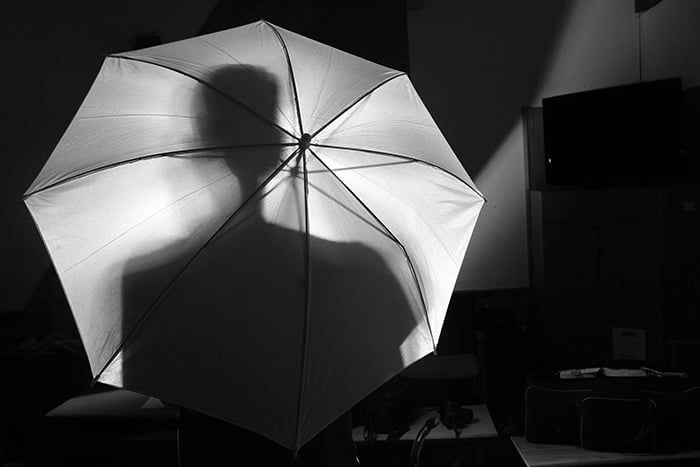
You can use umbrellas, curtains, and other kinds of transparent fabric to create abstract film noir photos.
This is perfect for self-portraits and villainous silhouettes. Especially if you don’t want to show your face
Have your model stand behind a see-through material. Use this opportunity to experiment with movements, shapes, and lines that aren’t as evident in typical portraits.
For the best results, there should be a source of light behind your model. It will emphasise their silhouette.
5. To Have Full Control Over Your Photos, Don’t Shoot in B&W Mode
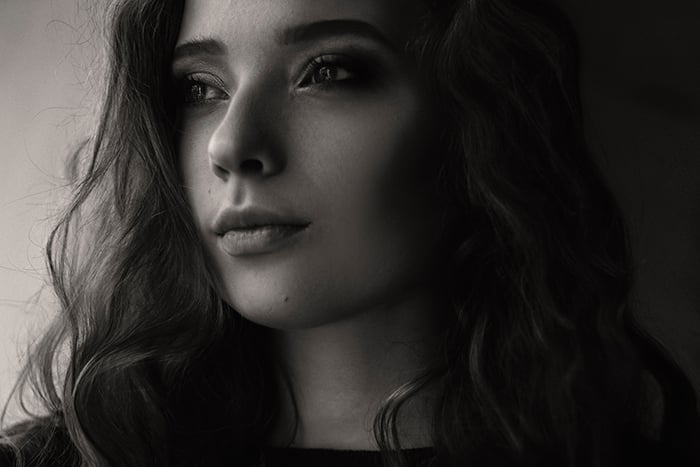
If used correctly, film noir photography will help you take photos that look like movie stills from the 1950s! This portrait is a perfect example of an uncanny photo.
Black & white mode is often used to look at the world from a different lens. This is ideal for photographers who want to think outside the box or simply challenge themselves.
When it comes to film noir photography, I don’t recommend shooting in b&w mode. Your camera perceives light in a specific way.
This might stop you from creating high-contrast photos.
Instead, shoot in color first and then convert your results to b&w. This will allow you to darken or lighten specific colors in your image before you transform it into a film noir photo.
4. Turn Your Film Noir Portraits Into Double Exposures
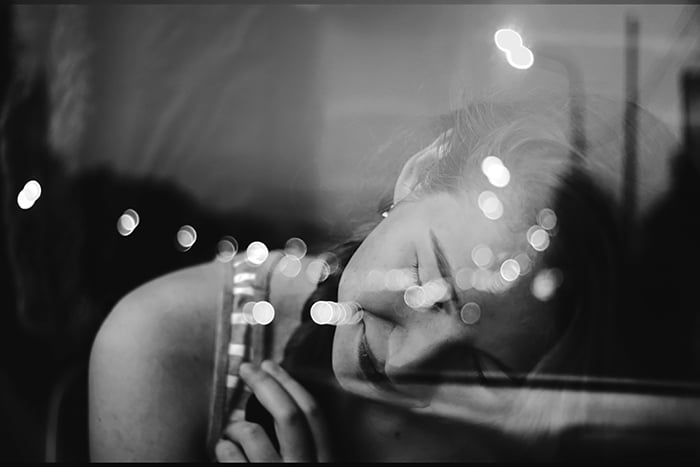
Not every film noir photo has to have a dark theme. If you’re a fan of creative and dreamy portraits, you can give them the film noir touch as well.
For extra artistic portraits, add textures and layers to your photos. Light leaks, scratches, and bokeh will all enhance your black and white portrait and add depth to your composition.
This isn’t the classic film noir approach. But it’s a great opportunity to have fun with a specific photography style.
3. Experiment With Different Tones to Give Your Photos a Vintage Touch
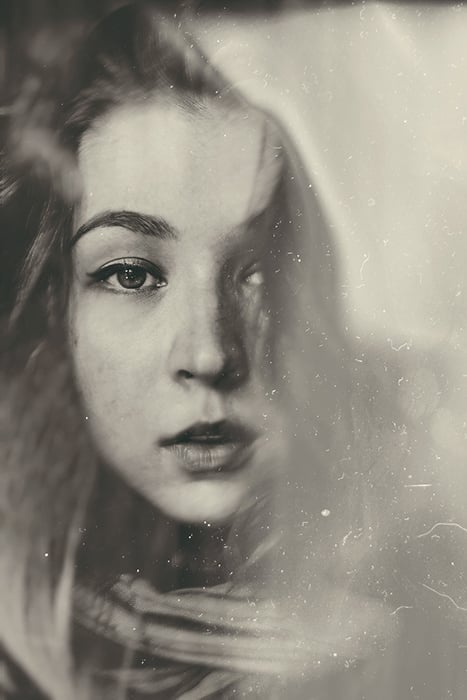
Film noir photos don’t have to be strictly black & white. You can experiment with subtle tones to give your photos a faded or vintage feel.
You can do this by altering the shadows or highlights of your photos. In the photo above, I added yellow highlights and green shadows to the image.
To make the effect as subtle as possible, I changed the layer’s opacity to around 10% or 20% in Photoshop. Compared to the b&w version, it looks dreamier and more eye-catching.
You can add your own signature style to film noir photography using methods like these.
2. Create Mysterious Shadows Using Direct Light and Window Blinds

Film noir photography often puts a spotlight on a subject’s silhouette or body part. In this photo, the photographer used direct light to highlight their model’s eyes. Using a simple window frame and the right angles, you can turn a bright image into a mysterious work of art.
One of the easiest ways to take classic film noir portraits is to create harsh shadows.
Harsh shadows can be created using bright direct light. For the best results, take photos next to a large window on a sunny day.
Have your model hold something against the sun. This can be a curtain, their hand, or anything that creates beautiful shadows.
Control the shadows so that they focus on one part of your model’s face or create an appealing pattern in general.
You can also use window blinds to create the perfect film noir portrait. This technique is very popular. Make it your own using different angles and points of focus.
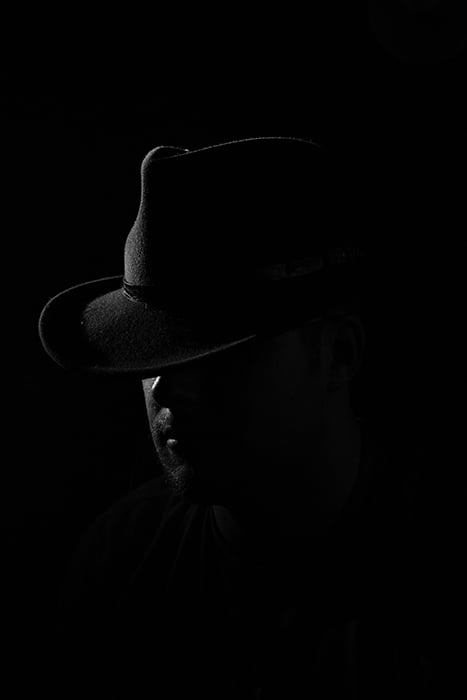
1. Use Backlight to Create Outstanding Outlines
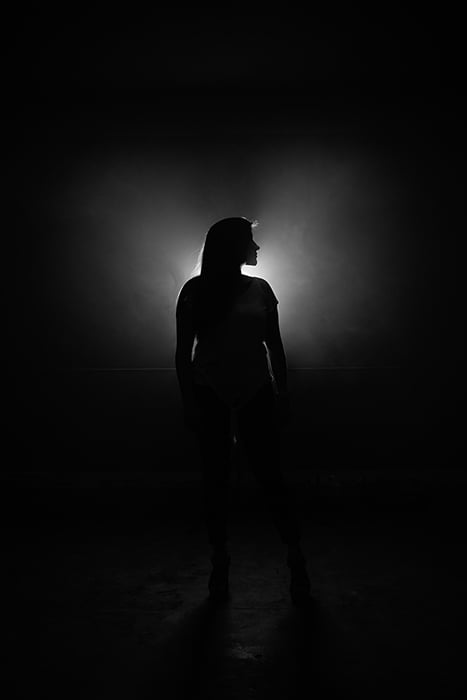
Film noir photography tends to have the perfect amount of shadows and highlights. Your photos don’t have to look exactly like this when you take them, though. You can remove flares and other distractions in an editing program.
Backlight is used in different photography genres to create a variety of effects. In film noir photography, you can use it to create unusual silhouettes.
Have your model stand in front of a bright light source. To re-create the film noir effect, take photos in a dark room.
From the right angle, the light will hit your subject in a way that darkens their body but emphasises their outline.
Sometimes, backlight can create flares that take the focus away from a subject. To avoid them, make sure your model is covering the light source. Stand directly in front of them.
Conclusion
Film noir photography has a lot of interesting elements. It can help you take incredible photos of your friends and clients.
The more you learn about it, the easier it will be for you to take unique photos that accurately reflect your creative vision.
We have great posts on fine art vs commercial photography or fine art photo mistakes next!