In the acting and modeling world, black and white head shots are commonplace in portfolios. If you want to diversify your photography portfolio, it would be a good idea to add this skill to it.
Head shots are laid back and can be a lot of fun; you can just play around, trying to come up with something creative.
Why Black and White Headshots?
This is a question I asked myself when I was approached to take some of these photos.
It’s a very good question really, with a variety of possible answers:
Firstly, there’s the idea that, because the majority are shooting in black and white, you should too. This spawns an array of similar-looking headshots for very little reason.
Secondly, it could date back to black and white film photography; black and white was your only choice.
I’m not sure, however, that either of those are particularly good reasons. Whether this is the real reason or not, I think that the most likely explanation is the effect that black and white has on a photo.
Most of us can imagine the true skin color from a black and white photo, so the color isn’t that important. What is important is the effect that it has on the form and structure of a face—you can see these details much more clearly.
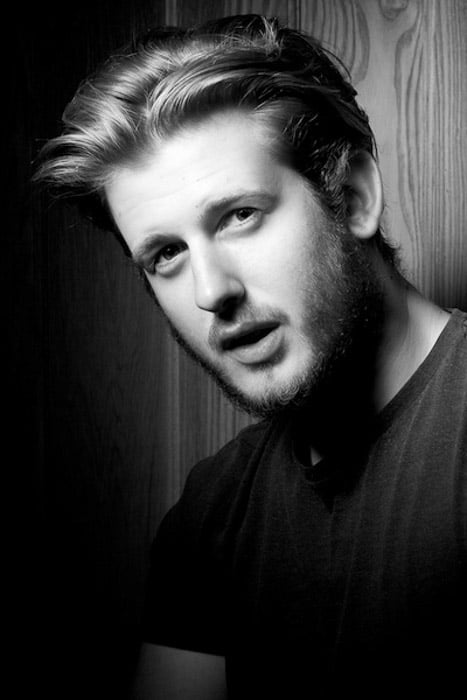
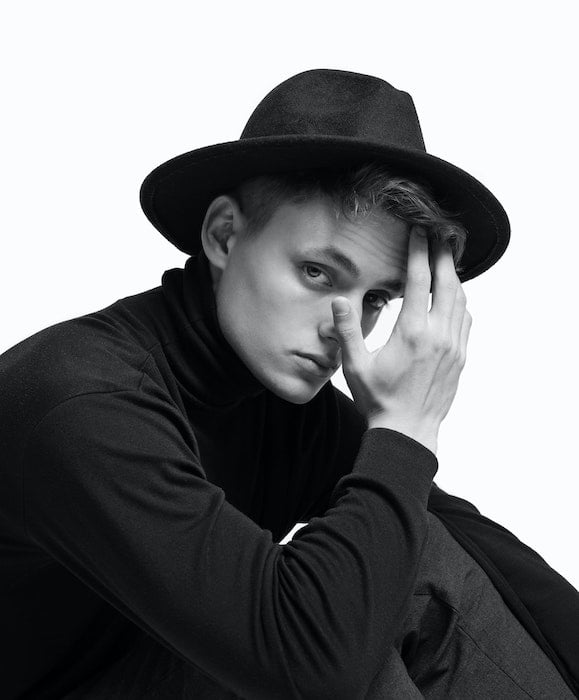
Texture
Black and white depend so much more on form for good photography than color, so it’s important to include texture in the photo.
Texture provides a contrast that shines through particularly strongly in black and white and is a great tool you can use to make your photos more interesting.
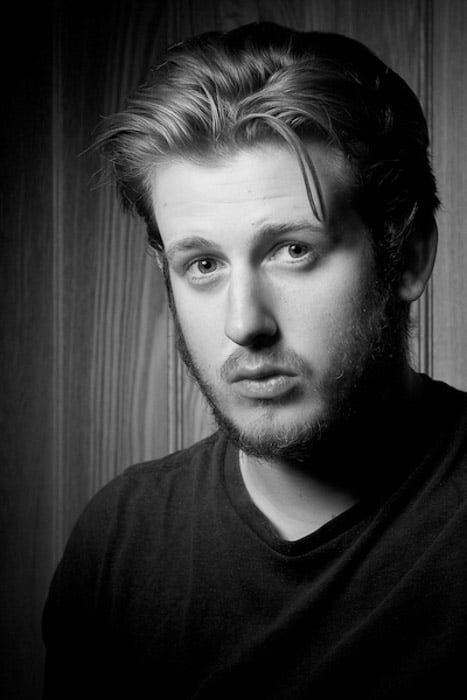
In the photo that I produced for my client, I added texture to the background, the hair, beard, and shirt, and contrasted these with his soft skin.
To produce texture in the background, I used a wooden door—compare this to the plain white backgrounds that you’re probably used to seeing and you’ll see exactly why I did this in the section below.
We played around with his hair for quite a while, trying to find where it looked best. We maximized the texture by playing around with the lighting, which I’ll explain in more detail further down the post.
The beard was simple but the shirt was a little trickier. For the shirt to rest the way it did, I had the subject sit down on a stool with his left arm up so that small ruffles would appear.

Background
When my client first approached me, he asked for a set of headshots in black and white, on a plain background. Immediately, alarm bells started ringing.
I find plain white backgrounds boring and would never choose to use one myself but I do see why he asked.
Plain white backgrounds seem to be the norm with a lot of studio photographers who don’t want to invest time in finding interesting and relevant locations. It’s much easier to churn out photo after photo on a boring white background.
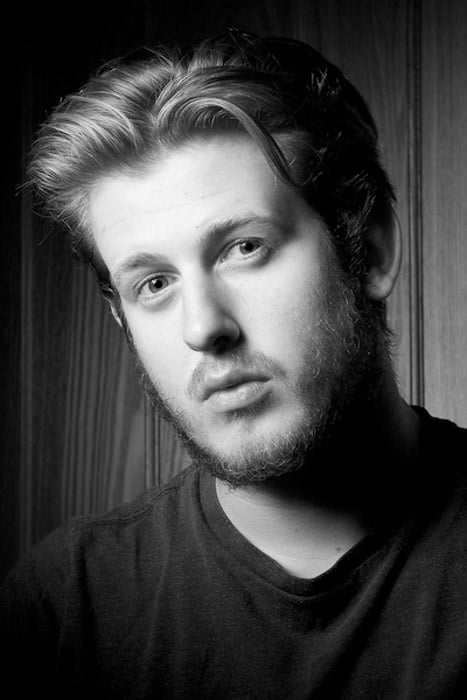
We took some test shots on a white background but it really wasn’t doing anything for the photos, as you can see from the comparison below.
We experimented with different textures, using various walls and plants in the background but eventually decided to use a door indoors; it would be easier to control the ambient light.
I’ve previously written in-depth on producing an interesting background and why it’s important so if you’d like to know more, I suggest reading this post on headshot backgrounds.

Hiding Certain Features
As with all commissioned photos, there’s going to be a degree of vanity involved that you’ll have to cater for. In this case, the subject’s hair was the issue. He was growing it for a movie role that he had coming up but didn’t like how it looked, particularly the facial hair.
As the photographer, it was my job to hide the unsightly aspects. I did so by having the light source point down on the subject, casting a shadow over the neck and hiding the majority of the hair.
We positioned him so that the hair on the head revealed a nice texture without being too dominating and the facial hair outlined the face, making it stand out from the background.
Lighting
The lighting was the biggest part of this shoot.
As I was stuck working in an unimaginative setting, I wanted to be creative with my lighting.
First of all, I thought about how I wanted to light my subject and, after only a small amount of playing around, I decided to use a beauty dish with a grid, pointing downwards on to my subject.
For those of you who don’t know what this is, the beauty dish is a lighting modifier commonly used when shooting models due to its flattering results. The grid that I attached to the front forces the light to go forward, rather than around the side, creating a vignette-like effect.
This is a really creative way to play around with the lighting and minor adjustments can make a huge difference.

Next, I had to set my camera up in manual mode so that all of the ambient light would disappear and I could use only my flash to illuminate the subject.
This is easier than it sounds; I knew from experience that, if I set my aperture to f/8, my lens would be at it’s sharpest. From there, I only had to adjust the shutter speed.
I settled on 1/800 of a second and the flash set to +1.67ev which combined to produce natural looking light without having to deal with ambient light.
As you can see below, placing my flash at an angle meant that I was able to produce natural looking shadows on the subject’s face, whilst lighting the background in a flattering and interesting way.

Post Production
I always recommend that you shoot in color and RAW when taking black and white photos; you’re left with more possibilities in post.
Rather than going into massive detail about what I do to photos of models once I’m done with them, have a look at this tutorial which I wrote two days ago. Saturation isn’t really relevant but there’s a lot to be learned from the rest of the post.
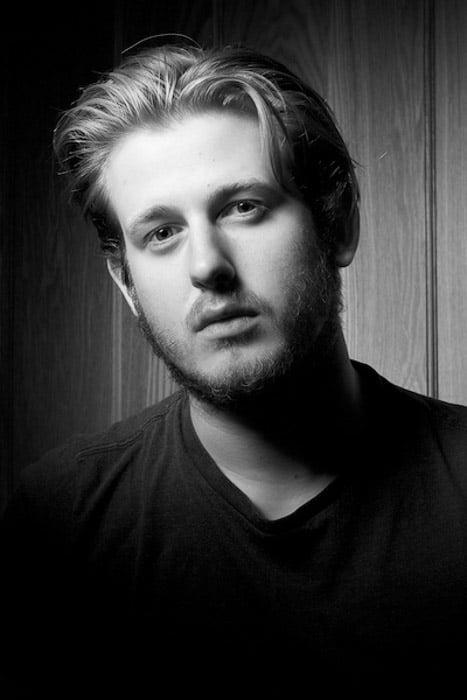
For black and white post production, you can afford to be a little more creative as it’s easier to hide your techniques such as boosting the contrast, as I’ve done below. I also boosted the green channel after converting the photo to black and white but, other than that, I’ve not really done anything to it.
For more great tips, check out our article on taking professional business headshots.