Creating time-lapse videos can be a fun way to show your friends and family the progress of a project, or just to share your world in a unique way. In this tutorial, we’ll show you how to create a stunning Lightroom time-lapse video.
Lightroom Time-Lapse Photography: What Is It?
A series of images of a particular subject stitched into a film is called a time-lapse. You can capture an image sequence throughout the day, or create a nighttime time-lapse.
If you move while capturing each image, then it is called a hyper-lapse. A time-lapse sequence that moves from daytime to nighttime is known as a Holy Grail time-lapse.
The difference between a video and a time-lapse project is this. A video will record anywhere between 30 and 120 fps. With a time-lapse sequence, you set the interval between each shot. This means that time-lapse movies can be captured over hours, days, weeks or even months.
LRTimelapse
If you don’t have a stack of images ready for transformation, you will need to do so to follow this tutorial guide.
Although this great piece of software has the name Lightroom in it, it was actually developed by a man by the name of Gunther Wegner. It isn’t a plugin, but a separate tool that uses parts of Lightroom to create a timelapse.
If you haven’t used Adobe Lightroom Classic CC before, then you need to read our all-encompassing guide, here. If you need to download the software, you can find a free trial here.
LRTimelapse is a free product if you use fewer than 400 images. A higher number of images can be used, but only if you buy the pro license the software. Don’t worry about watermarks appearing on your video after all your hard work.
Gunther is a passionate photographer and lets us use his time-lapse tool without any strings. You can download it for free, here.
Another software you will need to have for this program to work is a DNG converter. These are downloaded from Adobe free of charge, here. Let’s get started!
There are many great things about this program. Firstly, it works from Raw files. Secondly, as you are moving images between the program and Lightroom Classic CC, you have a chance to add post-processing to your images.
Using LRTimelapse is simple, especially after watching their handy tutorial video. Then, its a step by step process.
NOTE: LRTimelapse supports Lightroom CC Classic, 6, 5 and 4 as well as Adobe Camera Raw, Bridge and After Effects in the corresponding versions. Make sure you have one of these Lightroom versions, otherwise it will not work.
How to Import in LRTimelapse
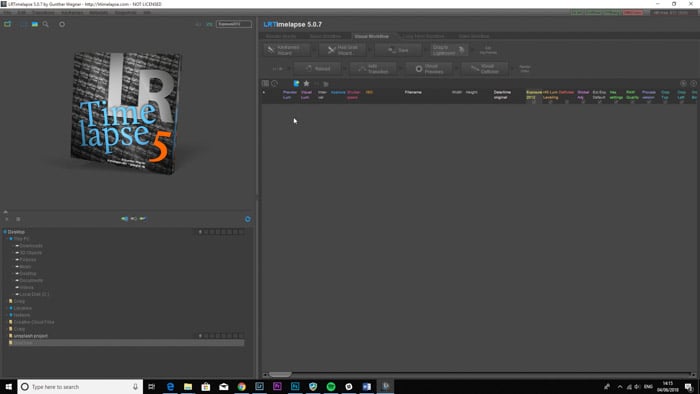
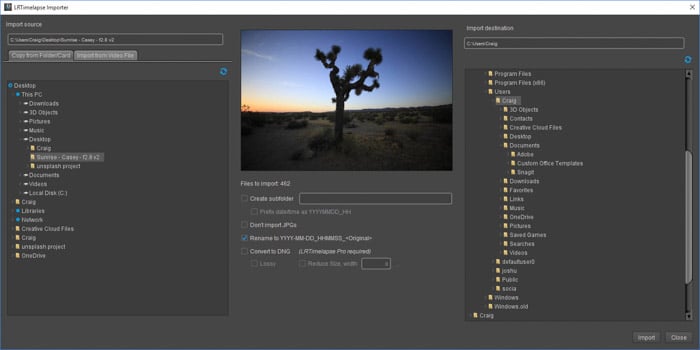
The first thing you need to do is download and install LRTimelapse. Go to lrtimelapse.com and download it for the appropriate operating system. Open the program, and you will have this window.
To import your images, click on the blue file icon with a green arrow.
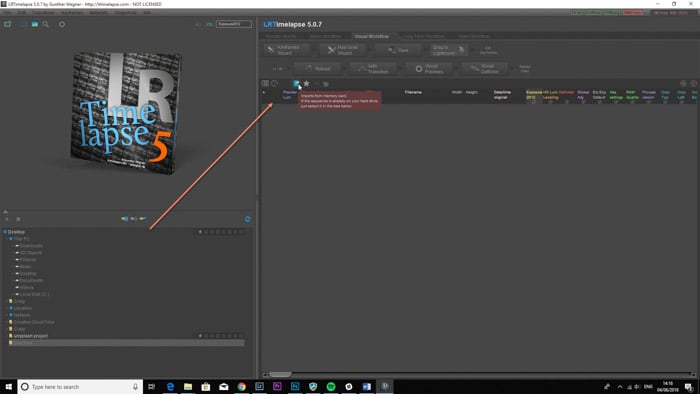
This will take you to the import dialog window.
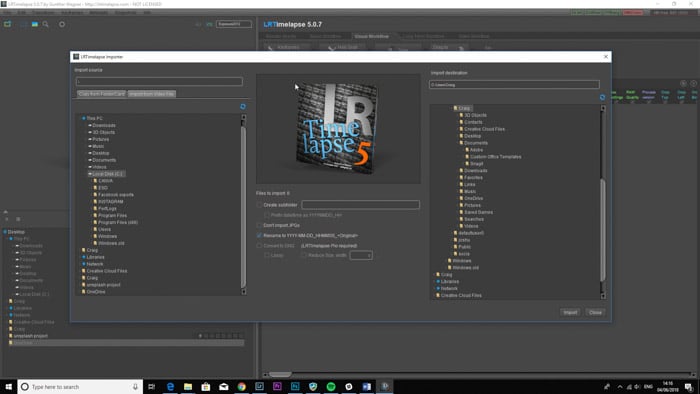
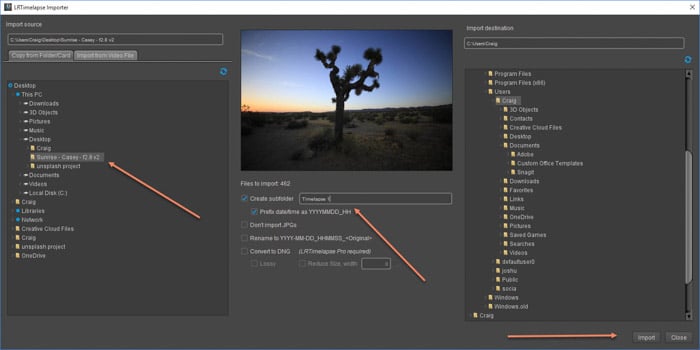
Locate the folder that contains your photographs in the left-hand panel.
As you click on the folder, the image in the middle will appear. This is helpful to know which project is selected. I decided to rename the project Timelapse 1, and check the box directly underneath so it will use the Prefix Date/Time. This will allow me to search for the sequence much easier.
Use the right-hand panel only if you want to save the sequence to a different area than where it is located. Press Import.
The progress at the bottom will show how much time it will take to import your images into a sequence.
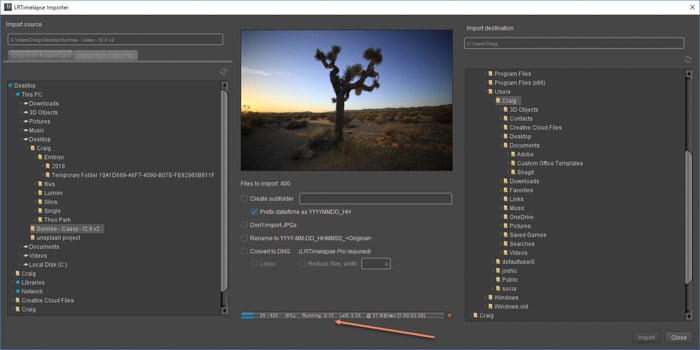
After that has finished, you need to press the Close button on the import dialog window.
How To Create The Time-lapse in LRTimelapse
On the left, you will see the name of your sequence, along with the number of images and a few greyed-out boxes. When you highlight this, all information from the photographs is in the panel on the right.
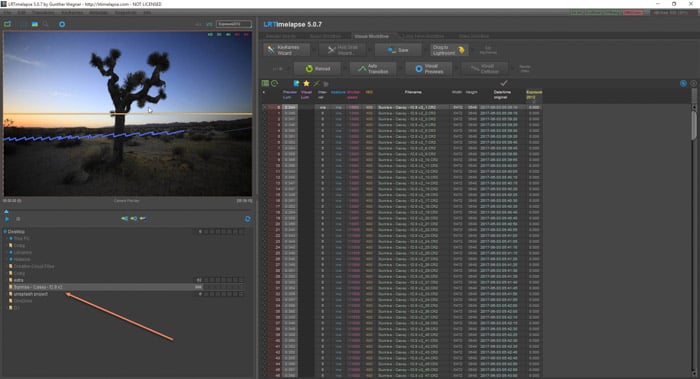
The sequence will start to render itself, giving you a blue line. This line represents the luminosity of each image. This is handy to see, as a big jump up or down could mean that you have imported two different time-lapses into the same sequence.
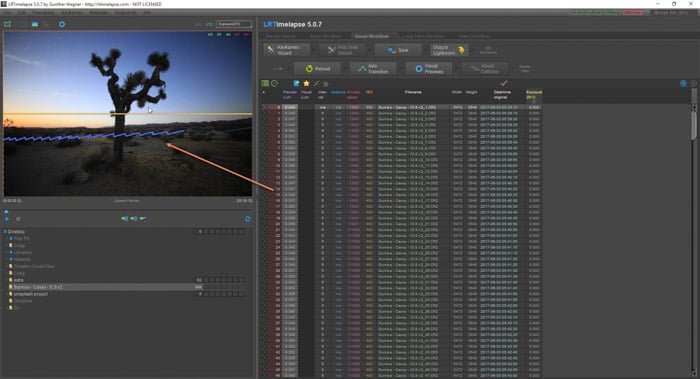
The preview of the sequence is in the image in the top left of the screen. Press the Play button to see the video in a basic format.
If you see that some of the frames are darker than the others, then you need to add keyframes. This will help in editing the images to keep them at the same exposure.
Click on the Keyframes Wizard button.

This will bring up a few options, allowing you to add keyframes.
In my sequence, I noticed a few changes in overall exposure, so I want to add some keyframes.
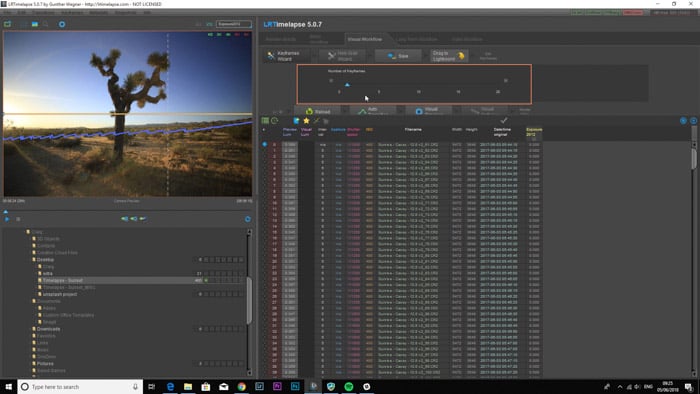
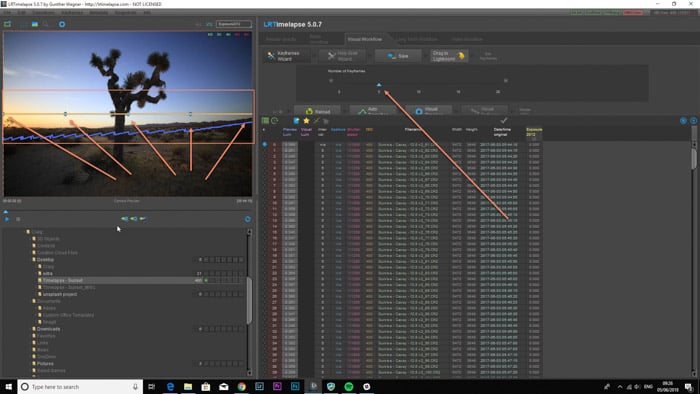
I want to have five keyframes in total, so I select five keyframes with the slider. It will add them immediately to the preview in the top-left corner.
Three will go in the middle, and the other two at the start and end of the sequence.
These keyframes will act as a template for the other images in the sequence. My time-lapse video will consist of 400 images, and the keyframes are the images I will edit. This will allow me to edit 5 photographs, rather than all 400 images individually.
To do this, find the Drag To Lightroom button. Click and drag this button to your Lightroom icon. This will be on your desktop, in your dock (mac) or located using the menu (windows).
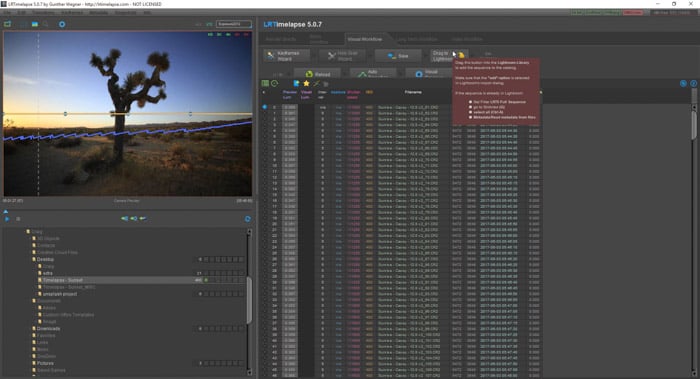
Lightroom will pop open, showing all of your images in the import dialog box. Press Import.
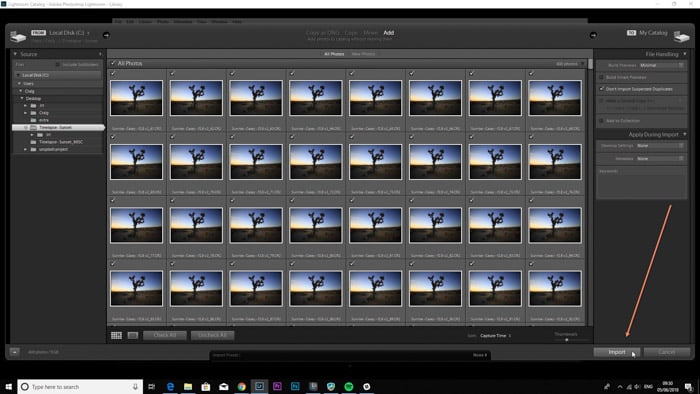
After the import has finished, you will be presented with all of the images in your folder.
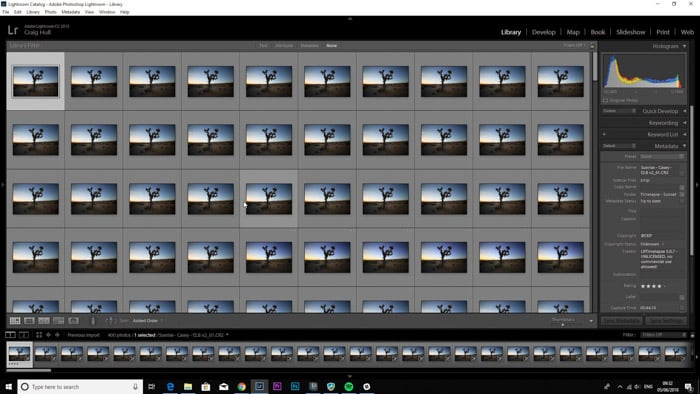
The five keyframes will be five separate images in this collection. These images have been flagged with four stars. You can see this by closely looking at the first image in your sequence.
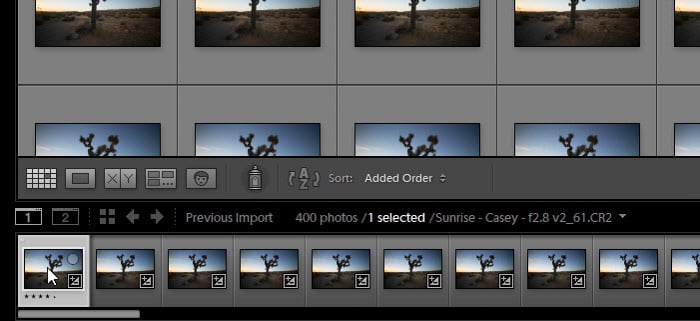
To find these images, you need to use the filter tab, located before between the scroll bar at the bottom, and the quick develop panel on the right.
Click on the stars area, selecting four stars. This will single out and only show those five images with four stars.
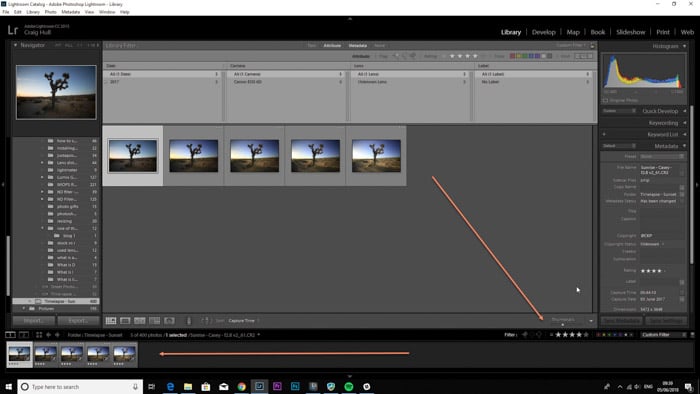
Next, head over to the Develop module.
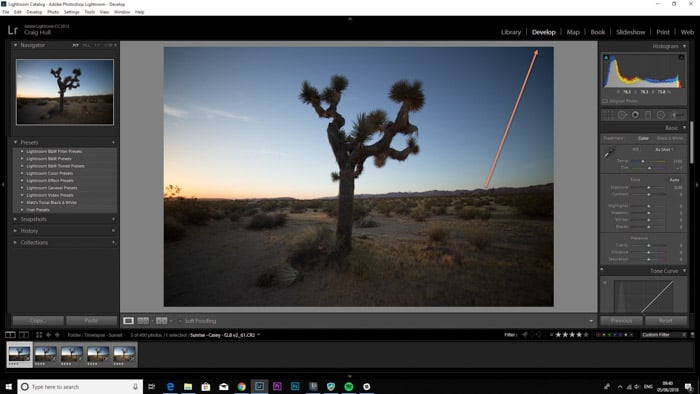
Go through the images one by one, changing the exposure as you see fit. Keep referring to the image before to create an image with a similar exposure.
Feel free to use the Highlights, Shadows, Blacks and Whites sliders to find the best combination. The key here is to make all five images match as closely as possible.
As you can see, the last image in my sequence needed to have less exposure.
<img class=”aligncenter wp-image-30345 size-full” src=”https://expertphotography.com/img/2018/06/lrtimelapse-editing-timelapse19.jpg” alt=”Lightroom screenshot of editing images on LRTimelapse – time lapse maker” width=”700″ height=”394″ />
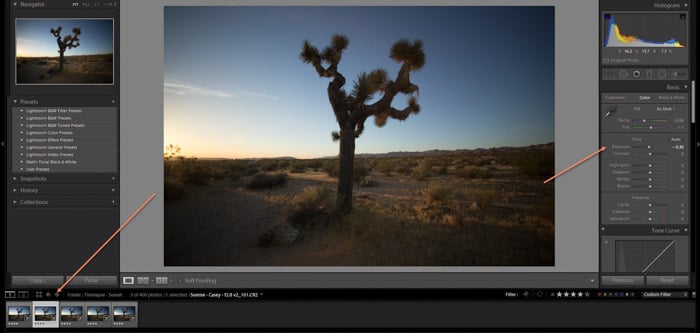
Select all five images, and go back to the Library module.
<img class=”aligncenter wp-image-30346 size-full” src=”https://expertphotography.com/img/2018/06/lrtimelapse-editing-timelapse20.jpg” alt=”Lightroom screenshot of editing images on LRTimelapse – time lapse maker” width=”700″ height=”394″ />
Next, we need to save the adjustments from those five images and copy them to the other 395 photographs in the sequence.
Make sure you are in the Library module, and in the grid view. Go to Metadata>Save Metadata To File.
<img class=”aligncenter wp-image-30347 size-full” src=”https://expertphotography.com/img/2018/06/lrtimelapse-editing-timelapse21.jpg” alt=”Lightroom screenshot of editing images on LRTimelapse – time lapse maker” width=”700″ height=”394″ />
Head back to LRTimelapse and click on Reload.
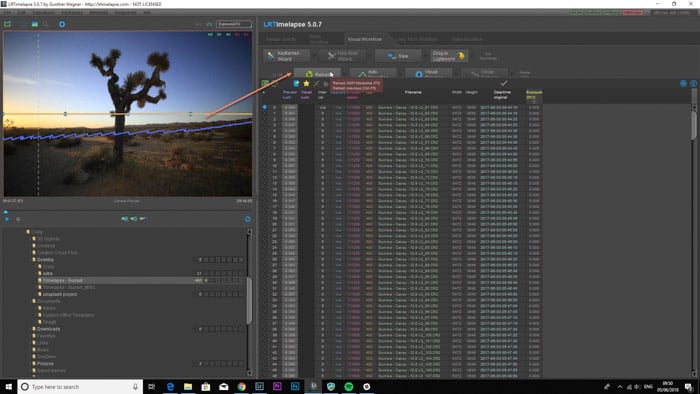
After clicking the Reload button, you will see the images will show their settings in the panel on the right.
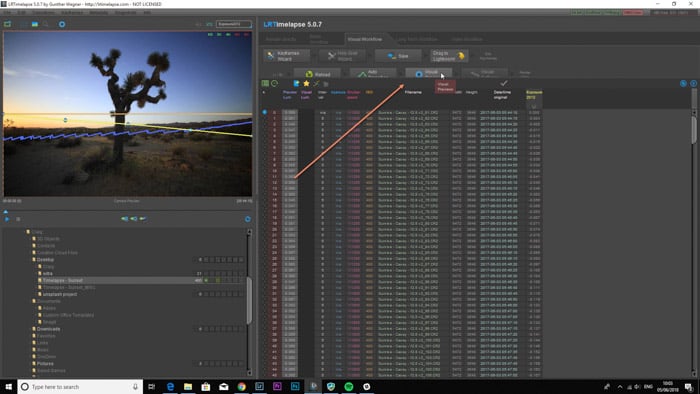
Next, we want to go to the next button named Auto Transition. Click on it.
You will see that all of the settings that we changed have created a nice, fluid transition. We changed the exposure, so in the exposure column, you can see the differences between the exposure in the keyframes, but smoothly and gradually getting darker.
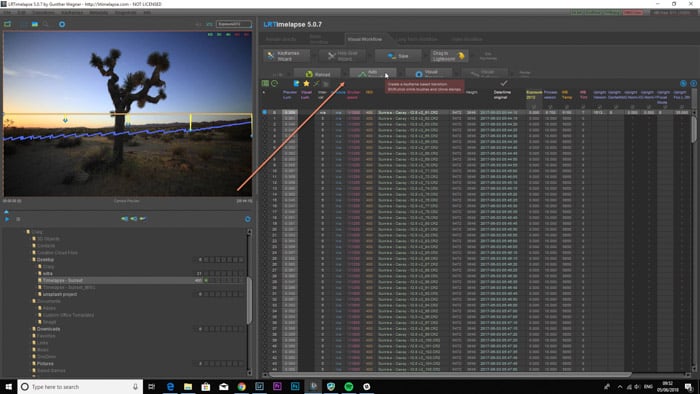
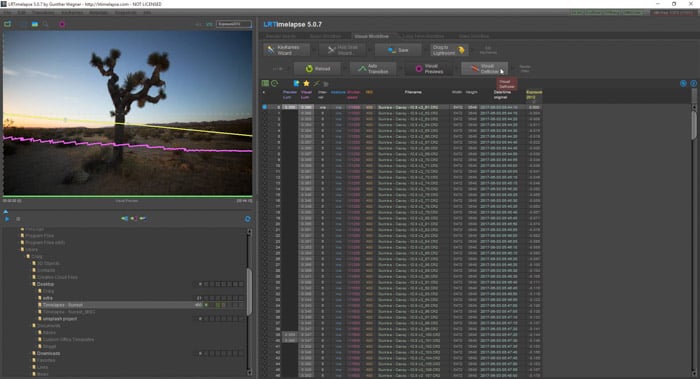
The final step is the Visual Previews button. So far, we have only seen the sample video in the top-left. Click on the button.
A pink line will appear. This line represents the flicker in the images taken. If the pink line is a curve, where the start and end are almost horizontal, this means the flicker is minimal.
The more you edit your images in Lightroom, the more flicker your images could have. This is why it is best to solve the flickering problem at the end.
Click on the Visual Deflicker button.
Use the slider and the preview window to see what effect the visual deflicker has on your sequence. You will notice the pink line will move, along with the slider.
I chose to go to 28 frames of smoothing. Make sure to set it to Default and to uncheck the Multi-Pass Deflicker checkbox.
<img class=”aligncenter wp-image-30352 size-full” src=”https://expertphotography.com/img/2018/06/lrtimelapse-editing-timelapse26.jpg” alt=”Adobe LR screenshot of LRTimelapse time lapse software” width=”700″ height=”379″ />
We need to make sure that all of the files in Lightroom match the files in LRTimelapse. We do this by reading the metadata from LRTimelapse to all of the images in Lightroom.
First, make sure you cancel the four-star selection. This will show all the images in your sequence. Select all images in the Library module and go to Metadata>Read Metadata From File.
<img class=”aligncenter wp-image-30353 size-full” src=”https://expertphotography.com/img/2018/06/lrtimelapse-editing-timelapse27.jpg” alt=”Adobe LR screenshot of opening the library in LRTimelapse time lapse software” width=”700″ height=”394″ />
With all the images selected, go to Export. You will see in your export dialog window, there will be an LRTimelapse option. This is what we will use.
Make sure you select 4K, choose the location to save the video and rename your video as you wish.
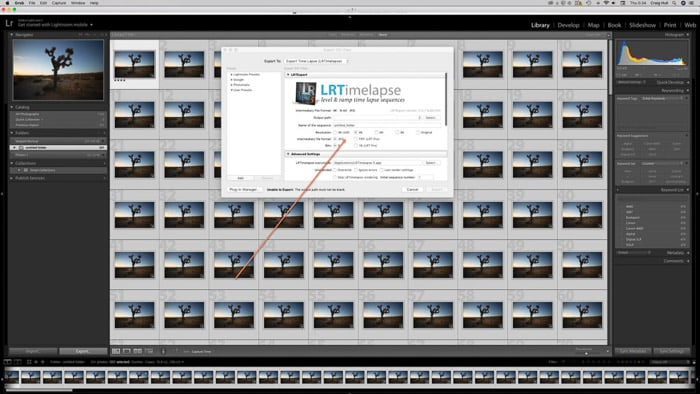
Next, the video option box will pop up. Most of the options appear greyed out. You need a license to use these. Mp4 will be selected, as will 1080p under the Codec and Output Size respectively.
The option to Force Output to 16:9 will be checked, so uncheck this if you don’t want to change the ratio.
The box at the bottom Show in Finder/Explorer means that when the video is done, it will open the folder with the video in it. Click render.
<img class=”aligncenter wp-image-30571 size-full” src=”https://expertphotography.com/img/2018/06/lrtimelapse-software-1.jpg” alt=”Adobe LR screenshot of rendering in LRTimelapse time lapse software” width=”700″ height=”394″ />
You can see the progress of the video with the blue bar in the bottom left-hand corner of the program.
<img class=”aligncenter wp-image-30572 size-full” src=”https://expertphotography.com/img/2018/06/lrtimelapse-software-2.jpg” alt=”Adobe LR screenshot of opening the library in LRTimelapse time lapse software” width=”700″ height=”394″ />
Ding! The software will let you know when the video is ready.