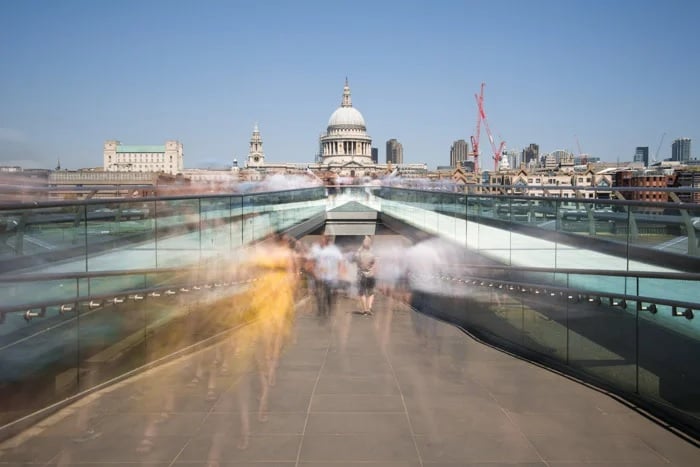
Time-lapse photography is a great way to expand your creativity and skill set with your camera. And with these fantastic time-lapse ideas, you’ll be able to make incredible media like you never have before.
The time-lapse ideas in this article will inspire your creativity and push your camera skills to new levels. You might have tried some before if you’re familiar with time-lapse photography, but everyone will find something new to try in this article.
Time-Lapse Ideas
Time-lapse photography is where you take a series of images over a period of time. You take images at set intervals over a set time period before putting them together to make a video. Making a video in this way makes it appear as if time is moving faster, which is a captivating visual effect.
Our time-lapse ideas help you push your media creation skills to the next level. Whether you’re a time-lapse novice or a seasoned pro, you’ll find some new ideas in this article.
Each section has a link to a full-length article on that subject, so follow the links to learn more.
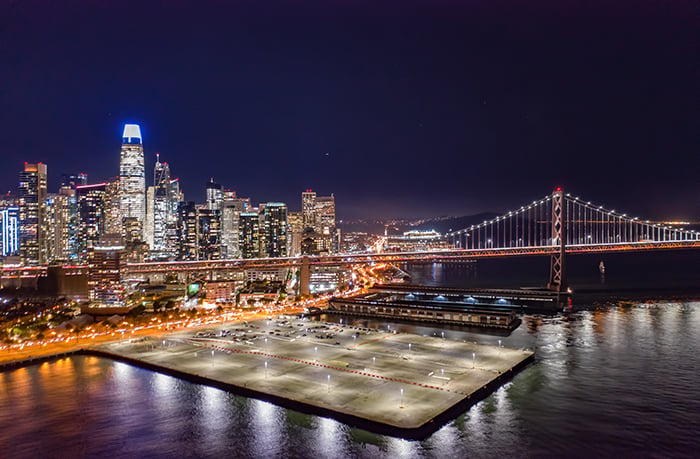
Day-to-Night
Shooting a day to night time-lapse involves capturing the changing light and atmosphere of a scene over an extended period.
To create a smooth transition, it’s important to choose a safe location where you can shoot for hours undisturbed. Set your camera to Manual mode and use an intervalometer to take photos at regular intervals.
As the light changes, you’ll need to adjust your exposure settings to maintain a consistent look. Shooting in Live View mode makes it easier to see what’s happening on your camera screen and make adjustments as needed.
Once you have your series of images, use software like LRTimelapse to seamlessly blend them together into a stunning time-lapse video.
Day to night time-lapse photography requires patience and planning, but the results can be truly breathtaking. With practice, you’ll be able to capture the magic of changing light and create mesmerizing videos that showcase the passage of time in a unique way.

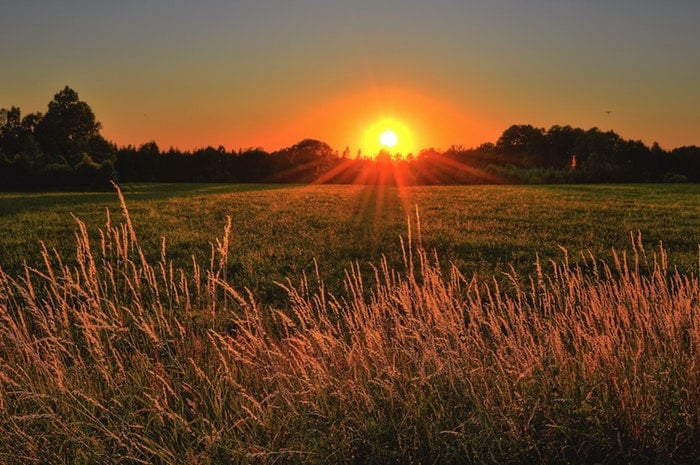
Sunset
To capture stunning sunset time-lapse videos, you’ll need a camera, sturdy tripod, and intervalometer. Set your camera to Manual mode and shoot in RAW format for the best results.
Find a location with a great view and arrive at least an hour before sunset to set up your equipment.
Use a wide-angle lens to capture the entire landscape and set your interval to 5-10 seconds for a smooth time-lapse. As the sun sets, adjust your exposure settings to maintain consistent lighting in your photos.
Look for interesting focal points that tell a story and don’t be afraid to get creative with angles.
Once you’ve captured your sunset time-lapse, use software like LRTimelapse or Time Lapse Tool to turn your photos into a professional video.
If you’d like to learn more about sunset time-lapse settings, our full article is the perfect resource to help you master this technique.
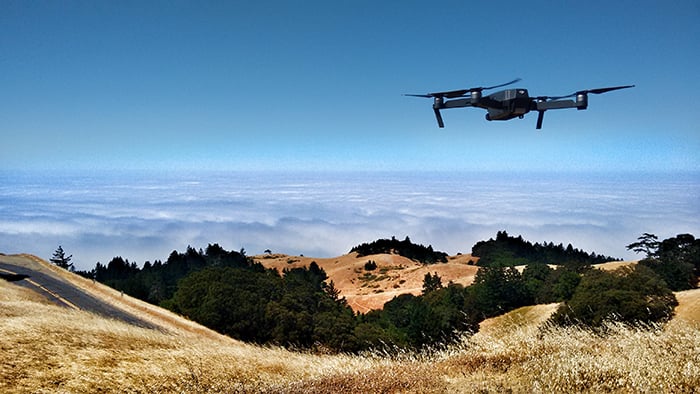
Drone
Drones are perfect for creating stunning time-lapse videos. To get the best results, shoot in manual mode for full control over your settings.
Use a slow shutter speed to create a dreamy motion effect and set your time interval to 2 seconds or less for smooth transitions.
Shoot in JPEG mode to speed up your editing process later on. While RAW photos contain more image data, they take longer to import and edit.
JPEG compresses image data while still preserving many details, making it ideal for time-lapses with hundreds or thousands of photos.
For an extra creative touch, try making a hyperlapse. As your drone moves in a specific direction, it takes photos every 2-5 seconds, creating a cinematic 3D illusion.
Start with a straight line and a slow flying speed, then experiment with more complex patterns.
To learn more about drone time-lapse, check out our in-depth guide.
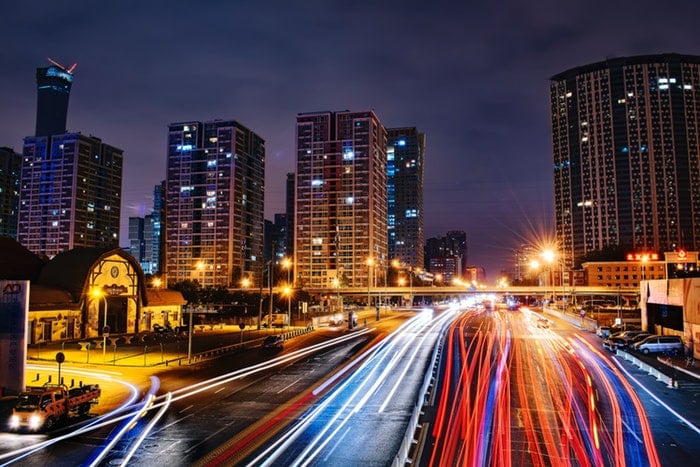
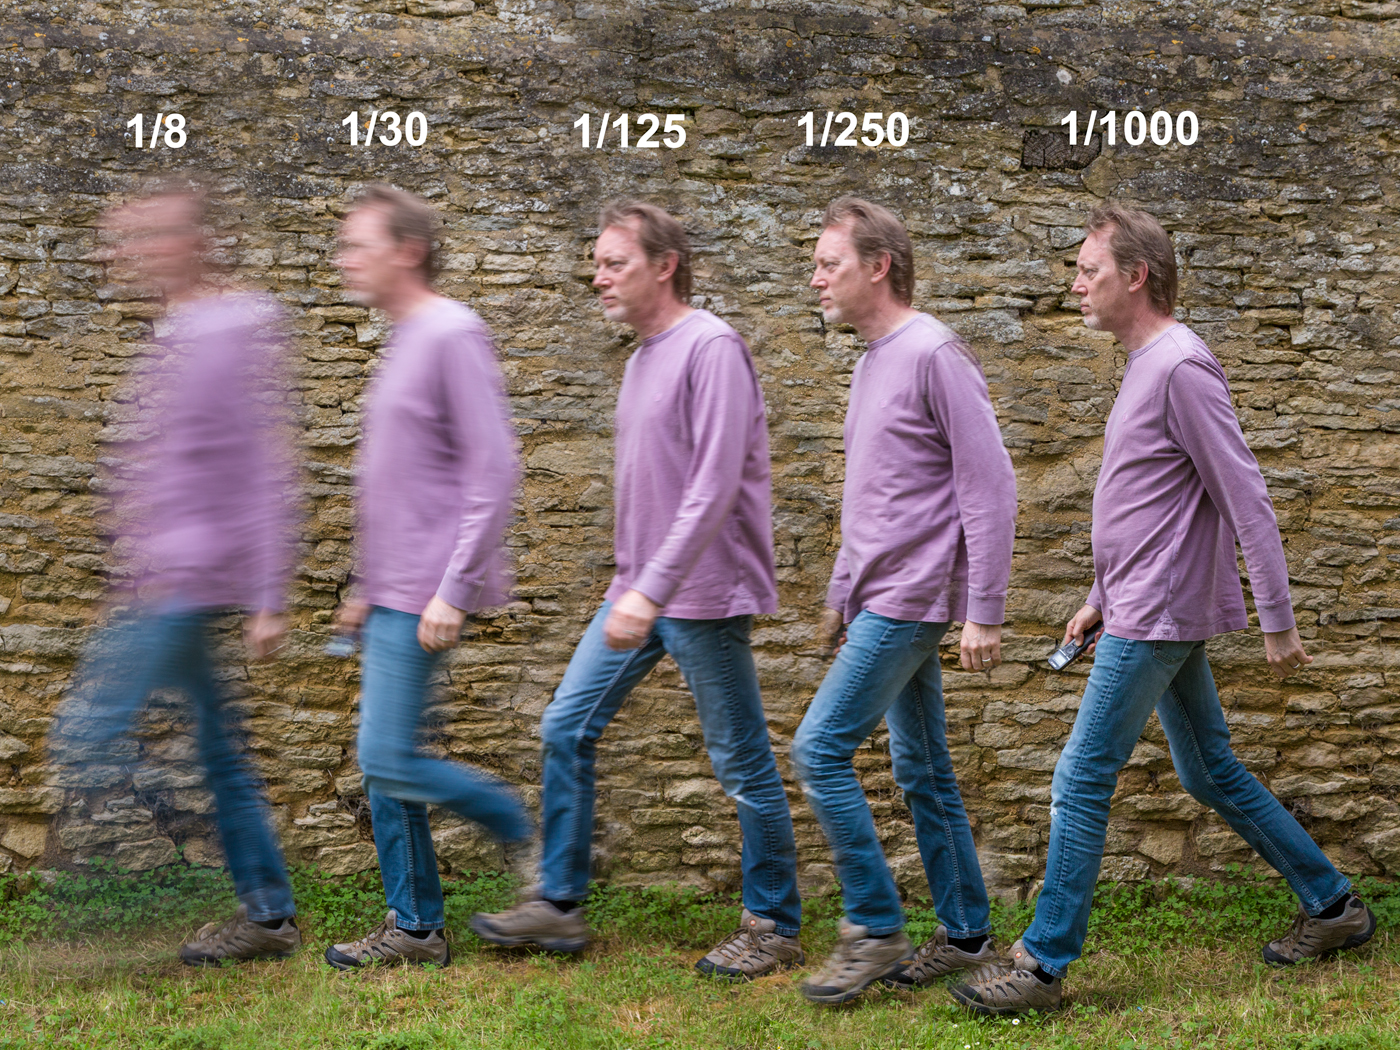
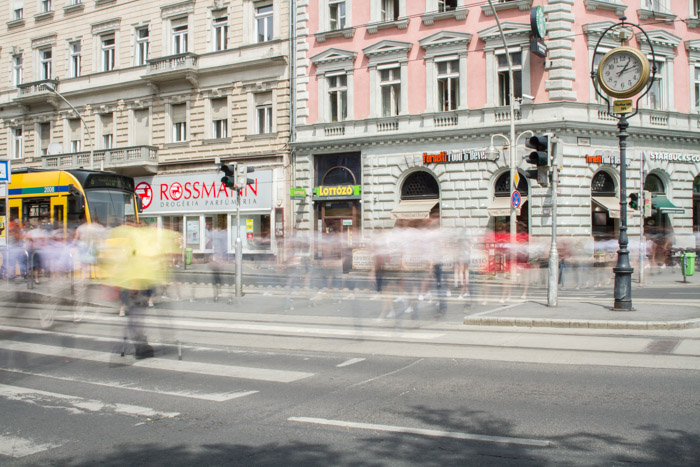
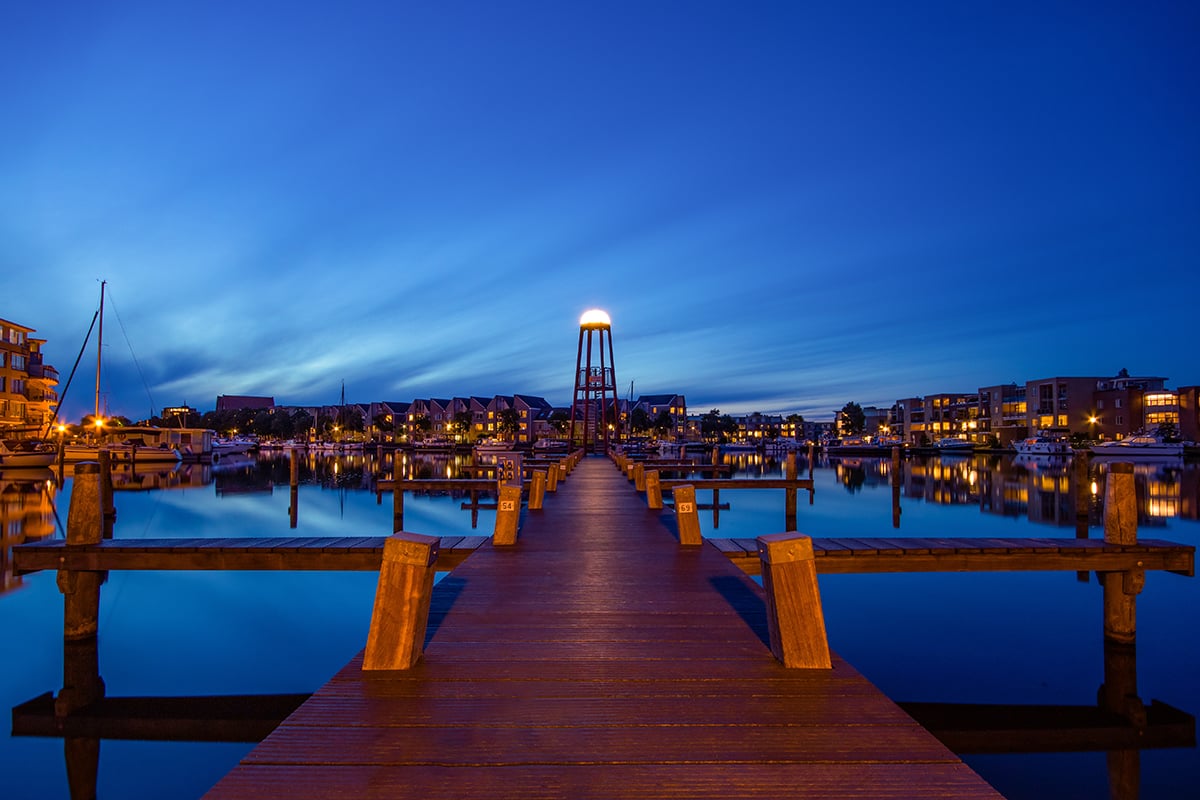
Long-Exposure
Long exposure time-lapse photography combines the techniques of long exposure and time-lapse to create stunning, surreal images.
To get started, you’ll need a camera, lens, intervalometer, tripod, and ND filter. Choose a busy location to capture more movement and light trails in your time-lapse.
Shoot in manual mode to maintain consistent settings throughout the time-lapse. Use a slow shutter speed of 3-10 seconds to create smooth light trails and seamless motion. Focus manually to avoid inconsistencies between shots.
An ND filter helps prevent overexposure in bright daylight when using slow shutter speeds. Use a time-lapse calculator or app to determine the best interval settings for your desired video length.
Once you’ve set up your intervalometer, press start and enjoy the process of capturing your long exposure time-lapse.
Hyperlapse
A hyperlapse is a more dramatic and cinematic version of a time-lapse. Unlike time-lapses, hyperlapses don’t require a tripod. Most hyperlapse photographers shoot handheld while moving around, away from, or toward a subject.
To create a hyperlapse, choose a location with lots of space and pick a direction of movement. Shoot in RAW and manual mode for full control over your images.
Select a focal point to keep your compositions stable and use the grid display to keep it in one place.
Take a photo with every step to create a motion effect. The number of photos depends on the distance you need to cover.
Edit your photos in Lightroom and then import them as an image sequence into a video editing program. Use Warp Stabiliser to fix shaky movements and add music for professional results.
Check out the full tutorial learn more about hyperlapse videos.
Dolly Zoom Hyperlapse
The dolly zoom effect is a unique technique that creates a surreal, 3D illusion in your time-lapse photography. To achieve this effect, you’ll need a camera, tripod, zoom lens, and bubble level.
Start by choosing a subject with a distinct edge, like a building. Attach your camera to a tripod at eye level and use grid lines to keep your photos consistent. Take a step forward, zoom in or out slightly, and shoot.
Keep moving forward and zooming until you have at least 24-30 photos. Color correct your images in Lightroom, then import them into a video editing program like Adobe After Effects to stabilize and create your final time-lapse.
With practice, you can master this quirky filmmaking technique and create unforgettable dolly zoom hyperlapse video.
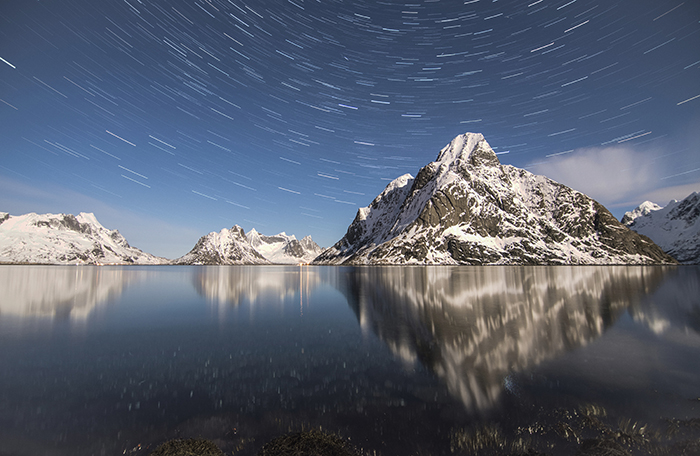
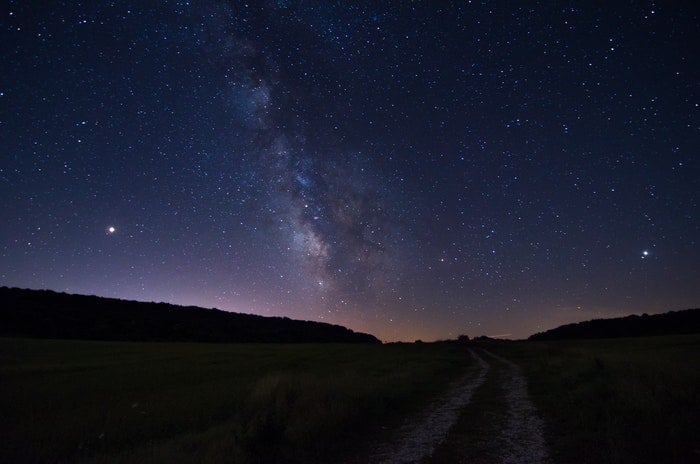
Milky Way
Capturing a stunning Milky Way time-lapse requires the right location, settings, and techniques. Find a dark location away from light pollution to capture the brightest stars.
Use apps like Light Pollution Map or Dark Site Finder to help you find the best spot.
Make sure the weather is good to avoid inconsistent shots. Use an app like BloomSky Weather to track the weather before your shoot.
Set an interval of 15-35 seconds using an internal or external intervalometer to determine how often your camera takes pictures.
Shoot in Manual mode and RAW format for the most professional results. Use a high ISO to capture more light, but not so high that it creates too much noise.
A milky way time-lapse can be taken to the next level with special tools like a motorised camera slider, rotating camera base, or flexible tripod.
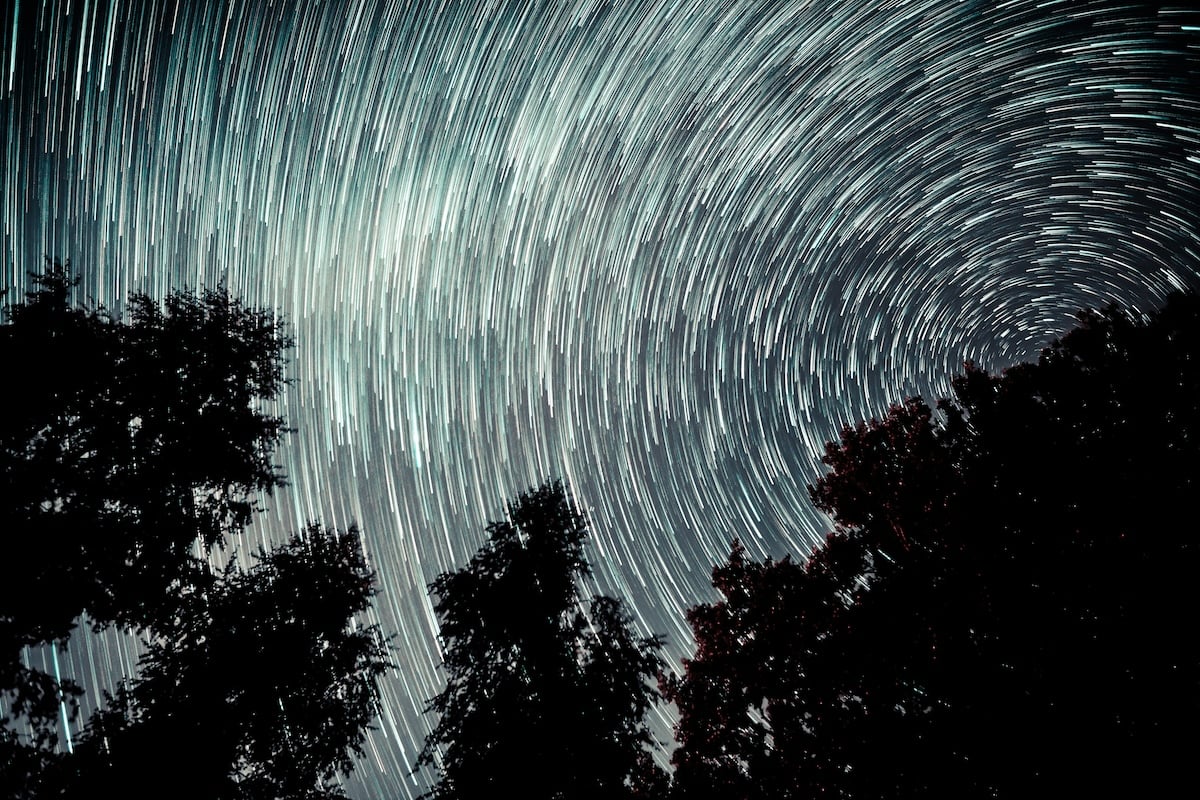
Night Sky
Capturing a stunning night sky time-lapse video is easier than you think. First, find a dark location away from light pollution. Use a sturdy tripod to keep your camera still for long exposures.
Set your camera to manual mode and use a wide aperture like f/2.8 to let in more light. Keep the shutter speed under 30 seconds to avoid star trails. Take test shots and adjust settings until you’re happy with the exposure.
Finally, set up your camera’s built-in intervalometer or an external remote timer. Let the camera take photos at set intervals for a few hours. Then edit the images together into a mesmerizing time-lapse video that captures the motion of the stars.
Our full tutorial shows you how to create a stunning night sky time-lapse.
Speed-Up Video
Time-lapse and speed up videos are two popular types of accelerated videos. Time-lapse requires more setup, like using an intervalometer to control the shooting interval. This can be time-consuming, but it allows for more control over the final result.
Speed up videos are simpler to create. Just hit record and start filming. This is better for capturing fast subjects that a time-lapse might miss between intervals.
Time-lapse has some advantages though. The individual photos take up less storage space than video files.
You also have access to long exposure effects to capture motion blur. Plus, you can edit the RAW photos afterwards for more control.
To learn more about the differences between time-lapse vs speed up video, check out this in-depth article.