Triangles in photography are one of the most important elements of photography composition. Using them to your advantage lets you create powerful images with a real sense of tension and drama. But how can you use triangles in your photos? Read on to find out.
Architectural and atmospheric triangles. Shot with a Fujifilm X-S10. 48.4mm, f/10, 1/60 s, ISO 320. Fumiaki Hayashi (Unsplash)
What Are Triangles in Photography?
Triangles are a fantastic way of grouping three points in a photo. They guide a viewer’s gaze across the frame, directing attention from one point to another. Having three points of interest encourages them to explore your image longer.
You can organize them to portray a certain feeling, like stability, aggression, or instability. When you understand this, you can use them as invisible features of a photo to evoke strong feelings in the viewer.
It’s not a case of why you should be using triangles in your composition. You’ll come to realize that the inclusion of triangles is inevitable. It’s more about why you should be using them properly.
How to Create Triangles in Photography
You can easily create a triangle if you have three vague points of interest that don’t exist on the same line. It’s not about having three clear lines joining up in the photo—that would be too obvious. It’s about grouping points of interest.
Looking back through some of your photos, you’ll probably see that many contain triangles. Whether you’ve used them to their potential is another matter.
Shot with a Canon EOS 5D Mark II. 67mm, f/4, 1/250 s, ISO 200. Gilley Aguilar
How to Use Triangles in Photography Composition
Here are six ways to best use triangles in your photography.
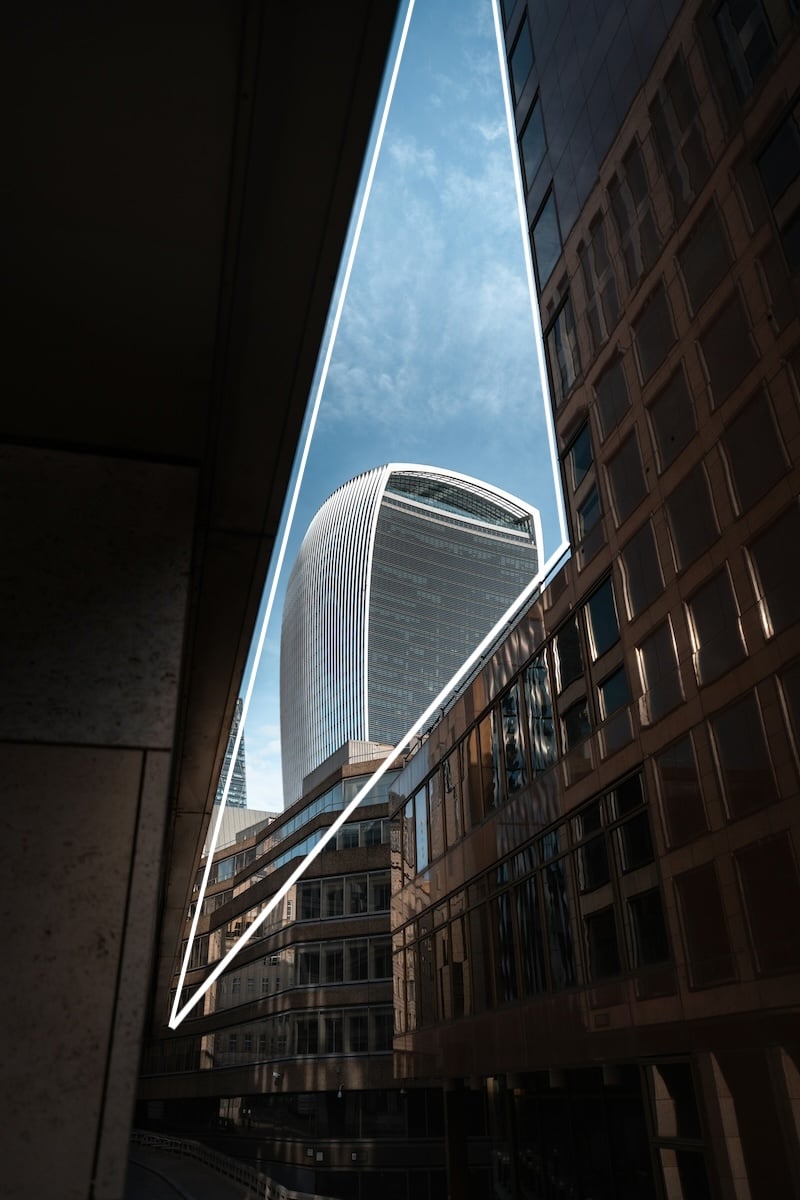
1. Implied Triangles
One of the most common types of triangle you’ll come across is the implied triangle. As you rarely see physical triangles in photography, the shape is almost always implied. And it’s usually done so without the viewer even noticing.
The more you know about composition, the easier it is to start deconstructing the factors contributing to a photo’s quality. You can use that to improve your photos.
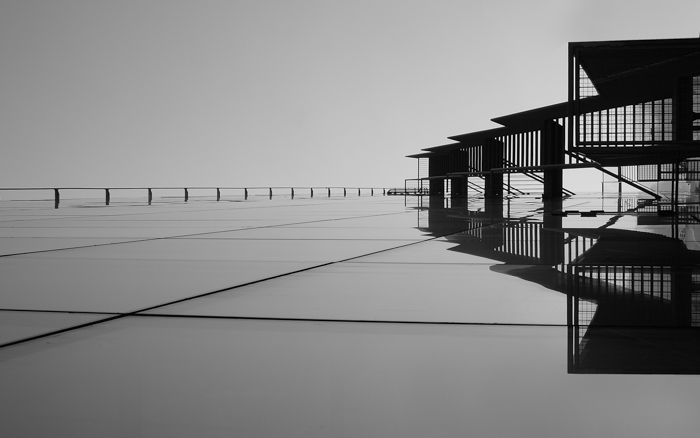
The photo below, for example, only has one physical line. But the shape of the roof and the angle of the building’s sides and stairs make us see a full triangle.

Cropped. Shot with a Canon EOS 5D Mark III. 17mm, f/11, 180 s, ISO 100. Florian Pintar (Unsplash)
The triangle’s base at the bottom and the apex at the top make it appear stable. This is much like the pyramids often found in architectural compositions.
When you change the rotation of the triangle and the angles inside, the photo appears less stable. The extreme version has the apex at the bottom. But we’ll get to that in a bit.
Look at the photo below, which shows a slightly less obvious triangle. Notice how the photographer used the horizon and lines of the boats as the triangle’s edges. You can also draw triangles out to the tiny boat to the left and the distant island to the top right.
Shot with a DJI Mavic 2 Pro. 10.3mm, f/11, 1/100 s, ISO 100. Alonso Reyes (Unsplash)
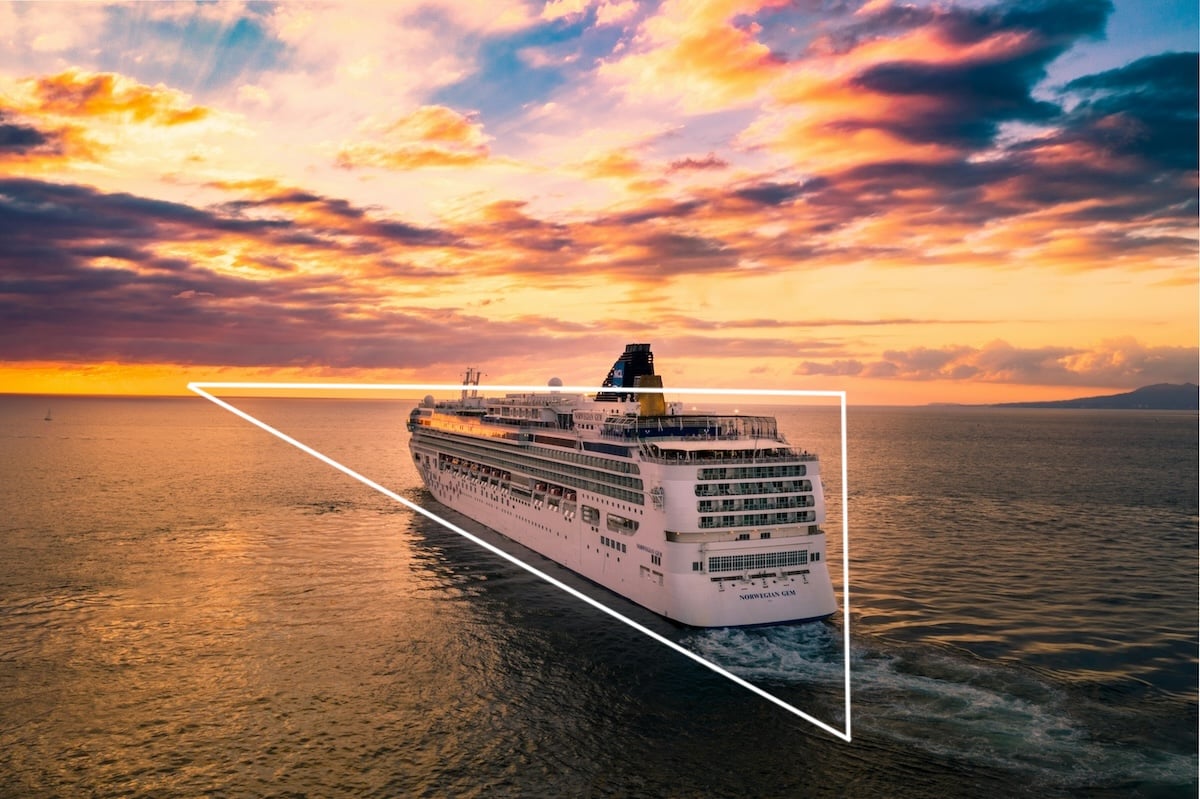
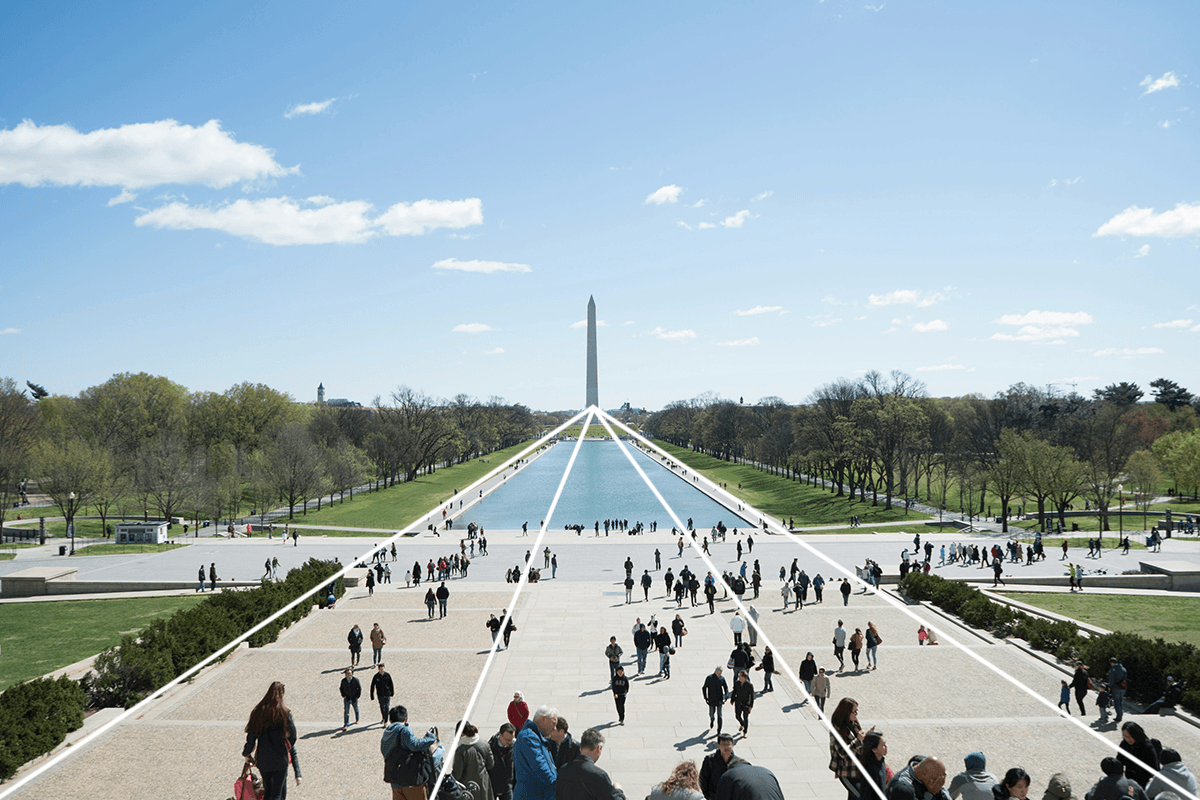
2. Converging Triangles
Whether the lines you’re dealing with are straight or diagonal, if they extend far enough into the distance, you start to see the lines converge. That is where you start to see a lot of triangles.
These triangles can appear inside or outside the frame, depending on the distance you have to work with. The wider the lens angle, the more likely the lines will converge inside the frame.
The lines of triangles in photos often converge outside of the frame when you’re shooting photos of buildings. Their height makes the lines converge towards the top. It isn’t necessary to include the point at which the lines would have converged outside the frame.
When lines converge within the frame, it’s much more obvious and easier to see. More than one line tends to converge at this defined point.
Notice that the photographer used only two sets of lines for each triangle in the photo below. This is because the photo’s frame can also be used as one of the triangle’s sides, as shown below.
Shot with a Sony a7S. 28mm, f/7.1, 1/320 s, ISO 100. Jacob Creswick (Unsplash)
3. Unstable Triangles
Maybe you want to create an unstable feeling in a photograph. A quick and easy way to do this is to include an upside-down triangle—or a triangle in a weird orientation.
The photographer used a main triangle in the photo below, with its apex pointing downward. The viewpoint looking up creates an abstract view and an unstable feeling.
This also accentuates triangles within the main one and the ones made by the London Eye’s spokes below. Triangles like this are excellent at drawing attention to something insignificant or bland. They make the photo more interesting.
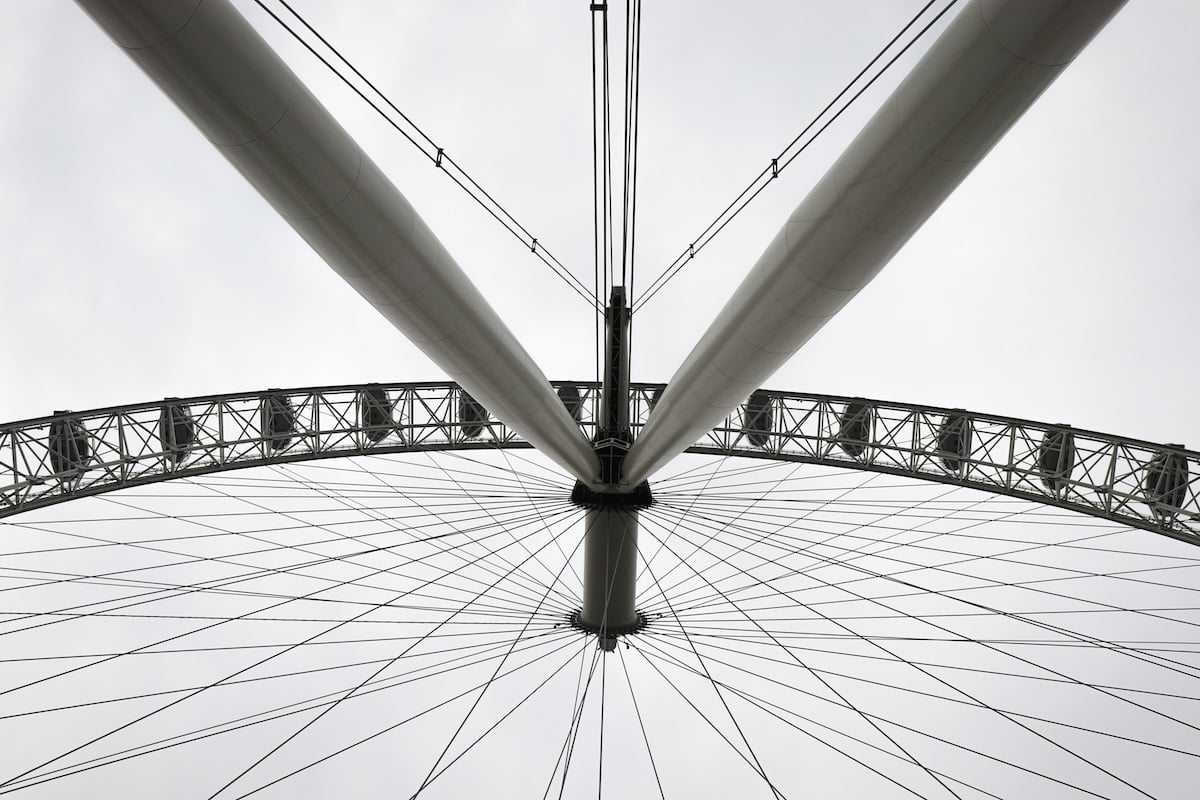
Shot with a Canon EOS 200D. 18mm, f/10, 1/400 s, ISO 100. András Gál (Unsplash)
4. Three-Figure Shots
You commonly see triangles in three-figure shots without even realizing it. This is where there are multiple subjects. Take the photo below, for example. You can draw imaginary triangles connecting their eyes.
There are three subjects, each with the same visual weight. This initially leads you to look at each subject for the same amount of time. You then go back to what most caught your eye.
This kind of shot works well, but be careful about forcing it. With three subjects of the same height, the heads appear in a line, which doesn’t work well.
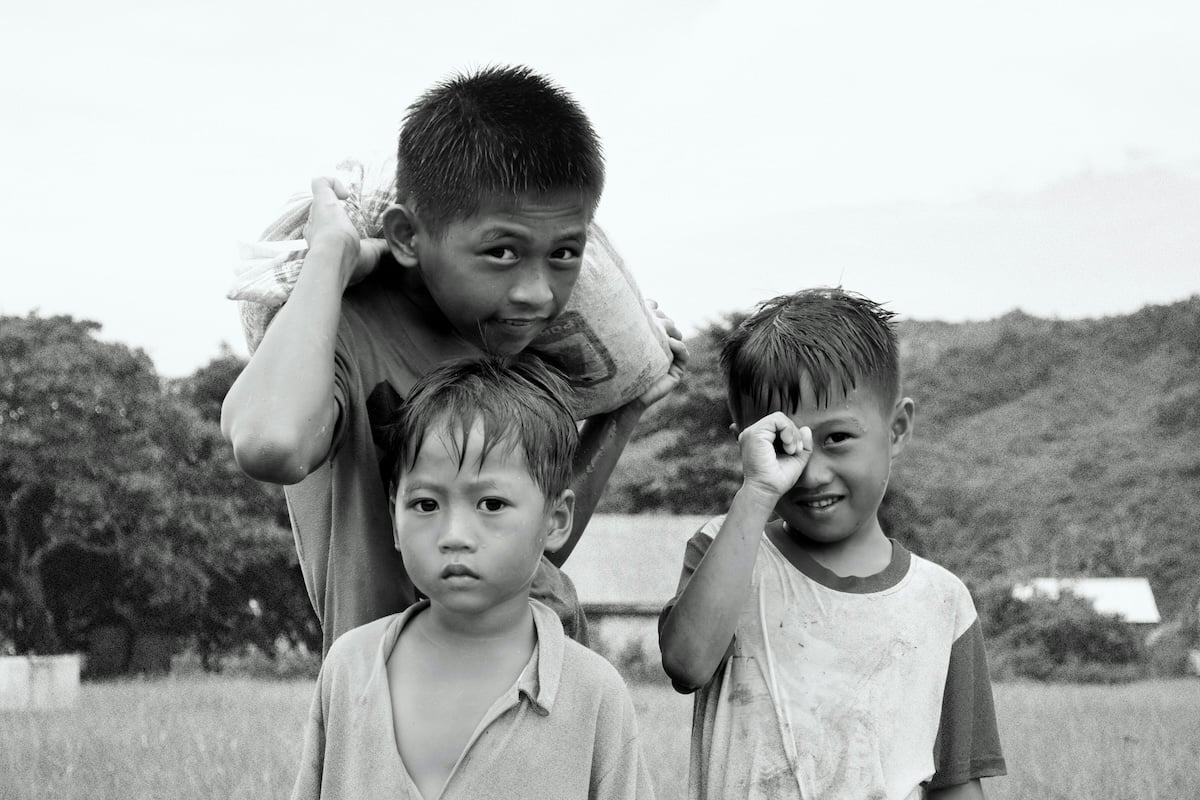
Shot with a Nikon D3100, 46mm, f/ 6.3, 1/160 s, ISO 100. Jonathan Ramalho (Unsplash)
5. Use Triangles to Focus Attention
Triangles act like arrows when their apexes converge at a single point. Your eyes are drawn down their edges and onto the subject.
This is arguably similar to what diagonal lines do. But this involves two or more physical lines and one implied line. Take a look at the photo below. Your attention starts at the boat and its reflection. It then goes to the triangle’s apex at the top, to the bird on the left, and back to the boat.
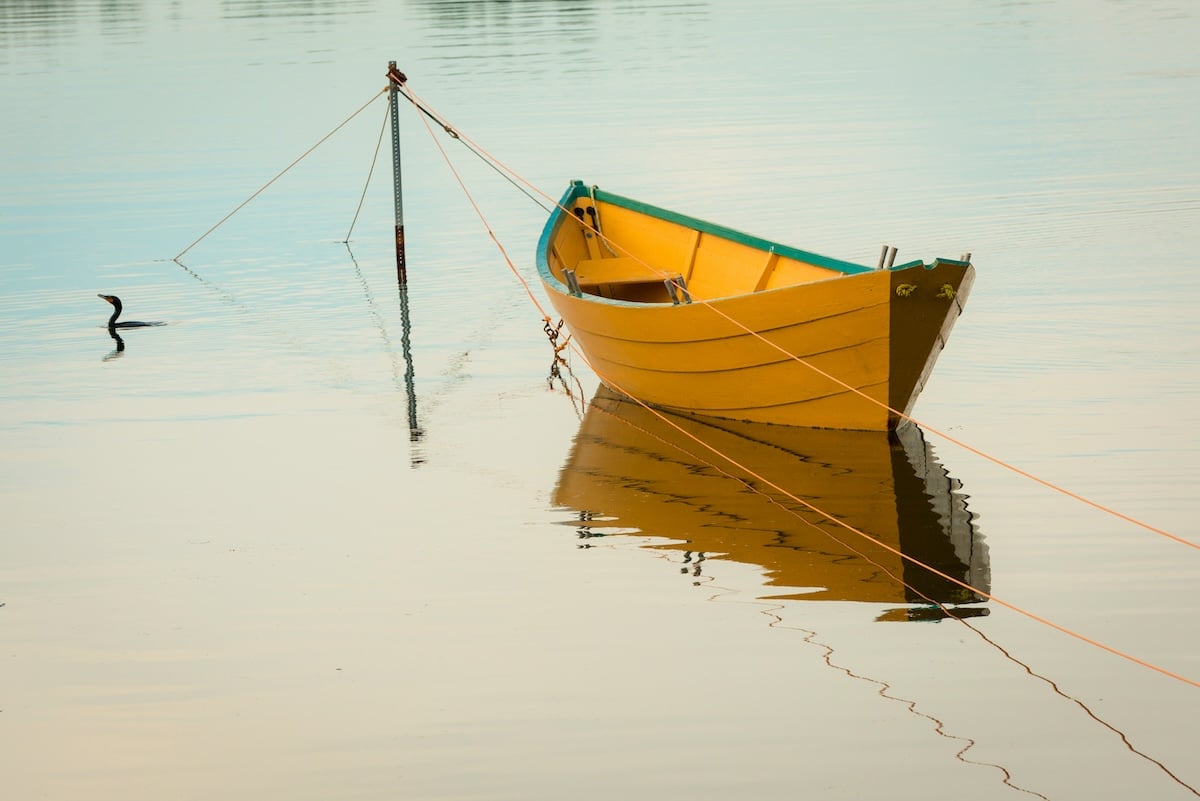
Shot with a Nikon D800. 170mm, f/9, 1/320 s, ISO 200. Jamie Morrison (Unsplash)
You can also use multiple triangles to create this effect. Just be careful how you use them and what they point toward. The photographer uses numerous triangular shapes in the portrait pose below. They direct attention to the model’s legs, torso, and face.
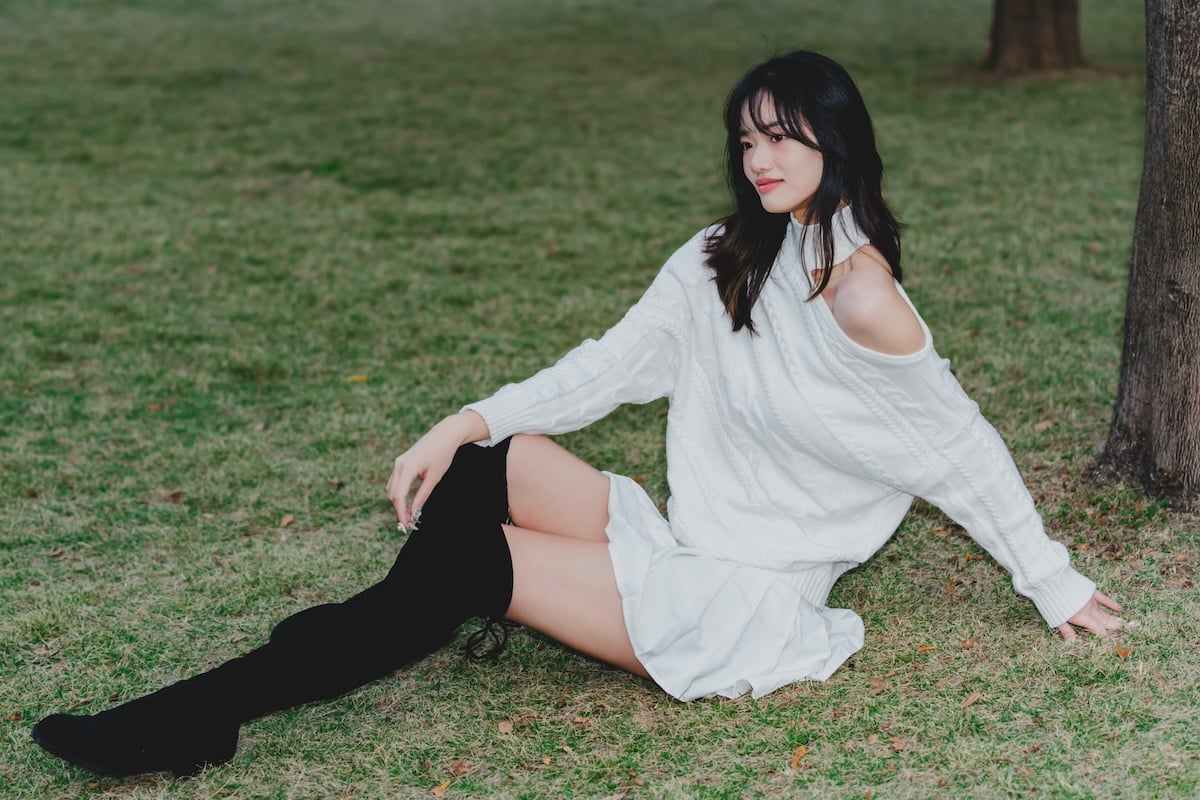
Shot with Sony a7R III. 70mm, f/2.8, 1/125 s, ISO 640. White Rainforest (Unsplash)
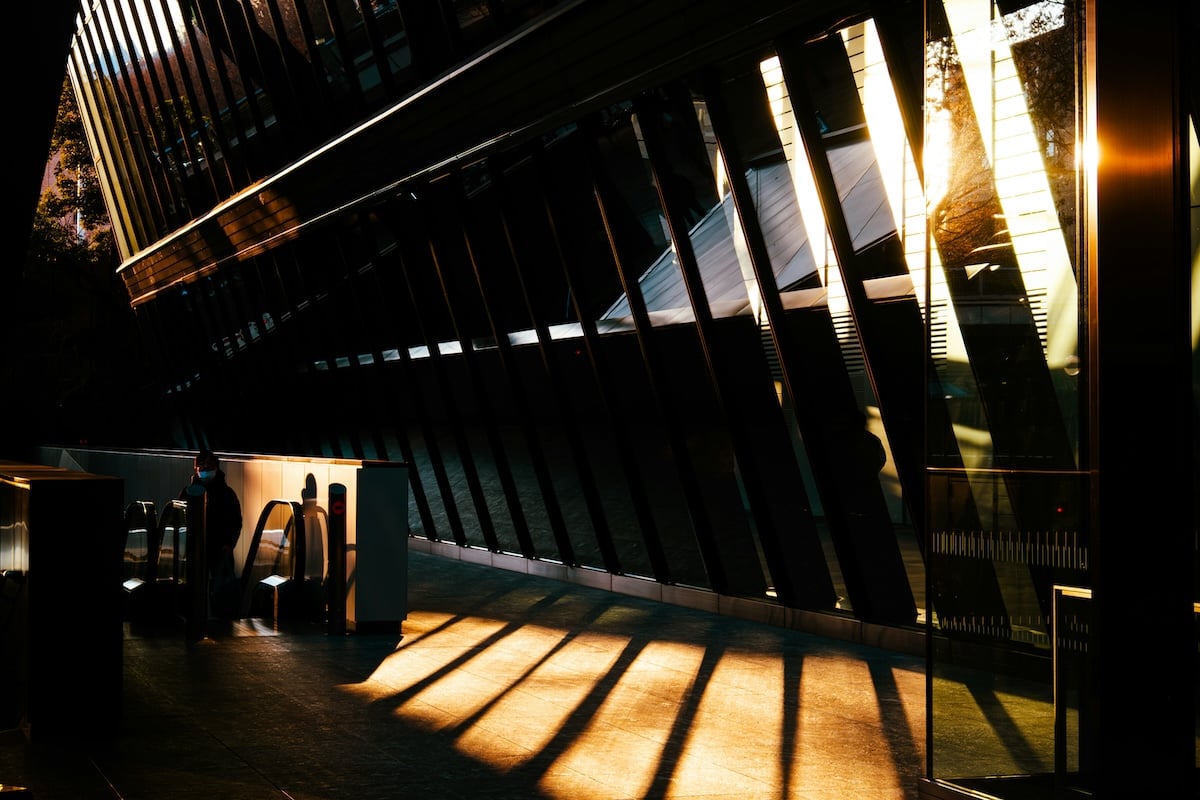
6. Use Triangles in the Background
I wanted to include this extra little section at the bottom to try and analyze what I like about the photo below. It’s hard to know exactly why without delving a little deeper.
The natural lighting is good, perhaps a bit dark. And the sharpness and aperture are fantastic. But most importantly, I feel it was the inclusion of so many diagonal lines. This created many triangles in the frame, making it so striking.
I counted at least seven triangles, which kept me staring at the photo. Subtle differences in angle and viewpoint can make a huge difference to your photos.

Shot with a Sony 7R IV. 35mm, f/2.5, 1/500 s, ISO 200. Mahdi Chaghari (Unsplash)
Conclusion: Triangle Photography
Using triangles in photography can add a new level of dynamism to your work. And using them effectively almost guarantees a more interesting photo. Next time you’re shooting, look for examples of the types of triangles above. Include them in your photos and see how they improve!
Check out our Intuitive Compositions eBook for more dynamic tips for better photos!