One of the most loved aspects of real estate photography is shooting stunning images at twilight. These images have a charming feel to them and can also make a real estate listing more attractive. Twilight photos also add great value to any portfolio but they are different from regular architecture photography.
In this article, we present the following tips to help you to master the enchanting technique of twilight real estate photography.
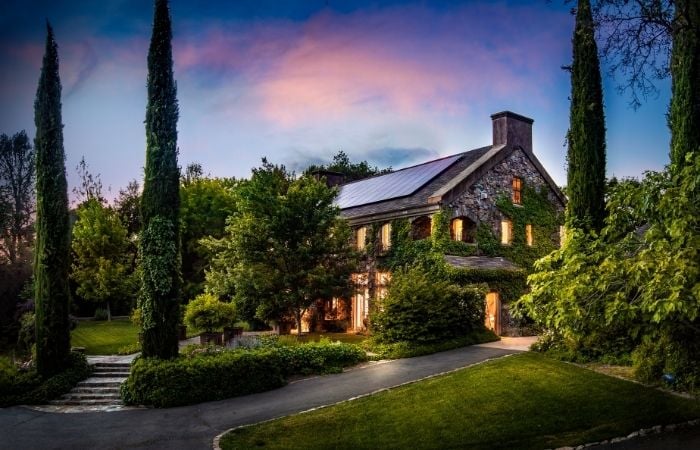
What is Twilight Real Estate Photography?
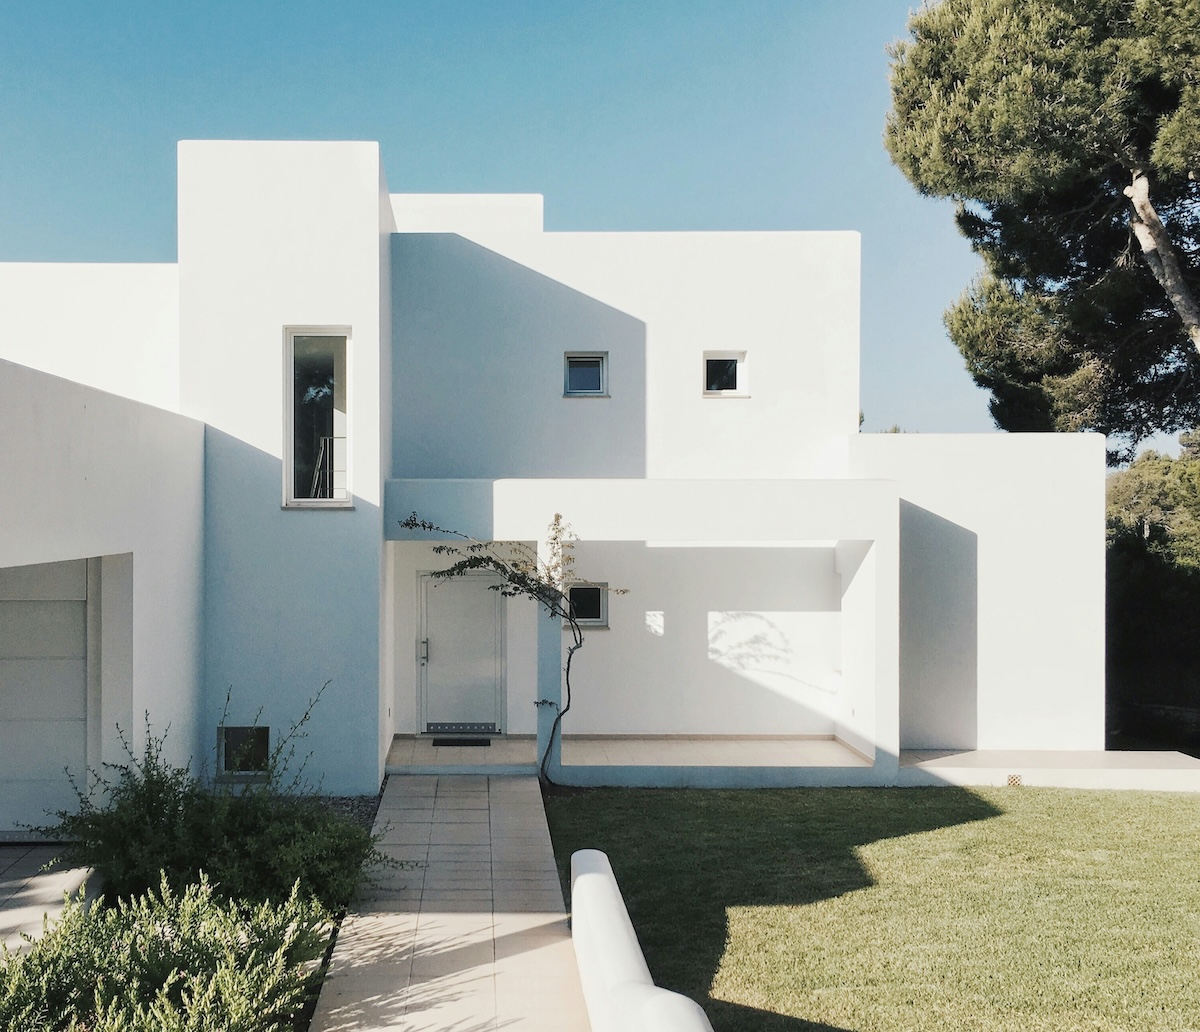
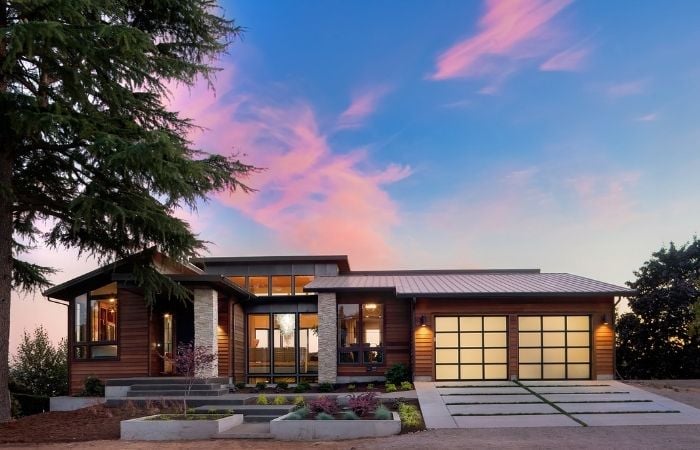
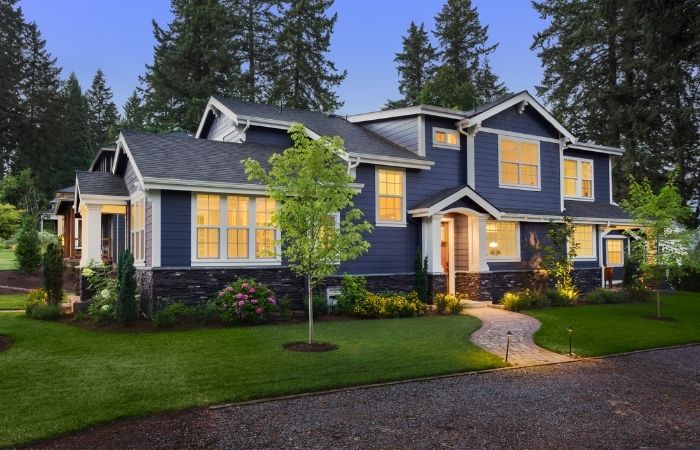
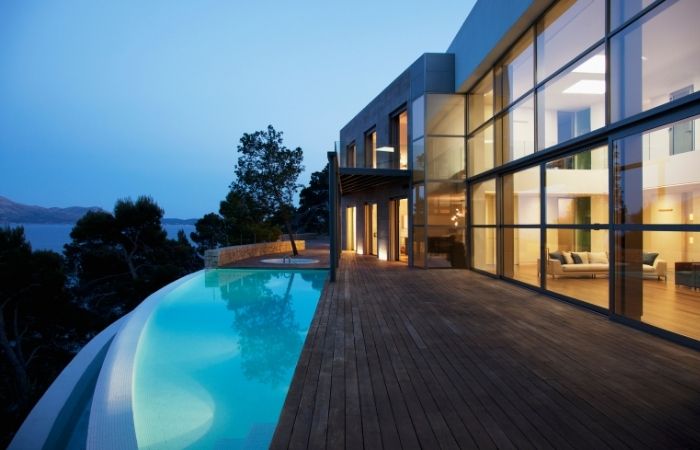
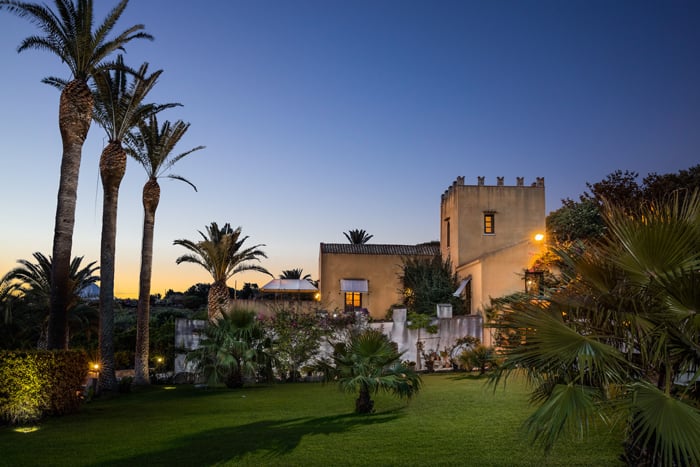
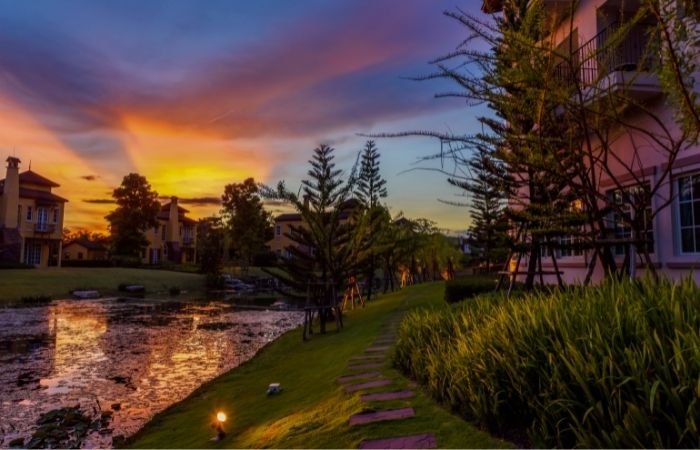
A twilight photo is an external image of buildings taken at dusk that is very common in architecture and real estate photography. It’s shoot in a particular moment when the sky’s light is perfectly balanced with the property’s lights.
Shooting extraordinary twilight real estate photography requires a camera, tripod, and perfect timing. After the sunset, turns on all the property’s lights and Shoot when the dusk light is perfectly balanced with it.
10. Plan and Prepare for Twilight Photos
The first step is accurate planning.
Since interior photos are usually taken during the day, you can set a different date for the twilight shot. Most such photoshoots are done during summer when days are longer.
Good weather is also essential. While a few clouds can add a colorful touch, it is not easy to predict a magic sunset. Consider arriving at least one hour before sunset so you have the time to set the framing in every detail. You will only have a few minutes to shoot twilight photos. If you arrive late, you will lose the photo.
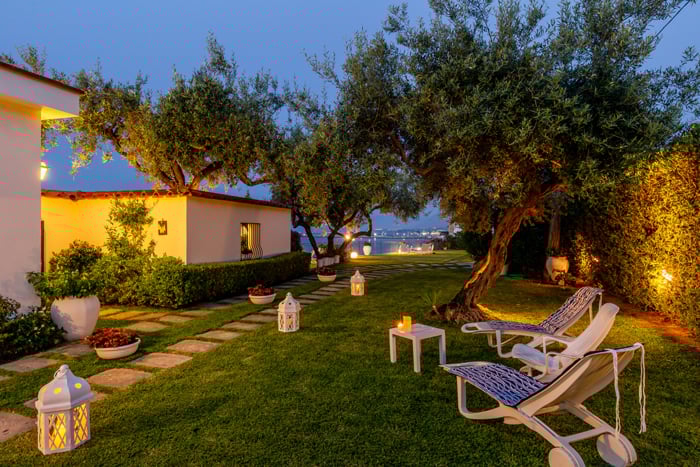
9. Turn on the Lights
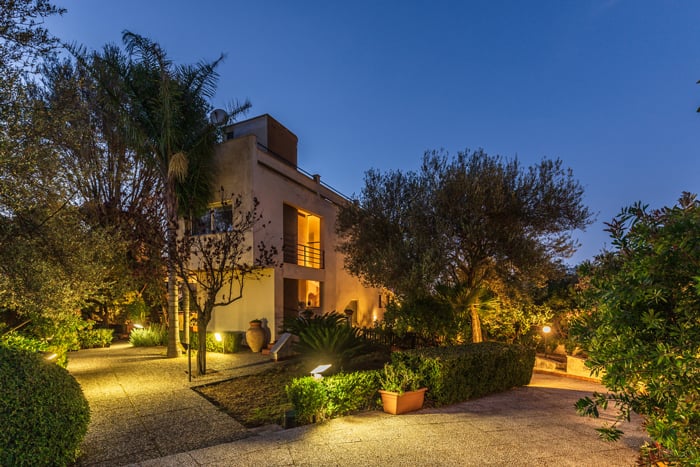
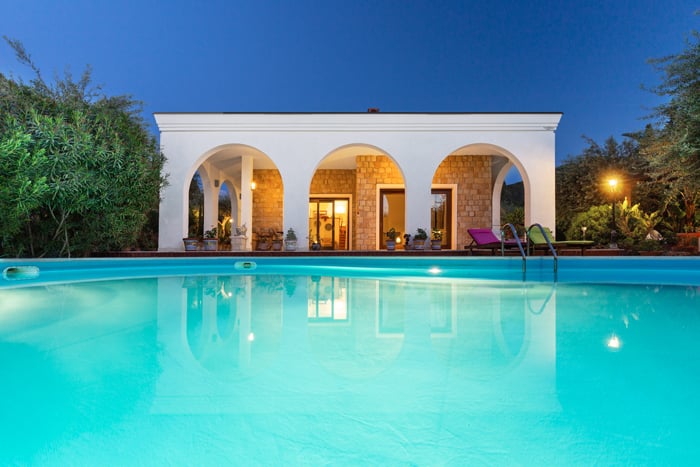
What makes sunset photography so fascinating is the richness and vividity of the colors. The blue of the sky and yellow of the lighting are at the opposites of the color wheel. For this reason, the combination adds a distinctive character to the photo.
The bright azure of the swimming pool can give a sense of peace, like the calmness of its still waters. Plants and hedges appear from the darkness, enlighten by outdoor fixtures.
Except for the sunset that is not always under your control, the final results will depend on artificial lighting. The first step is to turn on every light. Both interior and external lights have to be on before the sunset. The interiors light up doors and windows. You can also close the curtains if they make the light pass through to avoid an excess of details. The exteriors light up the walls, the plants, the pool, and the passages. As the sunset goes on, the lights appear more and more present until they reach a perfect balance.
8. Use a Tripod
As a real estate photographer, you do not need expansive or sophisticated equipment. But there is one accessory that you cannot miss. It is the tripod.
In real estate and architecture, you should take every photo slowly. Everything in the framing is still, and the tripod allows you to look at every detail.
And if interior daylight photography is slow, shoot twilight is even slower. You can choose the best point of view and prepare an accurate composition before the moment of the shot.
When shooting in low light, you need to use high ISO or slow shutter speed. Moreover, you avoid micro shakes and can capture a crisp, sharp image.
Finally, you can shoot multi exposures that are perfectly overlapping and merge them in post-production.
7. Wait Patiently for the Perfect Moment
Twilight real estate photography is never about quantity. Shooting at twilight is completely different from a standard daylight shooting. During the day, you move through spaces to describe the property in every corner. Most of the time you have to do it quickly, to fulfill the client’s needs. In the evening, you can only shoot a few images in two or three hours.
If you want to get the best result, patience will be your best ally. It’s easy to be carried away shooting a lot of pictures but you risk only get mediocre images.
The timing is decisive in the success of a great photo. The best way is to recognise the best point of view and wait until the light is perfectly balanced. Once you decide on the best framing, you do not have to move your camera until you get the perfect shot.
6. Capture One Hero Shot and a Couple Secondary Shots
You waited with patience to get an amazing hero shot, and you already did most of the work. Now there are only a few minutes left before the sky becomes too dark, and, in this time, you can still capture a few more useful images.
Unlike your hero shot, you need to move quickly, and you could not have time for accuracy. Depending on the season and the latitude, dusk can long less than half-hour, and you already spent most of the time for the hero shot. A few minutes are enough to shot some more great images. You can take an alternative exterior shot, an exciting view from an interior, or a breathtaking drone shot.
The best thing is to plan these secondary shots, so you can go straight to the selected point and shot without hesitation.
5. Use Flash
Sometimes exterior lighting does not light up an important feature as you would like it to. In this case, you can use a flash to compensate. This technique is particularly effective in twilight real estate photography.
Since you are using your tripod, you can illuminate a whole manor with a single flash. You need to take several pictures and move the flash at every shot. You can light up a dark wall, a beautiful plant, or even strengthen existing lights. All these images should be perfectly overlapping in composition.
The only limit to this technique is the power of your flash. Especially for outdoors, a Speedlite could not be enough to light up a large wall. For this purpose, battery-powered studio flashes are the best solution.
4. Use HDR or Layers to Recover Details
To reveal details from highlights and shadows, you can use different techniques.
You need to start from a bracketed series of at least three photos: one correctly exposed, one exposed for the highlights (underexposed), and one for the shadows (overexposed). You can use AEB (Automatic Exposure Bracketing) for a quick shoot.
You can merge the shots in a single HDR photo. In this case, I recommend a moderate use of the highlights and shadows sliders in Lightroom because they affect the whole image. To reveal more detail, you can continue with a local adjustment brush or radial gradient. With this method, you avoid the exaggerated look of HDR and get a more pleasing result.
For a more realistic look, you should instead process the images in Photoshop. Once you stack the images as layers, you can use a mask to reveal or recover details. Tweaking with the blur and transparency of the layer mask will allow you a seamless transition.
Do not exaggerate with filling the shadows because they add three-dimensionality to the image. In some cases, you may want to emphasise silhouettes. Then you should do the opposite, making the shadows even darker.

3. search the Sky for a More Dramatic Look
One thing that any photographer wants to avoid is to postpone the shooting for bad weather. If it’s not raining, you can still deliver great-looking pictures by replacing the sky. Unlike daylight exterior shootings, you do not have to worry about sun exposure and shadows.
First, you need a good experience with Photoshop and sky replacements. A twilight image will likely be used as a hero shot, and it would be useless if the sky is roughly stitched and looks unnatural.
Second, you need a good collection of skies to make every shooting unique. At the same time, all the twilight images from a shooting should be coherent. You should replace the same sky in all images, trying to change the angle of view to create a variation.
Third, you can use the new sky to add a stunning sunset. In this way, you can create impressive pictures even if you start from a clean blue sky. The only thing to pay attention to is that the direction of the sun. search the sky with a new sunset coming from the side, from behind, or in front of the viewer, in the same way as the real sunset.
2. Color Correct Lights
The ideal comes from the contrast of the blue of the sky and the yellow of the fixtures. In real circumstances, you will find lights with different temperatures.
Some will look yellow, and some others will look white, but you can make them uniform with quick editing.
You can do most of the work using the Local Adjustment Brush in Lightroom. For the most accurate selection, you can use a Luminance or Color Range Mask.
For a sequence of windows that differs in color, you can use the Clone Stamp or select and replace the window’s interior in Photoshop.
For the garden and exteriors, you can also remove the color cast in some cases. Especially for plants, a neutral light can look better.

1. Do Not Overprocess
With a twilight image, it can be easy to be carried away with processing to give a more artistic look. But the aesthetic approach is not always useful, and you should look from the market’s point of view. There are positive and negative to this.
The good is that the images can be more eye-catching, and the listing of the properties will attract more clients.
The bad is that the image does not correspond to reality, and clients will not find what they expect. The risk is that a bad first impression can minimise or cancel any effort made to attract clients.
Conclusion
Twilight real estate photography can be an art that makes your clients happier and helps you to attract new ones. By following these tens steps, you will do it in the right way will allow you to reach a higher level in your profession.
Learn more tricks to capture real estate photos that rent and sell properties at higher prices with our Picture Perfect Properties!