Doing a few simple photography projects together can benefit you and your child. Our article gives you seven photography explorations you can do with your child to build a closer relationship and improve your images!
Your children can gain self-confidence, improve their creativity, and build better communication skills through photography. We live in a visual world, and photography is a universal language anyone can understand.
7 Simple and Fun Photography Projects for Kids
The most important thing is to make it fun for you and your child. A positive and encouraging approach instills a desire to continue with photography for a long time.
Here are seven photography projects with two example photos each. We also have suggestions and ideas on how to explore each topic further. You can explore several projects simultaneously or pick one that interests your young budding photographer the most.
1. Create or Look for Shadows and Reflections
You can treat these two subjects as separate themes to have fun with. But I combined light and shadow because they both involve photography, in which the main subject may not be the center of interest.
You can photograph shadows the sun naturally makes or create your own using artificial light, like a flashlight. In the forks photo below, I set up two pieces of scrap cardboard in my dark basement and moved a small flashlight around until I liked the effect.
I mounted my camera on a tripod and used the self-timer function to give myself enough time to get the shadows right.
 For outside shadow pictures, the sun casts longer shadows earlier and later in the day. A simple, uncluttered background usually works best and makes interesting shapes from the shadows more prominent.
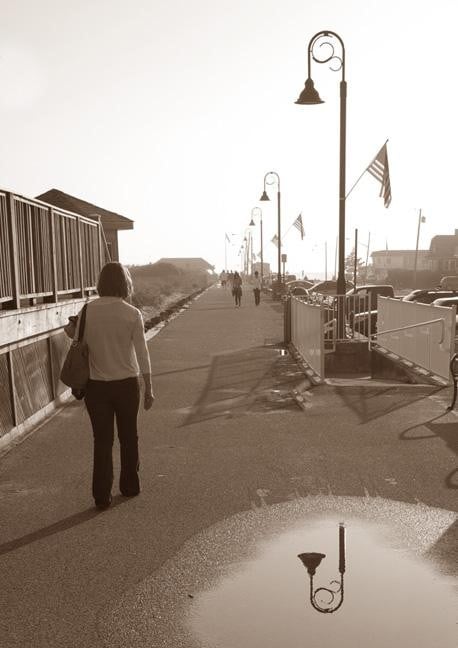
You can find reflections everywhere. Smooth, shiny surfaces work best. Glass surfaces, shiny metal, and water are popular surfaces to have fun with this one.
Small puddles are great for isolating parts of outdoor objects. You can also use mirrored sunglasses, shiny objects like your kitchen toaster, automobiles, or other silverware to achieve great effects.
2. Bring Cameras Closer
Close-ups and true macro photographs often reveal a world we ordinarily ignore.
The vast majority of macro photos photographers take are of flowers and insects. The variety of species and locations you can find makes these photography projects easy to delve into.
If you want to challenge your child’s (and your) creativity, try looking for other macro subjects. You can find very interesting subjects right in your kitchen.
When sliced open, this red pepper below revealed some interesting patterns. We achieved soft, directional light during the exposure by aiming a strobe light at a white piece of paper above the pepper.
 If you want to avoid the kitchen, try another location, like the playground, the garage, or the bathroom! Can you guess the subject in the photo below?
This is a close-up photo of the suction cups on a bathroom shampoo bottle holder. We sprayed it with water first to create interesting patterns.

3. Experiment With Different Textures
One of the best ways to improve your visual recognition skills is to focus on one element of photography—color, contrast, shape, or texture. Perhaps less exciting to many, photos of textures are often very simple and don’t get much fanfare.
Still, the point of these photography projects is to exercise the ability to recognize an image’s different qualities so you can capture it in an image. When light comes in from an angle, textures are usually most visible and enhanced.
Try to find textures that challenge you and your child to examine different surfaces. Look for the complex patterns found on the material you’re examining.
Shooting textures might be best if you like to find details that the casual observer may not notice. The photo below shows the ceiling of an abandoned factory, taken less than a year after a fire ravaged it.
Finding this texture required us to look up and notice the light coming in from the windows on one wall. It brought out the rough shapes of the singed materials above.
 Textures are often shot with a cropped view, sometimes with longer lenses or closer distances to eliminate distracting elements. A focal point or center of interest makes for a stronger image.
Shooting textures in black and white can also be good practice. The absence of color calls greater attention to textures and forms.
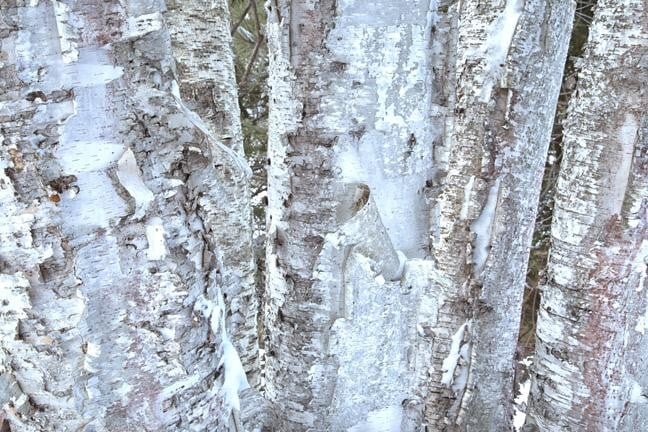
Photographers often use buildings, walls, and other artificial flat surfaces as subject matter for texture photos. But nature also has an abundance of texture subjects. Textures are everywhere!
The photo of the birch tree bark below, titled “Birch Brothers,” was taken in the White Mountains of New Hampshire. The photo has no real center point of interest other than the unique subtle colors and patterns the bark reveals.
4. Shoot in Different Natural Light
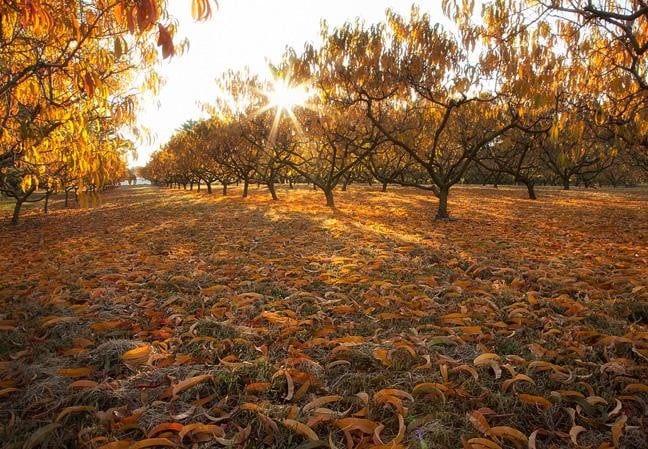
Photography starts with lighting, and any list of photography projects should have at least one outing based on lighting. For this project, look for situations where something partially or fully obscures the sun.
The direct sun hitting the lens may be too harsh and tricky regarding exposure and flare. The slightest movement of your camera or the sun can make a big difference in the final photograph.
We photographed the peach orchard below early on a crisp Fall morning. I positioned the camera so that only a portion of the sun made it through.
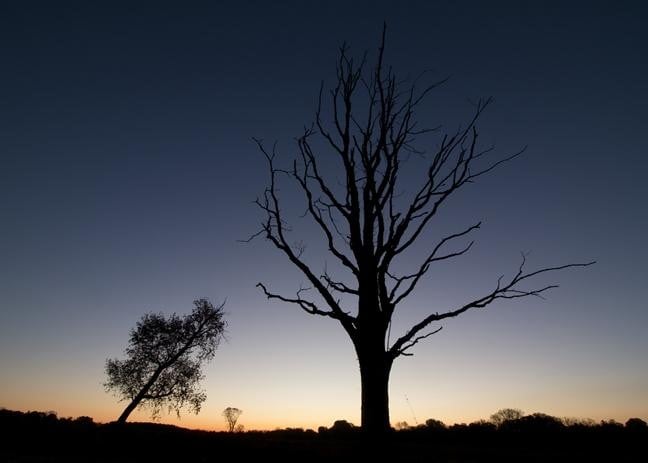
 Another way to experiment with light is to look for a situation where your subject completely blocks the sun. The sun was below the horizon in the photo of the leafless tree below.
You can get interesting results with silhouettes where all the light comes from behind your subject. Little or no light hits your subject on the side, viewable from the camera’s perspective.
You can shoot before sunrise or after sunset, and the sky becomes the background behind your silhouetted subject. Open spaces where the light doesn’t reflect toward your subject give you the silhouette look.
5. Find Frames in the Environment
Framing is a way of drawing attention to the subject of an image by blocking other parts of the image with something in the scene. It’s good to teach some of the standard rules of composition, even if you don’t want your kids to mindlessly follow them.
Framing your subject within your photos is a composition technique. It gives your photo a sense of depth and leads your eye toward the main subject.
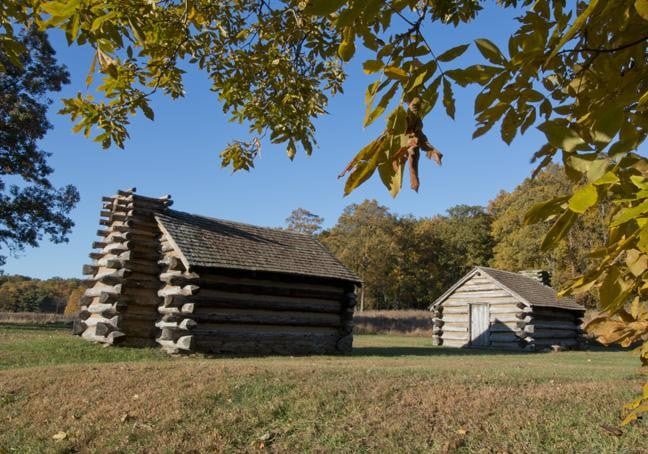
I took the photo of the cabin below in Valley Forge Park in Pennsylvania. I composed the photo to include the tree branches to frame and emphasize the cabin. Photographers commonly use this approach in landscape photography and portraits.
 You can also get creative with framing by using “openings” to frame your photos. During a photo excursion to Alaska, I saw this opportunity to use the windows inside our small cruise ship. I framed the Southeast Alaskan mountains.
Try including a doorway, an arch, an opening in vegetation, or another structure that frames your main subject. You can make it like a scavenger hunt. Your kids can search for different angles and perspectives to use.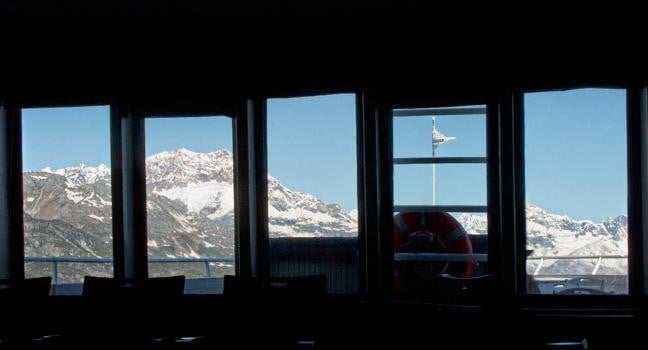
6. Take Unconventional Selfies
The informal self-portrait (or “selfie,” as it’s lovingly known) has become commonplace. It’s a fun idea for you and your kids to experiment with.
There are several photography projects you can come up with around this idea. One suggestion is to limit the type of selfies. Have your kids take pictures of their shadows rather than shooting the typical teen selfie in the bathroom mirror.
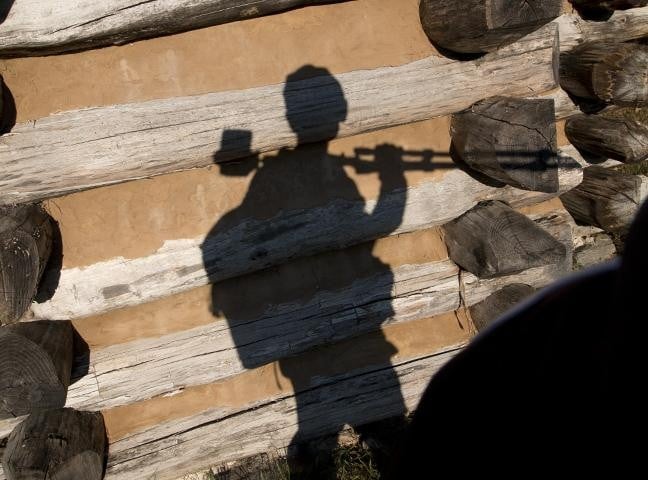
Yes, in the first example of a selfie, we’re back to a shadow photo. But this time, we want to focus on the shape of our shadows. In the shadow selfie photo below, I was strolling around with my camera and tripod draped across my shoulder.
I wanted to make the photo look like I was walking by this cabin, not just standing and looking. I set the camera on a self-timer and showed only my one holding onto the tripod.
 The second creative selfie example uses your reflection as the main subject. Curved surfaces or surfaces that only reveal a part of your face can give you the most interesting results.
The photo below includes an ordinary Christmas ornament with a tripod, camera, and distorted face. Your results will change greatly depending on whether you use a wide-angle or telephoto lens setting.

7. Experiment With Motion Blur
Out of all these photography projects, this one might appeal most to kids who enjoy expressing themselves by moving around.
You may have to shoot several variations of intentionally blurred photos to find an appealing one, but that’s a big part of the fun. Each version you try is unique, so experimenting is part of the game.
Taking a photo like this first one may make you feel dizzy, so it’s not for the faint of heart. You can have part of the photo remain sharp and some go blurry.
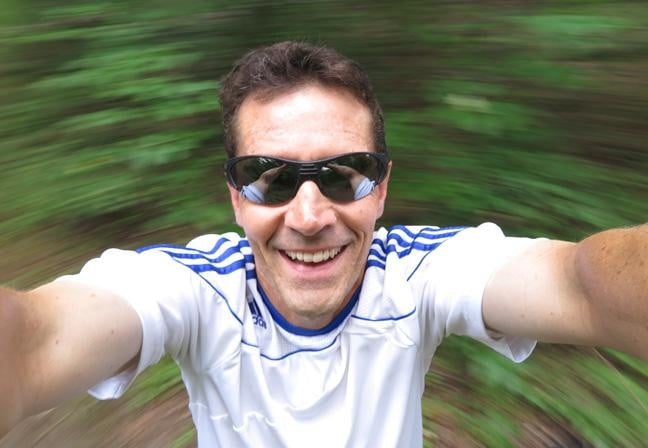 The tricky part is getting your spin and shutter speed at just the right speed. This blurry spin in the woods had an exposure time of 1/8 s (seconds). Other ways to create intentional blur include zooming your lens and rotating your camera during exposure.
In the photo of the blurry building, I rotated the camera as I took the photo. I took it from a balcony overlooking a picnic area at a sports stadium.

Conclusion: Photography Projects With Your Child
These fun photography projects for kids are perfect for keeping them engaged and fostering artistic expression. With little guidance and encouragement, kids can develop a lifelong passion for photography.
These are my three general tips when doing a photography project with your child:
- Keep a childlike curiosity when exploring each topic.
- Critique your photos and your child’s with a positive, supportive attitude.
- Searching for keywords on photo gallery sites like Flickr, 500px, and Pinterest can give you more interesting ideas for new photos.
Are you interested in finding some more great photography project ideas? Check out our article about 21 photography projects to try at home!