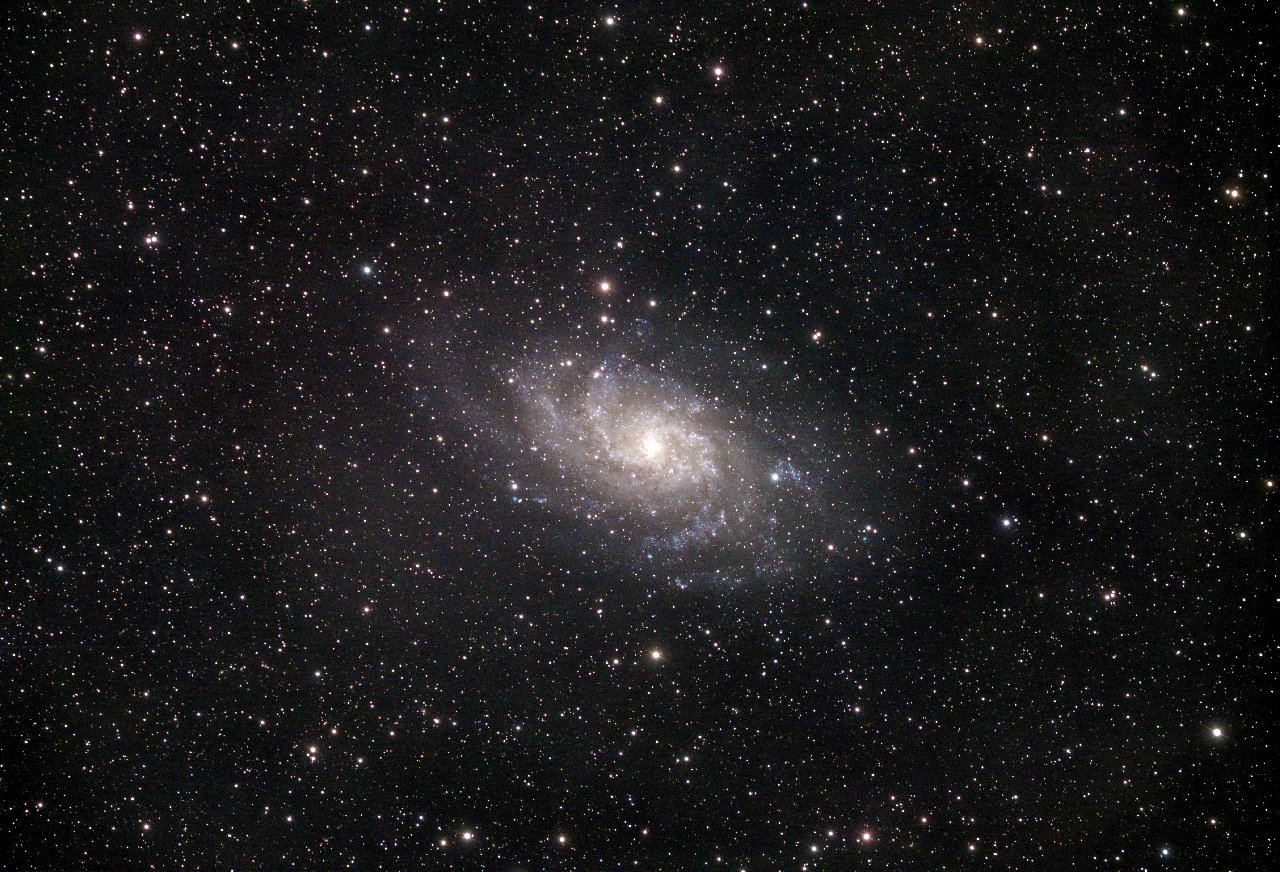
Space holds a special place in many of our imaginations. Astrophotography is the best way to explore deep space without leaving Earth. We can see planets, star clusters, and nebulae in glorious detail from our backyards!
Astrophotography isn’t the easiest form of photography. It requires specialist knowledge, skills, and equipment. But with patience and application, anyone can master the art. Astrophotography lets you capture breathtaking images of deep-space objects no one can see with the naked eye.
If you want to use your camera to go on a cosmic journey, we’re here to help you get started. Our article gives you all the information you need, whether it’s camera settings or the best astro gear. Keep reading to find out more about astrophotography.
- Learn to plan shots with optimal light, weather, and moon conditions.
- Discover the precise settings for stunning shots with any gear.
- Master simple editing techniques to enhance your night sky images.
What Is Astrophotography?
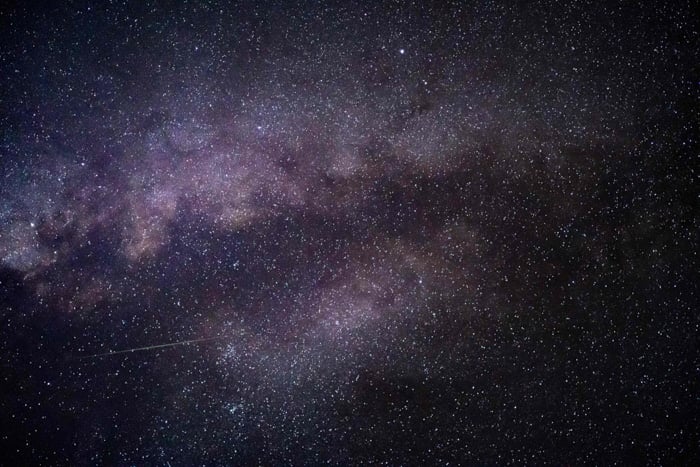
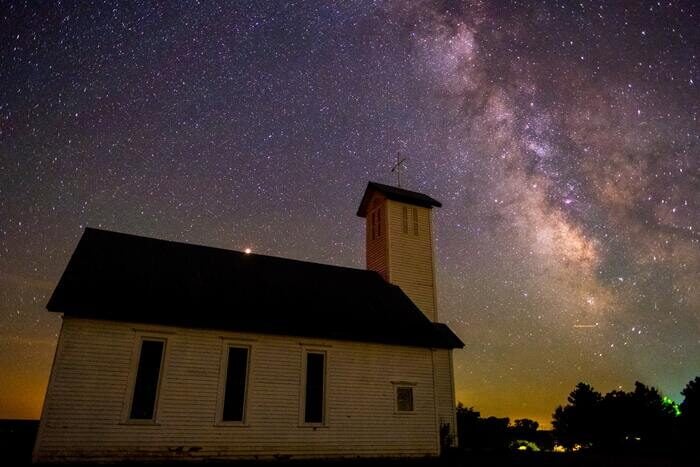
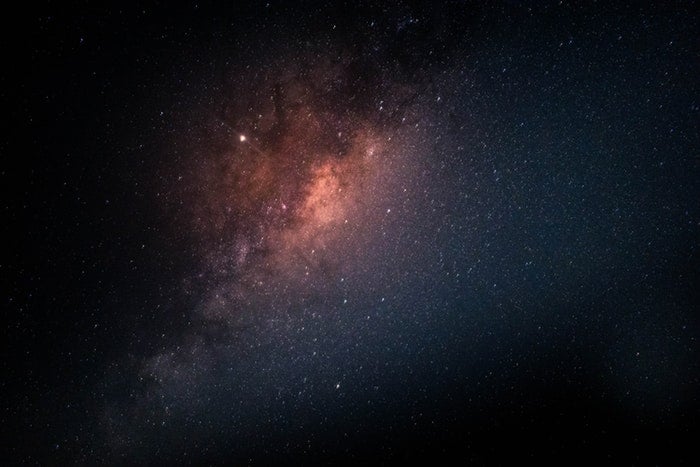
Astrophotography is the art of using a camera to take photos of objects in space. While Milky Way and night sky photography capture broad swathes of stars, astro focuses on specific elements within the night sky. These include planets, star clusters, and nebulae.
If you’re already familiar with Milky Way photography, that puts you in good stead when starting astrophotography. But as you may know, you can’t get deep-space images using standard camera gear. It’s best to have specialist equipment to capture detailed images from within the cosmos.
There are also different tricks and techniques for photographing different space objects. But don’t worry if you’re starting to feel overwhelmed. We have a wide range of tutorials focusing on everything from star to solar photography.
We start with an astrophotography glossary and then explore the detailed process of capturing astro images. Remember to click the link in each section to learn more about that topic. You can use these jump links to go to the section you need:
- Astrophotography terms
- How to shoot astrophotography
- Choosing a camera for astrophotography
- Astrophotography lenses and filters
- Telescopes and star trackers
- Astrophotography apps and software
- How to edit astrophotography
© Aldebaran S.
Astrophotography Terms
Astrophotography has its own unique set of terms that can be confusing for beginners. Understanding these terms is important for improving your skills and achieving results.
One key term is “aperture,” which determines how much light your telescope can collect. Another is “apparent magnitude,” which refers to the brightness of a celestial body. Calibration frames like bias, dark, and flat frames remove noise and correct uneven illumination in your images.
Other terms include “equatorial mounts,” which compensate for the apparent motion of stars. And there are “light pollution reduction filters,” which reduce the effect of artificial lights.
Learning these astrophotography terms helps you better understand the techniques and equipment used.
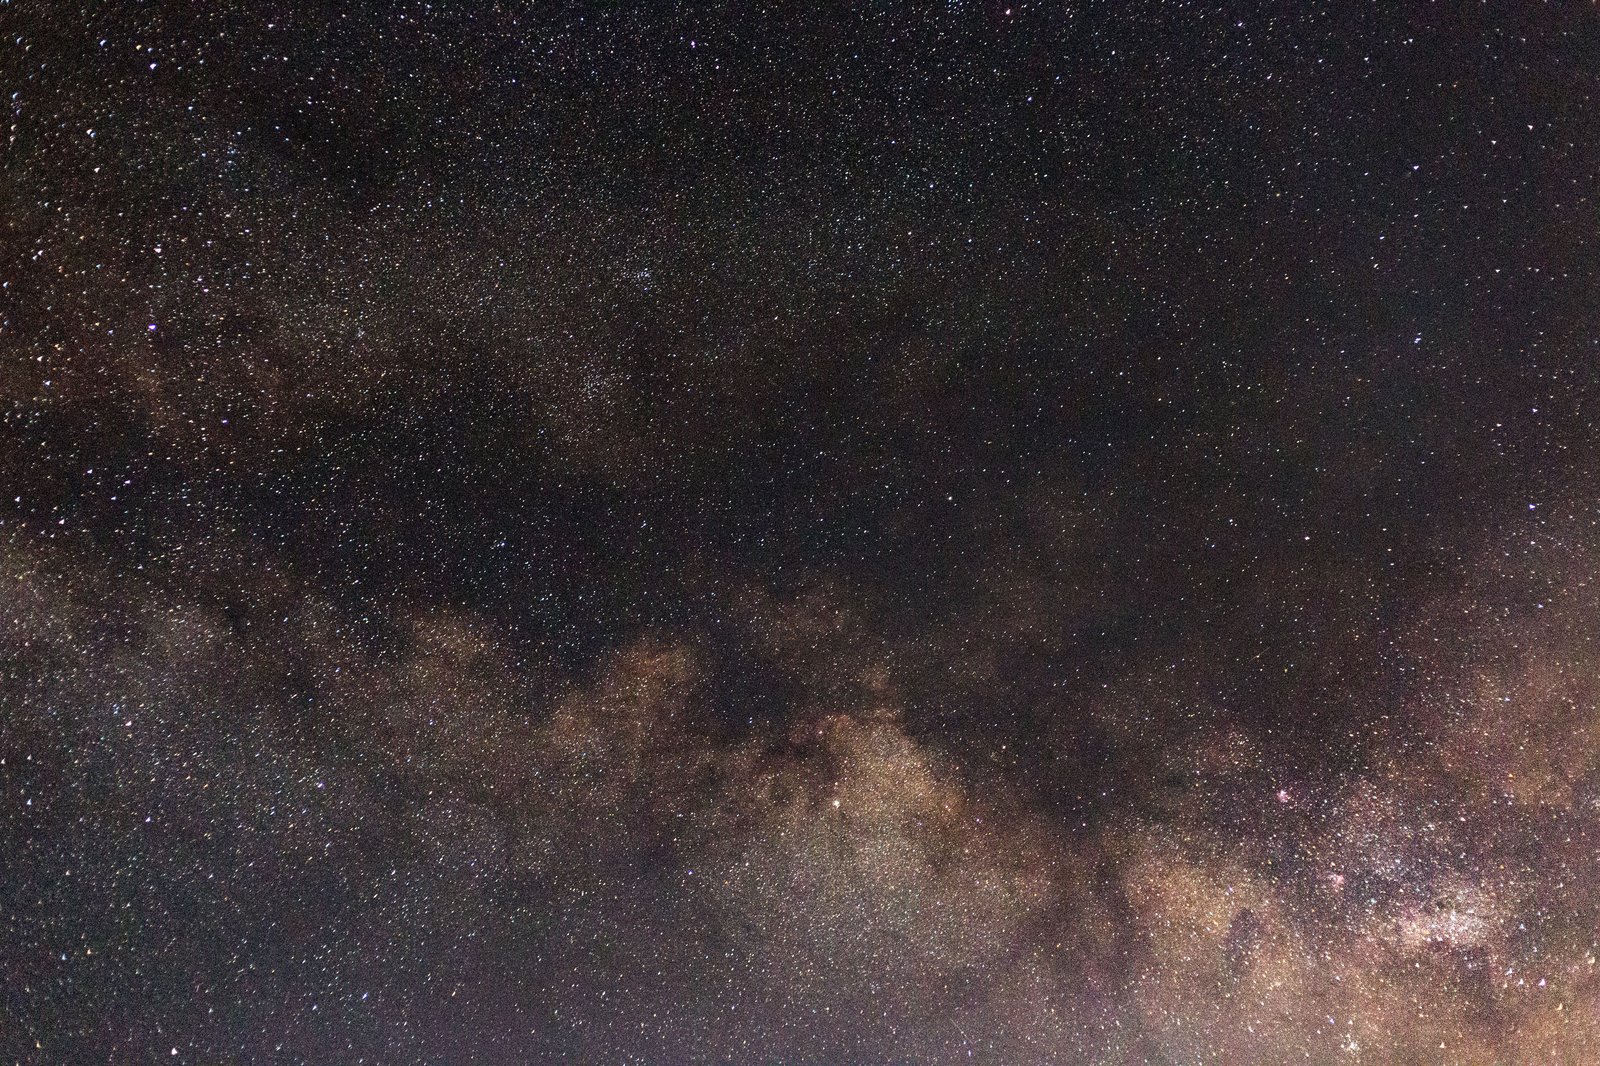
How to Shoot Astrophotography
Night sky photography is a beautiful field that involves turning your camera towards the stars. It’s not easy, but you can capture stunning night sky images with the right equipment and techniques.
You need a DSLR or mirrorless camera that can shoot in RAW format to get started. A wide aperture (f/2.8 to f/5.6) is also important for capturing as much light as possible. Other must-have accessories include a sturdy tripod, remote shutter, and a headlamp with a red light.
When shooting the night sky, you’ll want to focus manually and use a high ISO to capture as much detail as possible. An equatorial mount can help you take longer exposures without getting star trails.
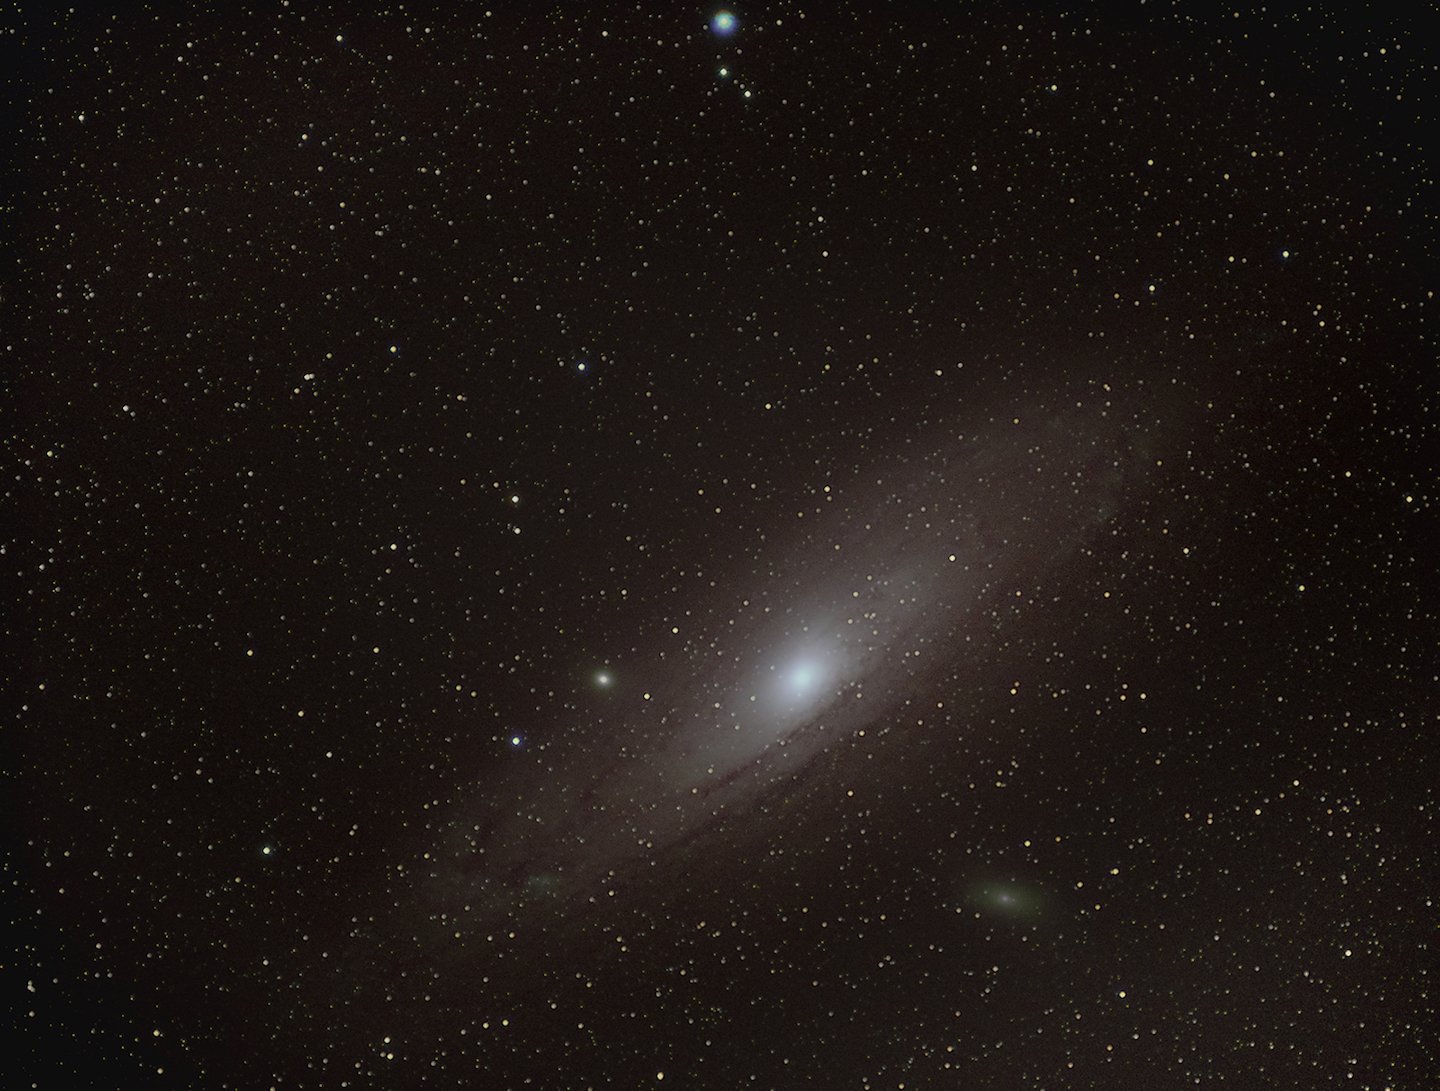
With practice and patience, you can take breathtaking images of the Milky Way, constellations, and even galaxies. To learn more about night sky photography, check out our in-depth guide.
Composition
Composition is key to taking powerful pictures in any genre, and astrophotography is no different. When shooting deep-sky objects, it’s best to experiment with different compositions. Try things out and find what works best for your style of astronomy and Milky Way Photography.
Place interesting foreground elements like trees or mountains in your frame to add depth. Using leading lines like roads or rivers draws the viewer’s eye into the scene.
The rule of thirds is a classic composition technique that works well for astrophotography. You position key elements like the horizon or Milky Way along the grid lines.
Include human elements, like a tent or person gazing at the stars, to provide a sense of scale. Silhouettes make striking subjects against a starry sky.
Reflections in lakes or ponds can double the impact of your astro images. The night sky mirrored in calm water creates a stunning symmetrical composition.
To learn more about astrophotography composition, check out our detailed guide. It contains examples and techniques to enhance your night sky photos.
500 Rule
The 500 rule is a simple way to avoid star trails in astrophotography. It lets you calculate the longest exposure time before stars start to blur.
To use the 500 rule, divide 500 by your lens focal length multiplied by your camera’s crop factor. The result is the longest exposure time in seconds before stars begin to trail. For example, with a 50mm lens on a full-frame camera, the longest shutter speed would be 10 seconds (500 ÷ 50).
You can improve your astrophotography even more by taking multiple exposures at the shutter speed given by the 500 rule. Then, you can stack them together in post-processing software. This process boosts detail and enriches the night sky.
Learn more about the 500 rule for astrophotography in our in-depth guide that covers the technique in detail.
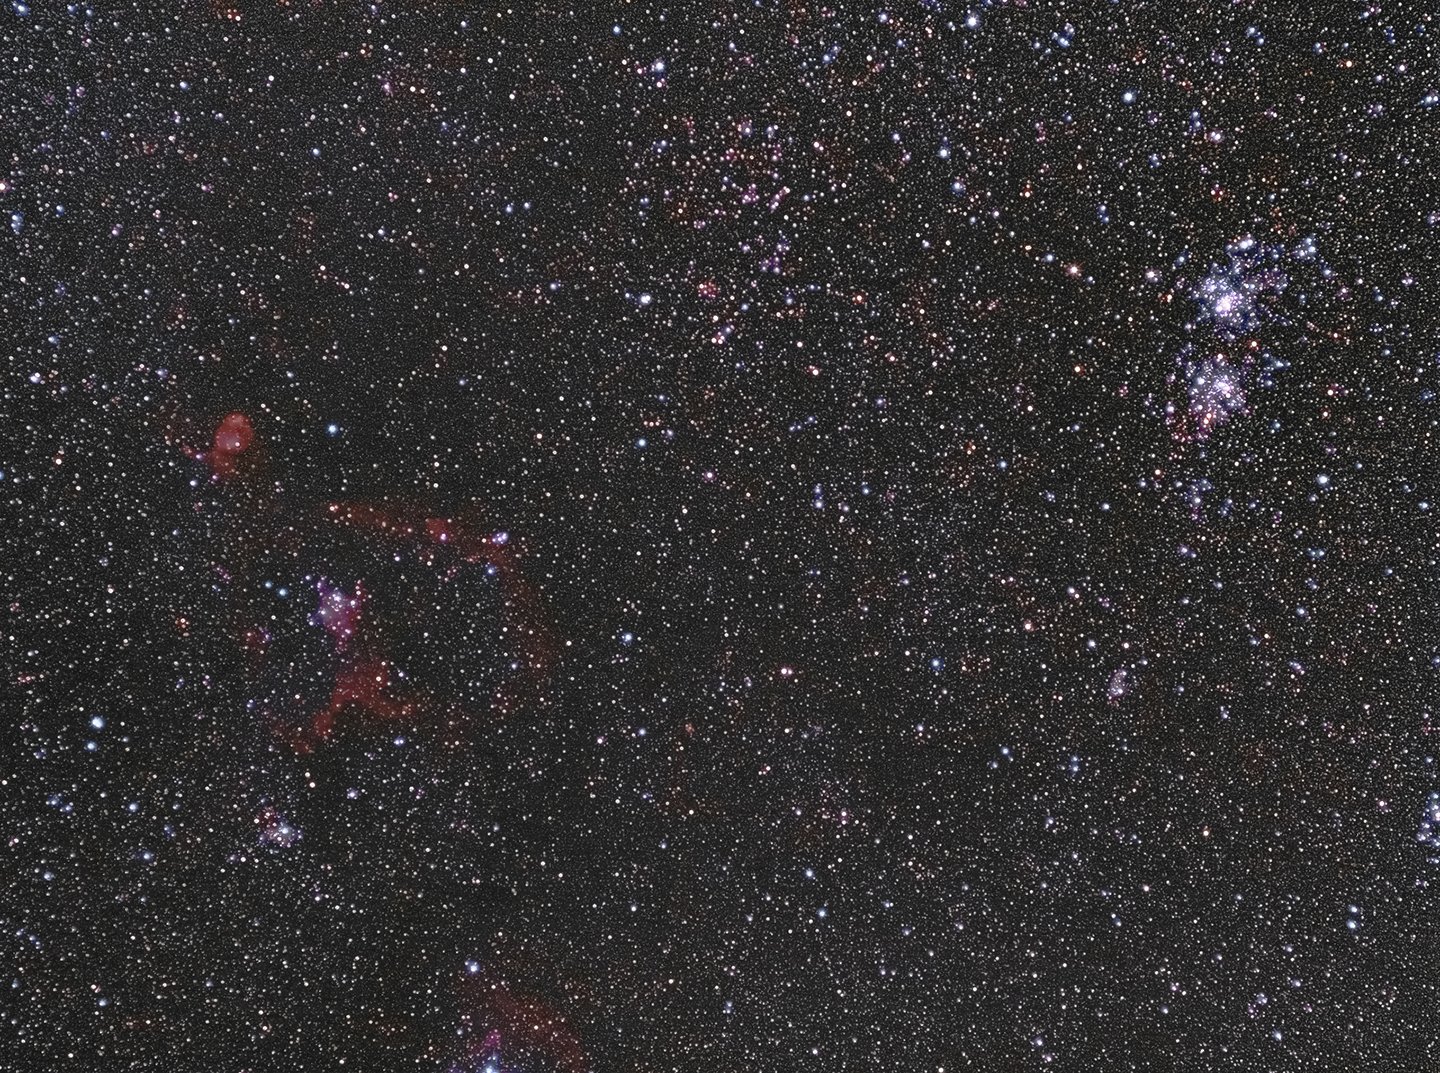
Star Photography
Star photography captures the beauty of the night sky. To shoot stunning star photos, you need a camera with good ISO performance, a sturdy tripod, and a fast lens with an aperture of at least f/2.8. Use manual mode and focus, and shoot in RAW format.
Camera settings vary depending on the type of star photography. You take a series of 30-second exposures over an hour for star trails and stack them in post-processing. When photographing the Milky Way, use the 500 Rule to find the longest exposure before the stars blur.
Find a location with dark skies away from city light pollution. Look for interesting foreground elements like buildings, rock formations, or trees. Star photography is a challenging but rewarding genre that can lead to breathtaking images.
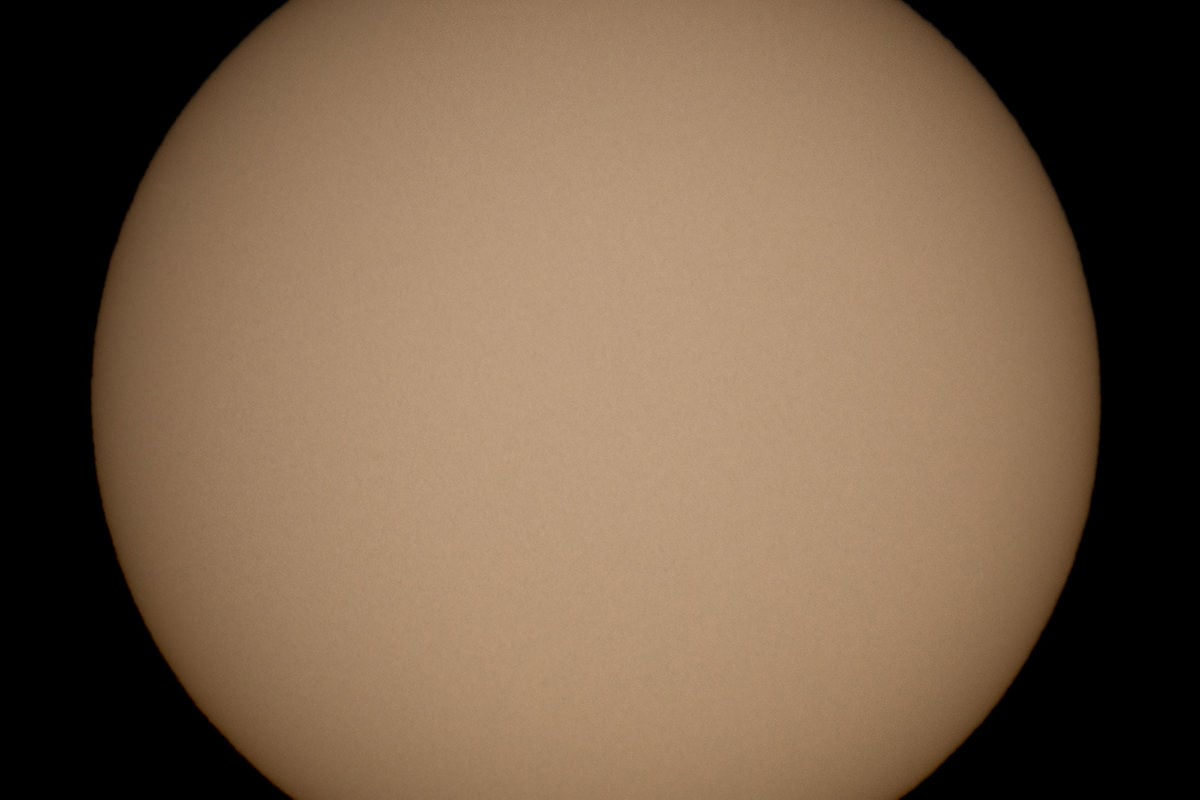
Solar Photography
Solar photography is a fascinating way to capture the Sun’s beauty and power.
You need a solar filter to protect the camera and your eyes from the intense light to get started. White light solar filters are an affordable option. They let you photograph sunspots, solar eclipses, and planetary transits.
When taking pictures of the Sun, use manual focus and the lowest ISO setting on your camera. A tripod and intervalometer are helpful accessories for capturing sharp, detailed images. You can also use a teleconverter or Barlow lens to get closer to the Sun’s surface.
Safety is crucial in solar photography. Never look directly at the Sun through a camera, binoculars, or telescope without a proper solar filter. Inspect your filter for damage before each use.
With the right equipment and precautions, you can safely explore the wonders of our nearest star. To learn more about solar photography, check out our in-depth guide.
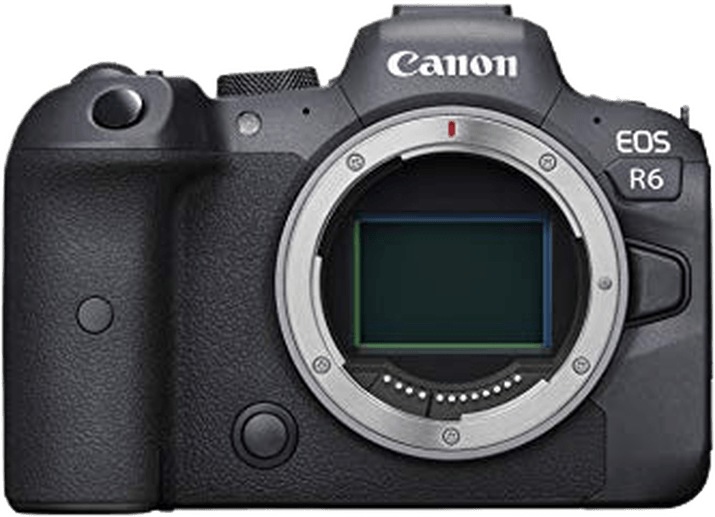
Astrophotography Cameras
You need a good camera if you want detailed images of objects from our galaxy. Although spending thousands of dollars on the most powerful camera is an option, you don’t need to. You only need a decent DSLR or mirrorless camera with good low-light performance.
Size and weight are two more important aspects when looking for an astrophotography camera. A camera that’s too heavy can be a problem, as it’s best to use a sturdy tripod and maybe a tracking mount.
It’s best to choose between an APS-C and a full-frame camera. The next section discusses which sensor size is best for astrophotography.
APS-C vs Full Frame
Consider your goals when choosing between APS-C and full-frame cameras for astrophotography.
Full-frame cameras have larger sensors, which means they perform better in low light and have a wider dynamic range. These features make them a good choice for capturing starry landscapes and star trails.
But APS-C cameras have advantages, too. Their smaller sensors give them a narrower field of view, which helps you hone in on targets like planets and deep-sky objects. Your setup is also more compact and lightweight, letting you use lighter, less expensive tracking mounts.
Ultimately, any modern camera can give good results for astrophotography. The key is to understand the strengths and limitations of different sensor sizes. Learn to work with the gear you have!
Best Cameras
When choosing a camera for astrophotography, low-light performance is key. Look for cameras with high ISO options and a wide dynamic range to capture the beauty of the night sky.
Shooting in RAW format is a must for post-processing your images. Long exposure noise reduction helps minimize hot pixels caused by leaving the shutter open for extended periods.
Consider battery life because long exposures and cold weather can quickly drain batteries. With the right camera for astrophotography, you’ll be ready to capture stunning images of the stars above.
Our Top 3 Astrophotography Cameras
Astrophotography Lenses and Filters
When choosing a lens for Milky Way-style astrophotography, you need a wide angle and a fast aperture. The best lenses have focal lengths from 14mm to 35mm. This focal range gives you a wide field of view to capture large portions of the night sky.
Look for lenses with maximum apertures of f/2.8 or faster, like f/1.8 or f/1.4. Larger apertures let in more light, which is important when shooting in the dark. Built-in image stabilization also helps you get sharper photos of the stars.
The astrophotography lens you choose depends on your camera. But you can find great options for shooting Canon, Nikon, Sony, or any other brand. With the right lens, you’ll be capturing stunning images of the Milky Way in no time.
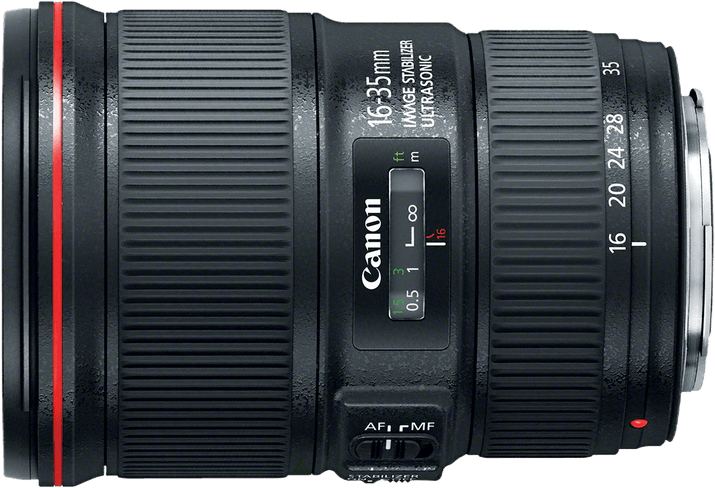
Canon Lenses
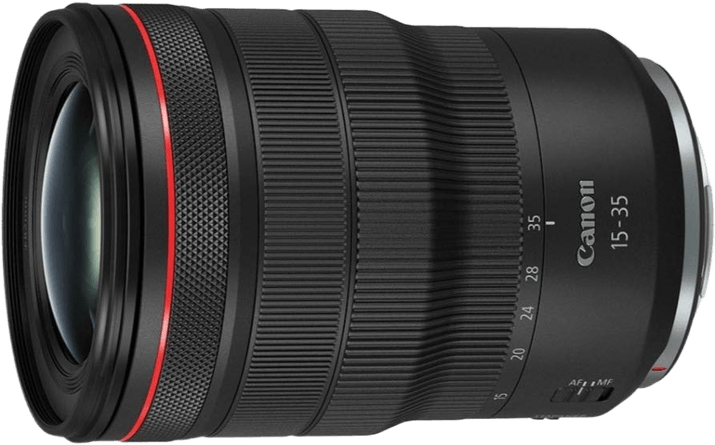
The best Canon lenses for astrophotography capture the beauty of the night sky. Wide angles and fast apertures are key. The Canon RF 15-35mm f/2.8L IS USM is our top pick for its constant f/2.8 aperture and wide focal range.
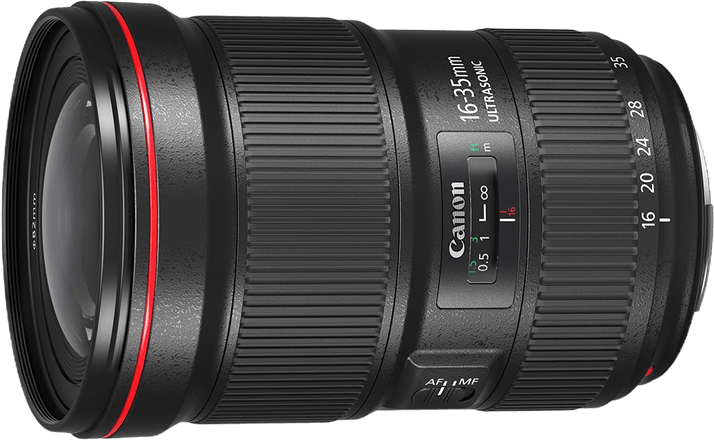
This lens delivers edge-to-edge sharpness, ensuring stars look crisp across the frame. It also handles distortion well, keeping stars looking natural. The Canon EF 16-35mm f/2.8L III USM is another great option for Canon DSLR users.
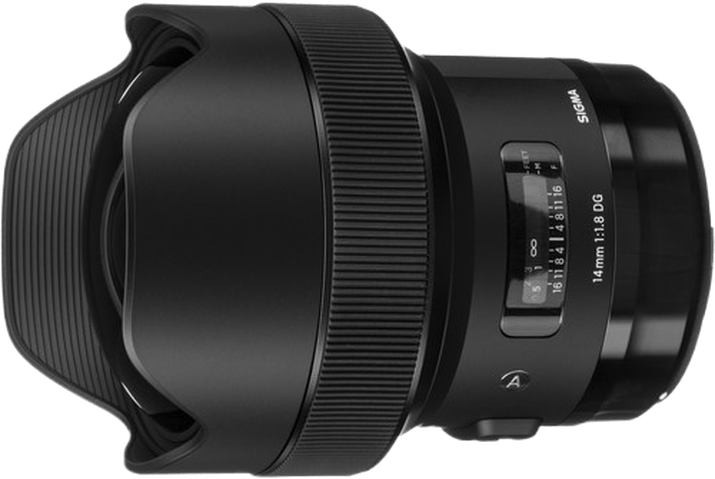
Other notable lenses include the Sigma 14mm f/1.8 DG HSM | A, which has an impressive f/1.8 aperture. Another lens is the EF 11-24mm f/4L USM for its ultra-wide zoom range.
No matter which lens you choose, you’ll be ready to explore the wonders of the night sky. To learn more about the best Canon lenses for astrophotography, check out our in-depth guide.
Our Top 3 Canon Lenses for Astrophotography
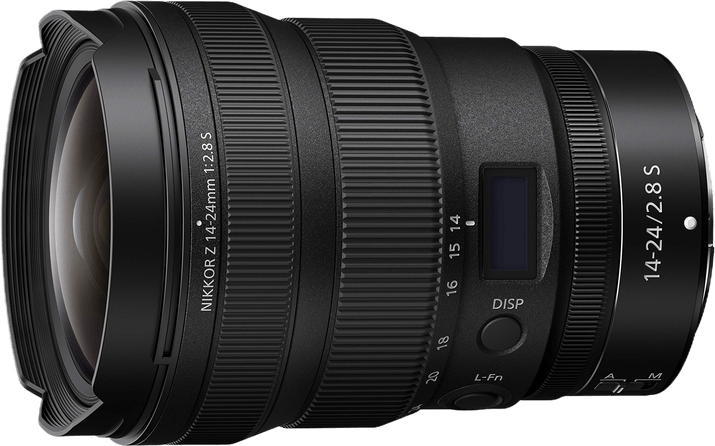
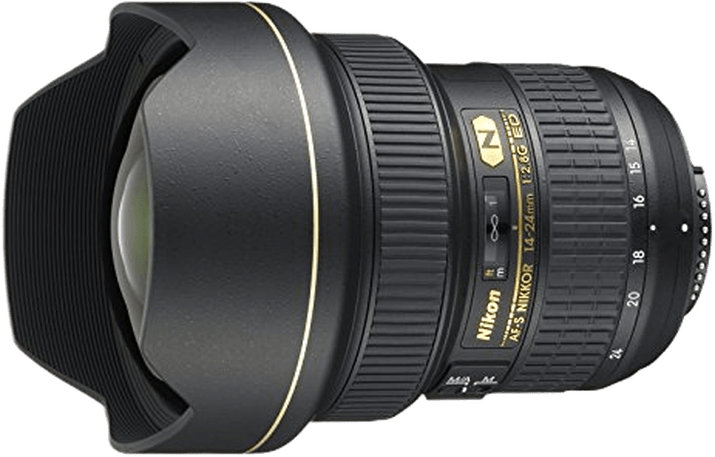
Nikon Lenses
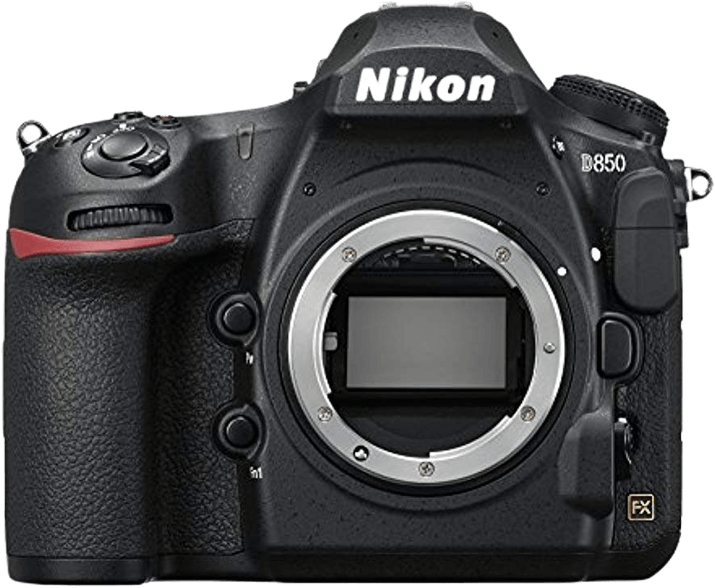
Capturing the night sky requires the best lenses for astrophotography. Nikon offers a range of options for both mirrorless and DSLR cameras.
The Nikon Z 14-24mm f/2.8 S and Nikon AF-S 14-24mm f/2.8G ED are top picks. These wide-angle zooms have fast f/2.8 apertures to capture lots of light. They also deliver sharp images from edge to edge.
Other great choices include the Z 58mm f/0.95 S Noct for unmatched low-light performance and the Z 20mm f/1.8 S for wide-angle shots.
With the right Nikon lens, you can capture stunning images of the Milky Way and beyond. Nikon lenses for astrophotography let you explore the wonders of the night sky.
Our Top 2 Nikon Lenses for Astrophotography
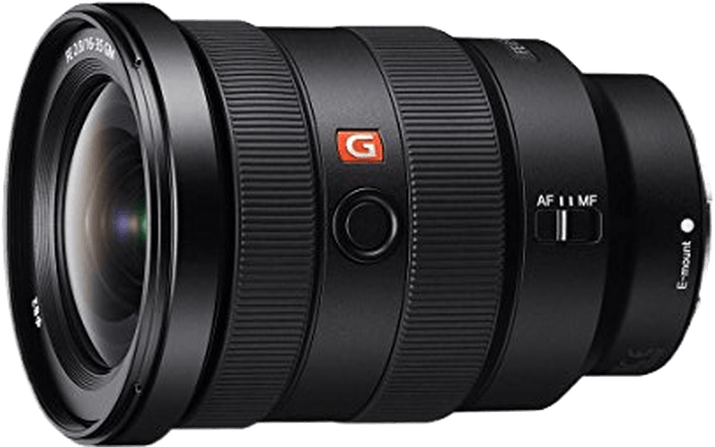
Sony Lenses
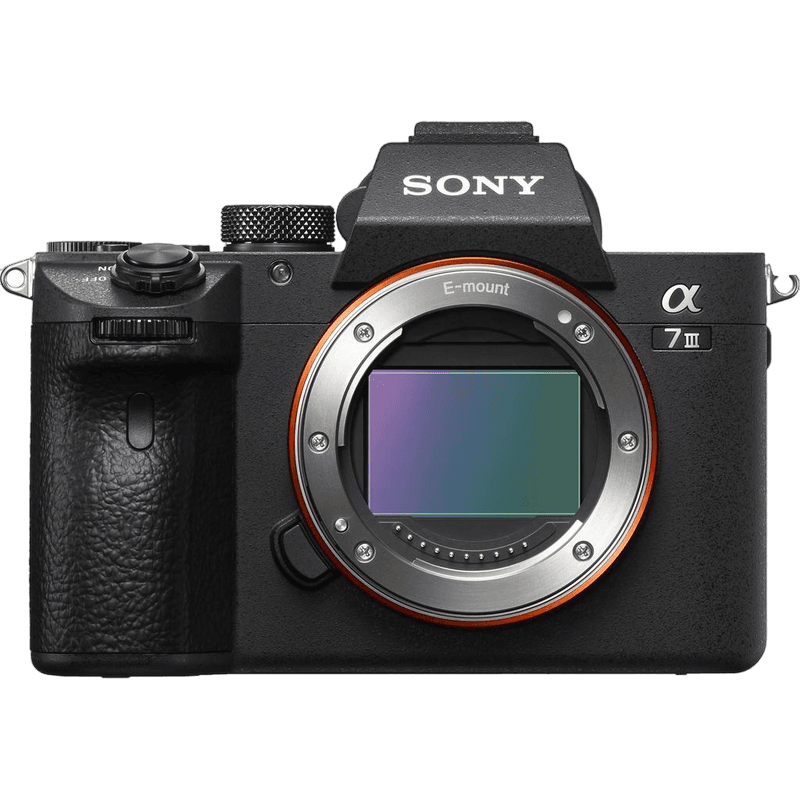
Astrophotography enthusiasts know the importance of having the right lens to capture the vast beauty of the night sky. The best Sony lenses for astrophotography offer everything you need to capture stunning images of the galaxy around us.
Our top choice, the Sony FE 16-35mm f/2.8 GM, earns its spot thanks to its versatility and sharpness. It lets in a lot of light to capture faint details in the night sky. Its zoom range of 16-35mm offers flexibility in framing, from wide star fields to more focused sections of the sky.
The Sigma 14mm f/1.8 DG HSM | A is another great choice for astrophotography. Its fixed 14mm focal length offers a broad view, perfect for taking in vast star fields or the Milky Way.
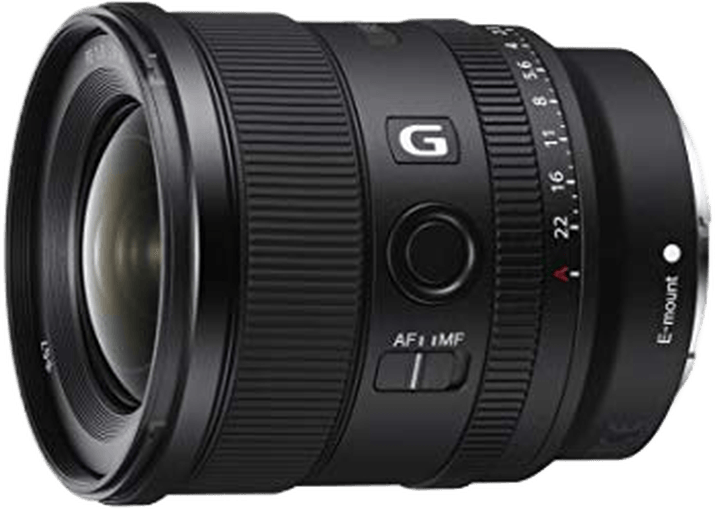
The Sony FE 20mm f/1.8 G is another superb astrophotography lens. Its fast f/1.8 aperture and lightweight design make it easy to handle during long photoshoots at night.
To learn more about the Sony lenses for astrophotography that will help you capture breathtaking images of the night sky.
Our Top 3 Sony Lenses for Astrophotography
Astrophotography Filters
Astrophotography filters are important for capturing stunning images of the night sky.
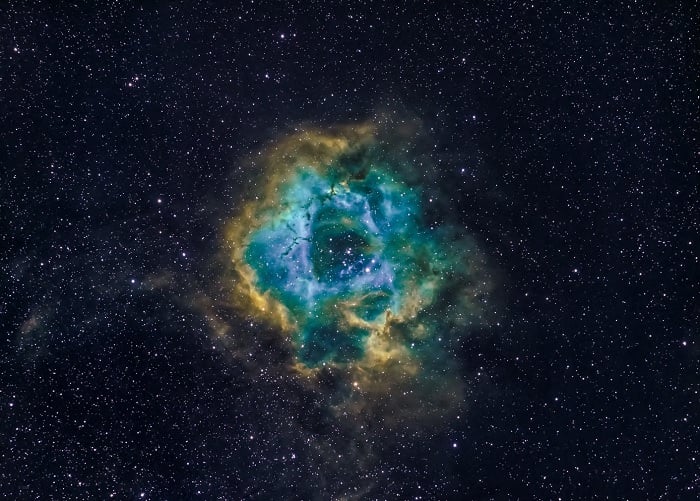
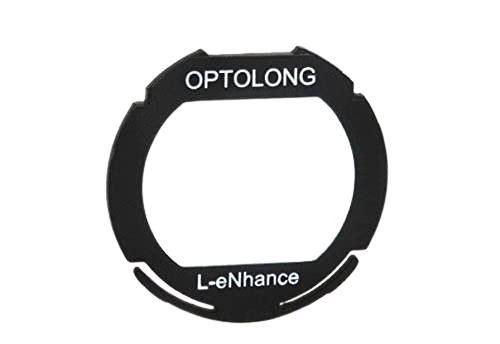
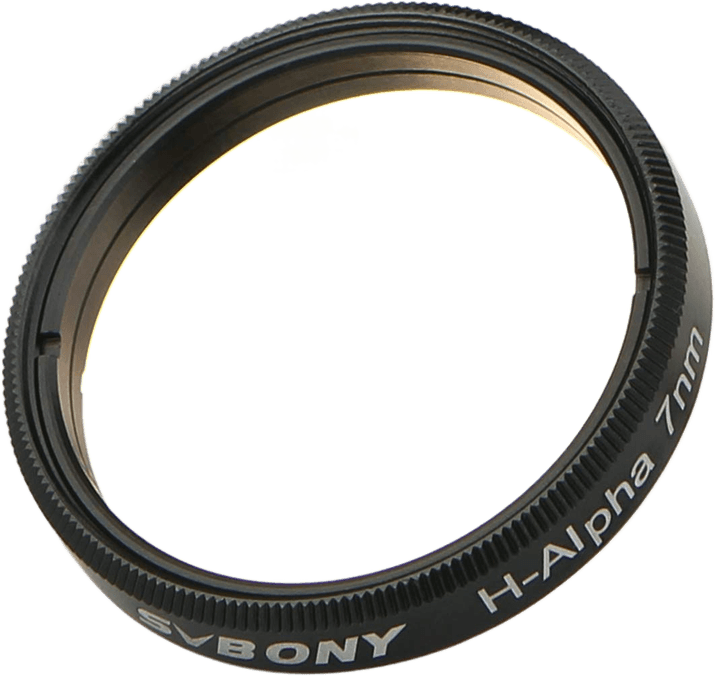
Light pollution filters reduce artificial light in cities, giving you a clear view of the stars. Narrowband filters only let a small selection of light waves pass through. They focus on emission lines from nebulae gases like hydrogen and oxygen.
Line filters are sensitive to just one emission line, blocking all other light. Solar filters make photographing the Sun possible by limiting its power and light. Diffusion and UV filters remove atmospheric noise, making stars more prominent in night sky photos.
Graduated ND filters help balance the exposure between the sky and earthbound features like mountains. Astrophotography filters are essential for capturing the beauty of the universe in sharp detail.
Our Top 3 Choices for Astrophotography Filters
Light Pollution Filters
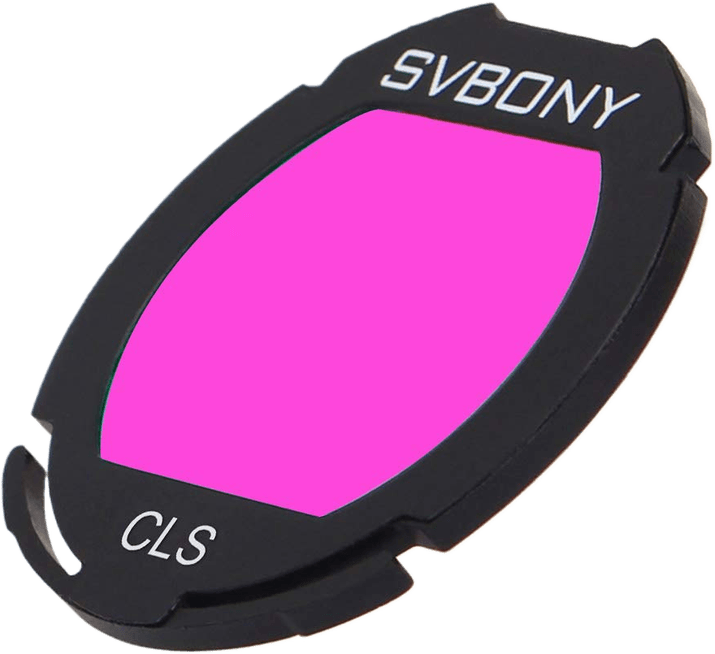
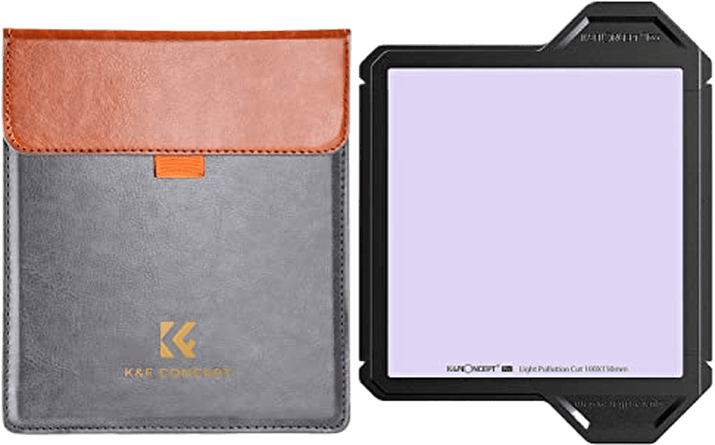
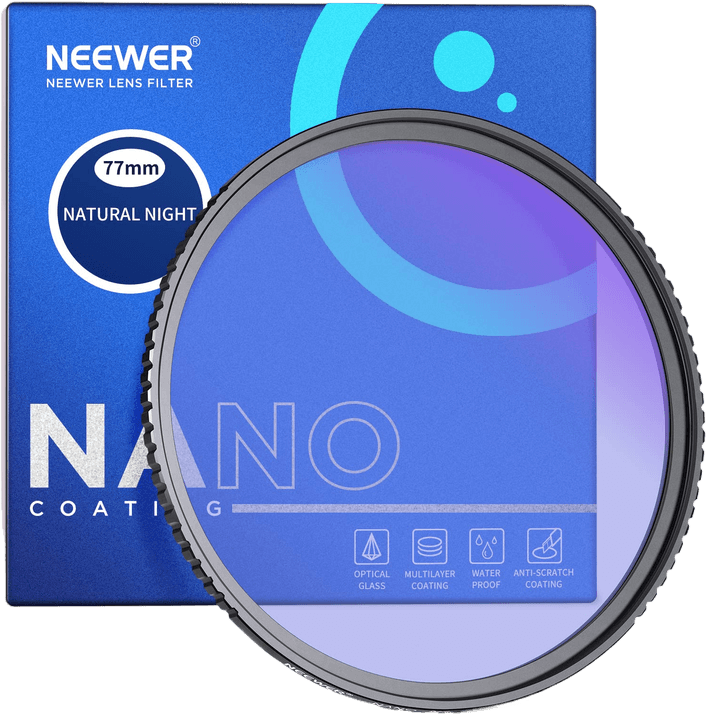
Light pollution filters are important tools for night sky photographers. They block artificial light from street lamps and buildings, allowing stars and galaxies to shine through.
The best light pollution filters use high-quality glass with special coatings. These coatings improve image quality by reducing flare and vignetting. They also protect the glass from scratches, oil, and water.
Light pollution filters come in different shapes and sizes. Circular filters screw directly onto your lens, while square filters require a holder. Clip-in filters are also available for some camera brands.
To learn more about light pollution filters, check out our detailed guide. It covers the best options for different types of night photography.
Our Top 3 Light Pollution Filters for Astrophotography

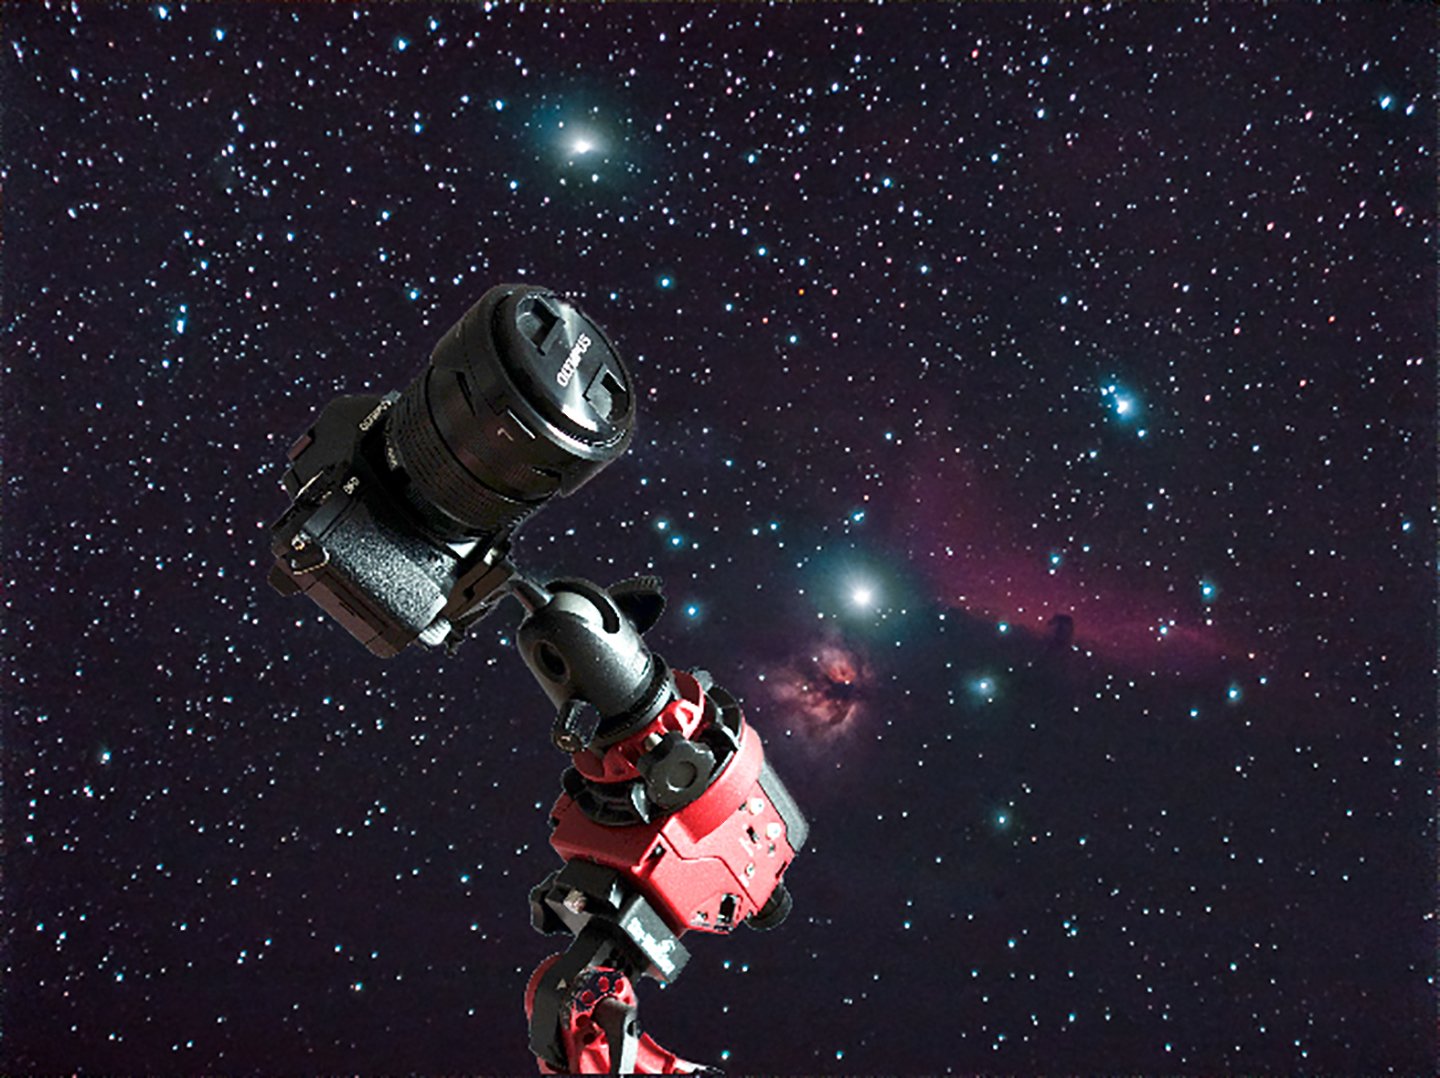
Telescopes and Star Trackers
Telescopes and star trackers are other important tools for stargazing and astrophotography.
Telescopes give the best close-up view of the stars, planets, and other deep-sky objects. Some telescopes can even be used as camera lenses when paired with the appropriate adapter.
Star trackers are essential for high-level astrophotography. They are attachments for your tripod and camera that track the movement of the stars in the sky. A star tracker lets you use long exposure times without creating star trails.
Let’s look at both pieces of equipment in more detail.
Star Trackers
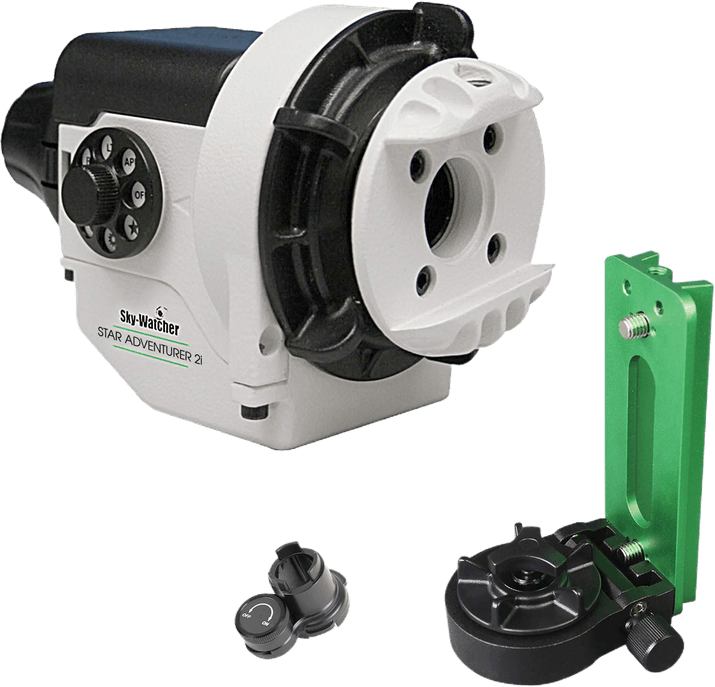
A star tracker is essential for capturing bright, clear, and sharp night sky photos. It helps your camera move with the stars, making astrophotography easier. The best star trackers have precision tracking, easy setup, and good build quality.
Our top pick is the Sky-Watcher Star Adventurer 2i Astro Pack. It has a motorized platform with a built-in polar finderscope for easy alignment. The all-metal gears provide top-notch quality and accuracy. It also has pre-programmed settings for tracking the stars, Sun, and Moon.
Star trackers can be a big investment, but they’re worth it if you love shooting the night sky. We have a detailed guide with trackers for different skill levels and budgets to learn more about the best star trackers.
Our Top 3 Choices for Astrophotography Star Trackers
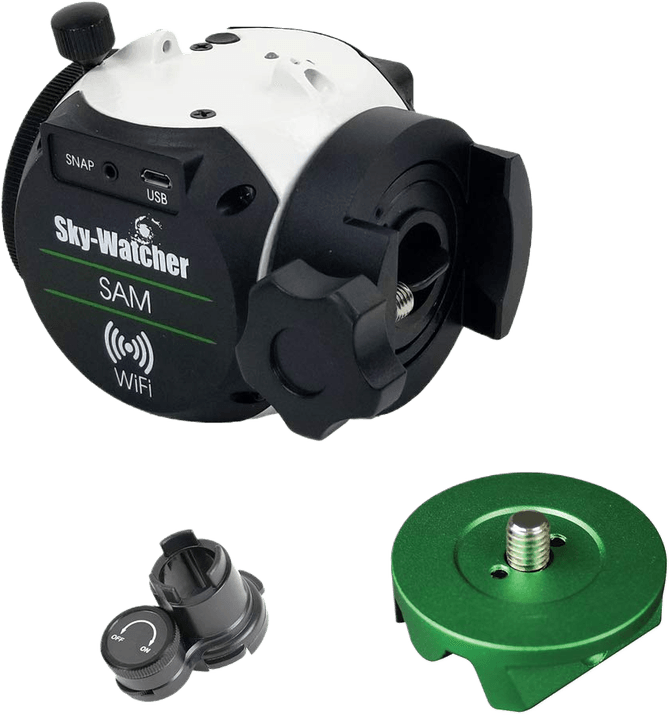
SkyWatcher Star Adventurer
The SkyWatcher Star Adventurer is a compact and affordable equatorial tracking mount. It’s perfect for lightweight astrophotography and time-lapses.
This mount is easy to use and set up. Its max payload weight is 5kg with a counterweight. The Star Adventurer offers different tracking speeds for stars, the Moon, and the Sun.
The Star Adventurer is a great choice for beginners and astrophotographers on the move. It’s lightweight, flexible, and reasonably priced. Our in-depth review of the SkyWatcher Star Adventurer is available if you want to learn more about it.
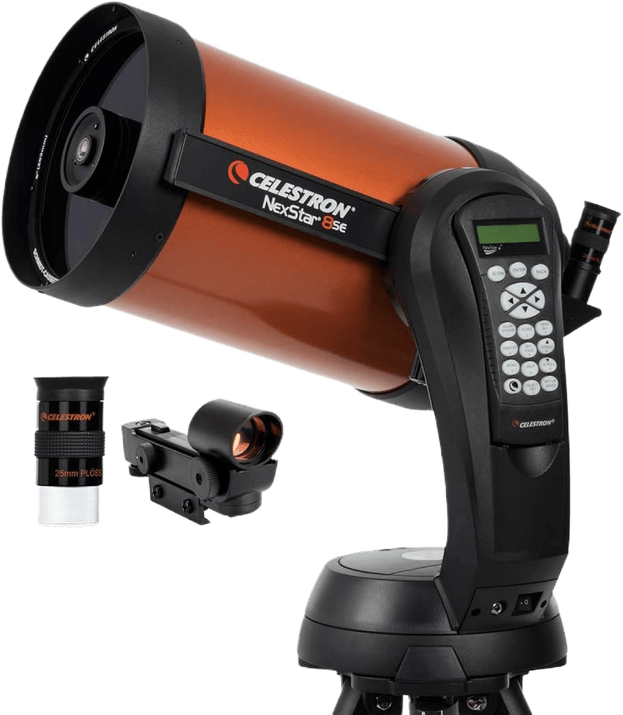
Telescopes
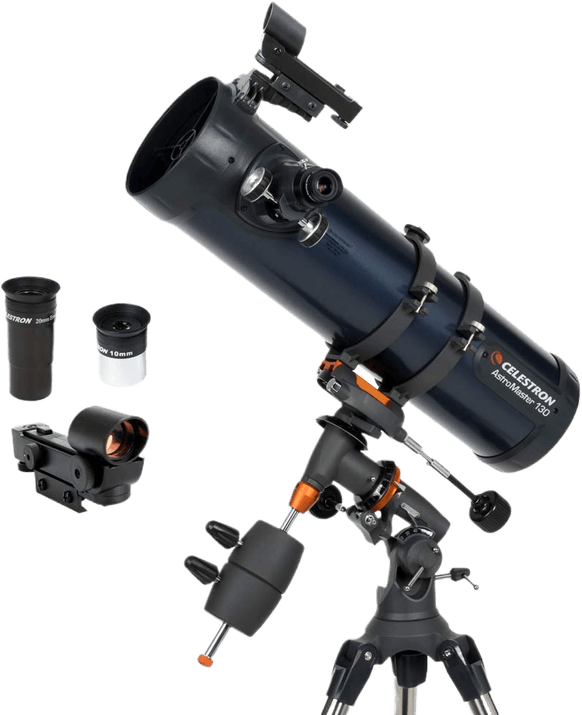
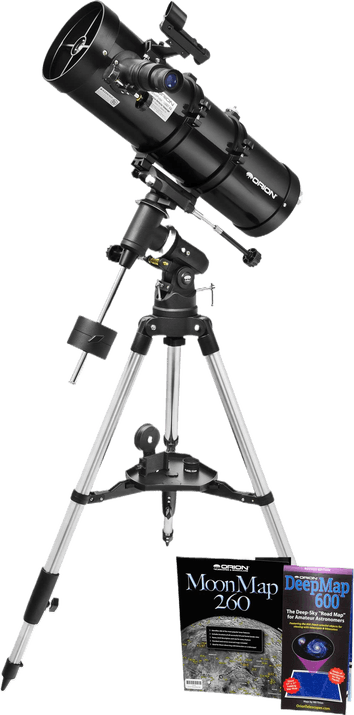
The Celestron AstroMaster 130EQ is a great telescope for astrophotography. Its 130mm aperture and fully coated glass optics provide clear night sky views. The sturdy German equatorial mount keeps the telescope stable for sharp images.
This telescope has two eyepieces and a finderscope, making it easy to locate and focus on celestial objects. It offers great value for its price and is suitable for both amateur and professional astrophotographers.
The AstroMaster 130EQ is a reliable, high-quality telescope. It can capture stunning images of stars, planets, and galaxies. For more options, see our full article on the best telescopes for astrophotography.
Our Top 3 Choices for an Astrophotography Telescope
Budget Telescopes
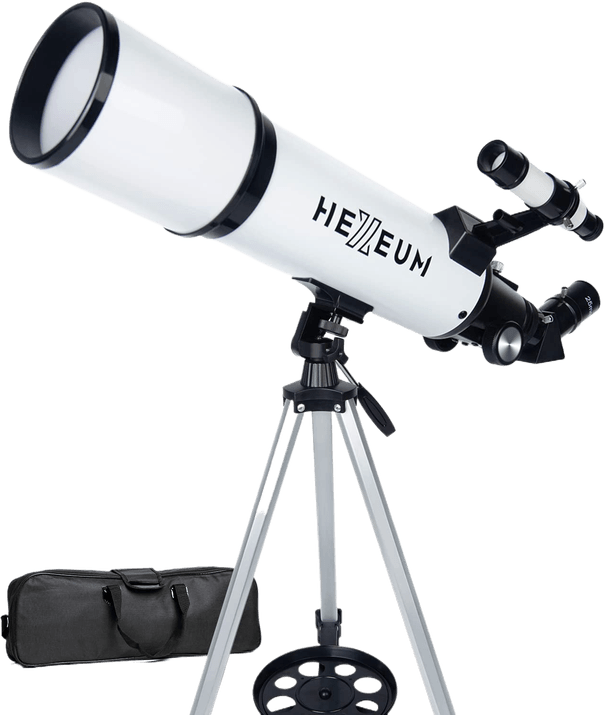
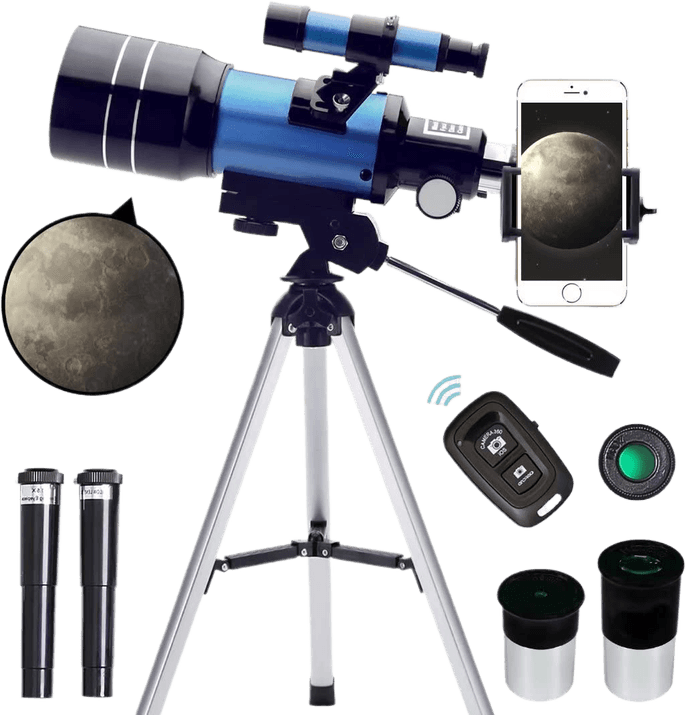
The best budget telescopes let you explore the cosmos without breaking the bank. You can get stunning views of stars, planets, and the Moon. Some telescopes even let you capture amazing astrophotography with your smartphone.
We’ve included affordable telescopes for amateur astronomers of all ages. Our top pick is the Celestron AstroMaster 130EQ Newtonian Telescope. It’s portable, easy to set up, and gives you great magnification and image quality.
We have an in-depth guide with even more options if you want to research more budget telescopes. From beginner telescopes to ones for tech-savvy users, find the perfect telescope to start your astronomy journey.
Our Top 3 Choices for Budget Astrophotography Telescopes
Telescope Mounts
Telescope mounts are an important part of any astrophotography setup. They hold the telescope in place and keep it stable while you view objects in the night sky. Many different types of telescope mounts are available. Each one has its advantages and disadvantages.
Equatorial mounts are built for astrophotography. They let you track the sky by moving the payload around two axes. One coincides with Earth’s rotational axis, and the other tracks the target’s declination.
The most important thing to look for in a mount is the maximum payload it can support. As a rule of thumb, you should not load your mount over 60% of its declared maximum payload to ensure it performs at its best.
We have a comprehensive guide available if you want to learn more about telescope mounts.
Astrophotography Apps and Software
Smartphones have become excellent tools for astrophotography. You can’t use them to capture deep-sky images, but some apps help you find constellations and specific celestial objects. They also help you read the night sky, giving you a better understanding of the cosmos around us.
Photo editing software is also essential for Milky Way and astrophotography. Programs like Adobe Lightroom and Photoshop can add clarity or brighten stars. You can also use them to create composites made from several exposures.
Let’s dive into specifics about the best apps and software for astrophotography.
iPhone Apps
Astrophotography apps make night sky photography easier. They help you understand and navigate the stars, Moon, and Milky Way.
The best astrophotography apps have augmented reality features. This function lets you see where celestial objects will be in the sky. Many also include light pollution maps to find dark skies.
Other useful features are weather forecasts and the ability to plan night sky photoshoots. Some apps will even let you virtually stand in a location to see the view. With the right astrophotography app, you’ll never miss an opportunity to photograph the night sky.
To review the best astrophotography apps, we have a detailed article covering all the top options.
Adobe Software
Astrophotography software helps you process night sky photos to bring out their best. Lightroom and Photoshop are popular choices for editing astro images. They have a rich ecosystem of third-party add-ons and extensions to speed up your workflow.
Lightroom presets are like recipes that let you adjust an image with one click. Photoshop actions automate complex editing tasks. Plug-ins and panels add extra features to Photoshop.
While you don’t need dedicated astrophotography software, these tools can take your editing to the next level. If you want to learn more about astrophotography software, see our full article.
Adobe Software to Edit Astrophotography


StarStax
StarStax is a free, user-friendly software for creating star trail photos. It’s available for Mac, Windows, and Linux. StarStax simplifies combining multiple exposures to create stunning star trail images.
The software has a clean interface for ease of use. It has options for loading images, dark calibration files, and adjusting settings.
To create seamless star trails, you can easily select a blending mode, like Lighten or Gap Filling. The Gap Filling mode helps eliminate gaps between consecutive exposures. The result is smooth, continuous trails.
StarStax processes your images in real time, letting you see the star trails before your eyes. You can experiment with different settings and save your final image as a JPEG or TIFF file. Then, you can edit it further using other software like Lightroom or Photoshop.
Read our StarStax review to learn more about creating stunning star trail photos easily. It’s a great tool to explore.
DeepSkyStacker
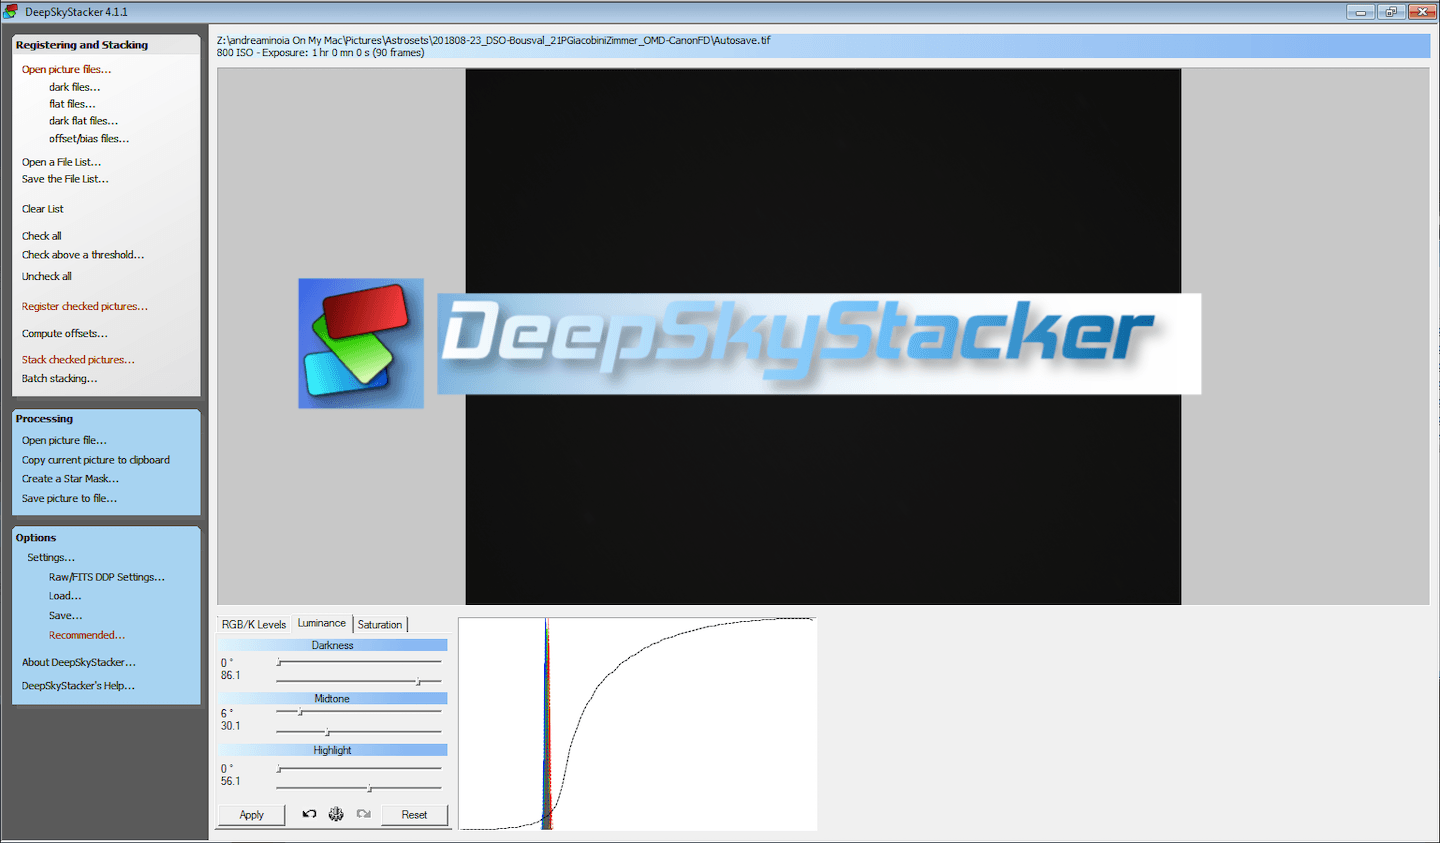
DeepSkyStacker (DSS) is a free software for pre-processing deep sky astrophotography images. It has a simple interface with seven main sections for registering, stacking, and processing your photos.
To use DSS, load your light frames and any calibration frames, such as darks, flats, or bias files. Then, check all the images you want to stack. DSS will align and combine them into a single image with more detail and less noise.
You can process the stacked image in DSS by adjusting the luminance curve, aligning the RGB channels, and adding saturation. You can save the result as a 16-bit TIFF file for further editing in other software like Photoshop.
Learn more about using this software with our in-depth DeepSkyStaker tutorial. It covers the workflow step-by-step. Although it’s old software, some astro shooters might still find it useful.
AstroBin
AstroBin is a great resource for astrophotographers. It’s more than just an image hosting site. You can use it to showcase your astrophotography at full resolution and get feedback from the community.
AstroBin has a huge database of astrophotography gear. You can search for images with specific cameras, lenses, telescopes, or other equipment. This search tool is very useful when you want to see how certain gear performs before buying it.
The site also has an active forum to discuss techniques, processing, and gear with other astrophotographers. Learn more about AstroBin in our full article. It’s a great place to connect with the astrophotography community and improve your skills.
Editing Astrophotography
Astrophotography post-processing can be challenging. But you can create stunning night sky images with the right techniques. One important step is image stacking, which combines multiple exposures to reduce noise and bring out more detail in your photos.
To begin with, align and stack your images using dedicated software like Starry Landscape Stacker or Sequator. These programs make the process straightforward.
Once your images are stacked, import them into your preferred editing program. You can use Lightroom or Photoshop for final adjustments like white balance, contrast, and sharpening.
With practice and patience, you can master the art of astrophotography post-processing. The final results are breathtaking images of the stars, planets, and deep-sky objects!
Photoshop Tips
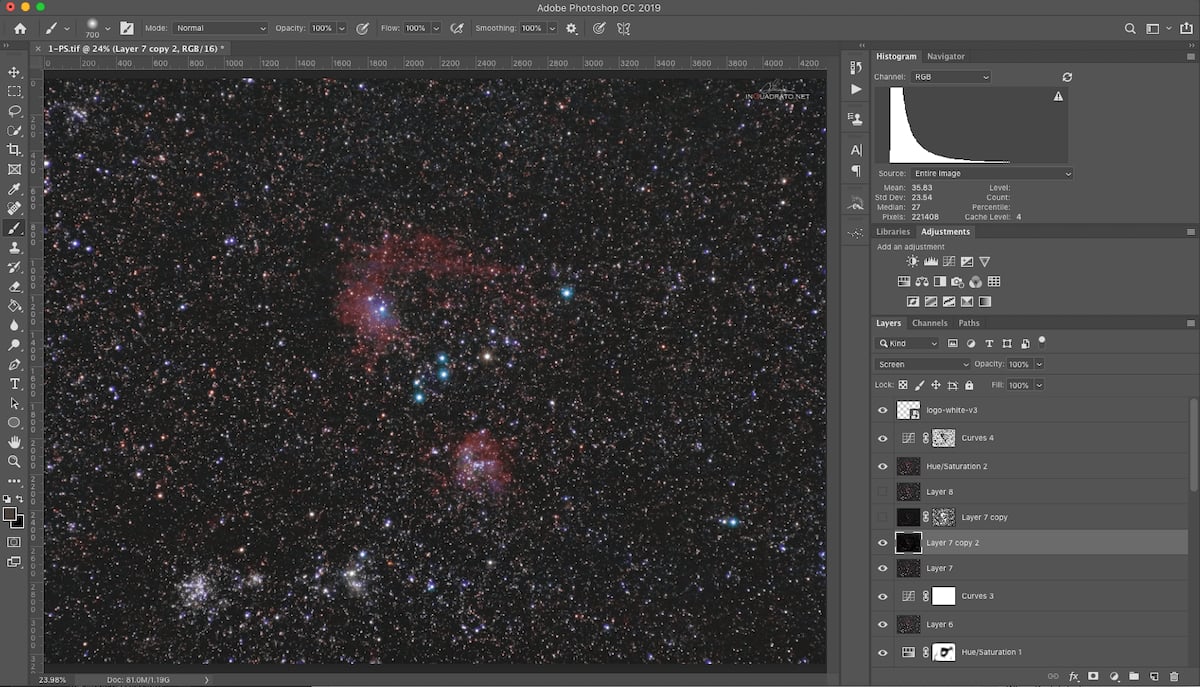
Adobe Photoshop is one of the best photo editing programs for astrophotographers. Its huge toolset is perfect for enhancing night sky images and bringing the galaxy to life. Here are a few top tips to get you started.
Use the Eyedropper tool to fix the background by sampling an empty patch of sky. Add artificial noise to the sampled color and paste it as a new layer, blending with the Lighten mode.
The Gradient Xterminator plug-in is a must-have Photoshop plug-in. It removes luminosity gradients caused by light pollution or moonlight. To use it, select the area to preserve and run the plug-in.
Set a natural white balance using an adjustment layer while keeping an eye on the color channel histogram. Move the sliders until a bit of blue and red are visible on the left and right of the main peak.
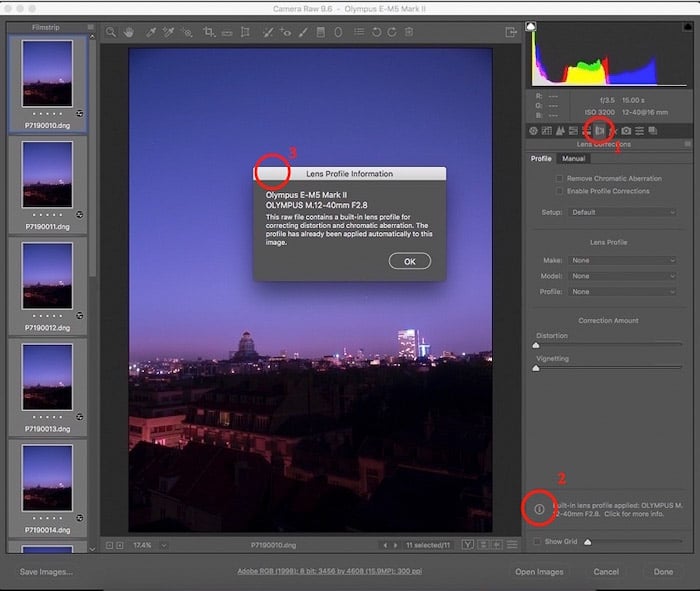
Reduce chromatic aberration in Camera Raw by first duplicating the layer. Then, apply a mild Gaussian blur and blend with the Color mode. Use opacity and masks to keep the best color details.
Make your images pop by again, duplicating the layer. Then, use the Scratch and Dust filter to remove small stars. Smooth with Gaussian Blur, push the black point in Levels, and blend with Screen mode.
Learn more about editing astrophotography with Photoshop with our full article. Some more tips and techniques can take your editing skills to the next level.
- Learn to plan shots with optimal light, weather, and moon conditions.
- Discover the precise settings for stunning shots with any gear.
- Master simple editing techniques to enhance your night sky images.


