

Street photography is all about capturing the life and energy of a city in a single frame. To do that, you need to be able to work fast and respond to whatever pops up in front of you. The best way to do that is to have your camera settings pre-configured so that you can spend more time looking for great shots and less time fiddling with your gear.
In this article, we're going to show you our favorite street photography lightroom presets. These presets will help you speed up your post-processing workflow and give your photos a classic film look.
What a Lightroom Preset Actually Does
Think of a Lightroom preset as a photo editing recipe. It is a unique combination of settings, including tone curves and color grading.
When you apply a preset, Lightroom sliders will change automatically. But you can still grab a slider and tweak it if you don’t like something about the result. The Presets panel also carries an Amount slider that scales the whole effect. It runs 0 to 200 with 100 as the normal strength, so a preset that lands too heavy gets pulled back in one move instead of five. It is in both apps: the Develop module in Lightroom Classic, and the Presets panel in the cloud version.
Using a Lightroom preset is not cheating. It is a quick way of achieving a look or style in your image.
You may not have created the recipe, but you choose the look. No one is going to notice if you used a preset. Professional photographers might use presets, and we would not know the difference.
Benefits of Lightroom Presets
Presets speed up your workflow. You do not have to tweak every slider for each image to get the look you want. Presets make the photo editing process easy. Thus, you are more likely to edit your photos and share them because the process is painless.
They are also great for learning how various sliders interact to create a look. Even if you have been editing photos in Lightroom for years, there is always something new to discover. Presets give you a new perspective on how your image can look.
Where to Find Lightroom Presets
At last count, there were over 150 presets included in Lightroom, and Adobe adds to the built-in set with each release. They are grouped in folders defined by a look (i.e. cinematic) or a type of photography (i.e. food).
Don’t get too tied to the labels. There’s nothing wrong with using a food preset on a street photograph. A travel preset may look good on an image of food.
Lightroom presets are in different places, depending on whether you use Lightroom Classic or the cloud-based Lightroom. If you have seen the second one called "Lightroom CC" in older guides, that is the same app. Adobe dropped the "CC" from both product names in 2019.
- Lightroom Classic: Open the Develop module. The presets are in the left-hand column in the Presets panel.
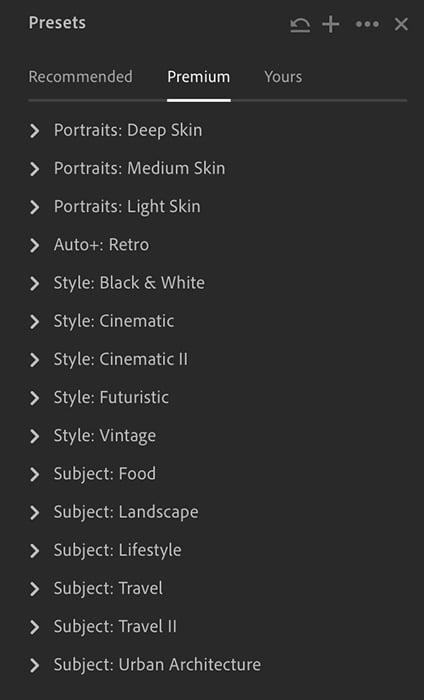
- Lightroom (desktop, mobile and web): Open the editing workspace. Under the histogram, click the Presets button. The panel opens on three tabs. Premium holds Adobe’s own folders, Yours holds anything you made or imported, and Recommended is the AI suggestion feed covered further down this page.
The Premium tab is split into Adaptive, Portraits, Auto+, Seasons, Style, Subject and Video. Street photographers live in two of those. Style covers Black & White, Cinematic, Cinematic II, Film-Inspired, Futuristic and Vintage. Subject covers Concerts, Food, Landscape, Lifestyle, Travel, Travel II and Urban Architecture. Urban Architecture is the one most street shooters never open. It is aimed at buildings, but buildings are the backdrop to most street frames, so it is worth a browse.
 Best Lightroom Presets – Street Photography
The best preset for urban photos depends on the scene and what you like. You can choose color or black-and-white presets. The look can be modern or vintage. The image can have grain that simulates film or be bright and airy.
Contrast and color play a big part in how a photo looks. Some presets create high contrast or saturated colors. Others mute colors or add a tint to simulate old film.
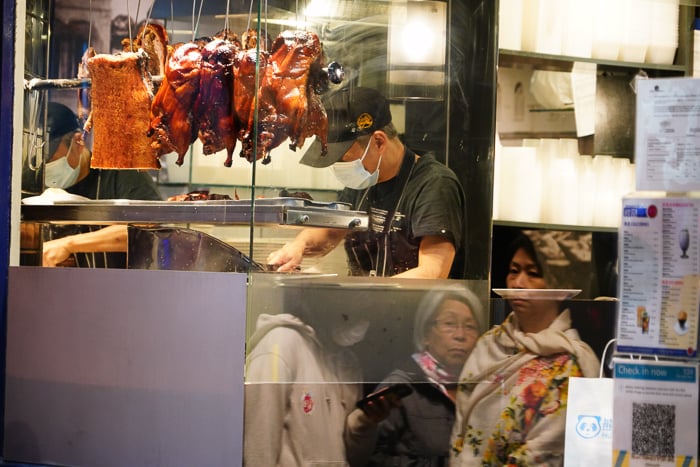
Adobe numbers the presets in most of these folders, so there are no memorable names. We will list the folder and the preset designation. The newer groups break the habit. Film-Inspired, Adaptive, Portraits and Seasons all use plain words instead. The original photos in the comparison examples below have only had lens correction and cropping applied.
Auto+: Retro – AR06
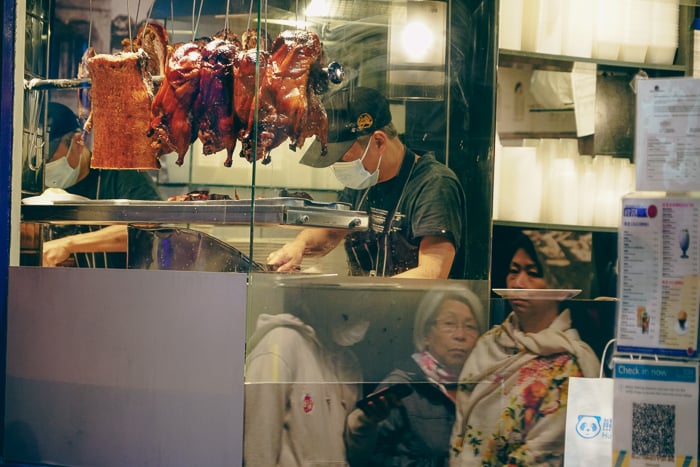
There are eleven presets included in the ‘Auto+: Retro’ folder. The Retro presets create a classic vibe. Most add a matte look and a bluish tint without taking away from your original colors.
With street photos, AR06 is a good place to start. If the blue is too strong, try AR08.
See how this night street scene of three women reflected in a restaurant window changes with the AR06 preset applied.
Style: Black and White – BW07
If you think converting an image to black and white only means removing color, you are in for a surprise. There are as many black-and-white presets as stars in the sky.
Each of the twelve in Lightroom creates a different black and white look. Some have a toned color cast, like sepia.
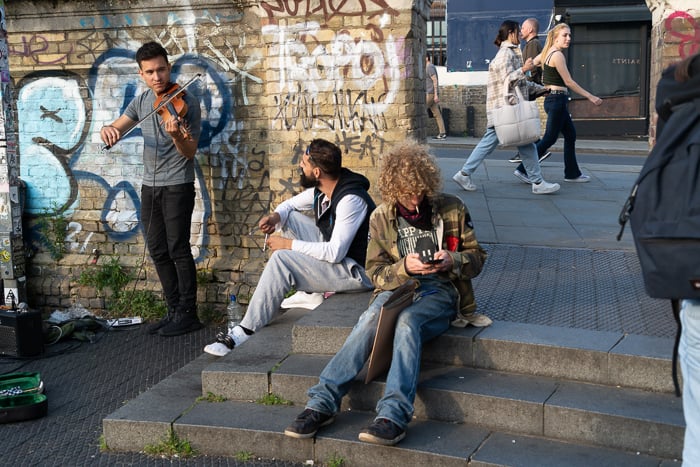
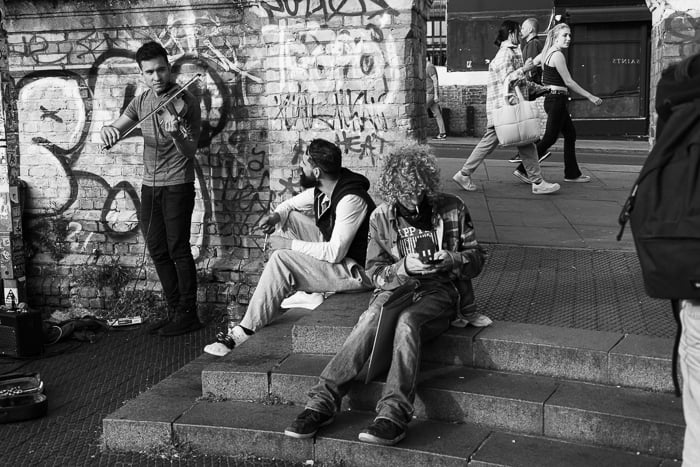
If you want a modern black and white conversion with clean contrast, you can’t go wrong with BW07. If the look goes too dark, brighten it up by moving the exposure slider to the right.
This street photo of musicians in London’s Camden Market becomes classic with the BW07 black-and-white conversion applied.
Style: Black and White – BW03
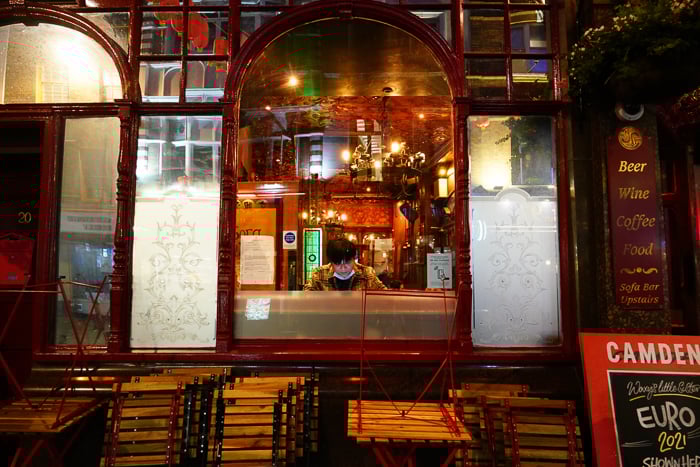
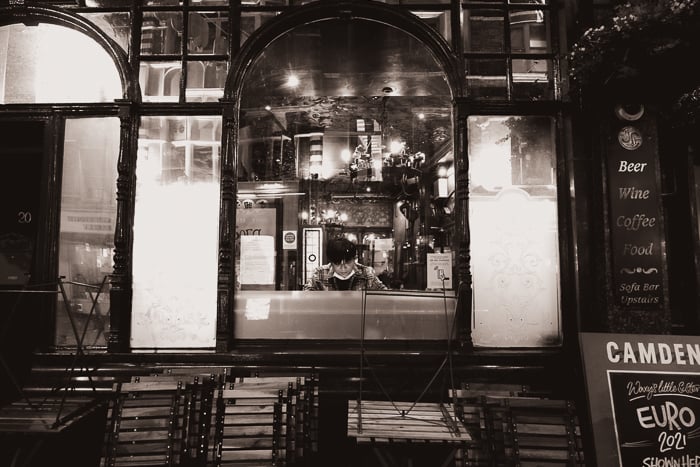
Sepia adds a yellow or brown tone to your image for a vintage look. For a high contrast sepia look, try BW03.
You may want to brighten the image by moving the exposure slider to the right. If the brown tint is too strong for your taste, try BW02.
Here is a modern scene of a man seated alone in a restaurant window with the vintage look created by BW03.
Style: Cinematic – CN09
The cinematic presets in Lightroom are divided into two folders. There are a lot of different looks available.
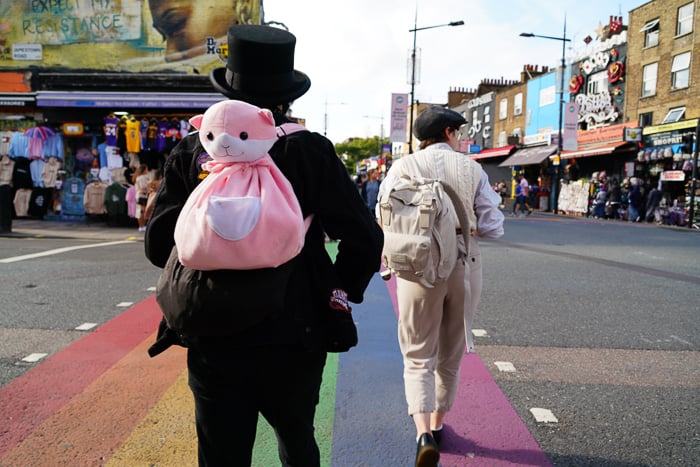
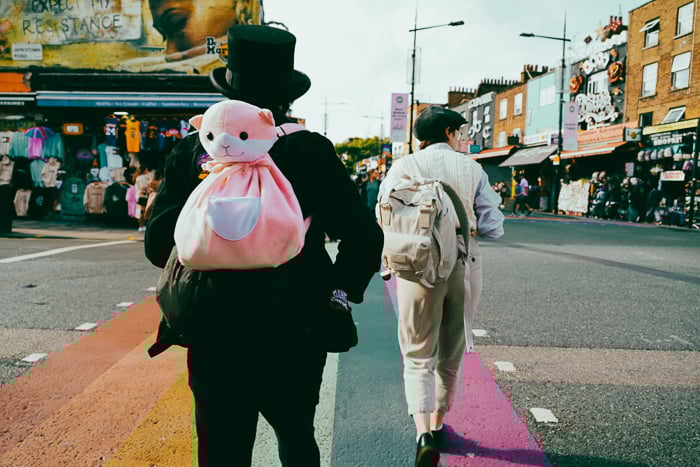
A favorite is CN09. This has a slight green tint and muted colors. For a grungier look with teal shadows and orange highlights, try CN01. CN12 gives you a brighter, more natural look.
The bright colors of London’s Camden Town take on a classic cinematic look with CN09 preset applied.
Style: Futuristic – FT02
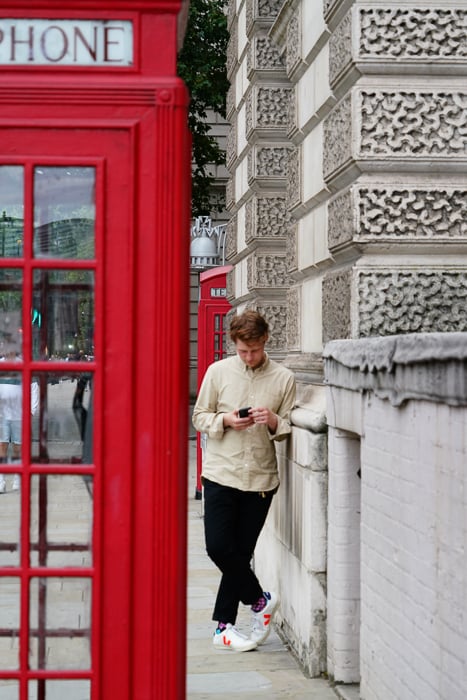
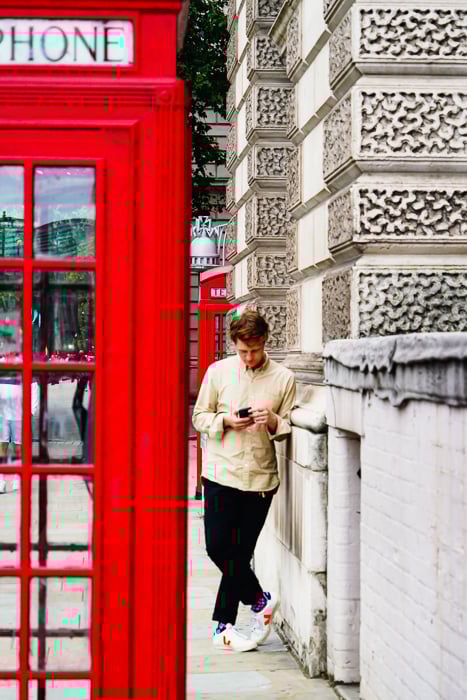
There are twelve Futuristic presets. If you want a modern-color pop, you can’t go wrong with Futuristic FT02. This preset clarifies and brings out textures. If you want more muted colors, try FT12.
This red phone booth on a London street pops with the FT02 preset applied.
Style: Vintage – VN09
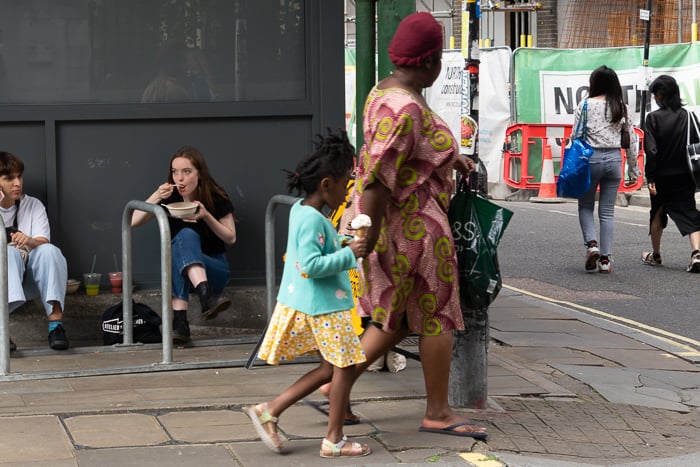
There are ten vintage presets that create old film looks with muted colors. VN09 gives your photos a soft, vintage flavor without an overwhelming color cast.
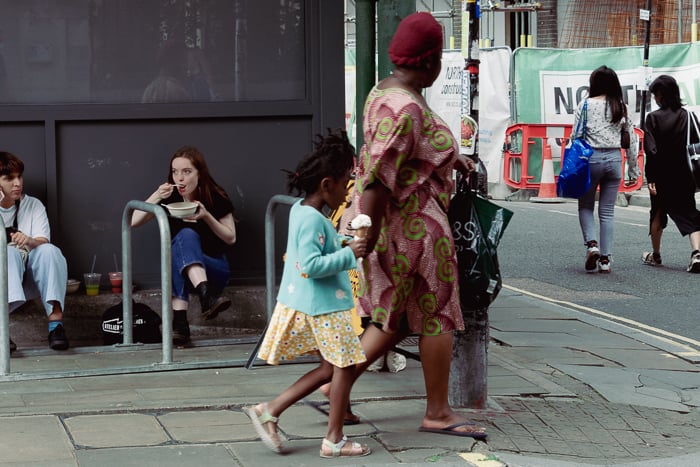
The VN09 preset makes this image of a mother and daughter out for a summer stroll in London’s Borough Market look like it was taken in the 1990s.
Style: Film-Inspired
Film-Inspired is the newest folder in the Style group, and it is the closest thing Lightroom has to the film-emulation packs people usually pay for. If a classic film look is what sent you looking for street presets, start here rather than with Vintage.
There are twelve variations and, unusually, they are named rather than numbered: Warm Gold, Rich Gold, Soft Ember, Strong Ember, Faded Blue, Deep Blue, Light Sage, Deep Sage, and four black-and-white options in Warm B&W, Muted B&W, Cool B&W and Bold B&W. Adobe describes the set as adding moody texture, rich contrast, soft shades or nostalgic warmth.
For street work, start with the black-and-white four. The names tell you what they do. Muted B&W and Cool B&W hold contrast back, which suits the flat gray light of an overcast city. Bold B&W pushes contrast hard, which is what you want when midday sun is carving black shadows across a pavement. Of the color options, Faded Blue and Soft Ember are the gentlest, and the two Golds are strong enough to fight with anything already warm in the frame.
Two catches. This group only appears on recent Lightroom releases, so if you cannot find it in the Premium tab you need to update. And a film look is a finish, not a rescue. On a flat, badly exposed frame these presets add grain and a color cast to a weak picture rather than saving it, so set your exposure and contrast first and apply the preset last.
Subject: Food – FD04
The eleven presets in the food folder are not designed for street photography. But that doesn’t mean they won’t work well with your images. The FD02 preset brightens your image and brings out the colors.
But FD04 is the winner. Notice how it creates a sepia look to the highlights but retains the original colors.
Subject: Lifestyle – LF03
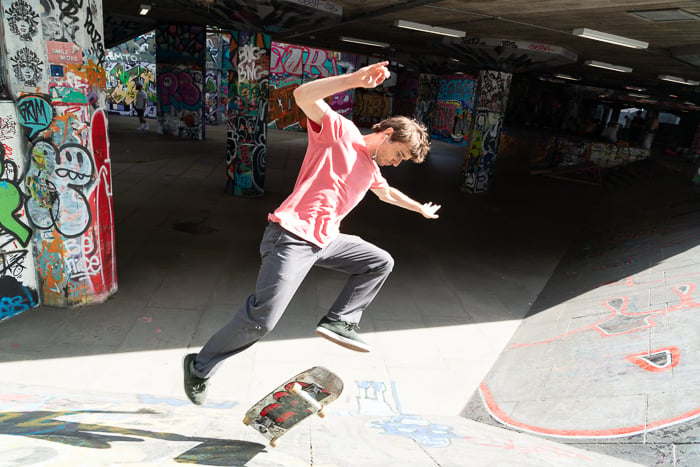
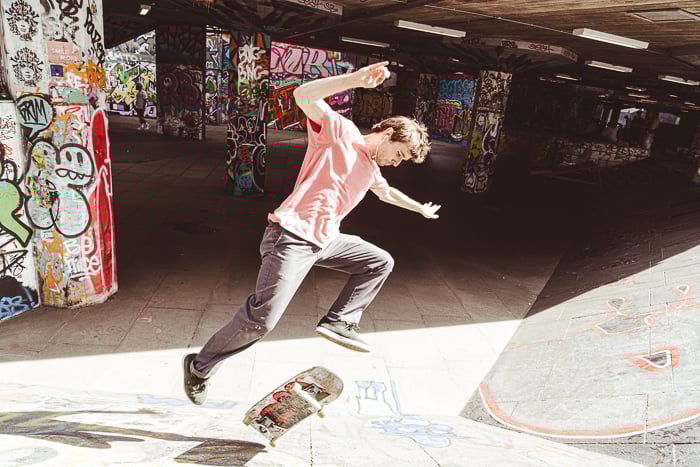
Lifestyle photographs are natural moments in everyday life. Thus, they’re perfect for street photographs.
The look is often relaxed and light. The LF03 preset lightens the midtones and adds a slight haze for an airy look.
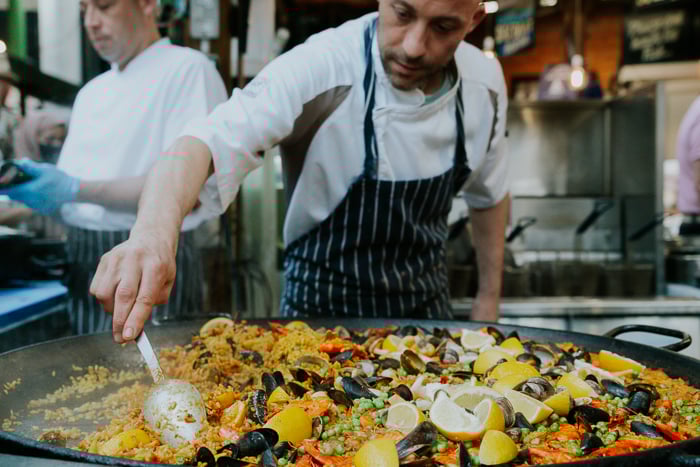
Subject: Travel – TR18
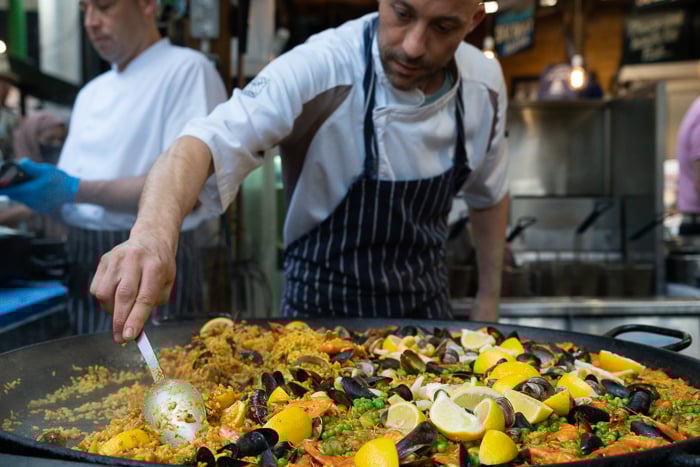
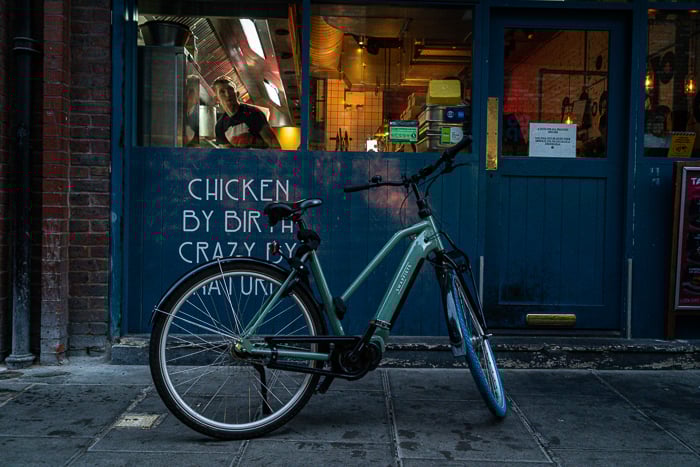
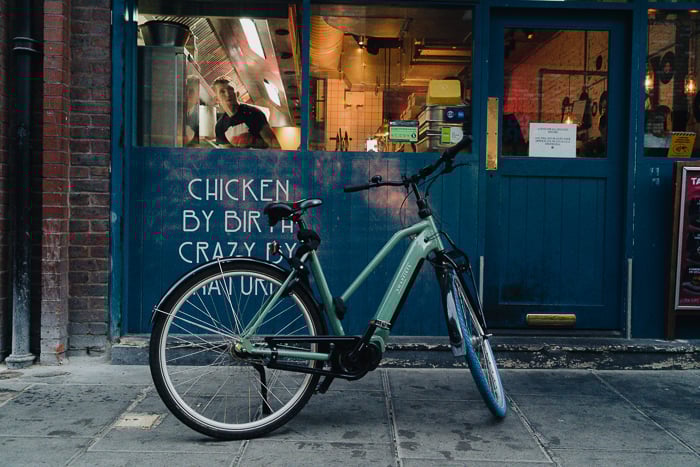
Lightroom includes eighteen travel presets divided into two folders. Many of these presets work for street images. Both TR03 and TR18 will give you bright photos. TR16 is a bit more neutral with less color pop.
The TR18 preset brings out the colors and adds contrast. The highlights are a warm yellow and the shadows a cool blue.
Free Lightroom Presets – AI Recommendations
Lightroom comes with a lot of good presets for street photography. But if you don’t find one you like, you can ask Adobe’s AI to find more.
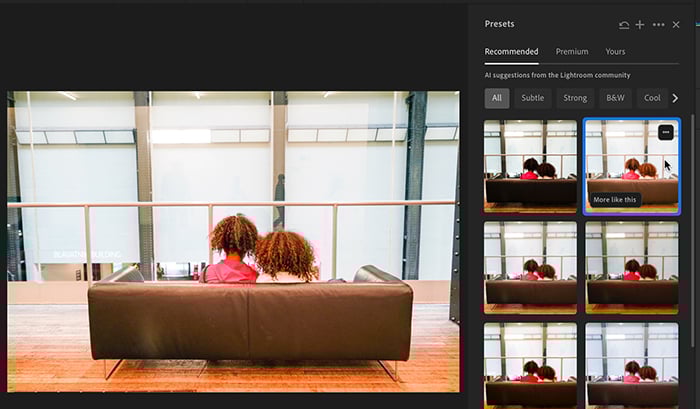
Click on the Recommended tab. Lightroom reads your photo with Adobe Sensei, searches shared user-created presets for ones that suit it, and keeps adjusting as it learns which ones you actually keep. A carousel across the top filters the suggestions by style and strength: Subtle, Strong, B&W, Cool, Warm, Dark, Bright, Cinematic and HDR. Dark and Cinematic are where the moody street looks live.
Hover a thumbnail and choose More Like This to follow one direction further. The three-dot menu on a thumbnail shows who made the preset, so you can follow that person or save the preset into your own Yours tab.
This feature is only in the cloud-based Lightroom: desktop, mobile and web. It is not in Lightroom Classic.
Frequently Asked Questions
Can I make a Lightroom preset weaker without undoing it?
Yes. The Presets panel has an Amount slider running 0 to 200, where 100 is the strength the preset was built at. Drop BW03 to 50 if the sepia is too heavy rather than hunting for a milder preset. It is the fastest fix for the "nearly right, just too much" problem, and it works in Lightroom Classic as well as the cloud version.
Will my presets follow me to my phone?
Any preset you star as a Favorite lands in the Favorites group of the Yours tab, and that group syncs to Lightroom on mobile. Star the eight or ten you actually use on the desktop and they are waiting on your phone.
Why can’t I see the Recommended tab in Lightroom Classic?
Because it is not there. The AI suggestion feed is a cloud-Lightroom feature only, on desktop, mobile and web. Classic gets the same Premium folders but not the Recommended tab.
There are too many presets in my panel. Can I hide some?
Open the Options menu in the Presets panel and choose Manage Presets, then untick the groups you never touch. Hiding Video, Seasons and Portraits leaves you with a panel that is mostly useful for street work. The setting is per device, so you will want to repeat it on your phone.
Conclusion
Lightroom presets make it easy to edit your street photographs. You can go for urban grunge or a soft vintage look. You may even choose different presets depending on the scene and lighting conditions. Even if you prefer to edit your image one slider at a time, seeing a preset applied to your photo opens a world of possibilities!
If you only try three, make them BW07 for a clean black-and-white conversion, CN09 for a muted cinematic color grade, and the Film-Inspired black-and-whites for grain and mood. Star those as Favorites so they sync to your phone, then set the Amount slider to taste on the next frame you shoot.
Want to know more? Try out our Effortless Editing with Lightroom to rapidly improve your post-processing skills.