Are your photos missing some punch or atmosphere? Color Dodge is a great way to add color and contrast.
You can use Color Dodge in different ways. Often, it’s used in combination with Color Burn, but we’ll start with just Color Dodge.
How to Use Color Dodge in Photoshop
This tutorial works great for photos with a light source. It could be the sun, a light bulb, or a candle.
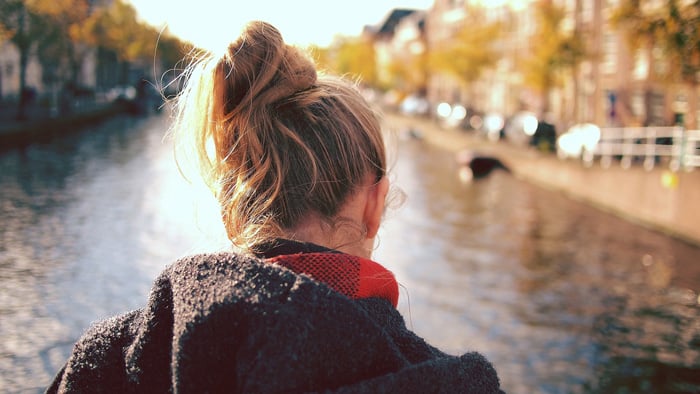
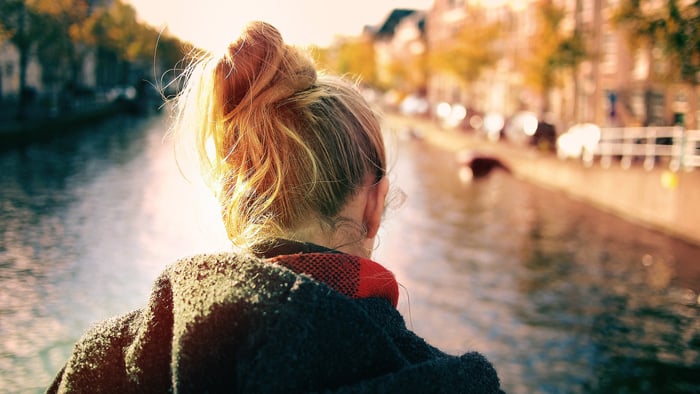
I’ll use this photo, and we’re going to make the light pop out a bit more.
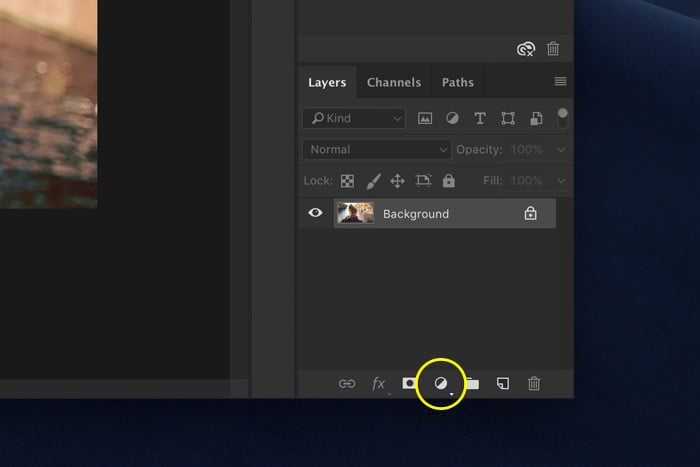
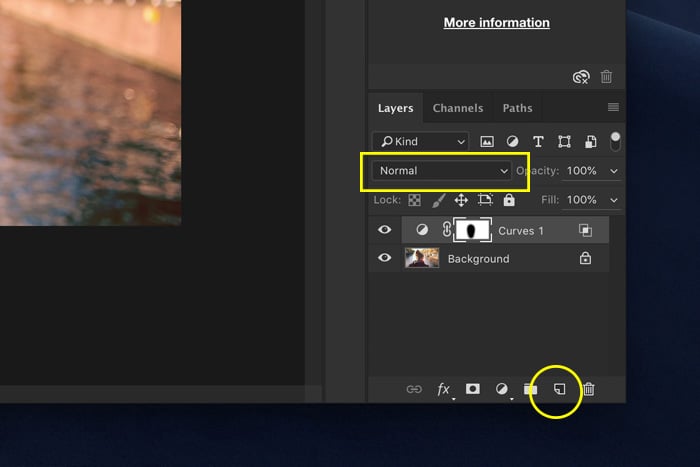
 Step 1: Curves
First, we’ll bring back the highlights a bit. I also want them to look warmer.
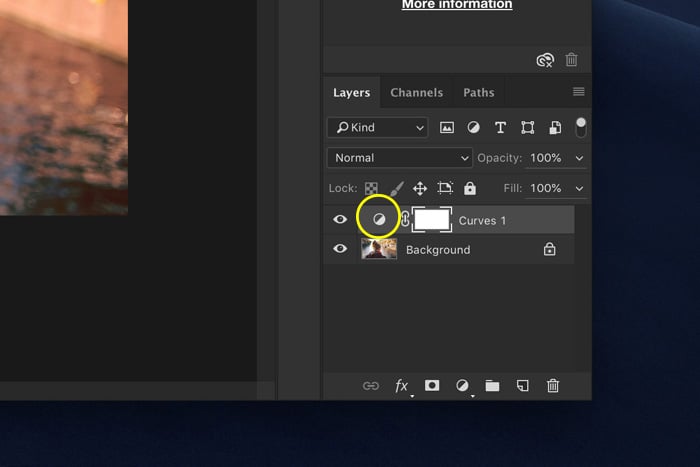
Click on the "Add fill or adjustment layer" icon and select "Curves". This will add a new layer, and the Curves panel will pop up.
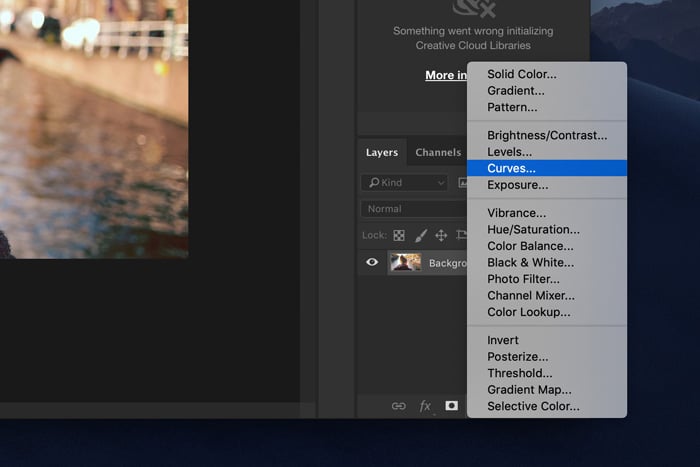
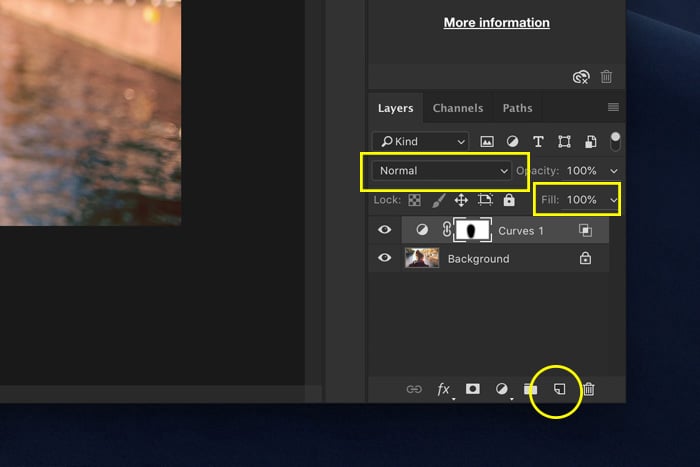
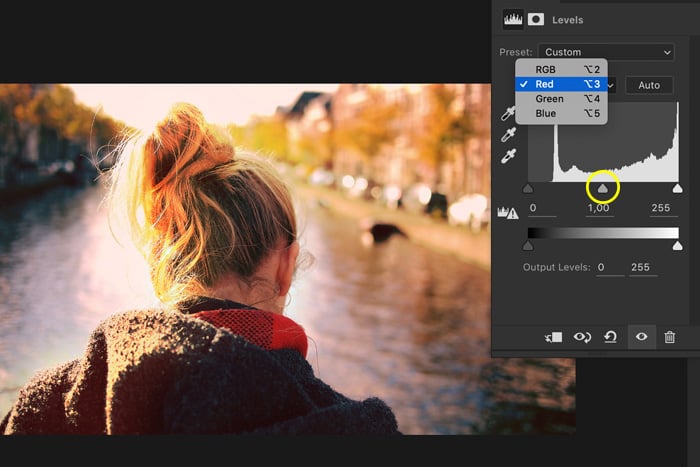
Open the RGB dropdown menu. Select "Red".
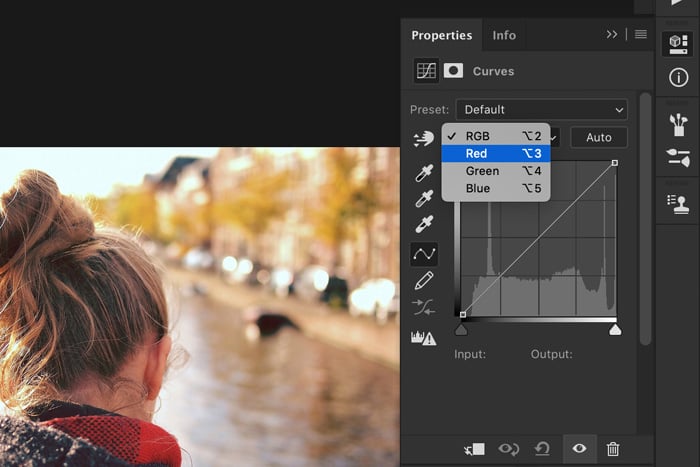
Pull the top anchor point slightly to the left. This will darken the highlights and add some extra red.
If you had pulled the anchor point down, it would have added cyan tones.

Next, select "Green" and "Blue" and do the same. In my example, I had to pull them down to make the highlights warmer.
It depends on the image you’re working with and what you want the result to look like: warmer or cooler.
Step 2: Use Layer Style to Protect the Shadows
Curves affects all areas in the image, including the shadows. I only want the highlights to be affected.
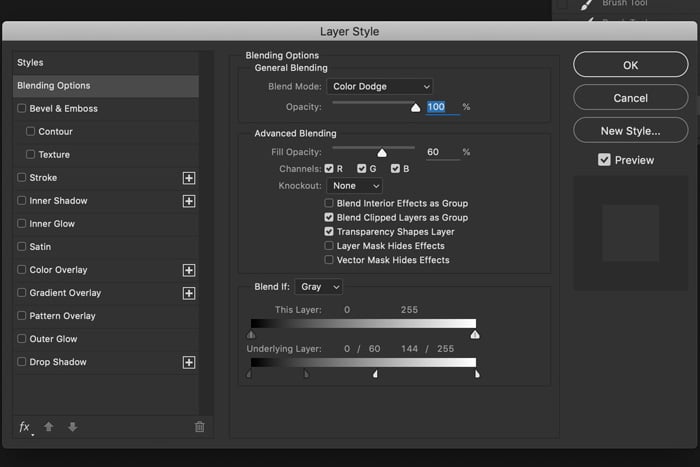
We can do this in the Layer Style option window.
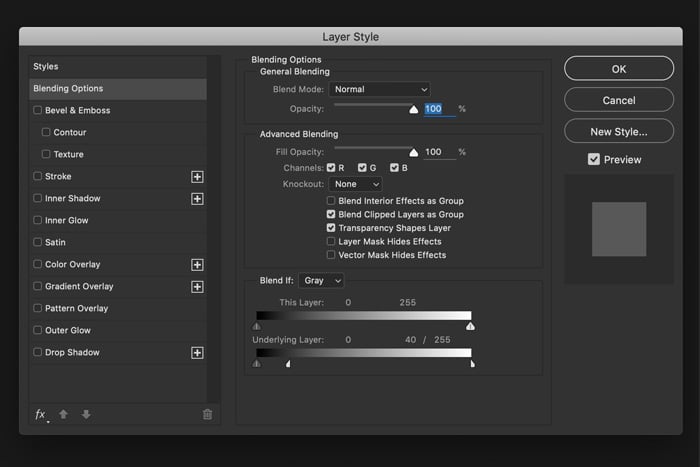
Alt + Double-click on the Curves layer. A dialogue box will pop up.
We are going to use the bottom slider called "Underlying Layer".
Alt + click on the black triangle and drag it all the way to the right. The little triangle should split in half.
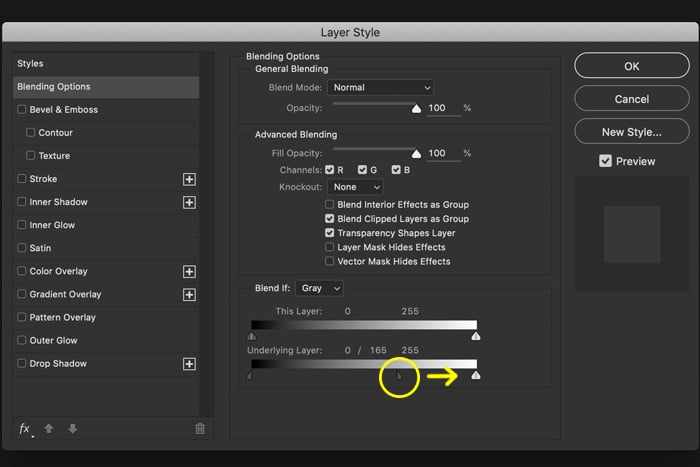
Now, Curves only affects the highlights in your image.
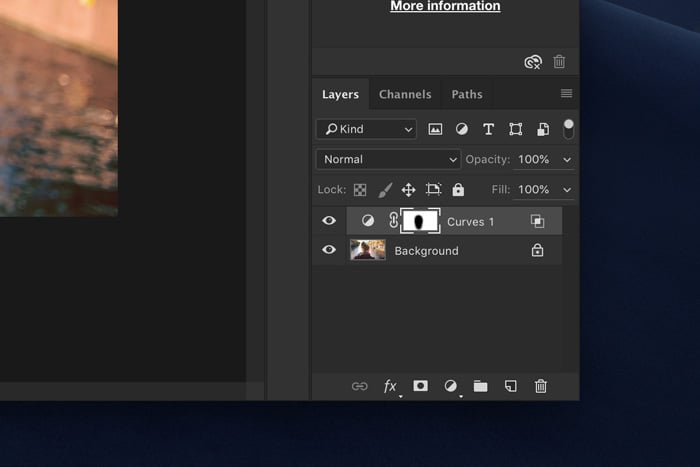
Step 3: Layer Mask
Use the layer mask to remove areas where you don’t want the highlights to be affected.
Select the mask thumbnail of the Curves layer.
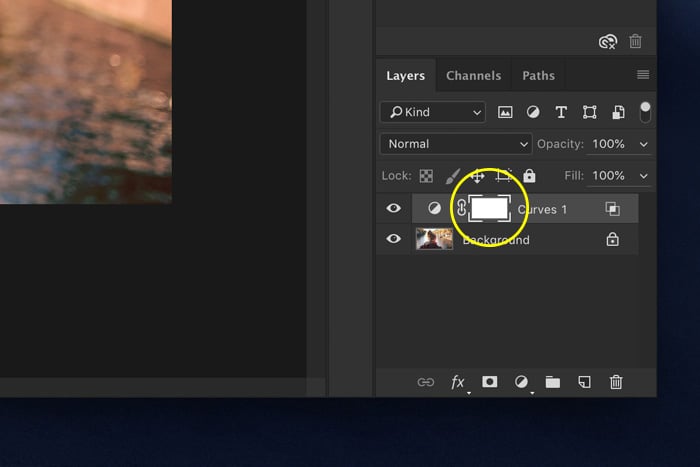
Select the Paint Brush tool and paint with black over the image. You’ll see the mask change.
White areas are affected by the curve effect, and black areas aren’t.
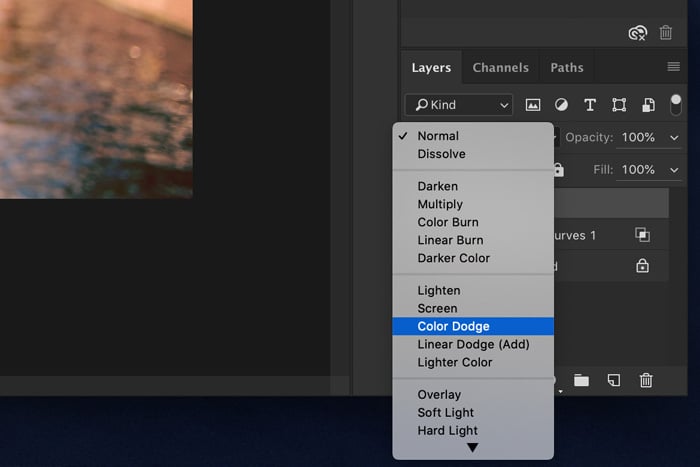
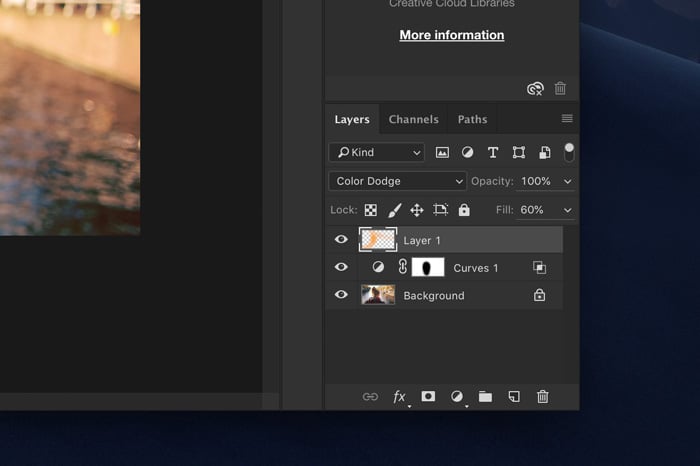
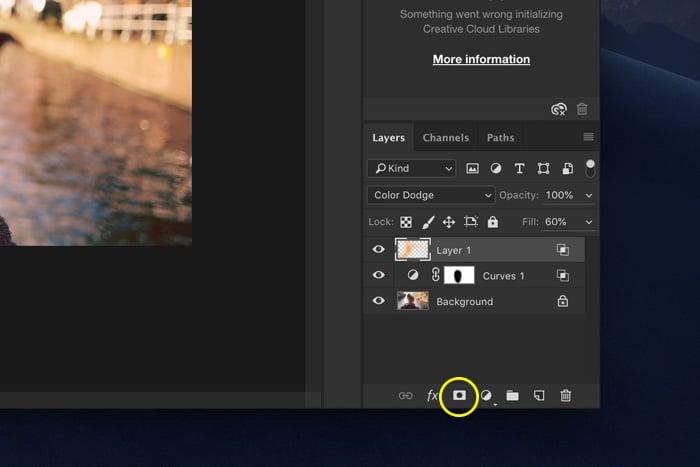
Step 4: Change Blending Mode
Now we’ll add some punch to the light. First, click on the "Create new layer" icon.
Set the blend mode on Color Dodge and Fill to around 60%.
Select the Paint Brush tool and Alt + Click on a color in the highlights of your image.
This will make that color your Brush color. Set the Flow of the brush to 10%.

Start painting around the light source to color blend and create some haze and light leaks. Experiment with different colors and brush sizes.
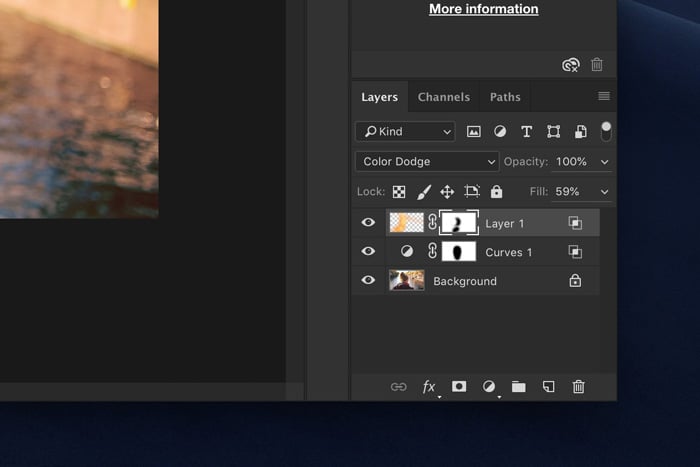
Step 5: Blending the Colors
Use Step 2 again for better color blending in the shadows and highlights. Just Alt + Double-click the new layer thumbnail. Just don’t drag the sliders as far.
Step 6: Add a Layer Mask
With a mask, we can make the effect look even better. Make sure the new layer is selected. Click on the "Add layer mask" icon. A thumbnail will appear.
Make sure the mask thumbnail is selected and start painting with black in your photo.
Set the Flow of the brush back to 100%. The process is the same as Step 3.
Remove the areas where you painted too much or where it doesn’t look right. Most of this is personal taste.
Step 7: Darken and Color the Shadows
Finally, to add some punch, we’ll darken the shadows.
Click on the "Add new fill or adjustment layer" icon and select Levels. The Levels panel will appear.
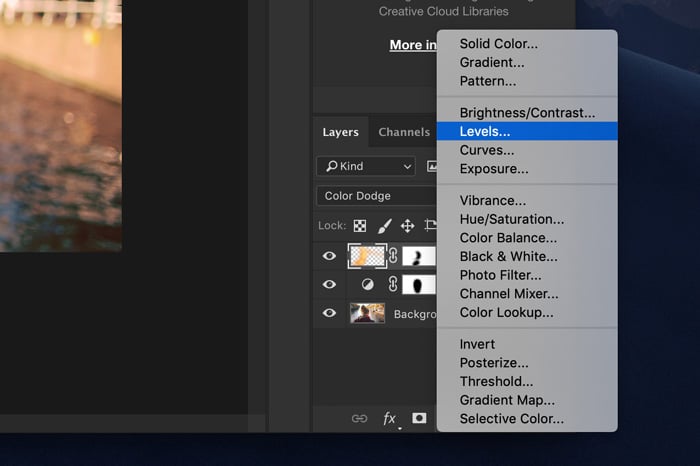
Make sure you set the RGB dropdown menu to RGB. Drag the middle triangle to the right to darken the tones.
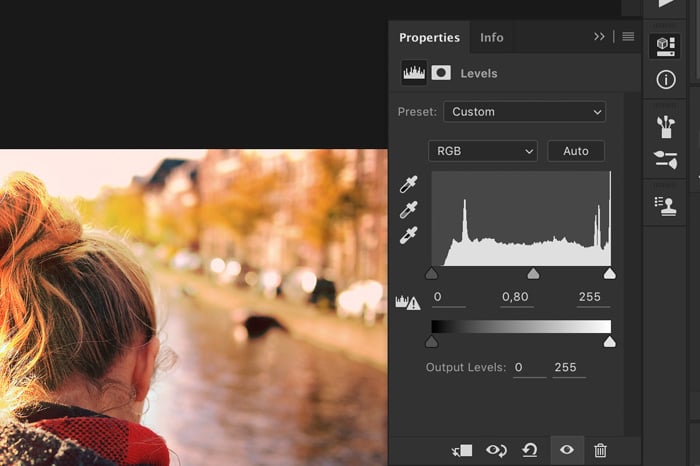
Now, we’ll add some warm and cold contrast. Select "Red" from the RGB dropdown menu and slide the middle and left triangle to the right. It is up to you how far.
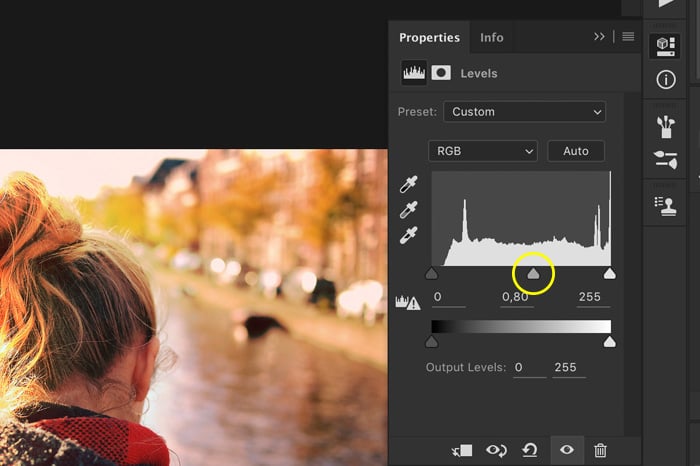
Step 8: Protect the Highlights
We’ll use Layer Style to apply the effect only to the shadows and protect the highlights. Alt + Double-click on the layer thumbnail.
This time, Alt + Click on the white triangle and slide it to the left.
And that’s it. Color Dodge to play with light in your photos.
How to Use Color Dodge and Color Burn
Color Dodge can do a lot more, especially in combination with Color Burn. Here’s how you can add color to your photos.
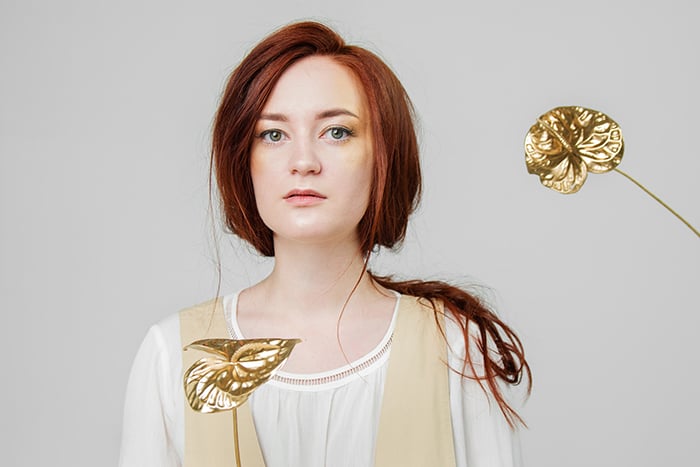
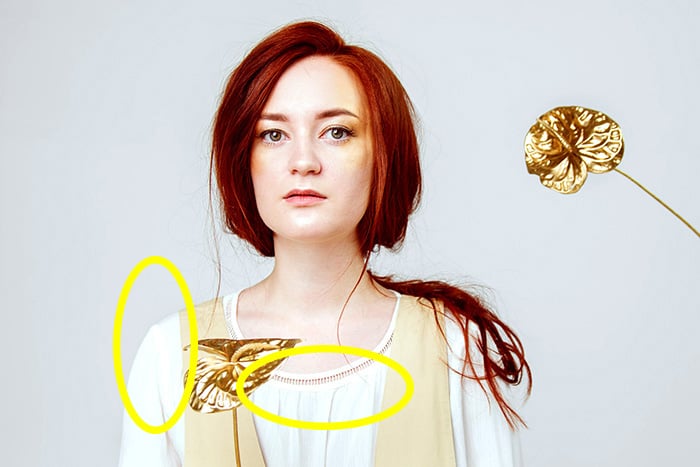
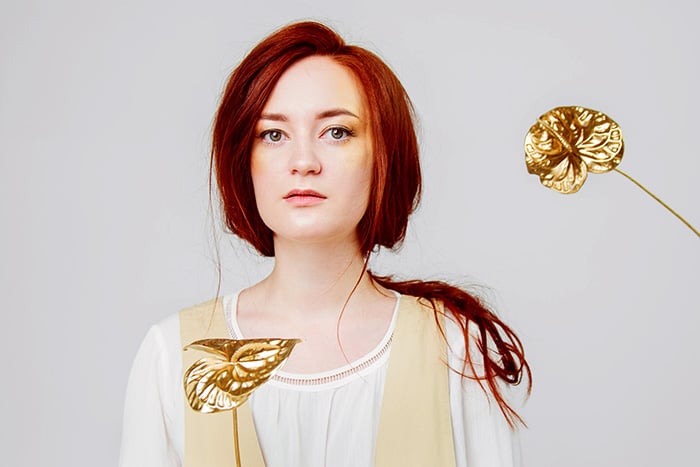
Use a photo like this with neutral colors to start. This makes it easier to experiment.
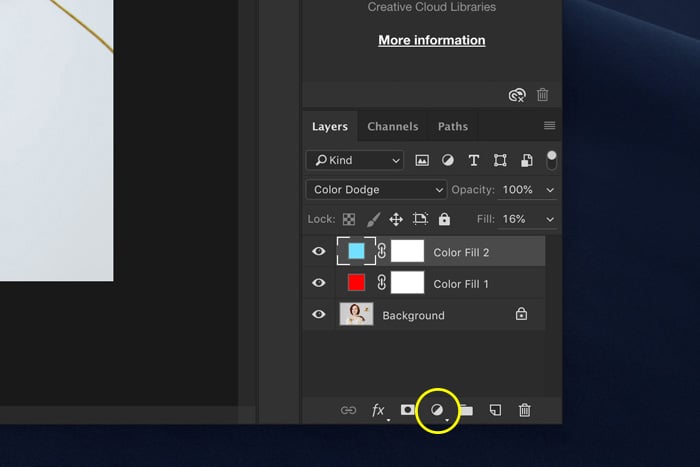
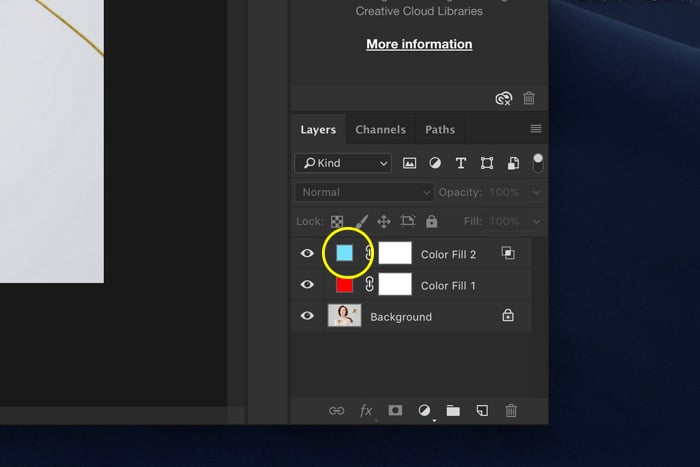
Step 1: Add Solid Color Layers
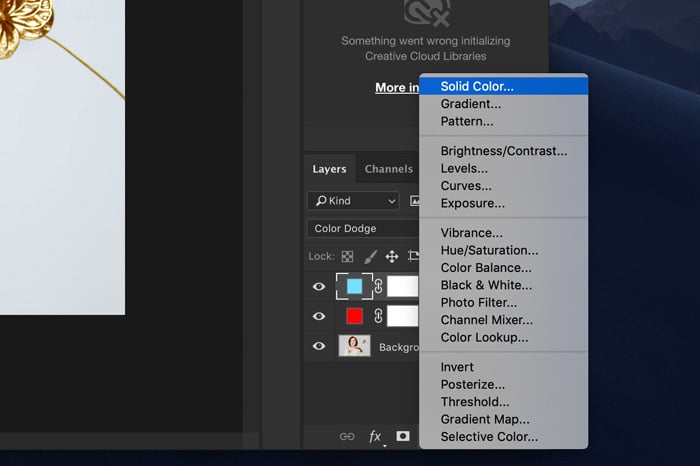
First, we need to add two new solid color layers. Click on the "Add new fill or adjustment layer" and select "Solid Color".
You can pick any color you want, but opposites tend to work best.
In my example, I used red and cyan. But you could use green and orange or blue and yellow.
Step 2: Set Blend Modes
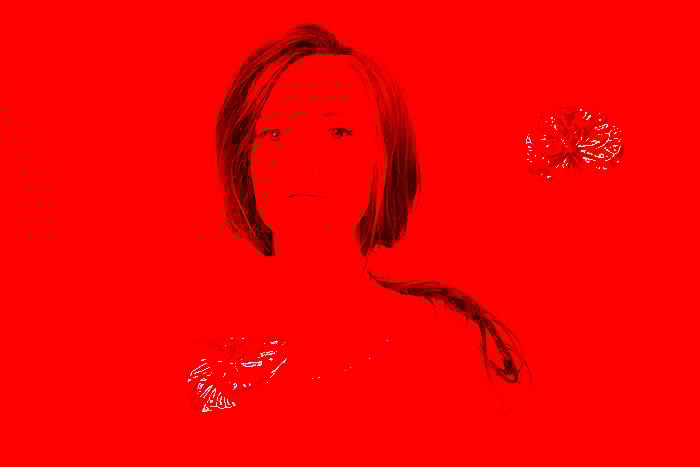
Now, set the blend modes. Color Burn will affect dark areas, and Color Dodge affect the lighter areas.
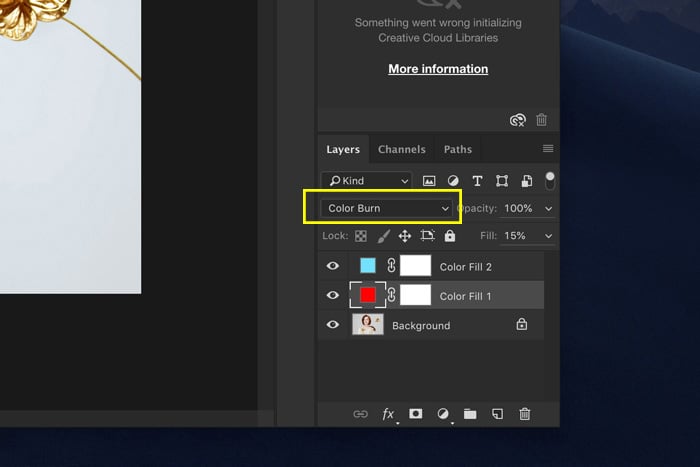
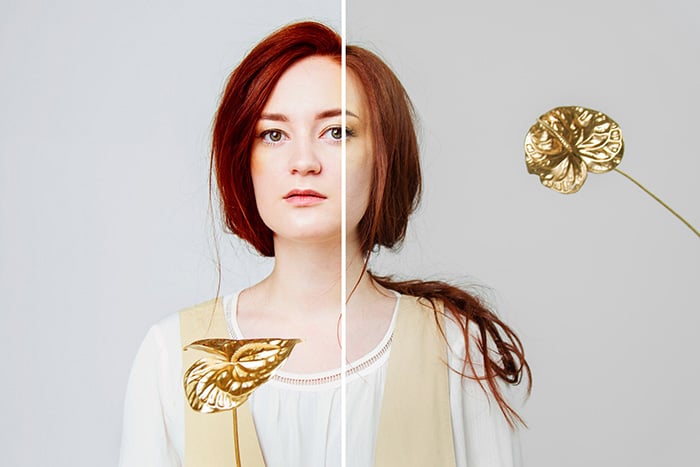
I’ve set the red layer to Color Burn and the cyan layer to Color Dodge. Your image will look like this.
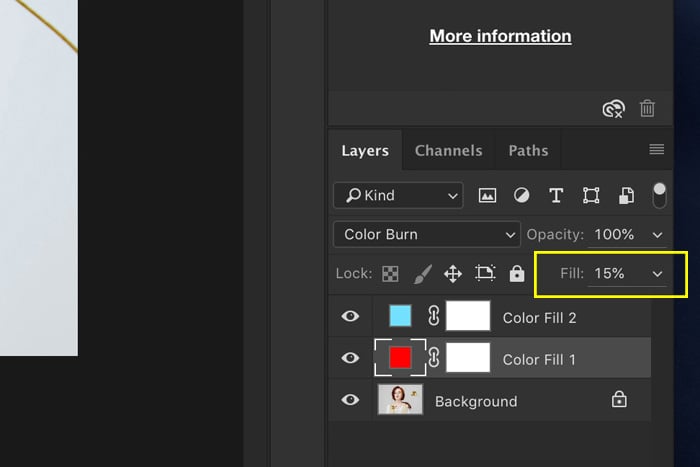
There’s just one thing you need to do to make it look right. Set the Fill of both layers to around 15%.
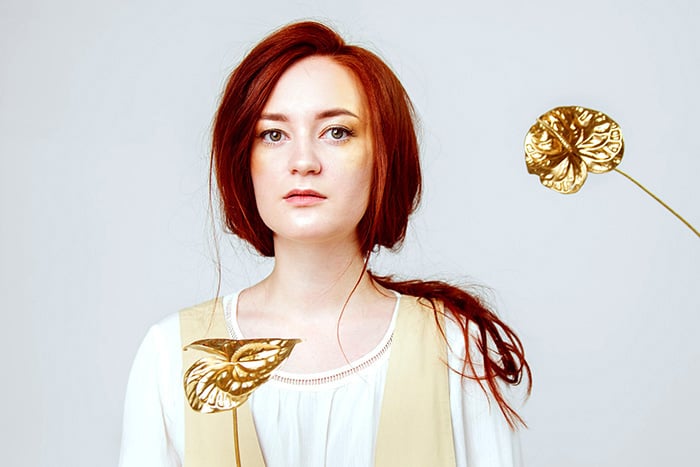
You’ll see that the red hair of the model really pops now. Also, it adds just a little bit more contrast and color to the overall image.
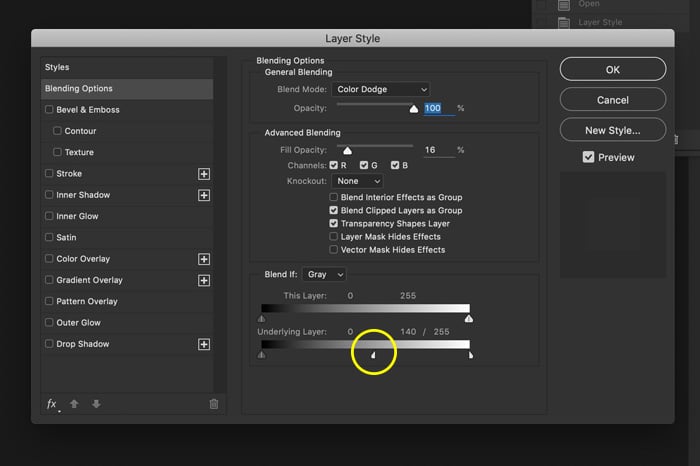
Step 3: Protect Shadows or Highlights
But there’s a problem. The highlights in the model’s blouse are blown out and don’t look right.
It’s time to protect those areas from the effect.
Alt + Double-click on either layer thumbnail. In my case, the Color Dodge layer.
Then, Alt + Click on one of the triangles of the bottom slider. Black will protect shadows, and white will protect highlights.
And that’s it. Instant punch added to your photo! By double-clicking on the Solid Color layers, you can still change the color and try out different settings.
Conclusion
Color Dodge and Color Burn are easy but powerful tools to color grade your photos and play with light. You can use this method for landscapes, portraits, or street photos.
Remember to drop your Fill down to around 20 percent to make it work.
After that, you can adjust opacity and Layer Style settings for that perfect colour-graded look.
Want to become a pro at editing? Try our Effortless Editing with Lightroom course!


