The purpose of food photography is marketing. It’s meant to make you hungry and get you to buy the product.
That’s why it’s so important to know how to edit photos of food. The colors have to be realistic and the food should look vibrant and appetising.
In this article, I’ll show you how to edit food photography in Photoshop.
How to Edit Food Photography in Photoshop
Editing food photography is important and it should be done right. The key is to make the food look yummy but realistic. Most food photography is done in a studio.
The assistant of the photographer prepares every element with care. A good lighting set up, results in a perfect looking image.
But you don’t need a studio for making good food photography. The next best thing is to use soft natural light. That works but sometimes the results looks dull and boring or the colors are off.
You can edit your photos in Photoshop to bring those lifeless food photos to life.
The basics are very simple. In the next steps I’ll teach you how to edit photos in Photoshop for food photography.
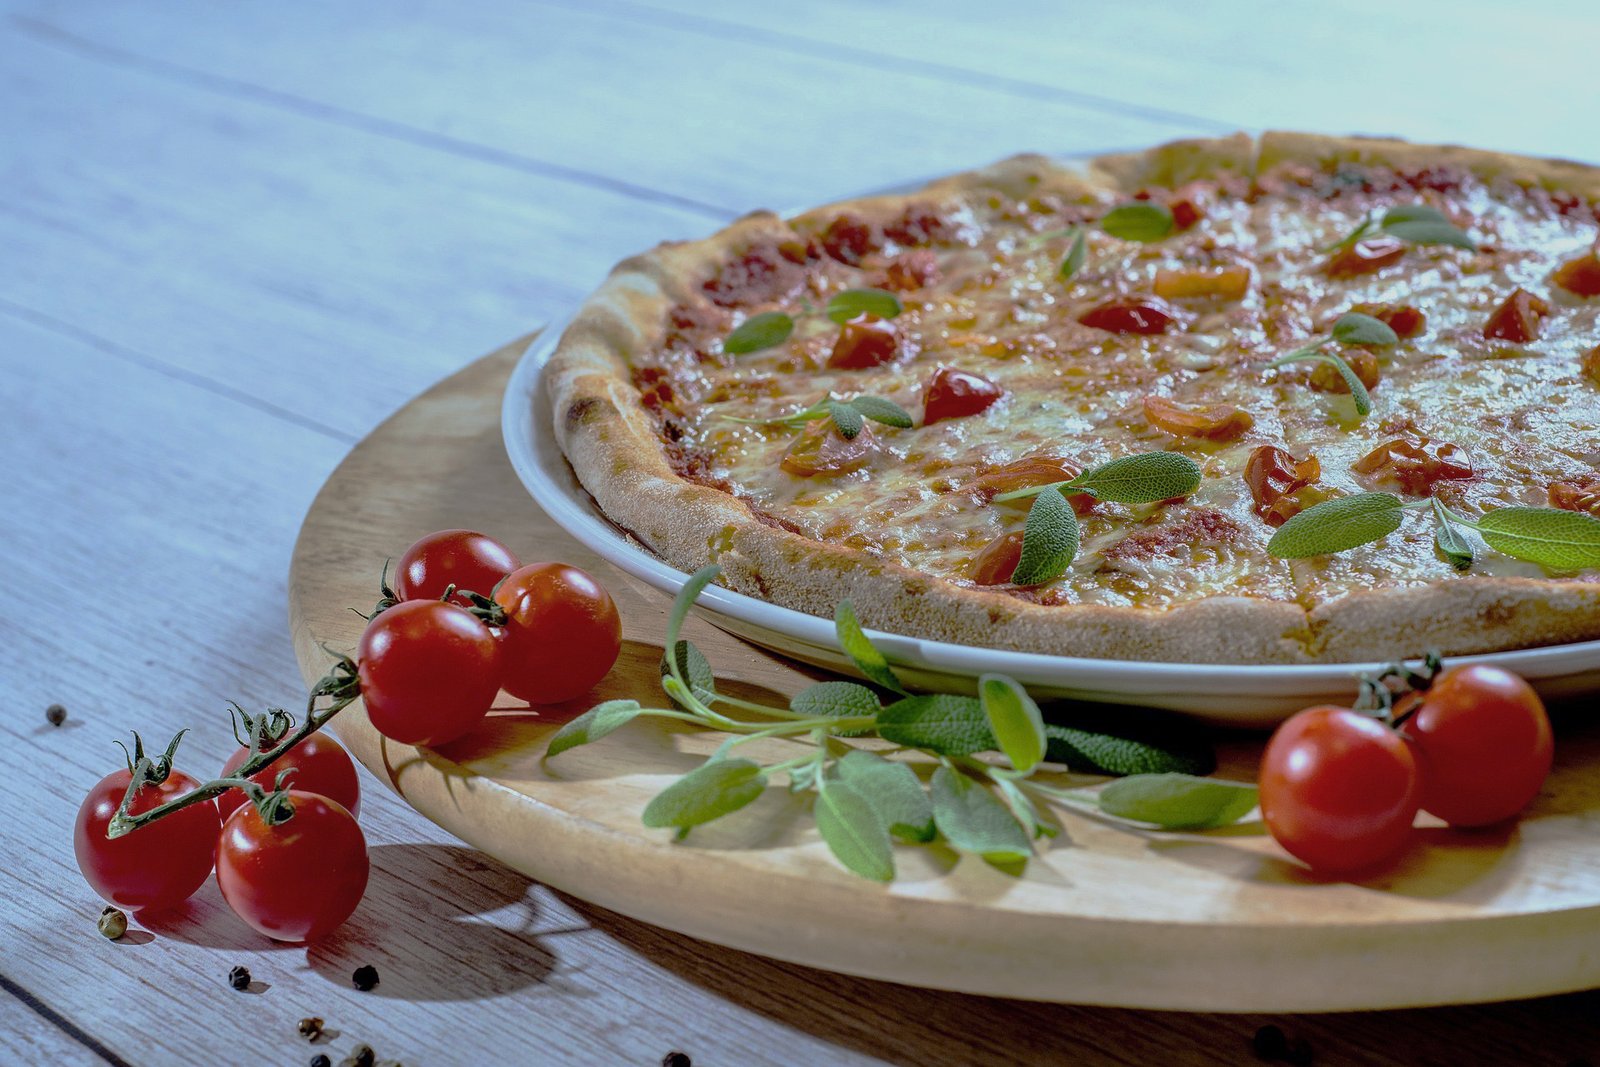
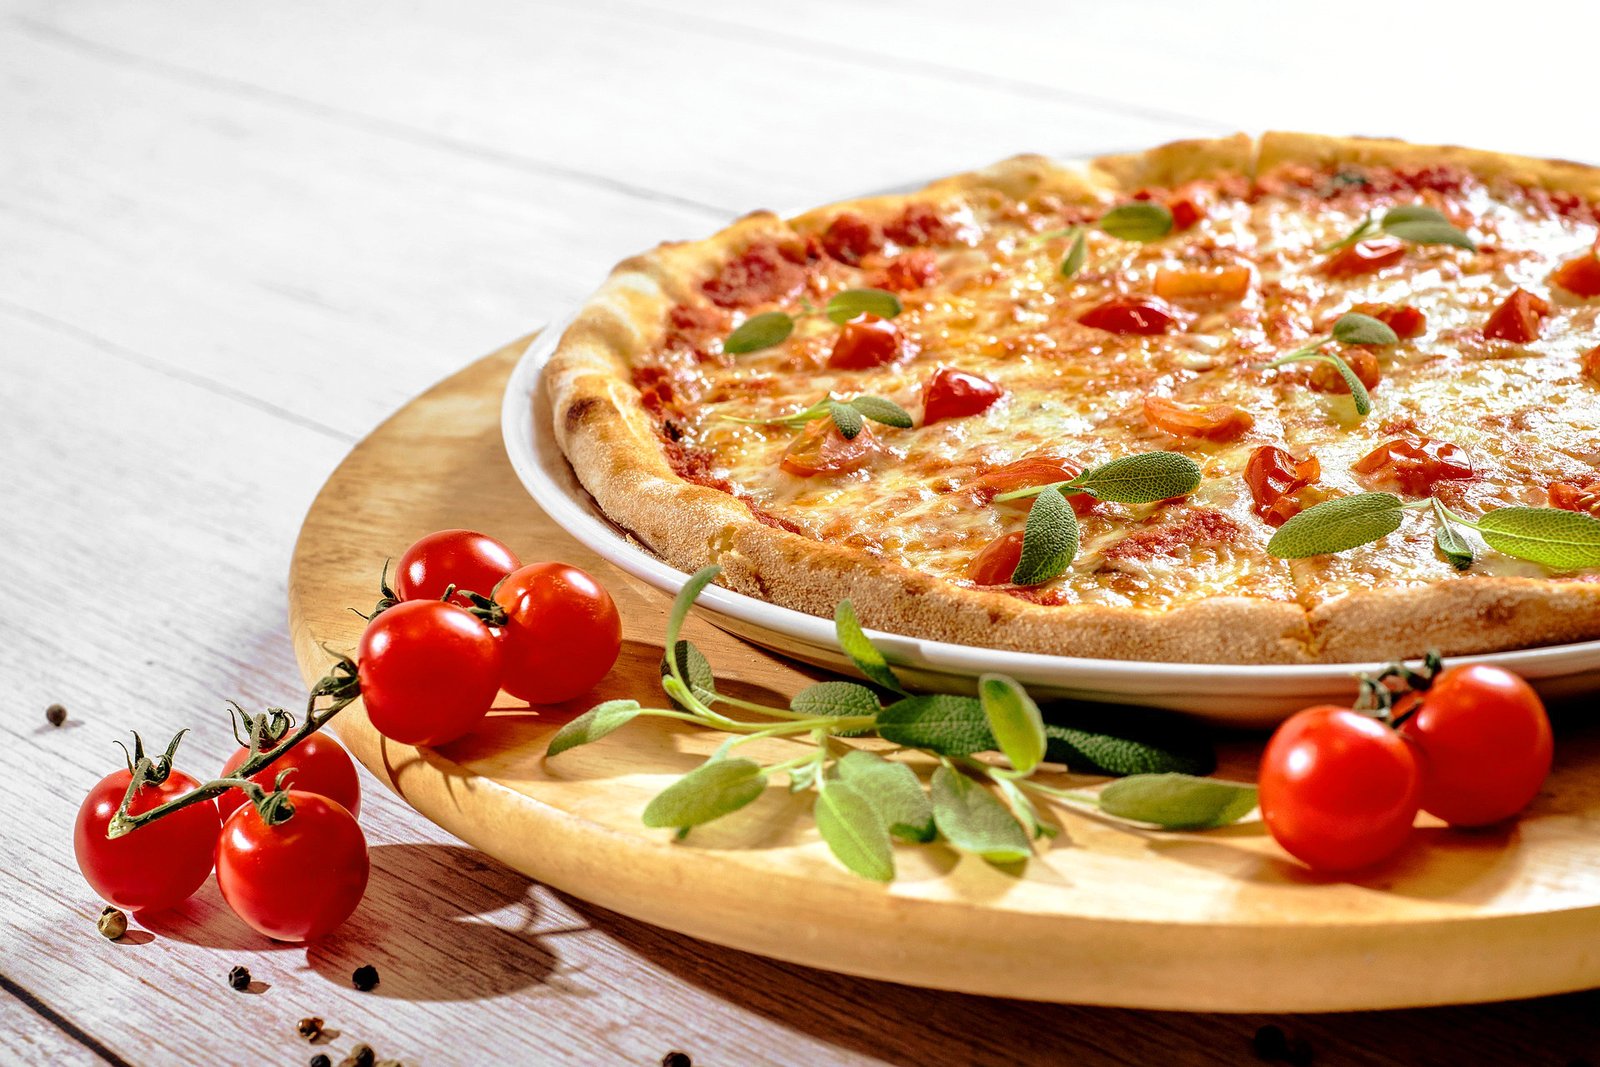
I’ll use this photo of a delicious pizza. The problem here, is that the white balance was not set correctly so the photo looks too blue.
Overall, there’s also a lack of contrast and vibrance. Let’s fix that with Adjustments Layers so we have full control over the corrections.
Step 1: Correct the Blue Cast
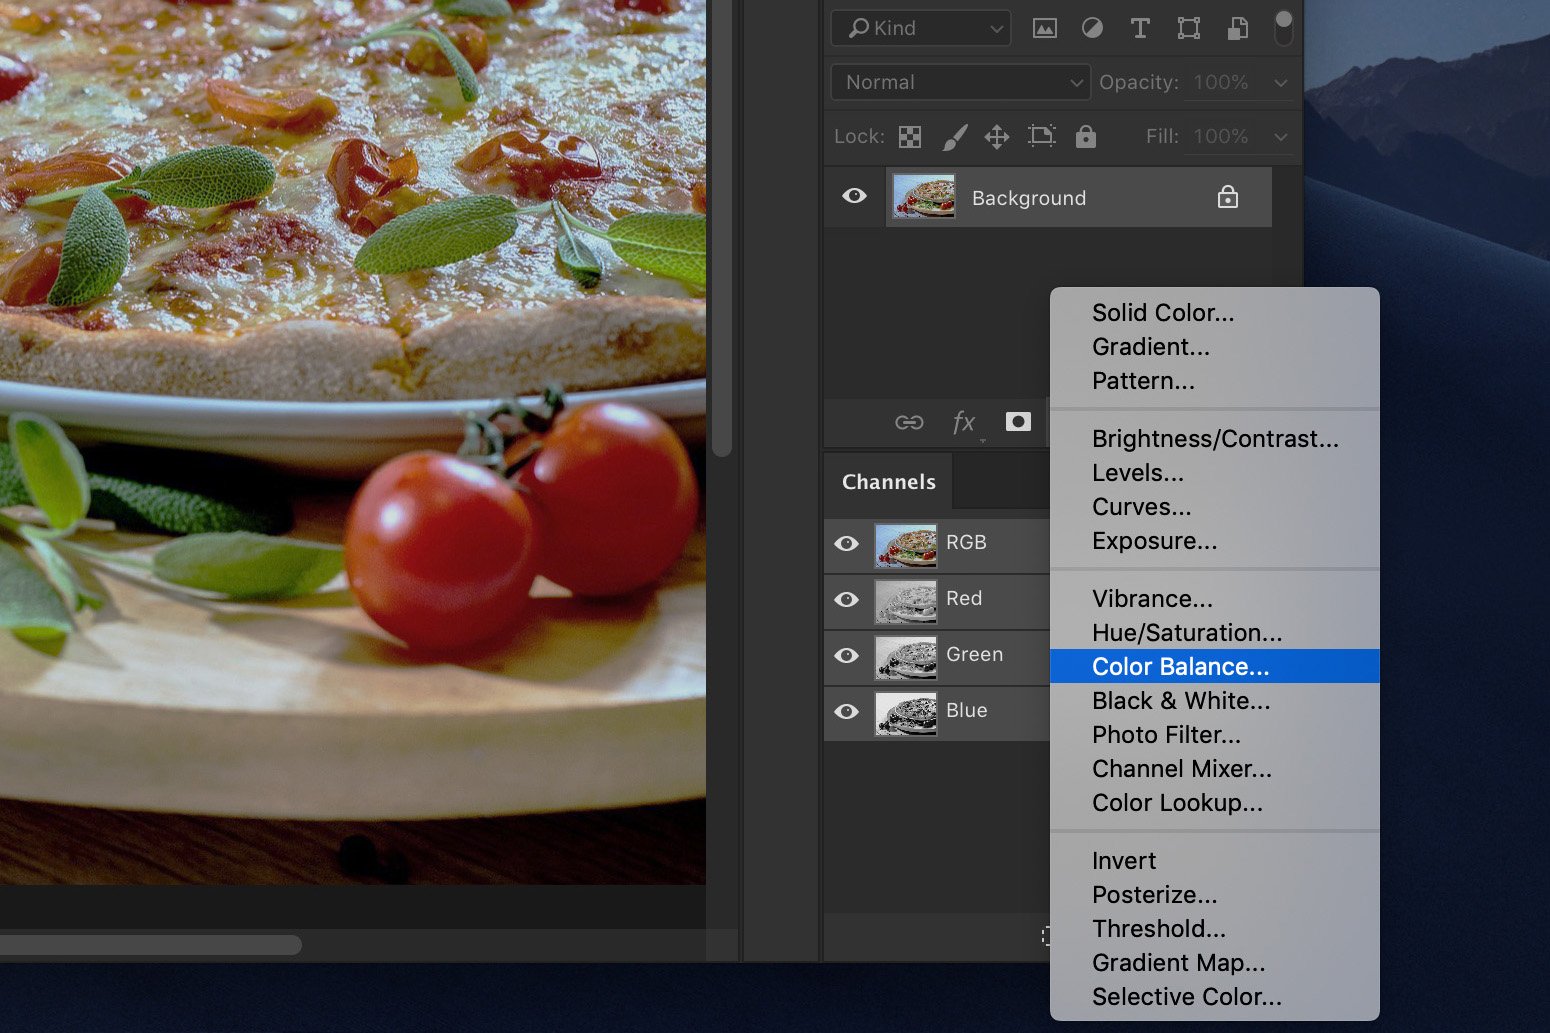
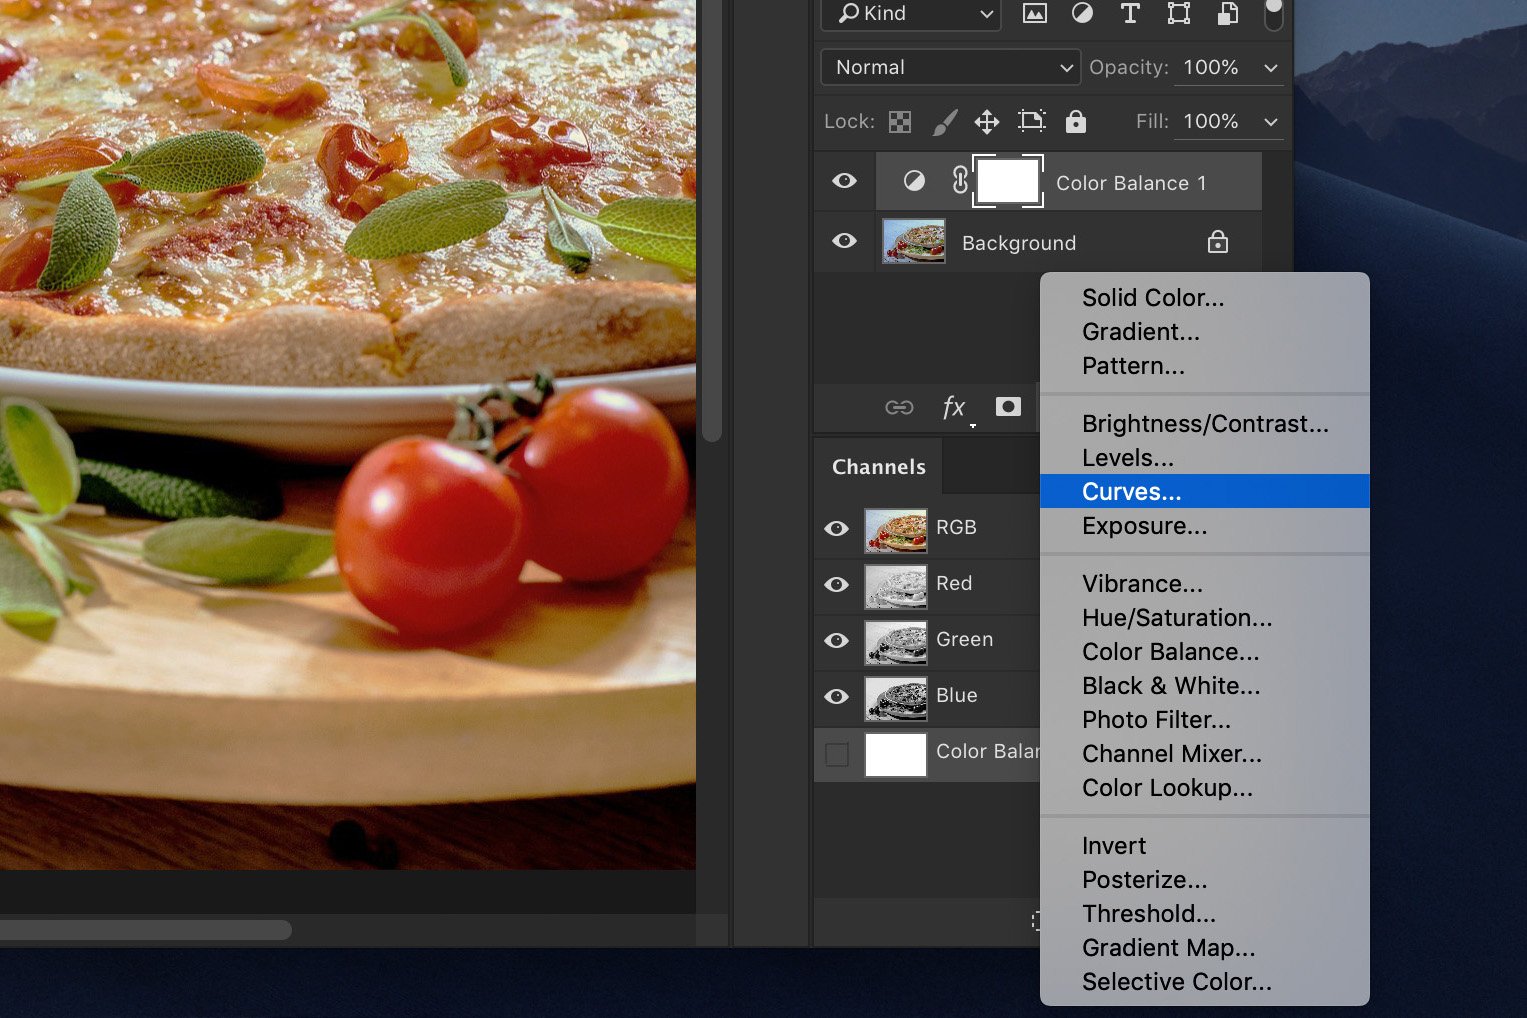
Click on the ‘Create new fill or adjustment layer’ icon and select ‘Color Balance…’.
You can adjust the blue color cast in the Color Balance window.
In this photo, the problem areas are the highlights and midtones.
![]()
Select ‘Midtones’ from the drop down menu and slide the top slider to the right. This will remove cyan tones while adding red tones.
Most food looks better and more realistic with warmer tones. The amount of red and yellow depend on the photo you’re using.
Make sure it looks realistic.
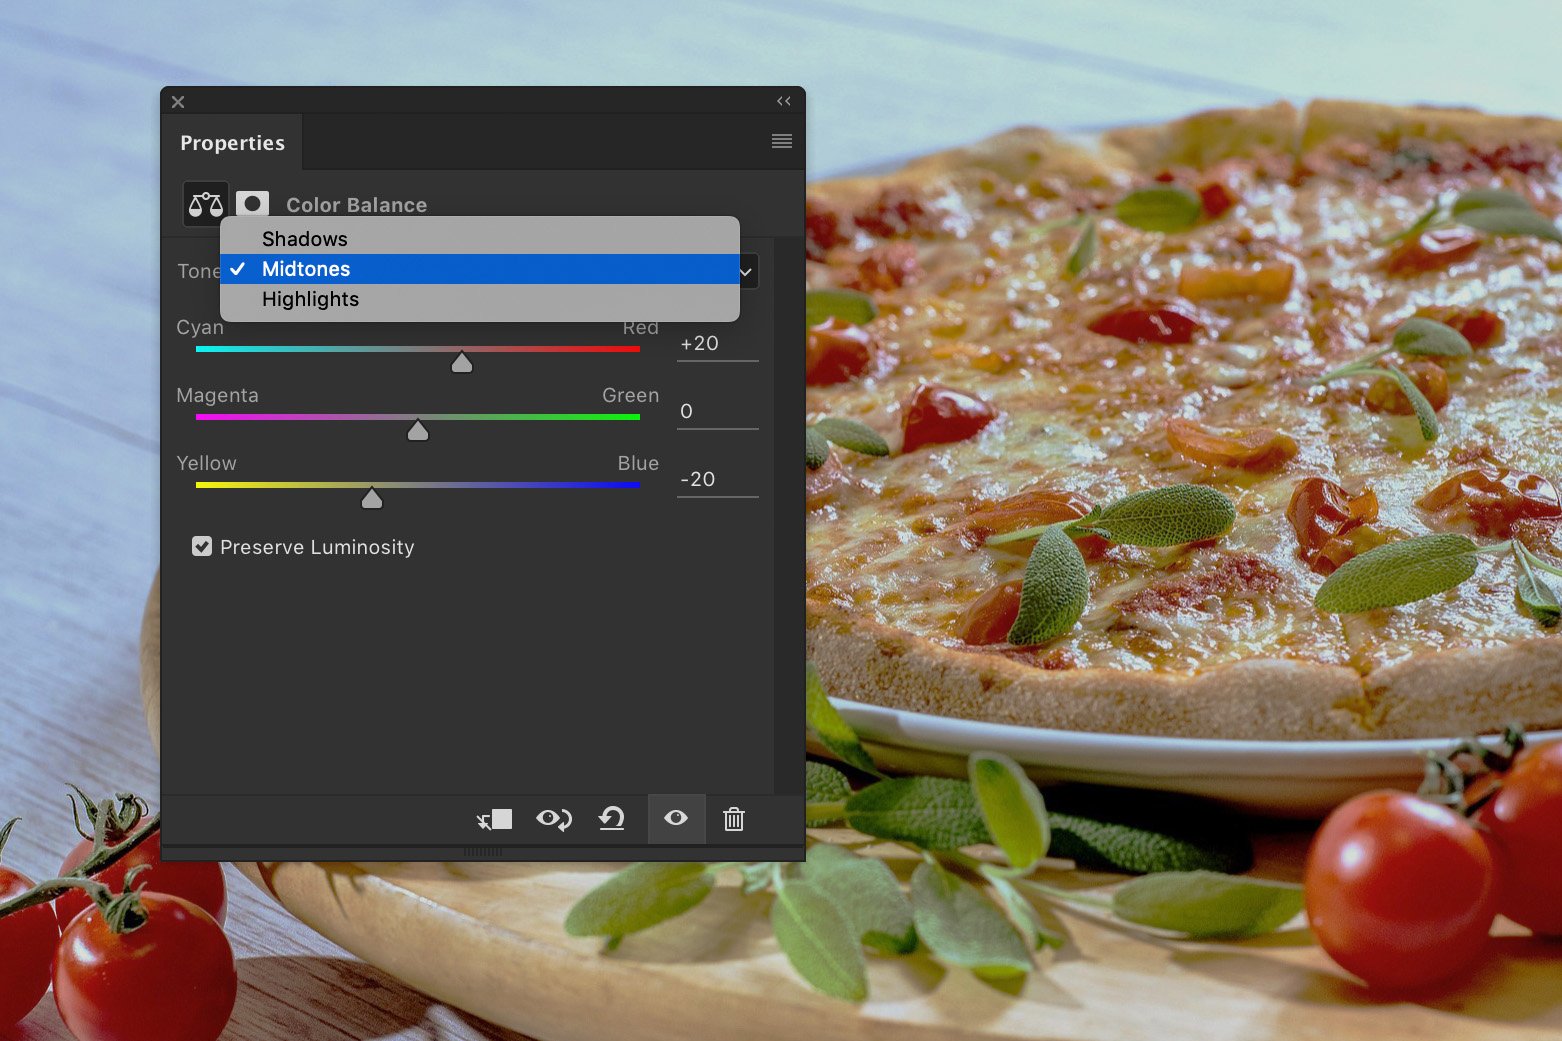
Next, slide the bottom slider to the left. This will remove blue tones and add yellow.
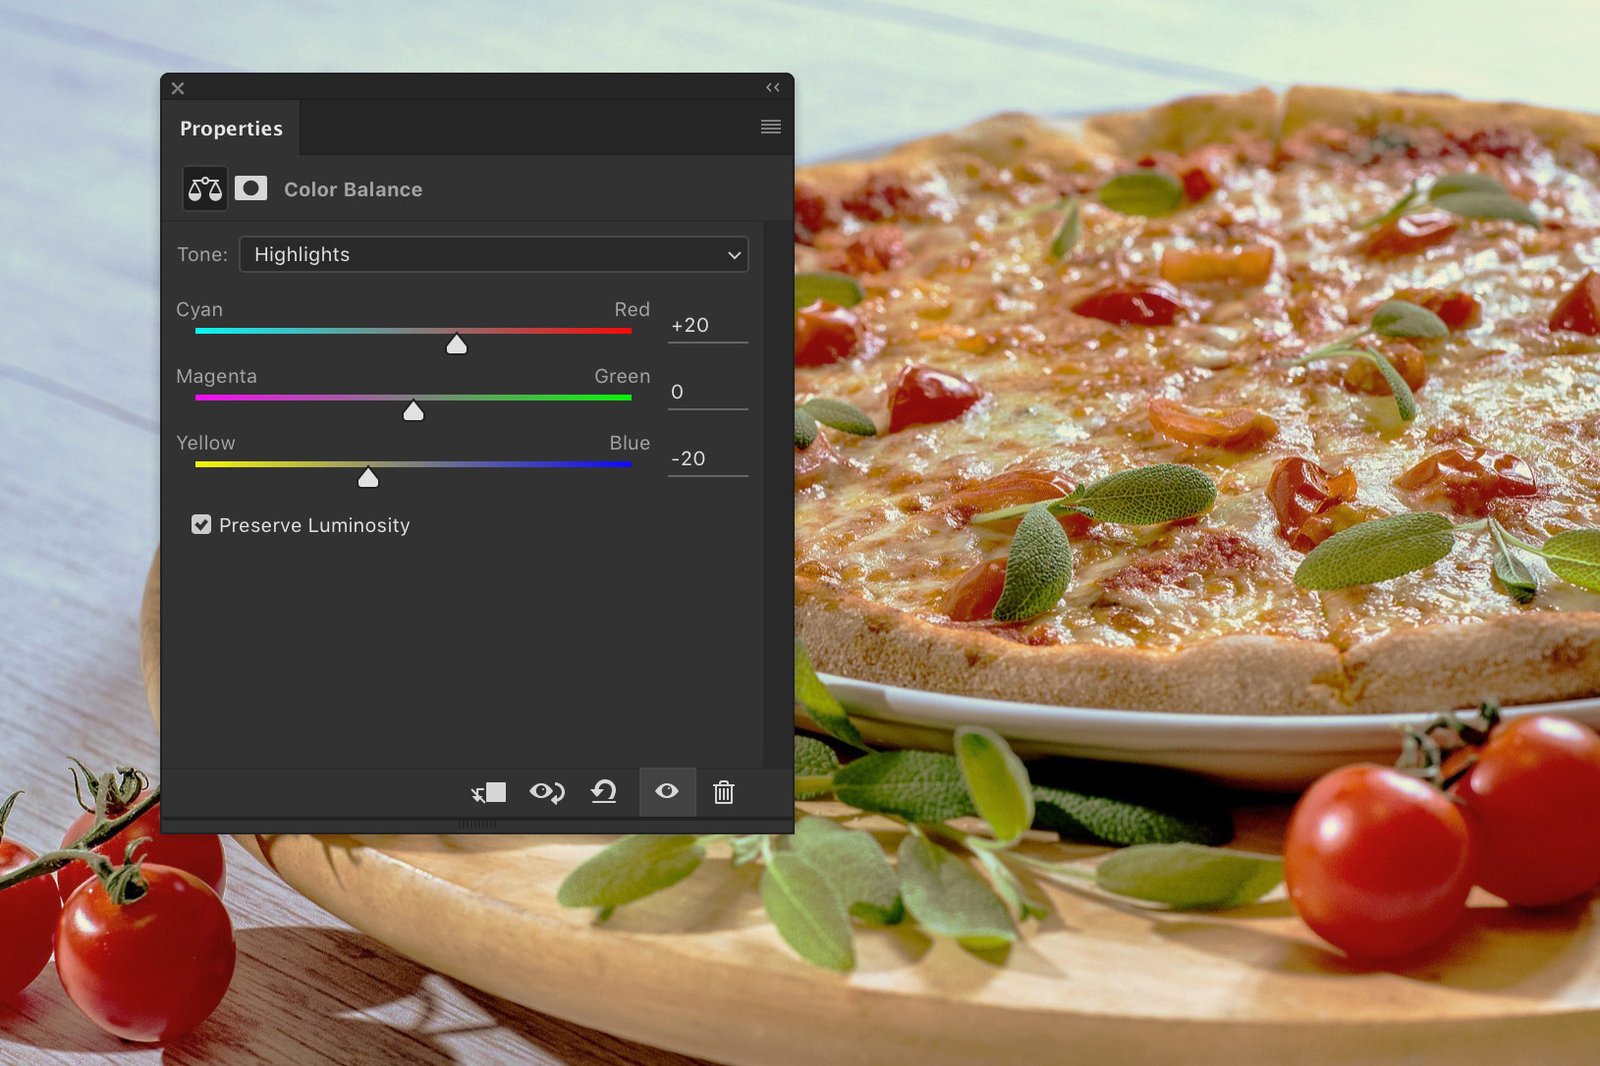
Select ‘Highlights’ from the drop down menu and do the same.
Step 2: Add More Contrast
Add another Adjustment Layer. This time, select ‘Curves…’.
Click in the middle of the diagonal line to set an anchor point.
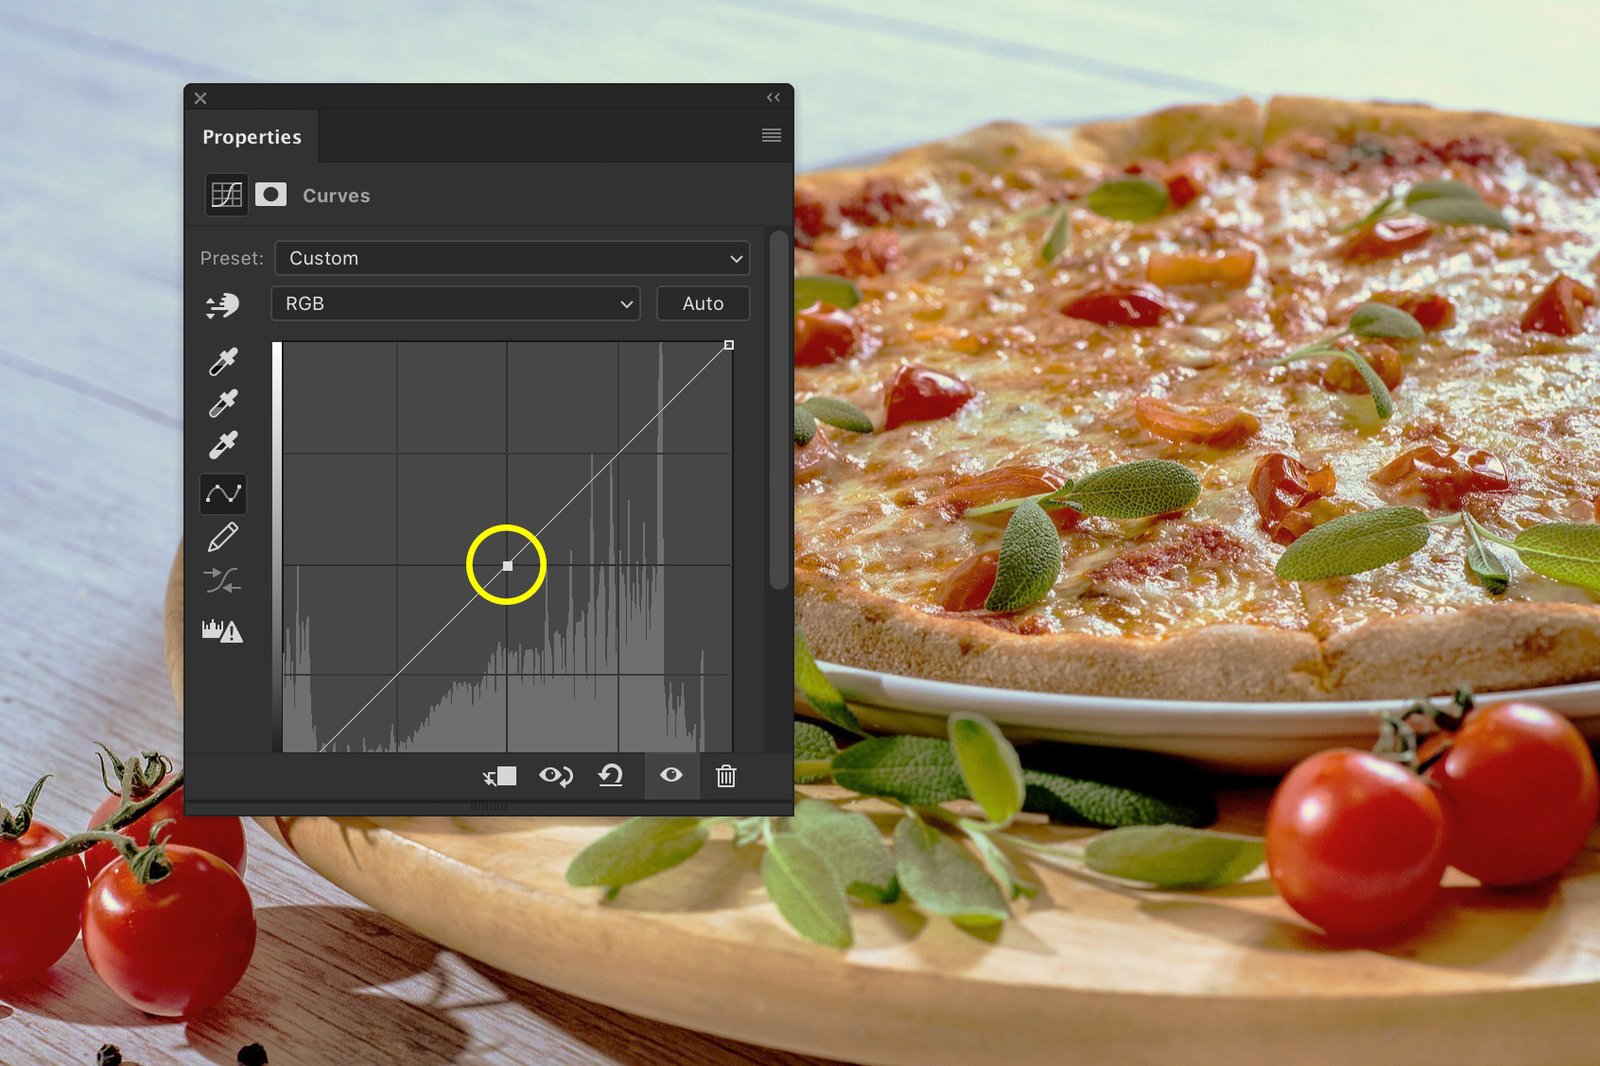
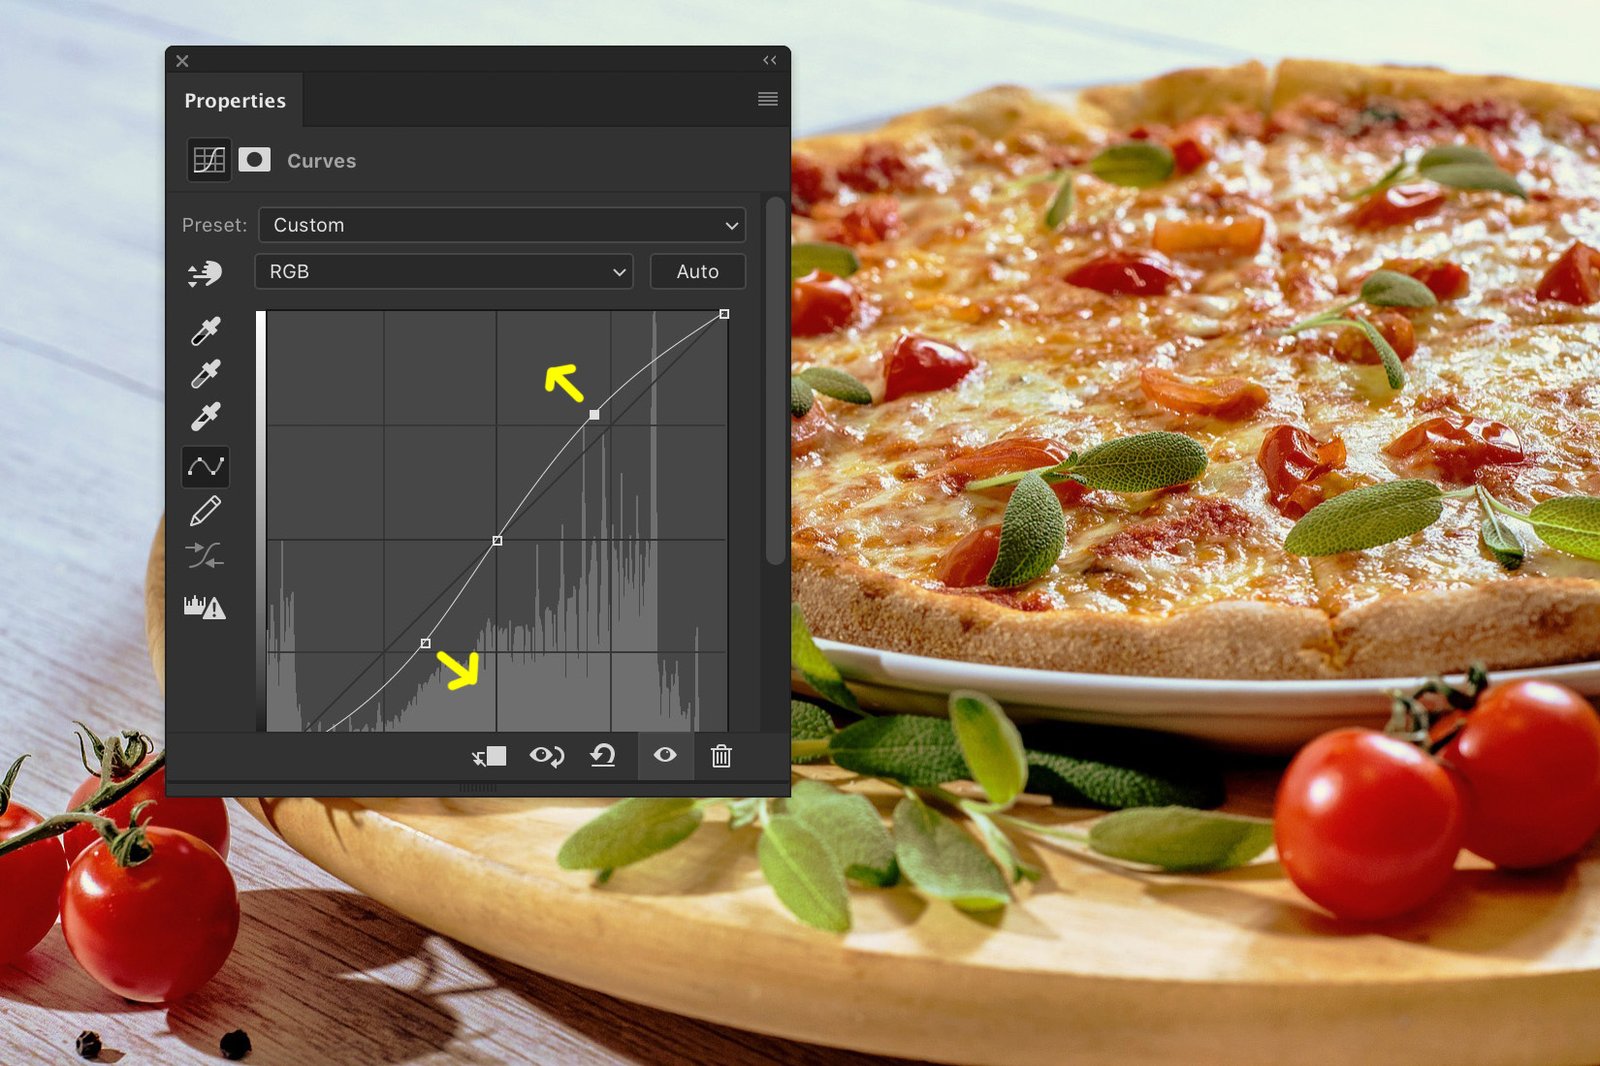
Now, drag to the top and bottom parts to create a slight S-shape.
This adds a nice natural contrast to the image.
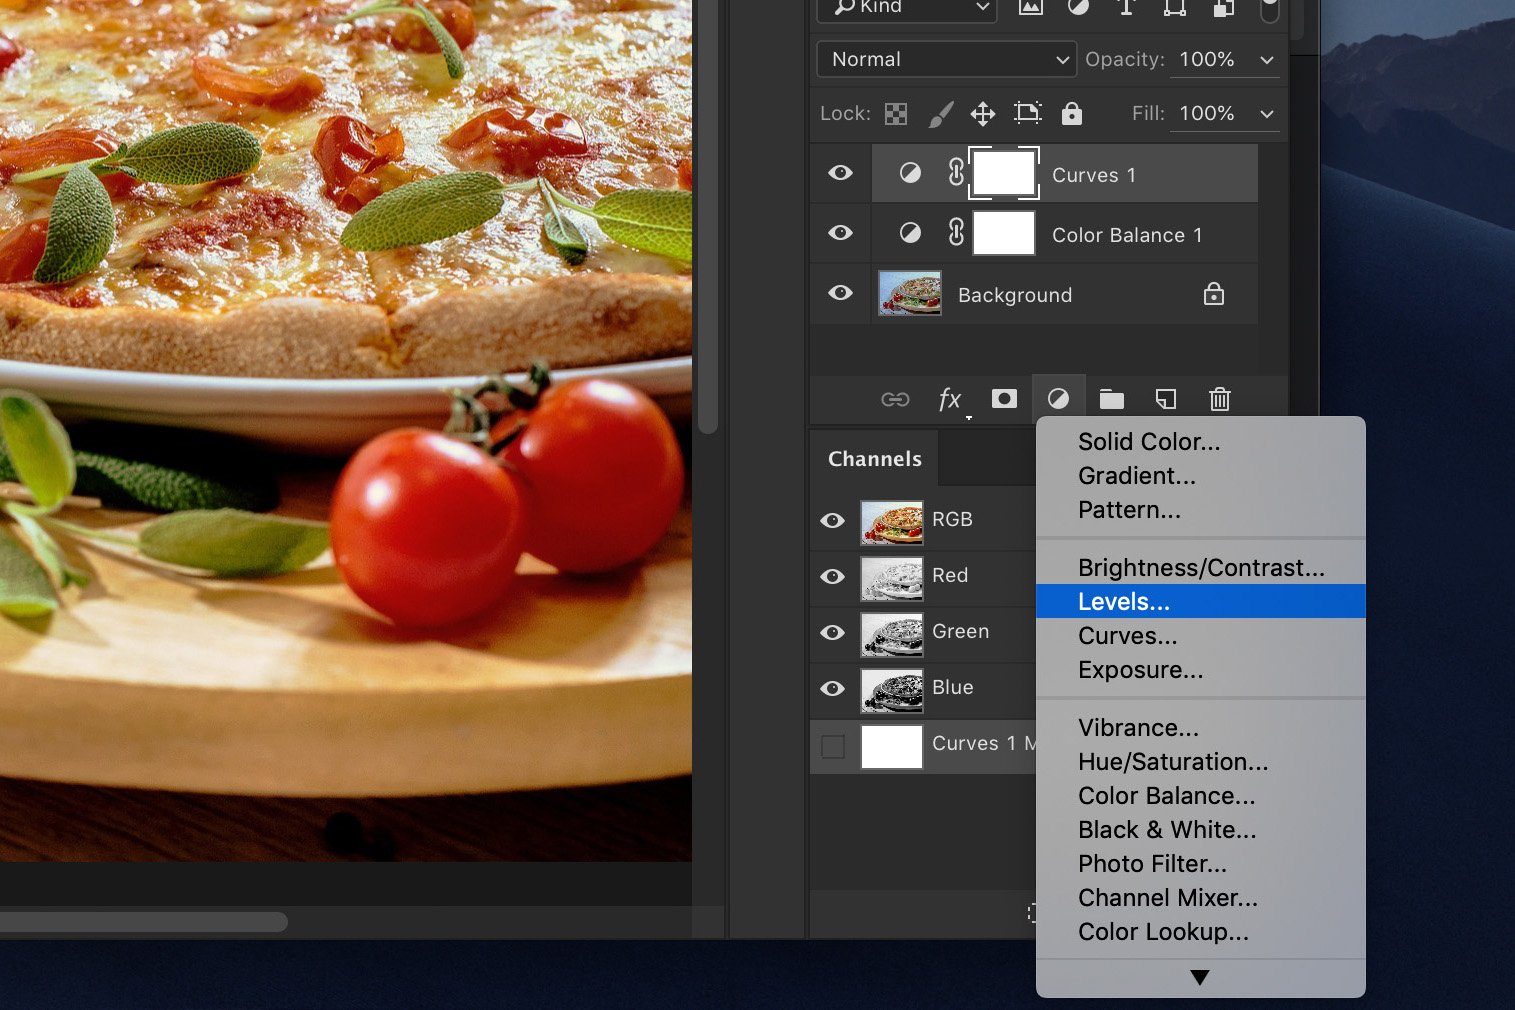
Step 3: Lift the Highlights
This time, add a ‘Levels…’ Adjustment Layer.
Drag the white triangle to the left to lift the highlights.
Don’t overdo it or they’ll burn out the image. A small amount will make the highlights pop out.

Step 4: Remove the Remaining Color Cast
There is still a slight cyan and blue color cast visible in the top highlights. Let’s get rid of those.
Create a ‘Hue/Saturation…’ adjustment layer.
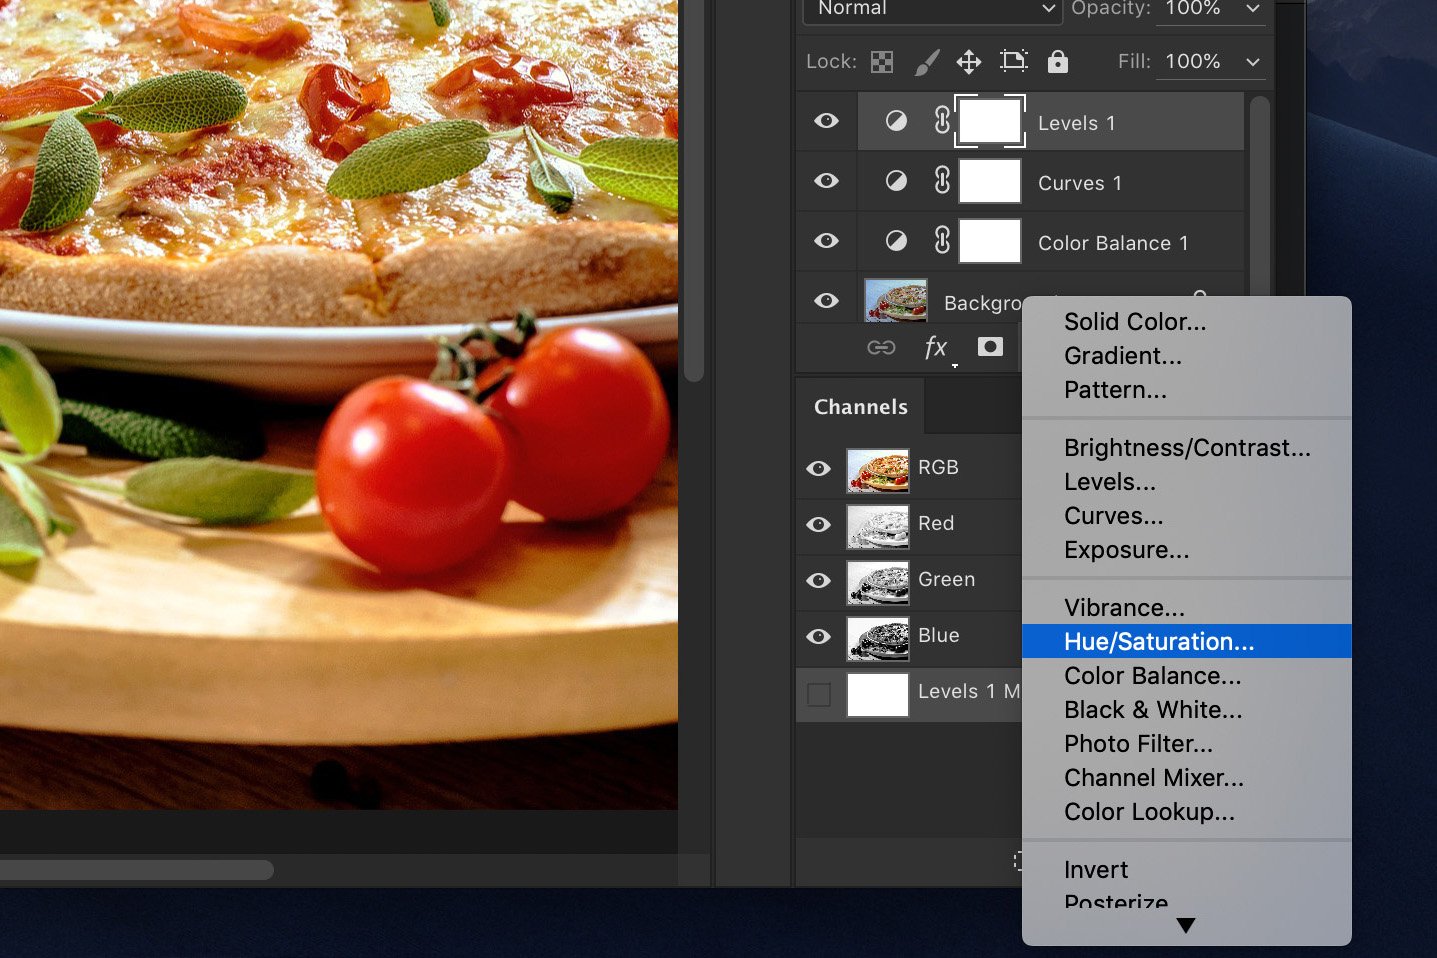
Select ‘Cyans’ in the drop down menu.
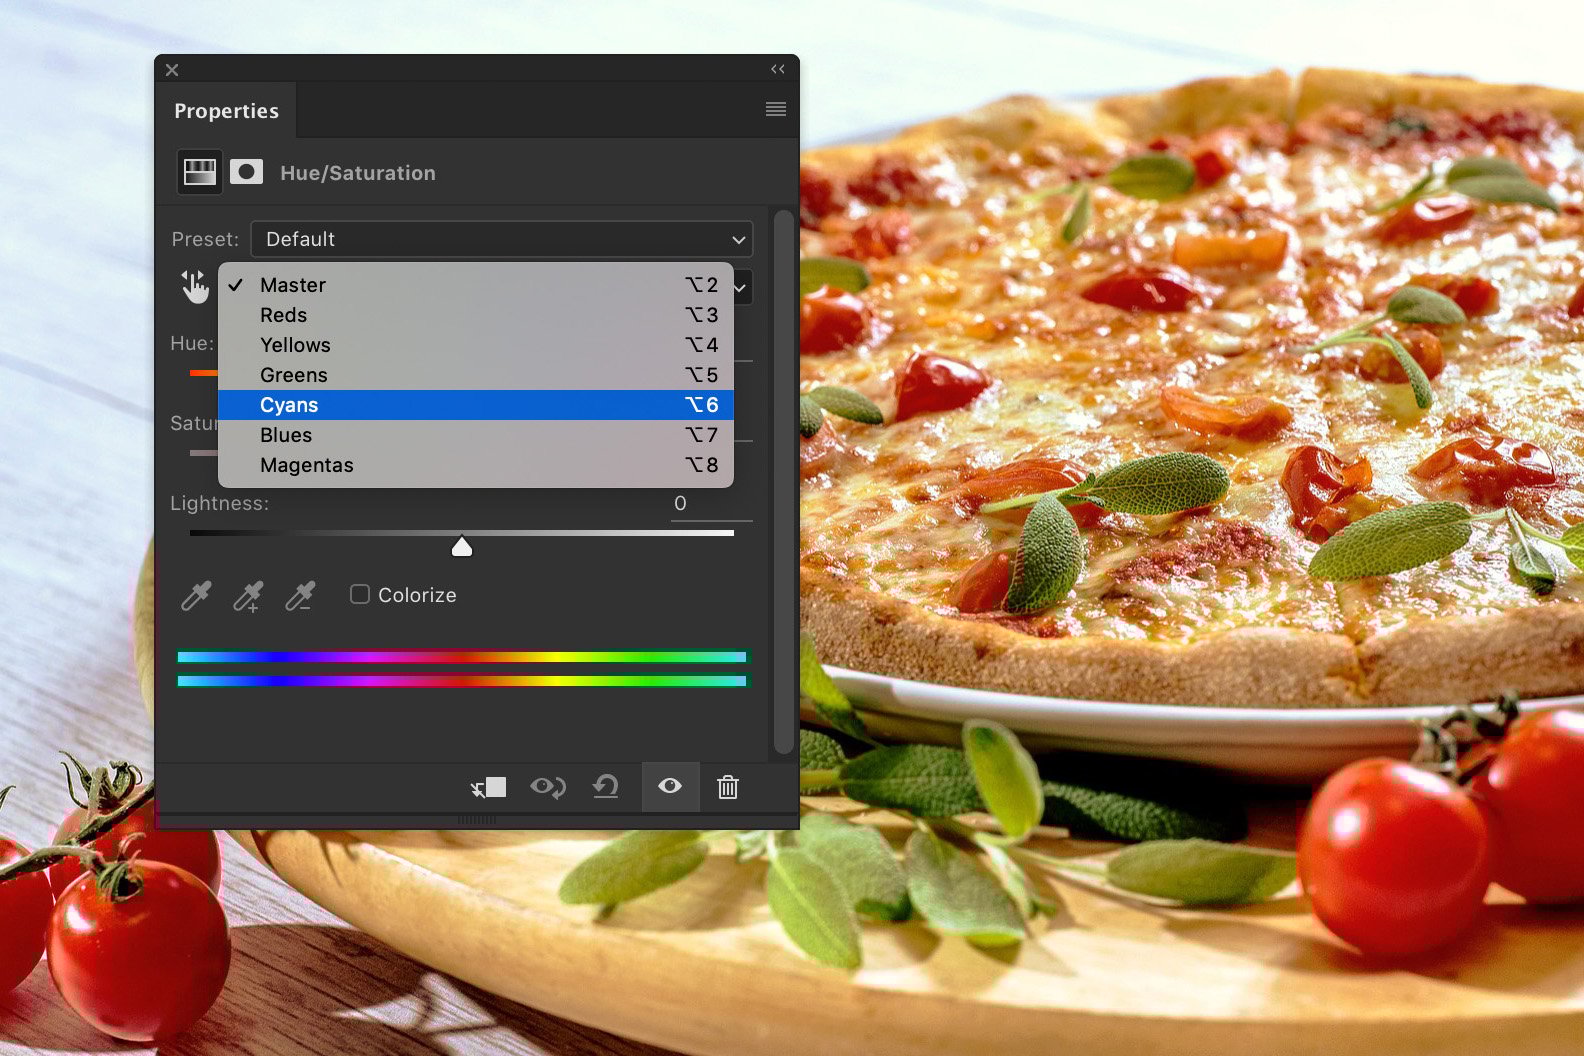
Slide the Saturation slider all the way to the left.
Do the same for ‘Blues’ in the drop down menu.
Step 5: Make the Reds Pop
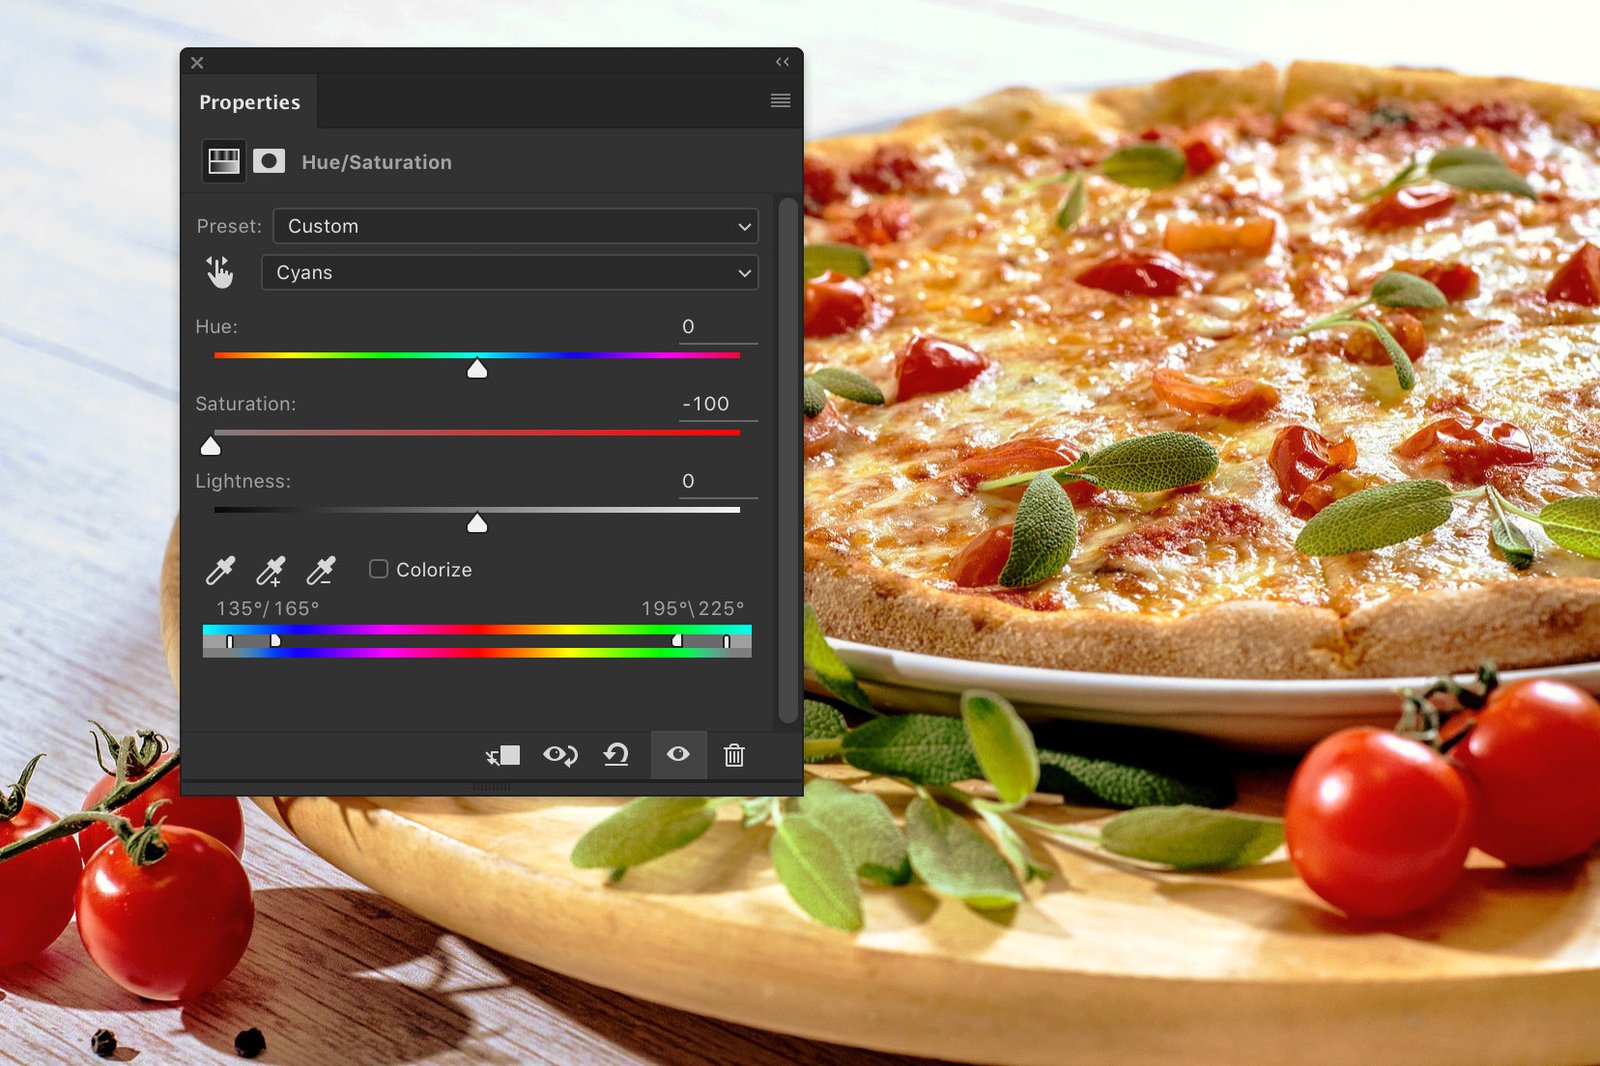
The tomatoes could use a little bit more saturation to make them really pop out. In the same Hue/Saturation window, select ‘Reds’.
Drag the Saturation slider to the right to add saturation. Don’t overdo it or it will look fake.
There you go. One delicious looking pizza!
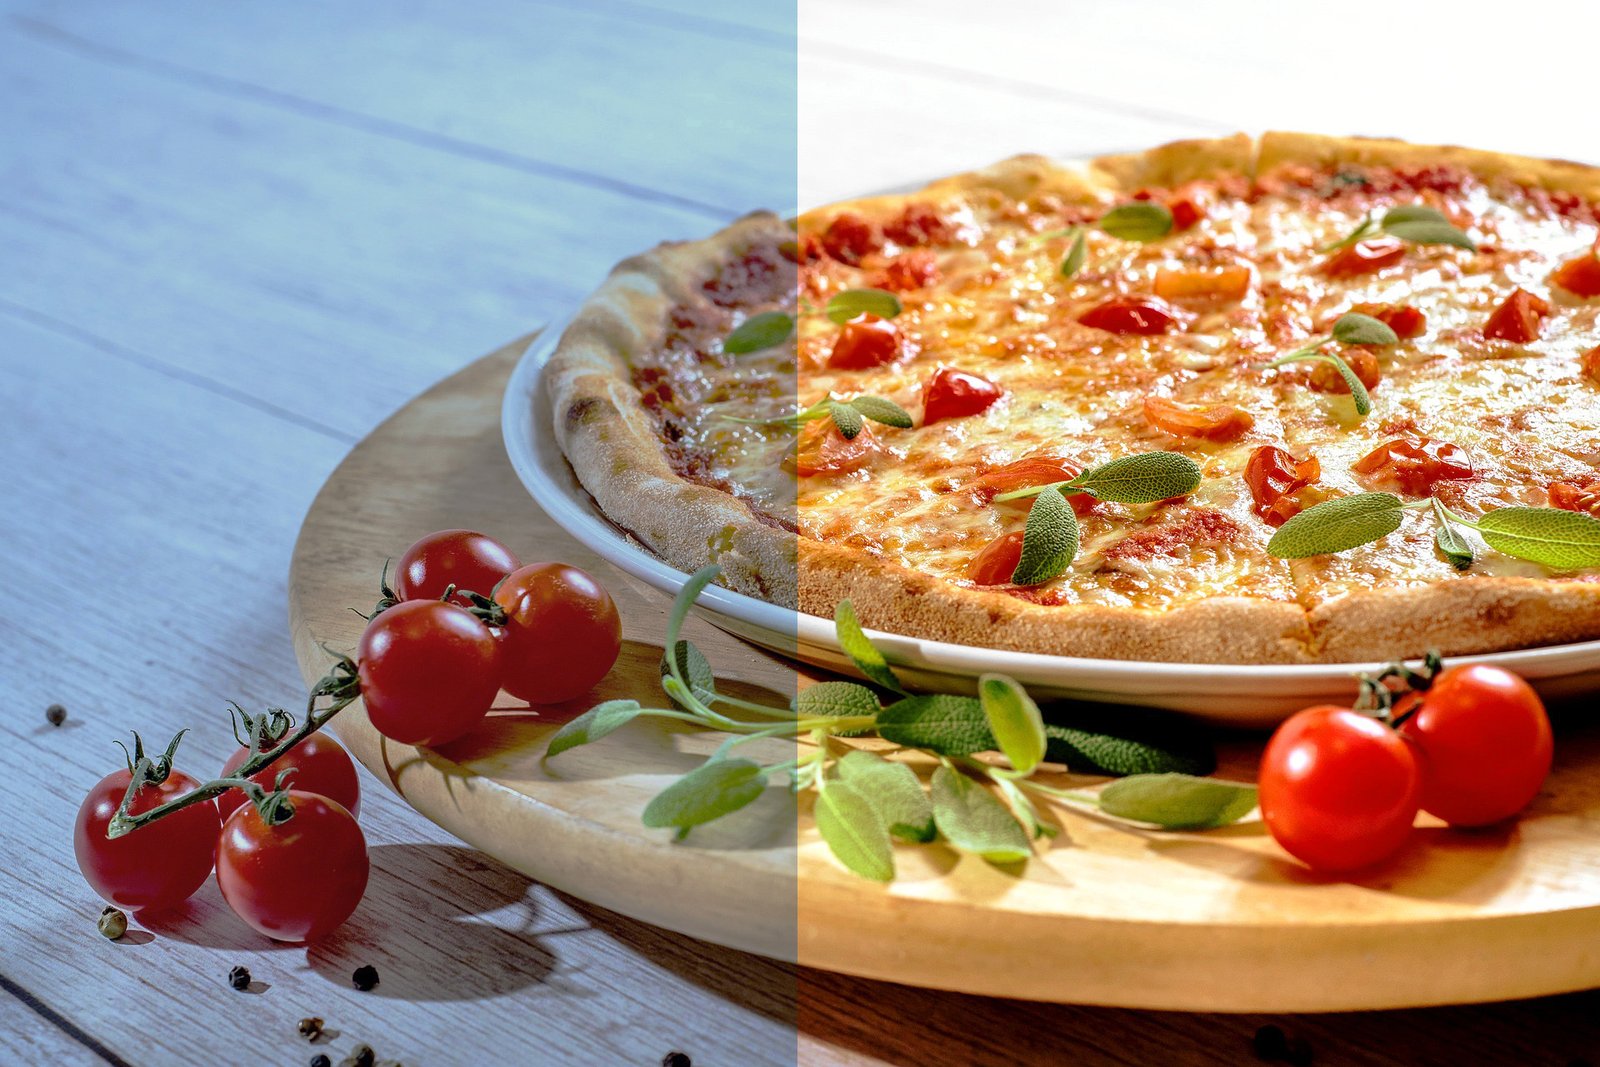
And here’s a before and after view.
Conclusion
Most food photographers have a studio available but you can start photographing food without one.
Make photos of food in natural light and edit the photos in Photoshop.
It’s important to find a balance. You should make the food look delicious but also realistic.
Using RAW files is a good idea for food photography. You’ll have even more control while editing.


