ExpertPhotography is supported by readers. Product links on ExpertPhotography are referral links. If you use one of these and buy something, we make a little money. Need more info? See how it all works here.
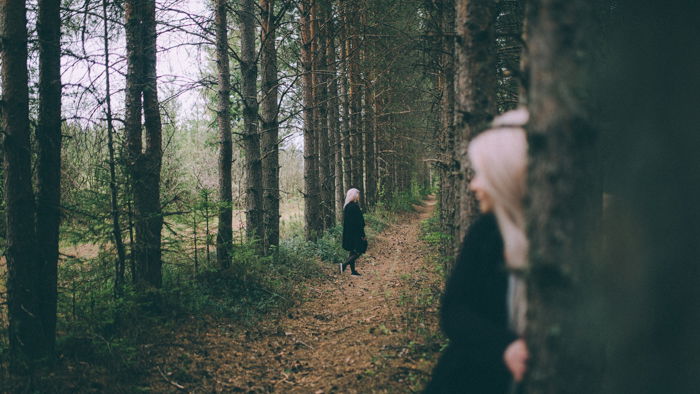
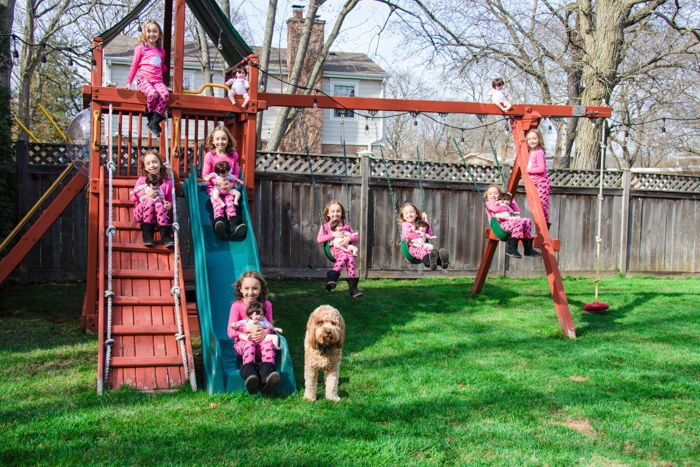
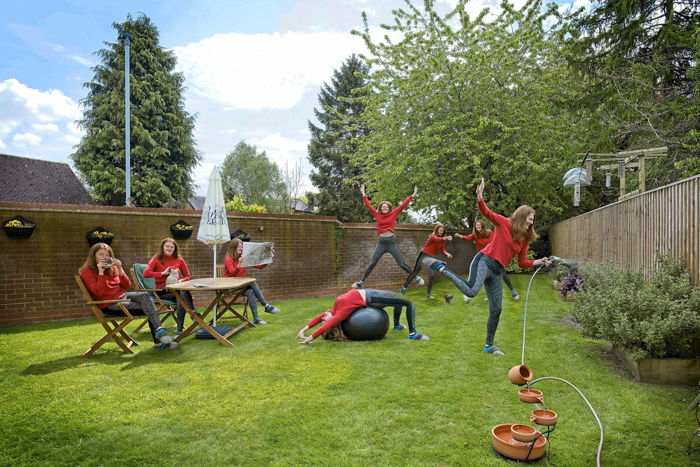
You’ve probably seen multiplicity photography presented as a funny story-telling composite or in a fine art photograph. It makes you wonder, how do you put multiple pictures in one?
Looking to perfect your multiplicity photography technique? A lightweight, space-saving travel tripod with a 360° panoramic ball head and stable spikes is a must-have for your gear.
If you buy a product through one of our referral links we will earn a commission (without costing you anything).
Prices last updated on .
As an Amazon Associate, I earn from qualifying purchases. Product prices and availability are accurate as of the date/time indicated and are subject to change. Any price and availability information displayed on Amazon at the time of purchase will apply to the purchase of this product.
The last tool you need is Photoshop. But it’s a good idea to brush up on your ACR or Lightroom techniques too.
How to Make a Multiplicity Photograph
Before you start with your cloning photography, have a clear idea of the story you want to tell. It doesn’t need to be elaborate or fancy. The best concepts are often the simplest.
Step 1. The Photoshoot
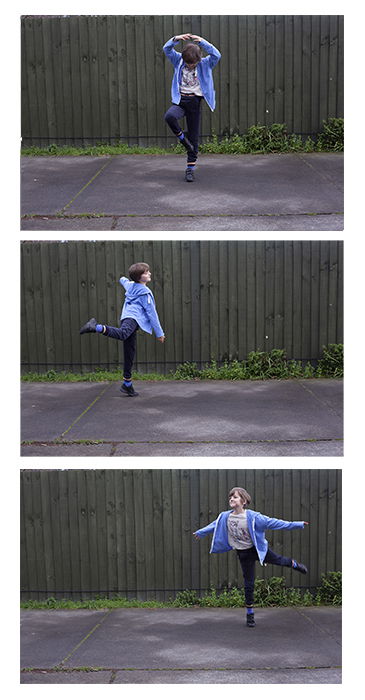
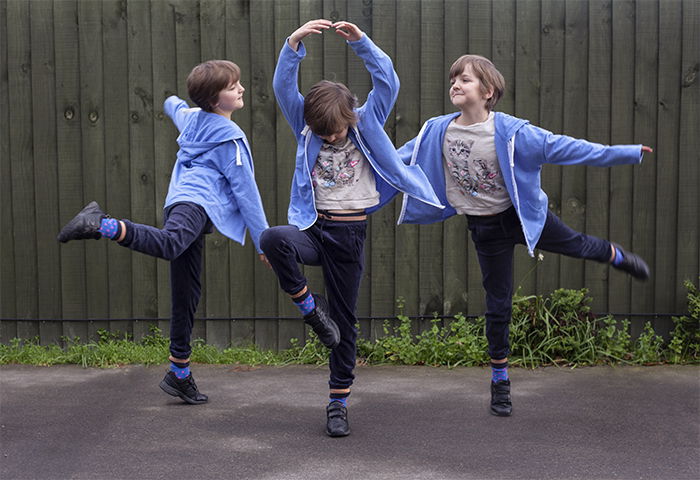
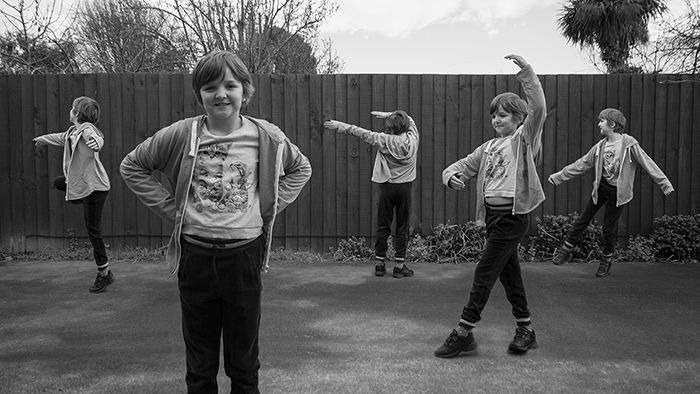
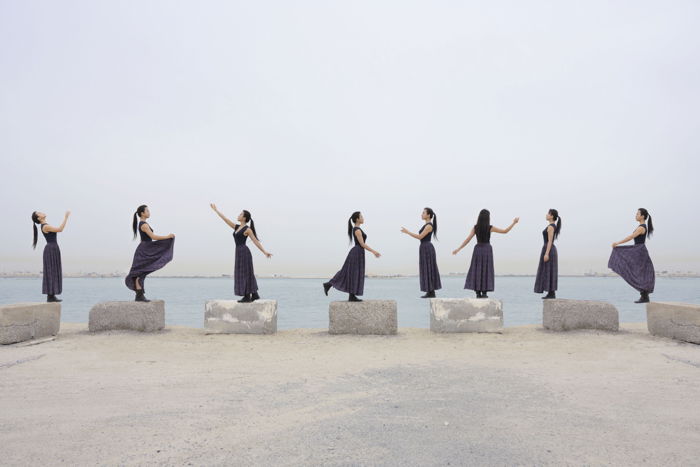
For this multiplicity photography example, let’s combine three photos of Elises dancing in Photoshop CC.
So how do you put multiple pictures in one? Getting the photos right at the start of the process makes the process seamless.
Avoid intense contrasting light and shadow. Shoot in RAW, and consider your composition.
First, I set the camera up on the tripod and made sure it didn’t budge. Then I asked Elise to move around and pose in different parts of the frame. I used a narrow aperture so that there would be a decent depth of field.
The light and shadow conditions need to be consistent for each photograph. Thankfully, the light was constant throughout the photoshoot. If the sun emerged from behind the clouds, I would have stopped taking pictures.
I took about twenty photographs of Elise in different positions. I then chose the three best ones to use for editing.
Step 2. Preparing the Photographs
How do you superimpose yourself into a picture?
I often load my favourites into the same Photoshop file. Then, I turn each layer on and off. Feel free to click on the ‘eye’ icon next to each layer to see how the images work together.
Sometimes I do a rough layer mask for each of them. I then discard files I don’t need.
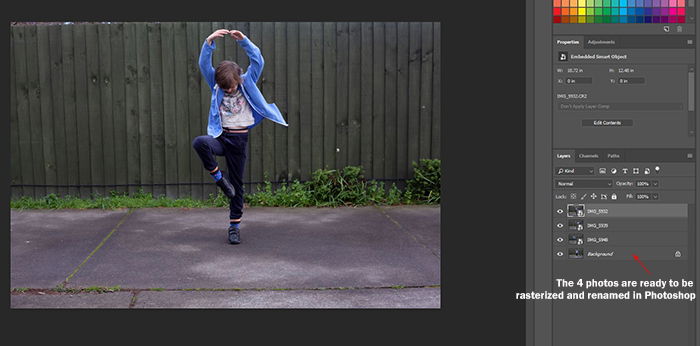
Open the first RAW image in Photoshop. Open the folder with your other photos for the project. Then drag them onto the main picture in Photoshop.
Rasterize the photos by right-clicking on each of the layers.
Double-click on the titles of the photo layers to give them specific names.
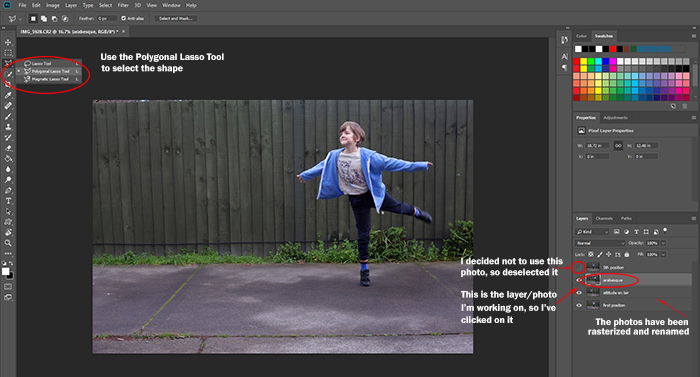
Cut out the first Elise-shape for the photo. After selecting the layer, I clicked the ‘eye’ icon on the layer above to hide it.
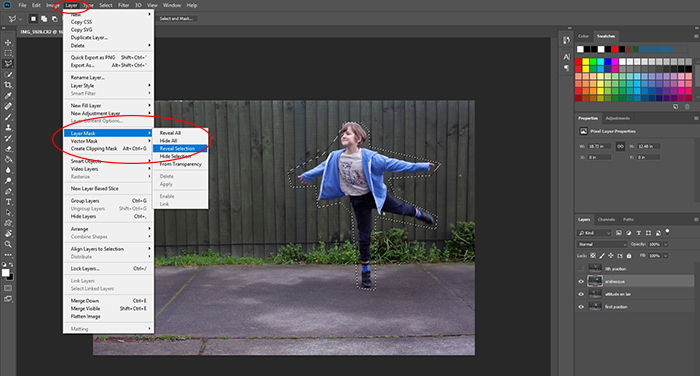
Use the Polygonal Lasso tool to ‘click around’ the main shape. Doing so creates a blinking series of dots we call ‘marching ants.’
Step 3. How to Create Layer Masks in Photoshop
Once you join up the marching ants using the Polygonal Lasso tool, click Layer – Layer Mask – Reveal Selection. Hold CTRL+D for PC or CMD+D for Mac to remove the ants. You now have a rough cut-out of the first shape. This process creates a mask attached to the layer on the lower right.
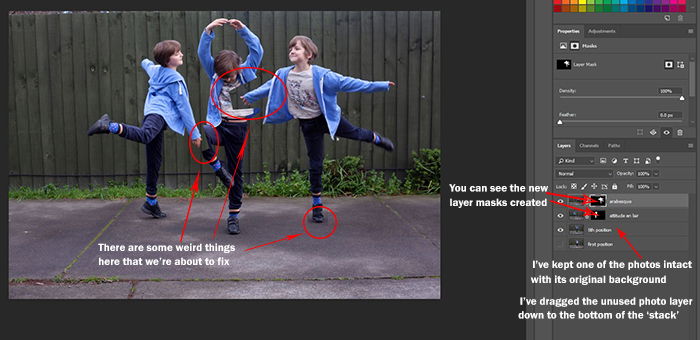
Repeat the process on the other shapes. But before you cut, single-click on the layer you want to edit.
Leave one photograph intact with its background.
Now it’s time for some fine-tuning.
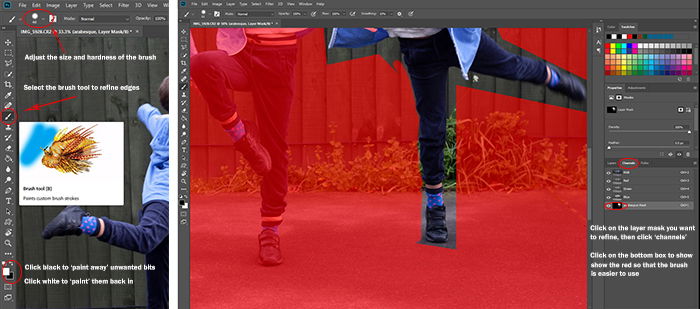
Click on the layer mask you want to edit. Select the box that you created with the Polygonal Lasso tool.
Click on the Brush tool. You can experiment with the size and hardness of the brush. I used a softer brush around the hair. But I switched to a harder, smaller brush for the rest of her body.
Use the brush to ‘paint’ around the shape. At the lower left of your screen, switch between the black and white colors to hide or reveal sections. You’re not permanently deleting anything because you’re working with layers.
When you’re happy with your photo, save the Photoshop file with its layers.
How to Duplicate in Photoshop
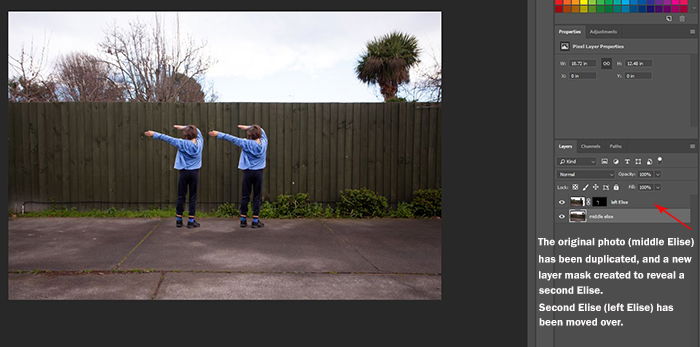
You can also go a bit Andy Warhol with your multiplicity photos. I used one of Elise’s dancing photos to demonstrate how to clone in Photoshop.
Open the photo in Photoshop. Duplicate and rename the layers. I called the new one ‘Left Elise’ and the original photo ‘Middle Elise.’
Create a layer mask on the new duplicate layer. Click on the layer you want to move, and use the Transform Tool (CTRL+T for PC or CMD+T for Mac) to shift it to the correct spot.
Refine the edges of this layer mask.
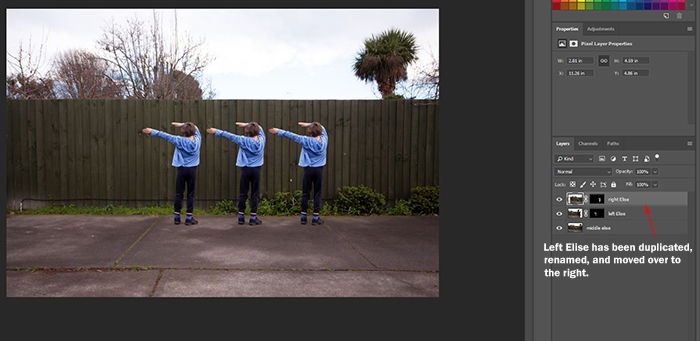
When you finish refining the new layer, duplicate this copied layer and layer mask (right-click, ‘duplicate’).
Rename the new layer and layer mask. I titled mine ‘Right Elise.’ Use the Transform Tool to move this new layer to the correct spot.
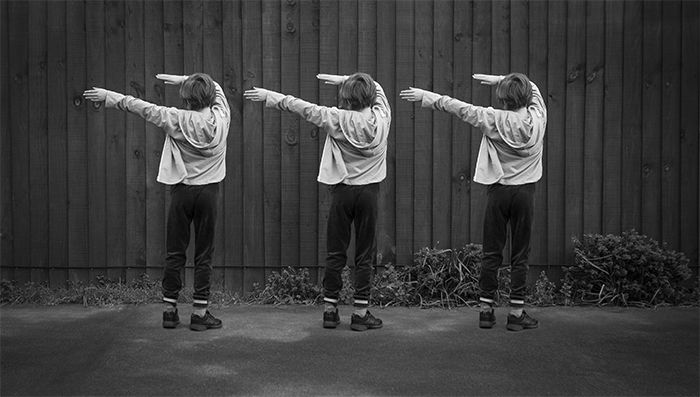
Save the layered Photoshop file. Tweak the individual layers, or merge and adjust the whole photo.
Troubleshooting
My Paint Brush Is Only Painting Black and White
This issue means you selected the layer, but not the actual layer mask.
Make sure you’ve clicked on the little box attached to the main layer you’re editing.
I Can’t See the Photograph I’m Working On!
There’s probably another layer in the way. Click on the one you’re working on. Then drag it to the top of the layer stack on the lower right.
You can also turn off the layers above it by clicking on the eye icons next to them. Doing this reveals the photo you need to see.
I Have Fuzzy Edges
Are the edges not sharp enough when you’re cutting a shape? That means you need to adjust the ‘hardness’ slider in the brush tool.
But sometimes making the brush smaller can help too.
I’m Getting Confused About What Photo I’m Editing
This problem is understandable when you’re working with lots of multiplicity photography files. Check if all your photos are clearly labelled.
If you’re still having trouble, turn off all the layers except the one you’re editing.
How to Duplicate Using a Smartphone
Now you’re probably wondering: Is there an app to clone yourself from a picture? The answer is undoubted, yes!
There are tons of “cloning” apps you can try regardless of whether you have an iPhone or an Android.
If you want to keep things simple, you should try the Split Camera. Just take two photos and blend them into the app. That’s it!
For detailed clone photography, you’ll need to get the Clone Camera Pro. It lets you do multiple images using masks and other advanced tools.
Conclusion
Spend time practising creating layer masks, and you’ll find multiplicity photography a cinch.
Don’t worry about making mistakes and starting over – it’s the best way to learn. The way you see your world is original, so gather inspiration from your day-to-day life and the people around you.
Photo by Robert MasonPhoto by Michael A. LynchPhoto by Stuart Glenn
Portable And Stable
Rollei Compact Traveler No.1 Travel Tripod
Looking to perfect your multiplicity photography technique? A lightweight, space-saving travel tripod with a 360° panoramic ball head and stable spikes is a must-have for your gear.
If you buy a product through one of our referral links we will earn a commission (without costing you anything).
Prices last updated on .
As an Amazon Associate, I earn from qualifying purchases. Product prices and availability are accurate as of the date/time indicated and are subject to change. Any price and availability information displayed on Amazon at the time of purchase will apply to the purchase of this product.