There are many reasons to make an image black and white in Photoshop. Monochrome photos highlight lines, light, and shapes. Color can sometimes be distracting or dull. Also, we see the world in color. A photo in black and white is a welcome change. It draws our attention to different aspects of our everyday world. In many ways, monochrome simplifies the image by removing the color. And some photographers find monochrome photos more artistic.
There's no formula for deciding which photos work better in monochrome or color. However, removing color is easy. I'll show you how to convert an image to black and white in Lightroom and Photoshop. In both programs, there is a simple method and a different method that gives you more artistic flexibility.
How to Make an Image Black and White in Photoshop and Lightroom
Simple Black and White Conversion
Lightroom makes it easy to remove color from a photo. Go to the Settings drop-down menu and select Settings > Convert to Black and White (hotkey "V"). You can also do this in the Develop Module by choosing the Black & White treatment option in the Basic panel. This will switch your photo's profile to Adobe Monochrome.

Screenshot of Lightroom's Basic panel showing Black & White treatment option.
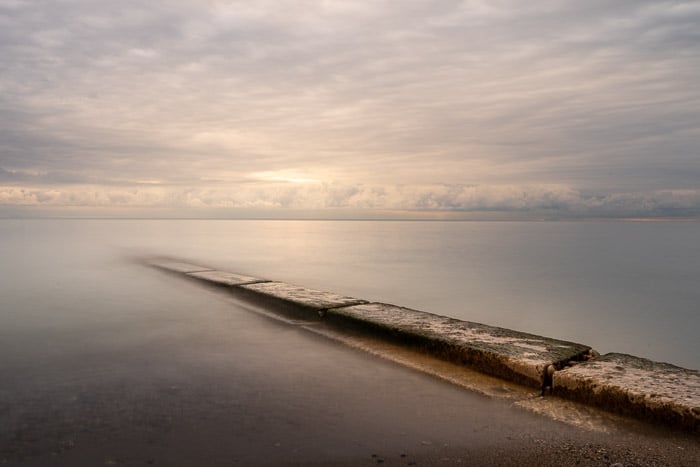
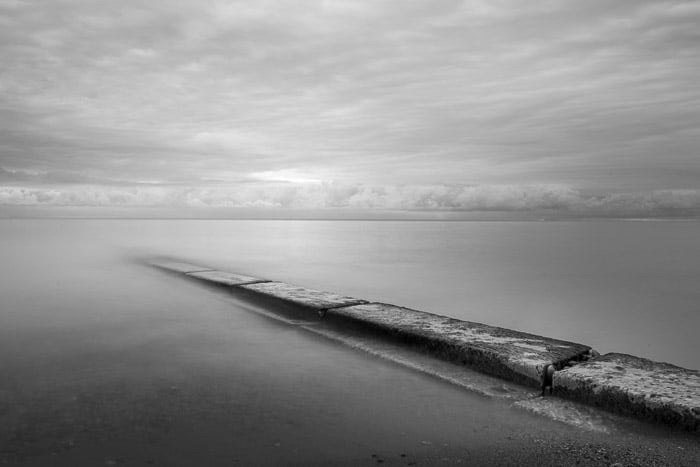
Selecting this option will quickly change any picture to black and white. Let’s look at a photo where color is not as important as the composition. We’ll use this photo, which is about a line extending out into the water and the light from the rising sun. Converting the image to black and white emphasises these elements.
Many photographers stop with this simple black and white conversion. But Lightroom has more to offer.
Color Adjustment in Black and White
After you convert your image to monochrome, the HSL/Color panel becomes the B&W panel. Lightroom still recognizes the colors in your photo even though you cannot see them. In this panel, there are eight color channels with sliders. By default, the sliders are at zero. You can selectively lighten and darken the colors in your image. This adds richness and visual separation to your photo. You can emphasise and deemphasise certain colors.

Screenshot of Lightroom's B&W panel.
Be cautious when using sliders. Pushing sliders to the extreme ends might create a halo (a light around the subject). Or color gradations pixelate and become uneven.
In this image of a local garden center, there is almost too much color. It isn’t easy to make sense of the scene. The bright colors pull your eyes all over the frame.
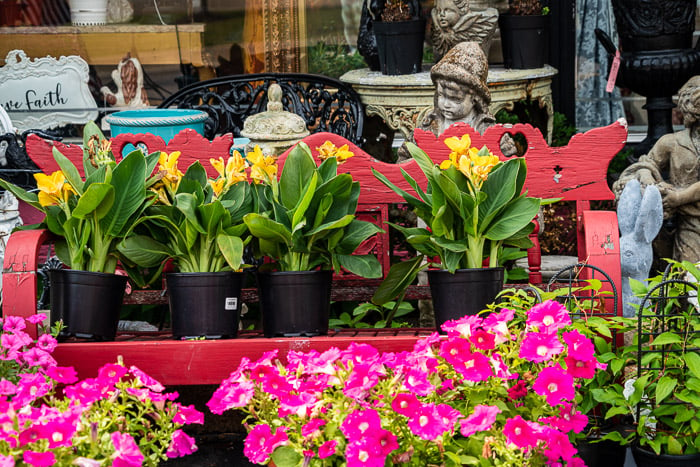
The original colored image of a bench at a local garden center.
Converting the image to black and white simplifies the scene, but the colors are equally weighted. Most show up in shades of grey. For instance, there is little distinction between the green plants and the red bench.
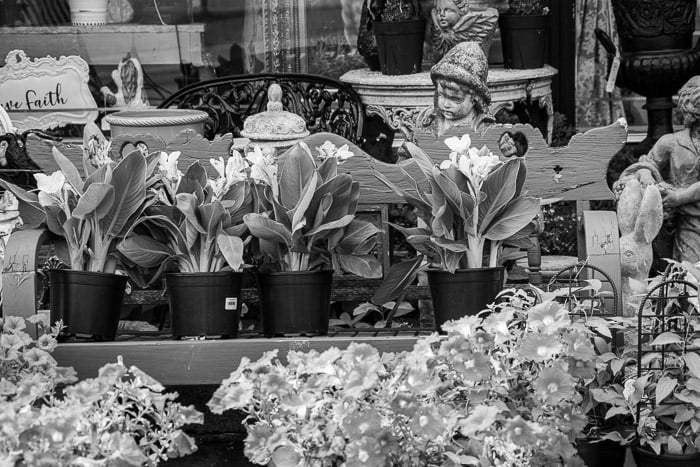
Image converted to black and white.
Using the B&W panel, you can adjust color exposure. In this image, I brightened the reds and darkened the greens. There is now a visual distinction between the bench and the leaves. I also darkened the blues, which darkened many elements in the background. This made the red bench lighter in comparison.

Screenshot of Lightroom's B&W panel showing color adjustments. Reds and oranges are lightened and blues and greens darkened.
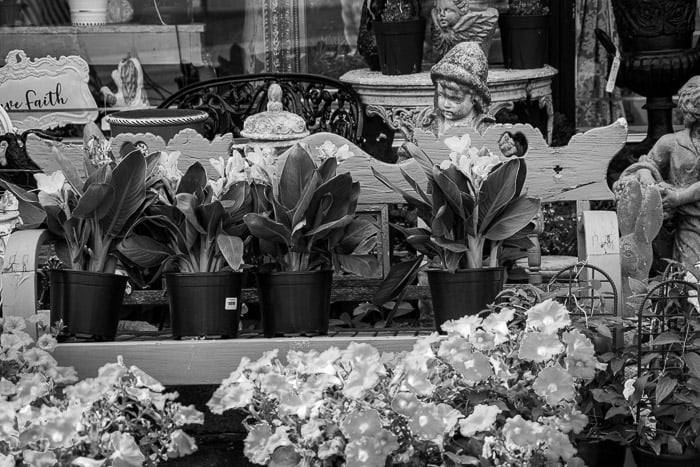
Image converted to black and white showing color adjustments. Reds and oranges are lightened and blues and greens darkened.
I had to be careful with the flowers in the foreground. A halo appeared when I pushed the purple and magenta sliders too far to the left. In this comparison, I darkened the purples and magentas to -50. Notice that the front flowers on the right side now have a white border or halo.
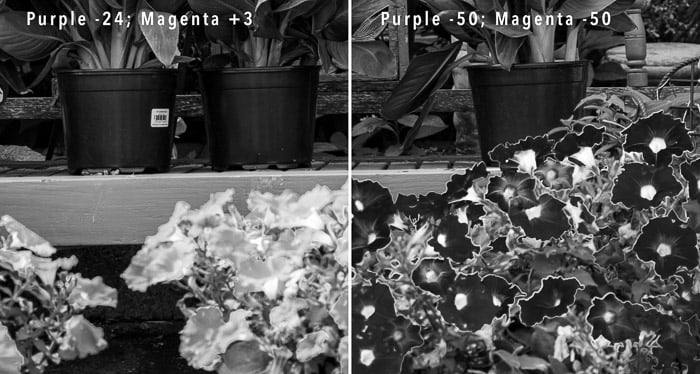
Two images comparing purple and magenta settings. Notice the halos created by moving sliders to the extreme (right image).
Lightroom includes a simple black and white conversion tool. The program also allows you to adjust each color channel individually. Photoshop has similar tools for black and white conversion.
How to Make an Image Black and White in Photoshop
Photoshop has a couple of simple black and white conversion tools.
Desaturate the Image
Desaturation is the simplest way to make an image black and white in Photoshop. This method is quick, but it is destructive. It changes your original file. It's always a good idea to work on a copy of your image in case you make a mistake or want to try something different. There are a few ways to do this:
- Right-click on the background layer and select Duplicate Layer.
- Drag your background layer to the + sign in the Layers panel.
- Use the keyboard shortcut Ctrl or ⌘J.
To convert your layer to black and white, go to the Image drop-down menu. Select Image > Adjustments > Desaturate (Shift-Ctrl or ⌘U). Photoshop quickly strips your image of color.
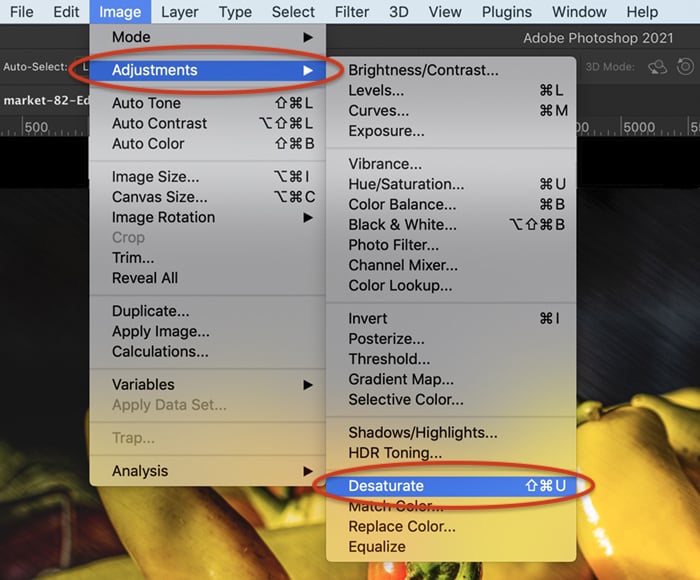
Screenshot showing how to desaturate an image in Photoshop.
In the desaturated image, the yellows and reds of the peppers are very similar in tone. You might not realize that there were two colors of peppers in the basket.
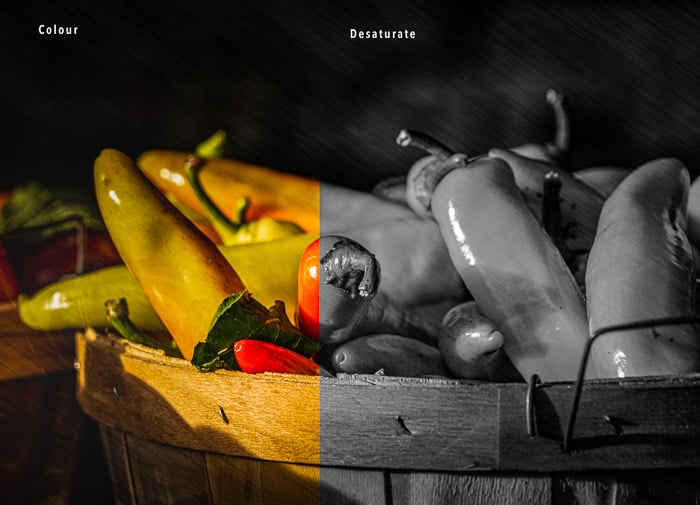
Comparison between the original color image and the result of the Photoshop desaturation tool.
Grayscale Mode
Another way to remove the color from your photos is by creating a grayscale image.
- Go to the Image drop-down menu.
- Select Image > Mode > Grayscale.
I find that this method retains more tonal range than the Desaturate tool, but it is also destructive. All color information is lost.
Converting your images to grayscale or using the Desaturate command are both easy. But these tools don't allow you to control the monochrome conversion. Photoshop has another tool for that.
Black and White Adjustment Layer
Adding a Black and White adjustment layer is a nondestructive way to convert your photo to monochrome.
- Go to the Layer drop-down menu.
- Select Layer > New Adjustment Layer > Black and White.
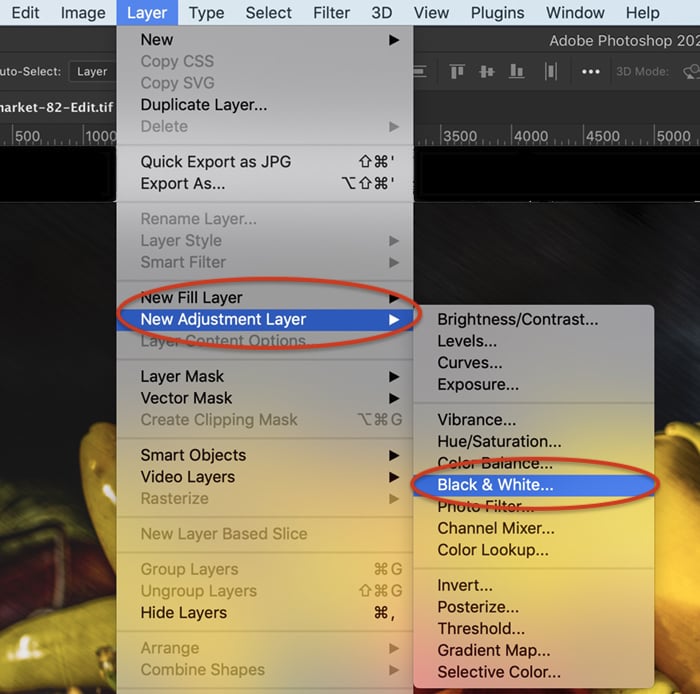
Screenshot showing how to add a Black & White adjustment layer in Photoshop.
Photoshop does a basic monochromatic conversion. From there, you can selectively adjust each color channel in the Properties panel. For instance, I can lighten the yellows and darken the reds. Or I can reverse this and make the red pepper light and the yellow peppers dark.
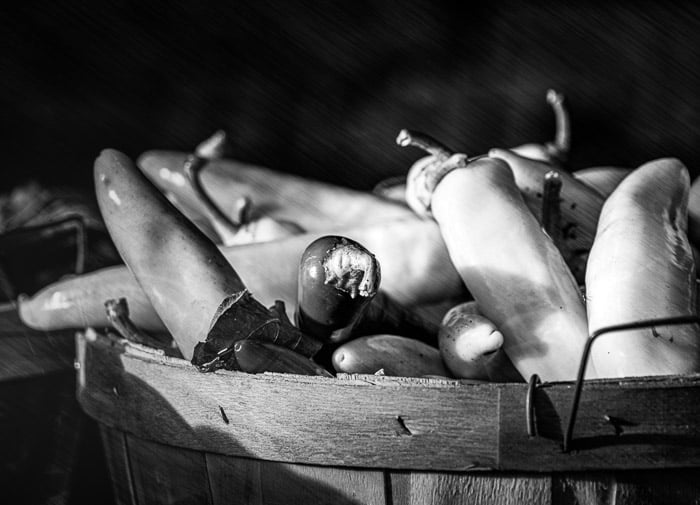
Image created using a Black & White adjustment layer with reds at -35 and yellows at +125.
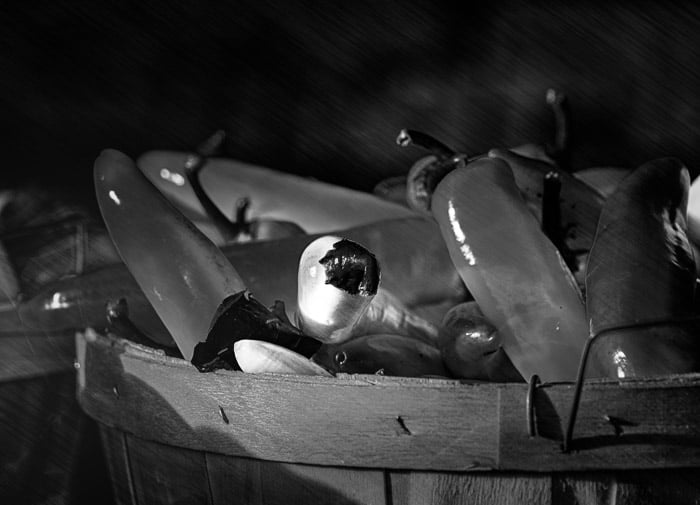
Image created using a Black & White adjustment layer with reds at +200 and yellows at -3.
The way you adjust the individual sliders makes a big difference to your final image.
Notice that the Black & White adjustment layer has a mask. If you paint black on this mask, the color reappears. This is an easy way of making partial black and white images. Depending on which area you mask, you can convert the background to black and white using Photoshop. Or for a more unique result, you can even try creating a color splash effect!
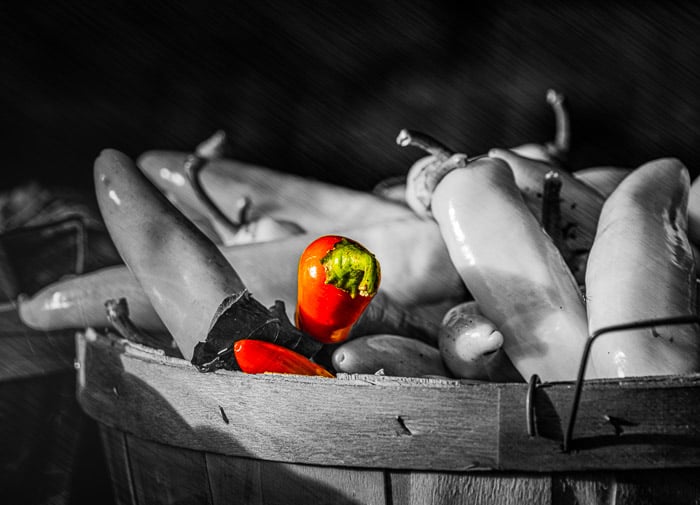
Image created using a Black & White adjustment layer with a mask painted over two red peppers.
Summary
It’s easy to make a black and white image in Photoshop and Lightroom. Some methods only require one click.
For a simple conversion, use the Desaturate command in Photoshop or select the Convert to Black and White tool in Lightroom. For a more artistic control, add a Black & White adjustment layer in Photoshop or the B&W panel in Lightroom.
Check out our Effortless Editing with Lightroom course to become a master at editing your photos!