If you’re looking to add a little more pizzazz to your photos, consider adding color splashes in Photoshop. This can be done easily in Photoshop by following these simple steps.
Using Color Splashes in Photoshop: Comparing the Color Splash Effect and Selective Color Techniques
A color splash effect in Photoshop is a bit like selective color photography. Both bring out colors in an otherwise black and white picture.
With selective color, you choose one color to emphasize. For instance, red is a popular color to pop against a monochrome background. To learn different ways to create selective color photography, see our Photoshop tutorial, "How to Use Selective Color in Photoshop (Step by Step!)."
A color splash effect is a little different. You are not restricted to one color. A color splash brings out the original colors of your image. But you decide where to bring out the colors and how colorful you want your image to be.
Color Splash Photoshop Tutorial
This is a simple step-by-step Photoshop tutorial to follow. We have provided two conversion options in Step 3 and an optional edit at the end.
Step 1: Open Your Image in Adobe Photoshop
A color splash effect works best with photos with a lot of colors. Choose a colorful image, maybe even one with too much conflicting color.
Start by opening your image in Adobe Photoshop. Go to the File drop-down menu and select File > Open (Ctrl/Command+O). Navigate to the file and click Open.
If you are starting in Lightroom, go to the Photo drop-down menu and select Photo > Edit In > Edit in Photoshop (Ctrl/Command+E). In Lightroom CC, this option is under the File drop-down menu. Click Edit.

Step 2: Set Foreground to Black and Background to White
You will add a Gradient Map to your image in the next step. A Gradient Map is an easy way to convert your photo to black and white.
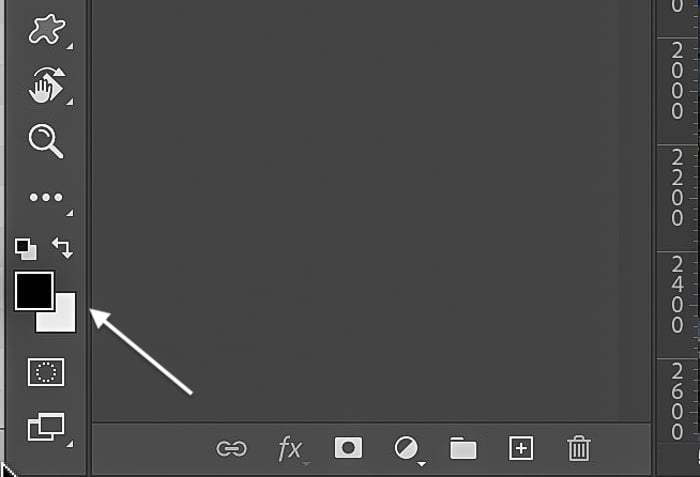
But first, you need to set your foreground color to black and your background color to white. Your foreground and background color settings are near the bottom of the toolbar. They look like a pair of overlapping squares.
Click on the top square and drag the color picker to black. Then set the bottom square to white. Click OK. Or simply press D (shortcut key). This resets the foreground and background colors to the defaults we want.
Step 3: Add a Gradient Map Adjustment Layer
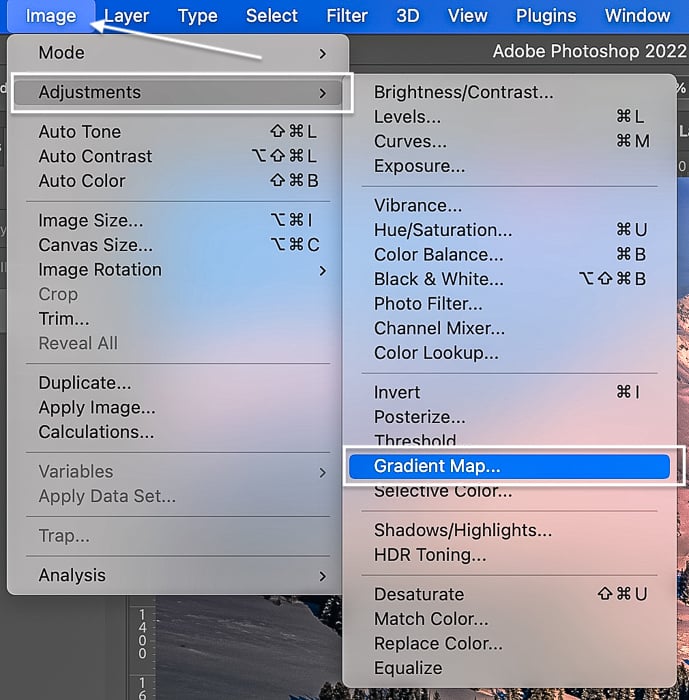
To convert your image to black and white, go to the Image drop-down menu and select Image > Adjustments > Gradient Map.
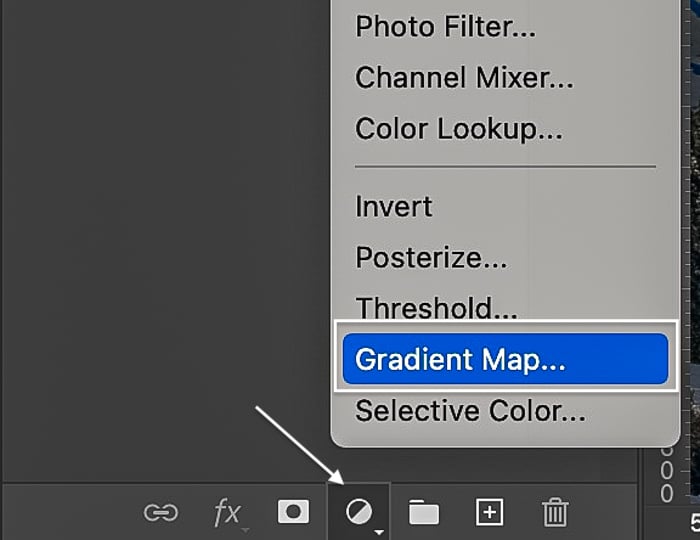
There is also an adjustment layer shortcut icon at the bottom of your layers panel. It looks like a half-white and half-black circle. You can click it instead to add a Gradient Map.
If you have not worked with a Gradient Map adjustment layer before, you are in for a treat! A Gradient Map adds colors to your image based on tonal brightness. Darker tones are one color. Lighter tones are another.
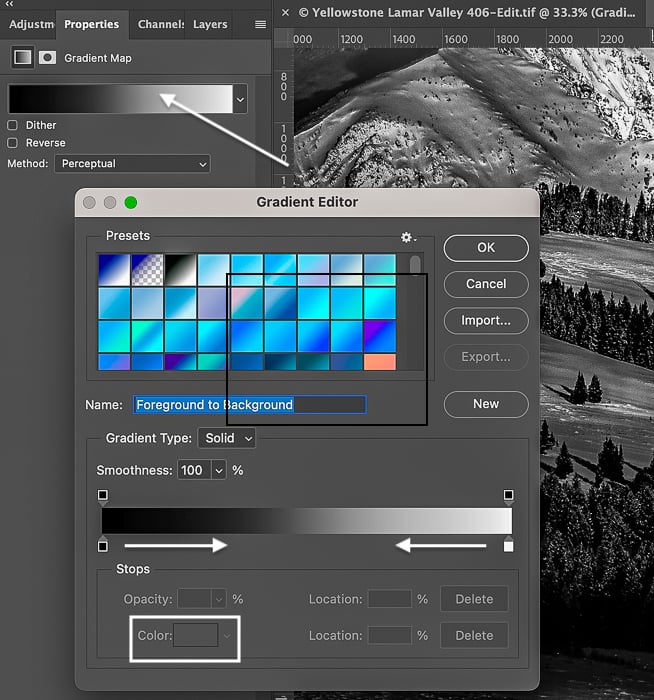
You are making a very basic Gradient Map for color splashes in Photoshop. Darker tones are black, and lighter tones are white. Photoshop gradually transitions between the two colors.
- In the Properties panel, click on the gradient to open the Gradient Editor.
- You can control the transition using the slider. Move the squares that anchor the black and white tones towards the center to adjust the gradient. A diamond appears, showing you the mid-point.
- If you want to tone your black and white image, click the box next to "Color." It activates when you select each square. Select a color. Click OK.
But there is no reason you could not choose another color combination for your Gradient Map. Feel free to stop for a minute and experiment with all the varieties of color you can instantly add to your image using a Gradient Map!
Photoshop comes with many Gradient Map presets. But you can create your own.
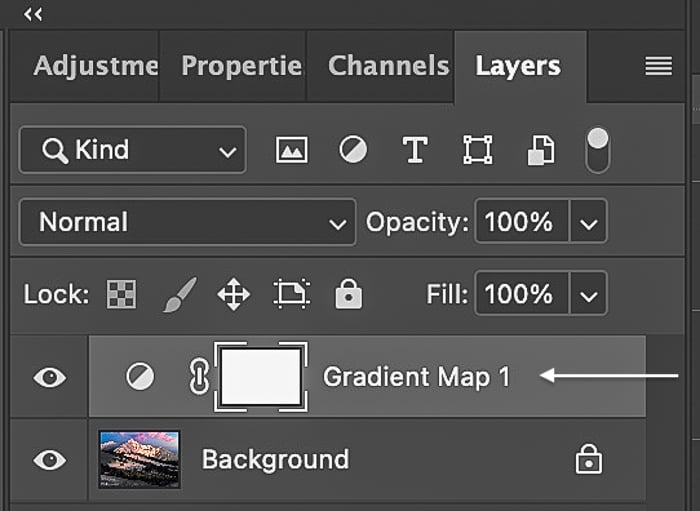
You should now see your original image as a "Background" layer in the layers panel. Above it is a Gradient Map adjustment layer with a mask. Your image should also now be black and white.
Step 3 (Alternate): Add a Black and White Adjustment Layer
The black and white Gradient Map works well for many images. But sometimes high- or low-key photos become too black or too white. Adding a Black and White adjustment layer gives you more control over the tonal values in your monochrome image.
Go to the Image drop-down menu to make your image black and white. Select Image > Adjustments > Black and White. Or go to the adjustment layer shortcut icon at the bottom of your layers panel and select Black and White.
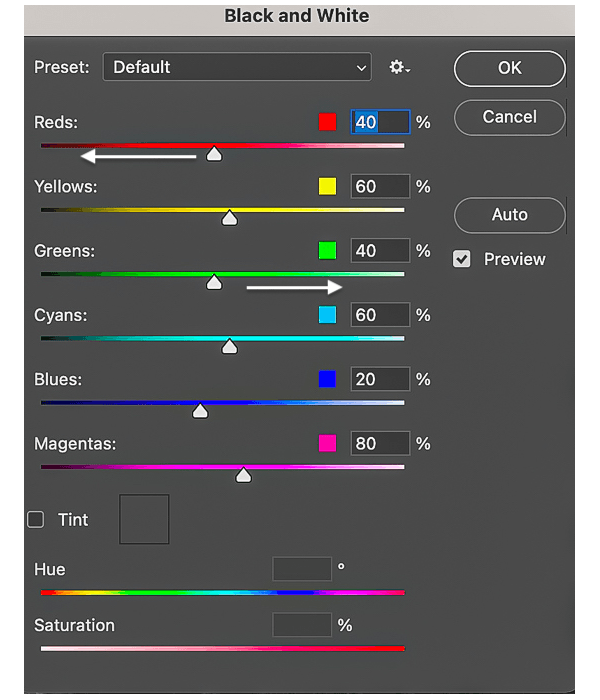
The black and white conversion will probably be less intense than the image created using the Gradient Map. From here, use the Black and White panel to adjust color sliders.
For instance, move the slider to the left if you want the reds in your image to be darker in tone. Move the slider to the right if you want the greens to be lighter.
When you are happy with the look of your black and white image, click OK and move to the next step.
Step 4: Select the Brush Tool
- Select the Brush tool from the left toolbar.
- Start with both Opacity and Flow set to 100%.
- Set brush Hardness set to 0%.
- Choose the Soft Round brush.
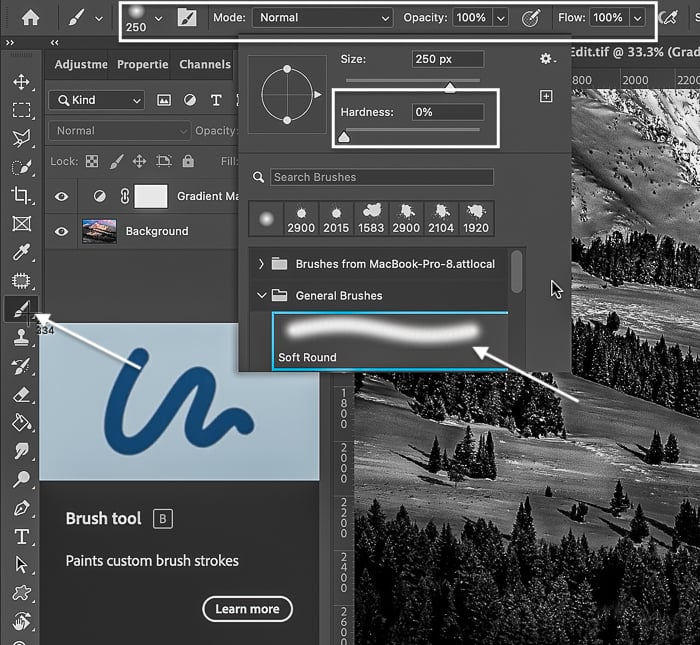
You can adjust the intensity of the color later. You can change the brush size in the settings panel or use the bracket shortcut keys. The left bracket key "["makes your brush smaller. The right bracket key "]" makes your brush larger.
The Soft Round brush is a good place to start. But feel free to explore textured brush strokes. These work great when creating a color splash!
With the Brush Tool selected, go to the bottom of the toolbar and set your foreground color to black.
Step 5: Select and Paint on the Adjustment Layer Mask
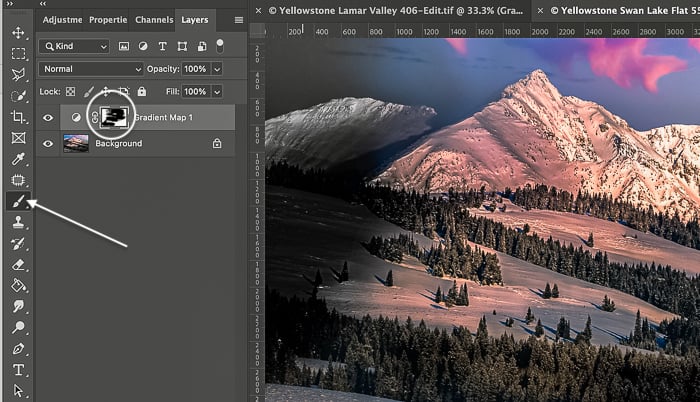
Select the layer mask next to the Gradient Map adjustment layer in the layers panel. By default, the layer mask is white. This reveals the Gradient Mask that has made your image black and white.
Using your black brush, paint over the areas to reveal the underlying color. There is no need to be precise. Color splashes in Photoshop can be random. Let your eye guide where colors show through. You can feather the color change by reducing the opacity and flow of your brush.
If you do not like the result, undo color painting by going to the Edit drop-down menu and selecting Edit > Undo Brush Tool (Ctrl/Command+Z). Or you can switch the foreground color of your brush to white and paint out the colors on the layer mask.
Remember, white reveals the black and white Gradient Map. Black hides the Gradient Map and shows the background layer. You can toggle between a black and white brush by pressing X (shortcut key).
Step 6 (Optional): Adjust Color Intensity
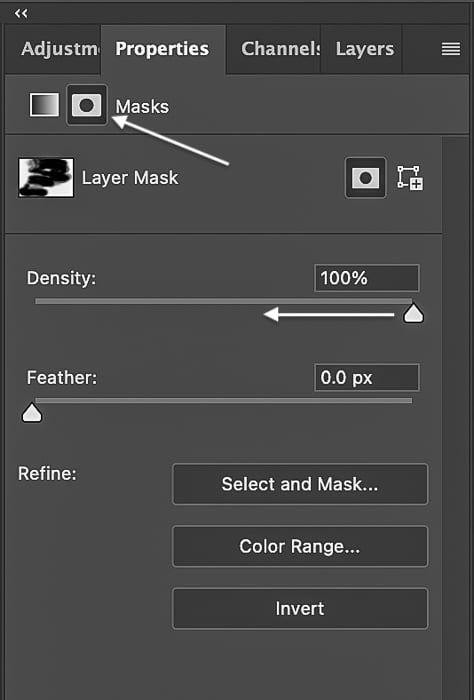
If you find the colors too intense, reduce the layer mask's opacity by double-clicking on the layer mask next to the Gradient Map. This opens the Gradient Map's properties panel with the mask selected.
The Density slider is at 100% by default. Reduce color intensity by lowering the mask density. Move the slider to the left. This will let a little more of the black and white Gradient Map show through.
Conclusion
That's it! You added a splash of color! This Photoshop tutorial showed you how to make a quick color splash effect. Convert your image to black and white and paint back the colors you want using the Brush tool.
The process is simple, but there are infinite creative possibilities. Try using different Gradient Maps or textured brushes. Swipe colors across your image randomly. Or you can be more precise and create a colored pattern.
A color splash Photoshop edit is a fun way to add a hint of color to a lifeless black and white image. Instead of bringing out one color like selective color photography, highlight a section of color to show through. You have complete control over where to add a splash of color and the intensity of the color.
Try out our Simply Stunning Landscape course for a fun and easy way to take beautiful photos!


