If you’re interested in adding shadows and patterns of light to your images, then you need to get a gobo.
Haven’t heard that term before? We’ll explain to you what a gobo is and how to use it.
What Is a Gobo and What Does It Do?
A gobo is a stencil or device that creates patterns using light. People have used it since the early days of theatre. But it also has found its way as one of the most creative tools in studio photography.
Photographers often use gobos to recreate window scenes even when there aren’t any in the room. Some also use it to add shadows and depth to images that otherwise have boring lighting.
Of course, we can’t forget about the conceptual aspect of using a gobo as well. Some use it to add dimension to black and white photos, while others like projecting patterns to realise abstract ideas.
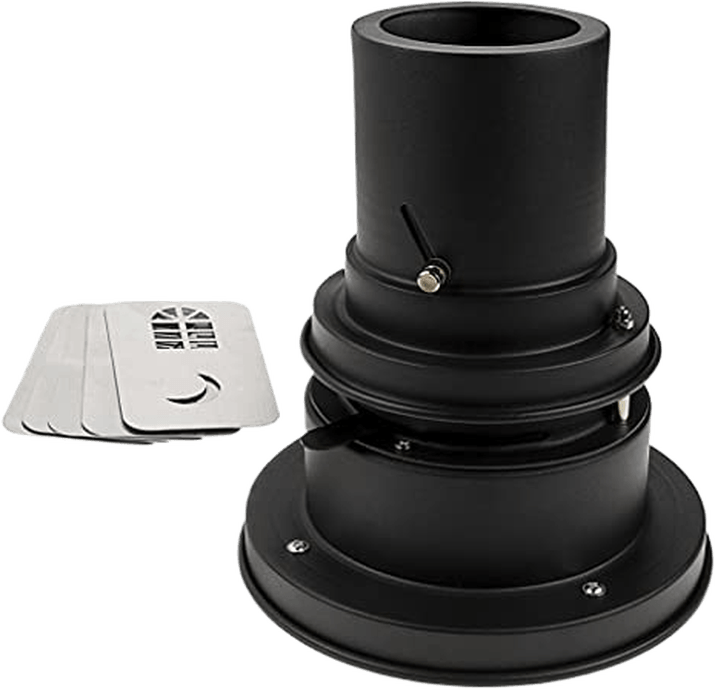
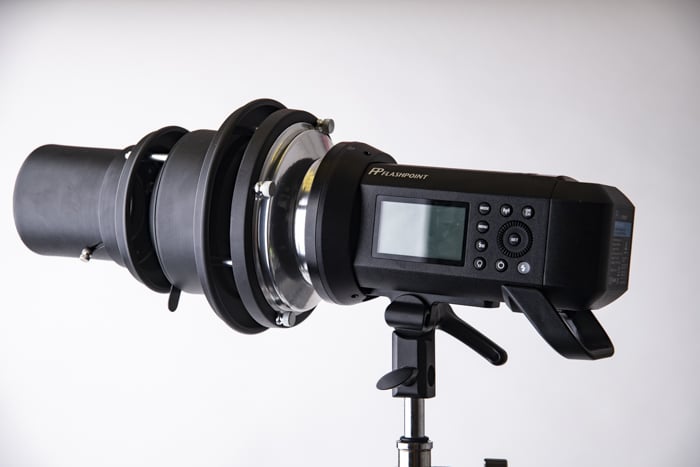
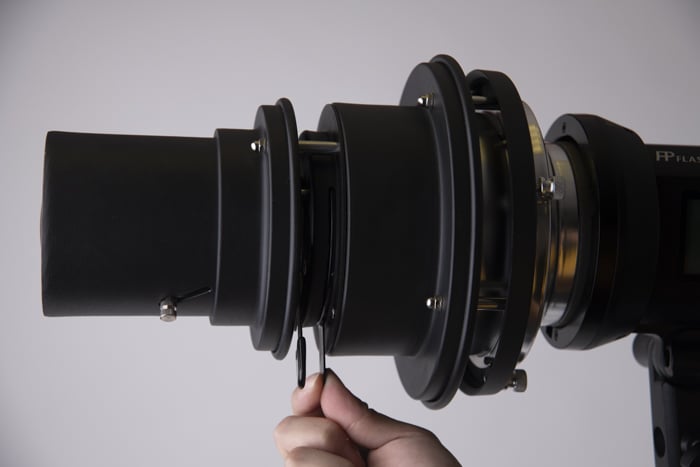
The device below is a lighting gobo for photography.
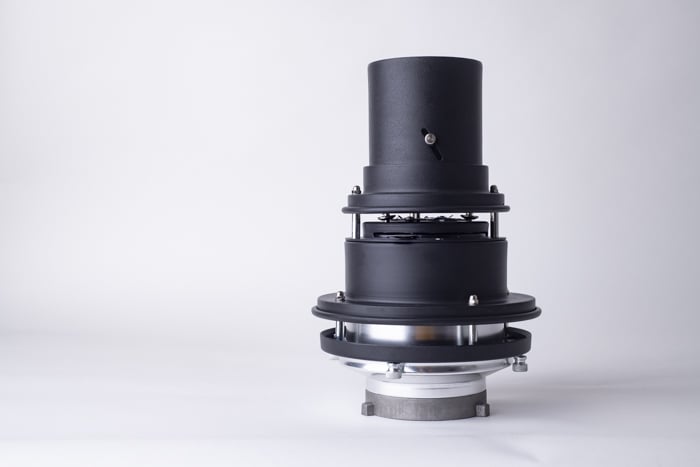
The gobo device typically has a Bowens mount, which allows you to attach it to standard flash units.
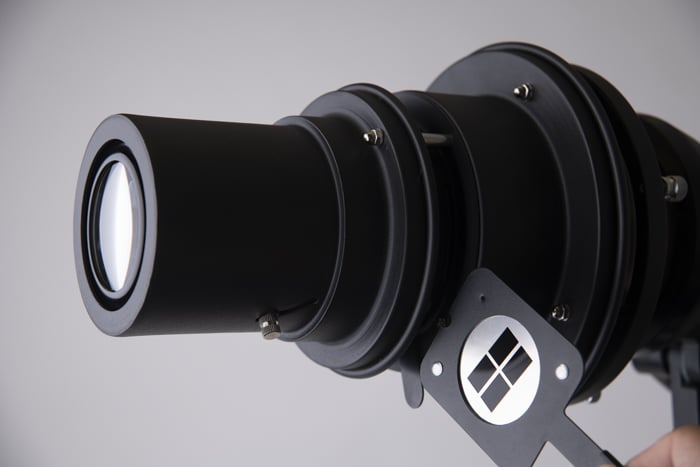
In the middle, you have a lens and a small lever to let you make the light wider or narrower. After that, there’s a gate where you place the template you want to use.
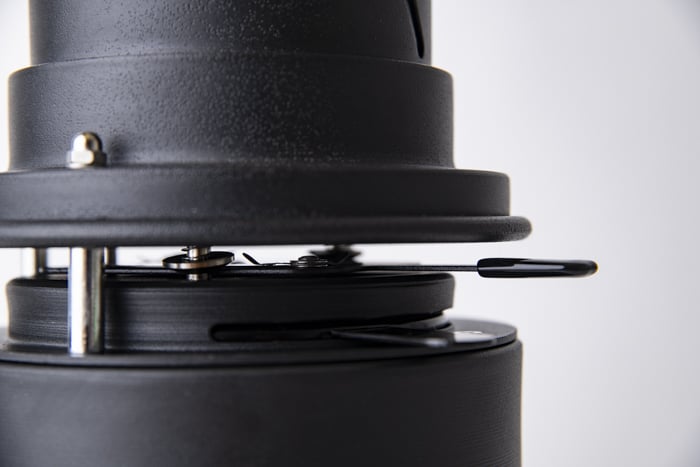
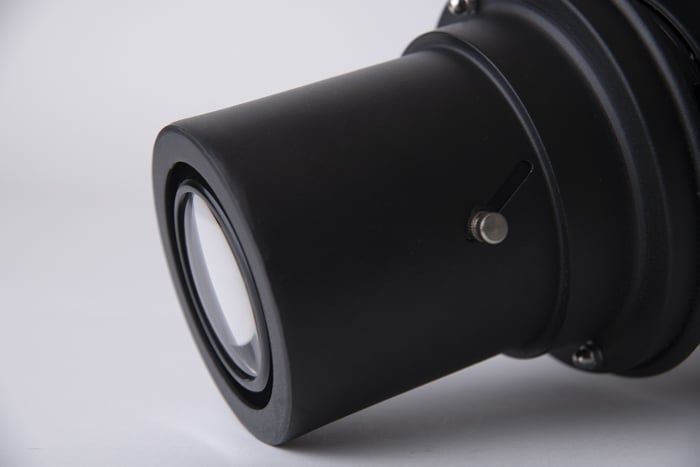
At the tip of the device is a lens and lever that focuses the light going out of the gobo.
Now, let’s look at some of the patterns common in light gobos. As you can see, a lot of them look like windows or blinders. That’s because they’re supposed to imitate shadows that the sun casts.
But there are also a few options that are more creative such as firework bursts and even dots.
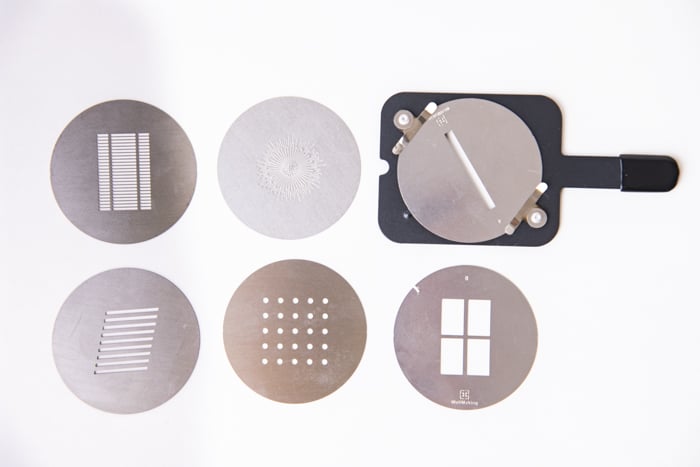
The patterns above are the standard options when you buy a gobo. But you can always buy a kit that includes even more designs.
Of course, you don’t have to buy a gobo to project shadows. Later in the article, we’ll also show you how to create DIY patterns without shelling out hundreds of dollars.
What Is the Best Light Source for a Gobo?
Since a gobo projects patterns, it helps to use a constant light source such as an LED. That way, you can see what you want to capture.
The issue with LED lights is that they don’t have a powerful output. Using them for gobo lighting may require you to lower your shutter speed or increase your ISO to get the correct exposure.
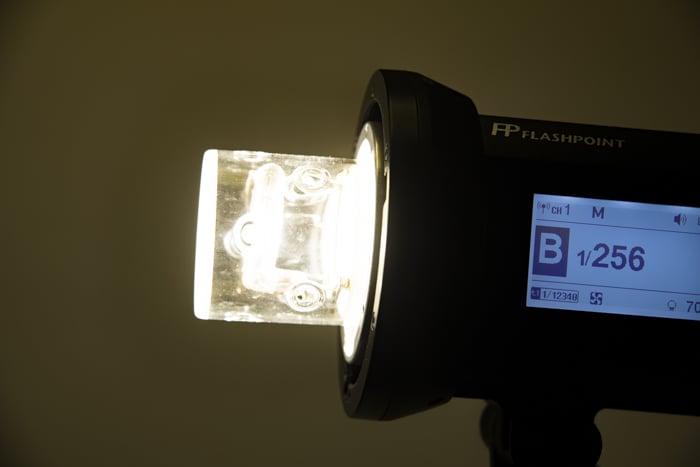
Thankfully, there’s a powerful alternative, which is the studio strobe. It uses flash, which is exponentially more intense than anything coming out of LEDs. But at the same time, it features a modelling light that allows you to see the patterns in real life.
If you don’t know what a modelling light is, it’s a bulb connected to the flash unit. It emits continuous light to give you some idea which part of the scene the flash will illuminate.
Just beware that modelling lights (especially from old studio strobes) tend to overheat. It happens even more when you attach an enclosed device such as a gobo. So make sure not to keep it turned on throughout the shoot. Let it cool off to avoid accidental fires.
If you don’t have artificial lights then you can always use direct sunlight. It’s effective, and it’s free!
How Do You Use a Gobo?
Using lighting gobos is surprisingly easy, especially if you are comfortable using artificial lights.
First, pick the pattern you like and slide it into the plate. Next, look for the gate and slide the plate into the slot.
Next, turn on your light source and move it to the area you want to illuminate.
At first, your pattern will most likely look blurry. If that’s the case, you’ll need to adjust the lens lever until you can see the template.
Once everything looks sharp, you are ready to shoot!
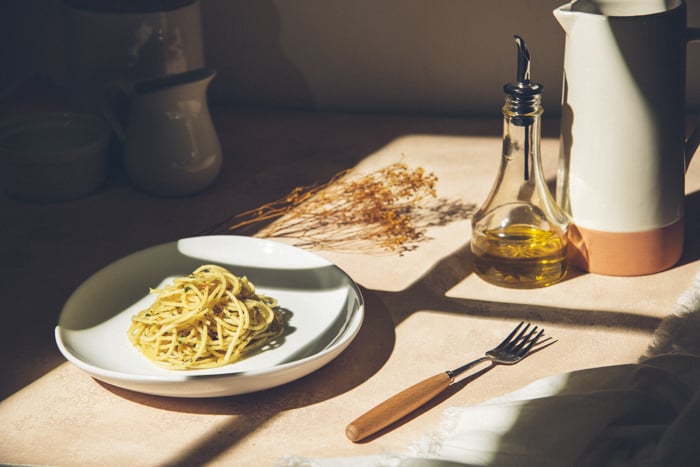
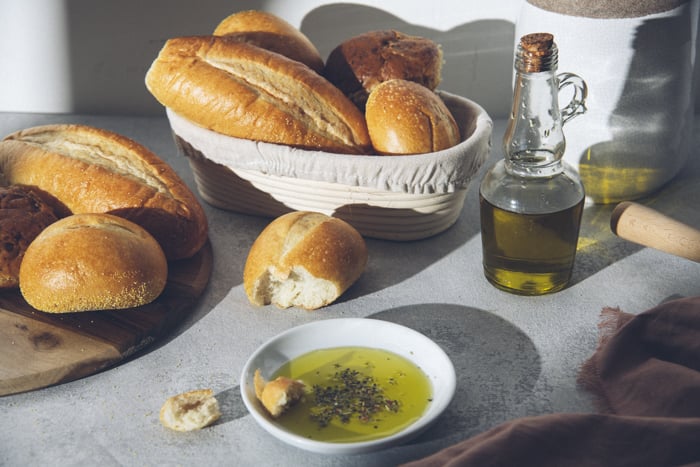
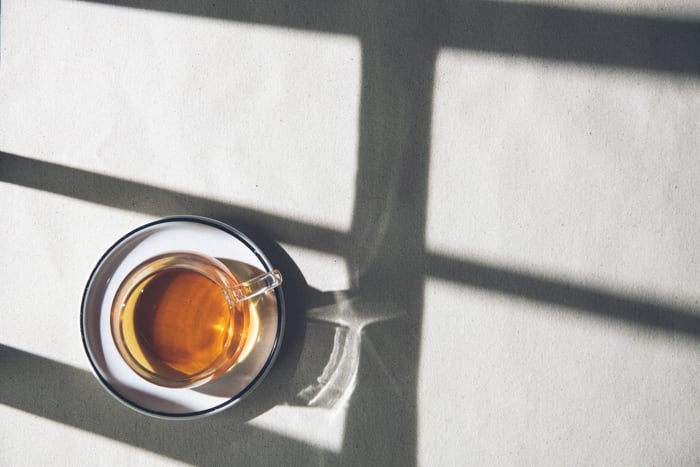
As you can see, my set is nowhere near any windows.
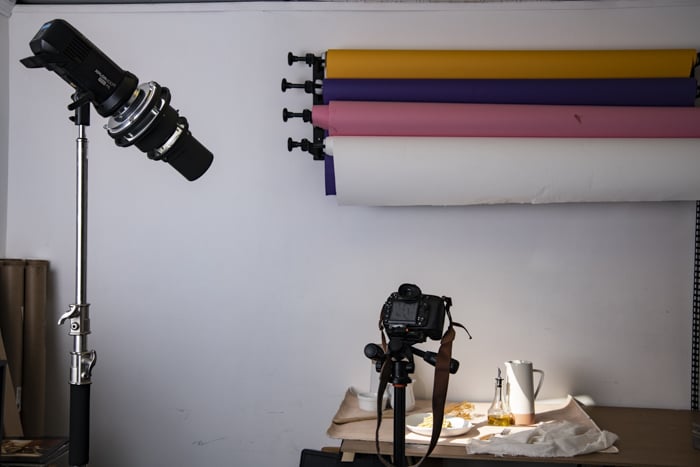
But with the use of a gobo, I can make my photos look like I took them inside a real house.
How Do You Make a DIY Gobo for Photography?
Gobos for lights are quite convenient to use, but they can be expensive. Apart from that, you’ll also need studio lights to operate them.
But the good news is that you can always create a gobo yourself!
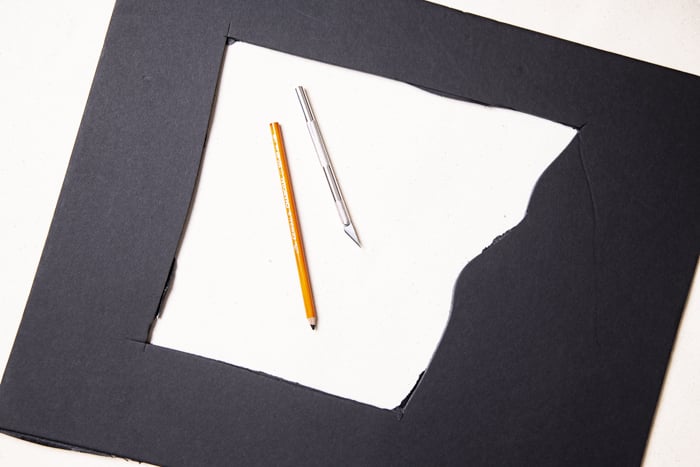
There are plenty of ways to create a gobo. But the most common one is cutting out shapes from the foam board. Here are the items you’ll need for the project:
- Foamboard;
- Exacto knife;
- Light source;
- Pencil.
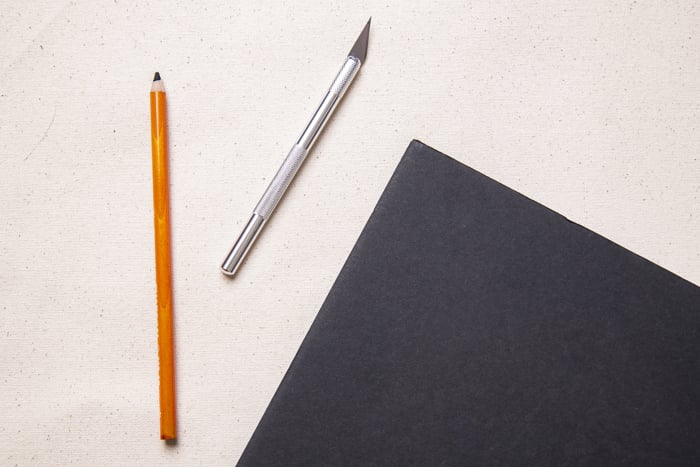
For this project, it’s best to use black foamboard. White foamboard bounces back light and can easily create distracting patches.
Once you have everything you need, draw a pattern using a pencil or a silver marker to see what you’re sketching.
Next, grab your Exacto knife and carefully cut out your gobo.
Once you have your DIY pattern, it’s time to place it in front of your light source.
Remember that not every light source will work for your gobo. You won’t see any patterns if you place your foamboard in front of a regular light bulb.
You’ll need a light source that’s small and creates hard light. That means you can use either direct sunlight or even a bare flash unit.
To make your gobo work, all you have to do is place it in front of your light and watch the patterns appear.
Just remember that the closer you are to the light, the bigger the design will look. But at the same time, such a short distance also causes your patterns to look blurry.
Feel free to move your gobo closer or further from your light until you find the sweet spot.
In many ways, this process is akin to using the lever to adjust the lens inside a real gobo.
How Do You Make a Gobo Out of Ordinary Objects?
The truth is, you don’t even need to use foamboard to create a DIY gobo. You can be creative and place all sorts of objects in front of your light and see what happens.
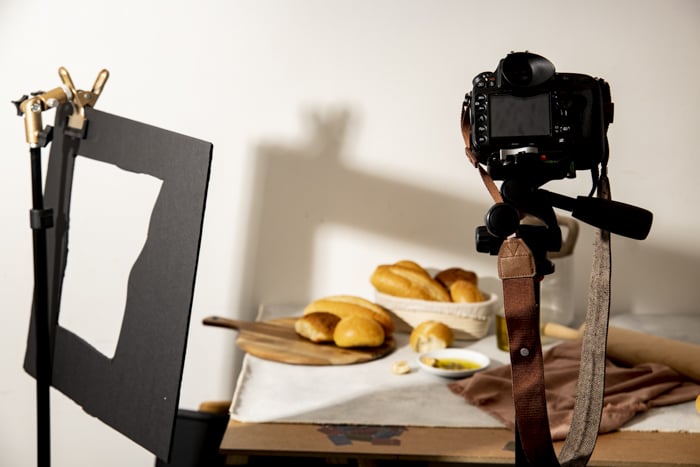
The “gobo” I use the most in my photography is this window frame from a crafts store.
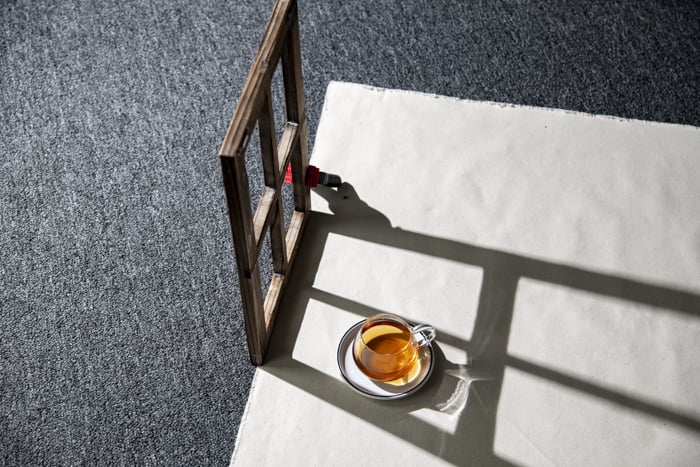
When I stick it in front of my light, it looks like the objects I’m photographing are really near a window.
I also use all sorts of plants, both real and fake, to create exciting patterns. Using them creates the effect that the objects I’m photographing are in nature.
Of course, you can try other items, too. If they create nice shadows, they’ll most likely make great gobos.
Feel free to experiment with different objects that you think will look interesting. At some point, I even tried using a colander to cast patterns on my subject!
Conclusion
As you get more into studio photography, you’ll find gobo lighting invaluable. Whenever your lighting looks a little flat, you can always use one to make your scene come alive.
Even though a gobo is an artificial device, it also somehow makes everything in your image look organic. All the shadows and patterns add a natural feel, especially if you’re using flash.
So go ahead and create gobos and learn how to use them. If you’re not satisfied with how your image looks, then perhaps a few cool patterns are what you need.


