As you evolve as a photographer, you begin to let go of automatic, semi-auto, or manual modes and start shooting raw.
To edit your raw files, you need a raw converter editor. If you’d like to try something other than Lightroom, Adobe Camera Raw is a great choice.
Today I explain why using Adobe Camera Raw may be beneficial for you.
What Is an Adobe Camera Raw File?
Raw files contain more tonal information than a JPG file. To completely understand the difference, here we explain it in more detail.
But in short, the difference lies in processing and compression. When you press the shutter button, your camera exposes light onto the sensor. Then, the amplifier sets the ISO to your required level to give a correct exposure.
After that, the analog-to-digital converter sends the signal to the processor. And here is the trick – if you choose JPG conversion, the data gets processed, colored, sharpened, compressed, and written onto the memory card.
However, if you choose a raw format, this procedure stops right after the digital conversion. It might get compressed, depending on your settings. What’s written onto the card is raw pixel data.
How Can I Open a Raw File?
You can’t simply share raw photos right after shooting. You need special apps to view them in their full beauty. Standard image viewer apps also open them, but can’t do more.
So, you need a raw converter and editor.
Adobe’s Camera Raw is one of the most capable raw editors in the market. It’s been developed together with Photoshop, and it’s a part of it, but also acts as a framework.
Lightroom‘s core editor is also a modified version of Camera Raw.
What Is Adobe Camera Raw?
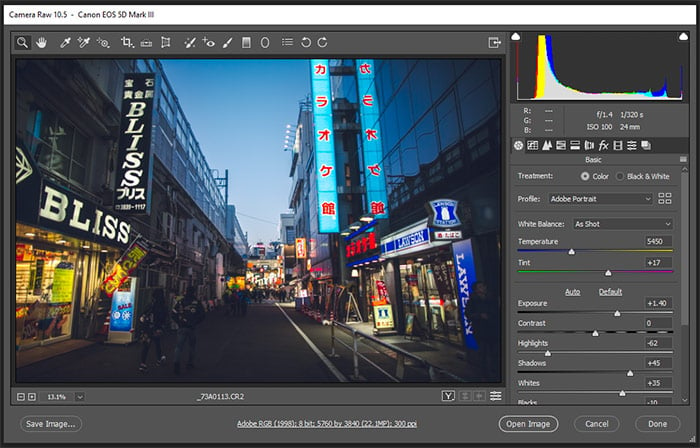
Adobe Camera Raw (in short: ACR) pops up when you open a raw file with Adobe Photoshop or Bridge. It acts like a plugin, as it opens up in a separate window.
With Adobe Camera Raw you can edit raw photos non-destructively. It handles all modern raw formats – CR2, CR3, NEF, ORF, or DNG files pose no problem.
Adobe Camera Raw gives you the same tools as Lightroom. You find all the profiles, tone sliders, local adjustments, curves, clone brushes, transform options in it and much more.
Besides editing and retouching, it allows you to choose export settings. You can set your desired output file format, bit depth, resolution, color space, and the ratio of compression.
You can also import multiple images and edit them together – you will find this useful when you’re editing a comprehensive series of images.
What Is the Difference Between Adobe Camera Raw and Lightroom?
You can edit your photos in Adobe Camera Raw just as quickly as you can in Lightroom. Editing options are roughly identical. You might find that some tools are organized differently.
The critical difference is in file handling. Lightroom works with catalogs, storing all your photos and their edits in huge batch files.
In turn, ACR stores your edits in small XMP sidecar files. If you’re working with a zipped raw format, like DNG, it edits the respective part of the file.
To put simply, with Lightroom, you can organize your whole library within the program. With Adobe Camera Raw, you need a file manager. This can be either annoying or very useful.
When Should I Use Adobe Camera Raw?
It’s a question of personal preference.
If you edit on your own computer and don’t care much about your file system, use Lightroom.
If you like to organize your files by hand or work from the cloud, use Adobe Camera Raw.
And, of course, you can combine them. You may use Lightroom for big projects but edit in ACR for one-off occasions.
Is Adobe Camera Raw Free?
It is not free. Adobe Camera Raw comes with Photoshop, you get is as part of the subscription. A monthly subscription for Photoshop and Lightroom costs 10 USD.
Adobe Bridge, a file manager, comes with Adobe Camera Raw compatibility. To use them together, you need to have either Photoshop or Lightroom on your computer.


