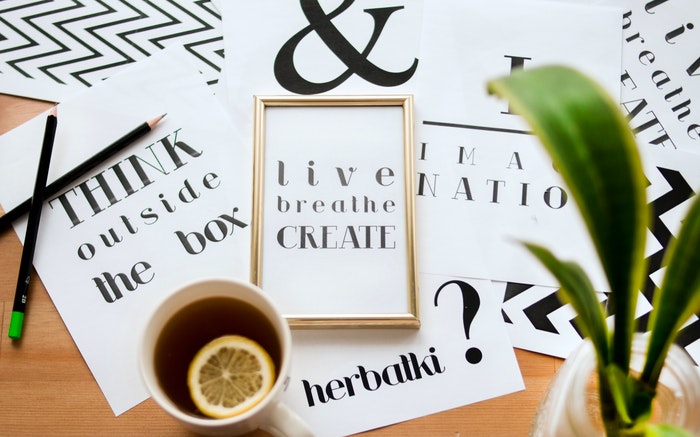
A DIY photo backdrop can be as simple as a sheet hung behind your subject or paper streamers taped to a wall. Start with the materials you already have, then choose a color and texture that suit the photo.
Below are 20 backdrops you can make for portraits, parties, and small product shoots, plus one option for changing the background during editing. Each idea includes a photo to help you plan the result.
21 DIY Photo Backdrop Ideas
Choose a starting point: Use a plain sheet or curtain for a simple headshot, streamers or balloons for a party, and a small paper or wood surface for products. Tissue-paper walls and paper chains need more assembly, so leave time to make them before the shoot.
Before you cut or hang anything, frame a test photo from the position where you’ll shoot. Check that the backdrop covers the sides of the frame and, for a full-length portrait, decide what will appear under your subject’s feet. You only need to decorate the area the camera will see.
Put your subject in position and check the light before adding the final decorations. Look for visible tape, gaps, wrinkles, and bright reflections. A small change to the framing or light can save rebuilding the backdrop.
1. DIY Photo Backdrop Streamers
Use paper party streamers to make a striped backdrop without much cutting or assembly. Choose a few colors and cut strips long enough to fill your frame. Tape their tops along a horizontal line, then let them hang straight or twist each strip for texture. You can also buy shiny streamer backdrops.
Keep the strips close together if you want to hide the wall. For a looser pattern, leave even gaps and let the wall color become part of the design. Test your tape on an inconspicuous area before attaching the whole backdrop.

Decorative balloons can also enhance your DIY backdrop. (Adobe Stock)
2. Paper Plates
Have a stack of unused paper plates left after a party? Tape them to a wall for a backdrop you can rearrange as you go.
You can buy different shades of the same color and create an ombre wall. You can also get different colored plates and mix them for a bright background. Or use paper plates with fun patterns.
Space the plates apart for a polka-dot effect, or let their edges touch for a mosaic. Overlap them in even rows for a scalloped pattern. Lay out a small sample first so you can check the color order before covering the wall.

Mix and match paper plates for a DIY photo backdrop. (Adobe Stock)
3. Magical Sheer Curtain and Fairy Lights Backdrop
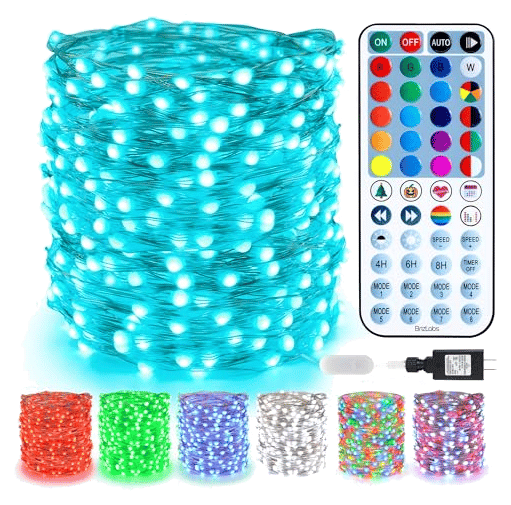
Want a soft, glowing background with fairy lights? Use a sheer curtain to soften the appearance of the lights behind it. You can buy some fairy lights and sheer curtains if you don’t have them at home.
Hang the lights from a suitable support behind the curtain, following their maker’s mounting instructions. Arrange the curtain’s folds and check the spacing of the lights through your camera. Add flowers along the top if you want a decorated edge.
Try a test photo with the room lights on, then dim them to see how the balance changes. Keep enough light on your subject’s face; the decorative lights do not have to provide all the illumination.

You can use varying amounts of fairy lights and natural light. (Adobe Stock)
4. Doily Backdrop
What are pretty, easy to find, and pocket-friendly? Doilies! Doilies make for easy DIY photo backdrops. All you need to do is buy a bunch of doilies and stick them to the wall in whatever form or fashion you like.
You can have a few different colors or get the same color. You can overlap them neatly in straight lines or place them randomly. You can even paint or color a large canvas backdrop or wall. Then, place white doilies overtop to create interesting texture and dynamics.

You can use paint, crayons, or pastels to color the backdrop. (Adobe Stock)
5. Craft Paper Triangles
Are you feeling crafty? Get out your favorite colored craft paper and some scissors for this geometric photography backdrop.
All you need to do is cut some triangles of different sizes on colored paper and stick them on the wall. Here, you can be as conservative or crazy as you like. You can create a symmetrical pattern, or you can place them abstractly.

Analogous colors, turquoise, blue, and purple, make a poly geometric background. (Adobe Stock)
6. Scalloped Wrapping Paper
Want a cute and easy pattern for a backdrop? Grab some wrapping paper and create this “scalloped” backdrop.
Cut the wrapping paper into equal-sized circles or tabs (rectangular with a rounded edge). Then, stick them on a plain backdrop or wall. Make sure they line up straight. Overlap rows one over the other to create a scalloped look. You can mix and match solid colors or patterns.

Copy this scallop pattern of bronze brass plates. (iStock)
7. Rainbow and Clouds
Have you ever wondered what was at the end of a rainbow? You may never find out, but you can create your own rainbow backdrop! All you need are some colorful streamers and white balloons or honeycomb flower balls.
You also need the basic scissors, tape, and a blue trifold display board. Just tape the streamers to the display board and hang the honeycombs over them. And now you have a cloud backdrop with a rainbow under them!
You can also hang this installation in front of a light blue backdrop or wall to look like a rainbow sky.

A balloon and rainbow streamer backdrop you can mimic
8. Ombre Tissue Paper
For a textured ombre wall, tuck pieces of tissue paper into a supported chicken-wire panel. This needs more assembly than hanging streamers, but it gives you control over the color gradient.
Plan the colors in bands from light to dark. Pinch each piece of tissue in the middle, tuck that center into a hole, and fluff out the loose edges. Fill the panel gradually, stepping back to check for gaps and abrupt color changes.
The original tutorial credited below shows how to attach the wire to a backdrop frame with zip ties. Build it where you plan to shoot if possible, so you don’t have to move the finished tissue-paper surface.

Source: Lovely Indeed
9. Checkered Streamers
Streamers can be woven into a checkered pattern for a party backdrop. Choose two contrasting colors for a simple grid, or use four for a more varied pattern.
Tape a row of vertical strips along their tops. Weave a horizontal strip over one vertical strip, under the next, and repeat. Reverse that over-under order for the next row. Secure the ends as you work and keep the spacing even.
Make a small sample before weaving a large wall. It will show whether your strips are wide enough for the pattern to read clearly in the photo.

Source: The Eclectic Life
10. Delicate Taped Flowers
Use dried or paper flowers to decorate a wall without relying on fresh blooms staying upright through a long shoot. Branches and leaves can become part of the arrangement, too.
Place a few stems first and check their position around your subject. Keep the tape behind the flowers where possible. You can remove small visible pieces in Photoshop, but it’s easier to hide them before shooting.
If you don’t want to tape the stems directly to the wall, suspend them from strings attached to a support. Match the string color to the background if you want it to be less noticeable. Use the arrangement behind portraits or above a small food-photography setup.

The dried flowers in this image perfectly complement the pink wall.
11. Creased Tin Foil
Crease a sheet of tinfoil, then open it out and attach it to a backing board. The folds create a textured silver surface. Keep it sharp for a metallic look, or place it behind your subject and let the reflected highlights fall out of focus.
Creasing the foil does not create bokeh by itself. Focus on your subject and experiment with a wider aperture and more distance between the subject and foil. These are the same controls used to blur other backgrounds.
Foil reflects its surroundings, so check for bright patches before shooting. Move the light, foil, or camera until the reflections sit where you want them. Soft window light is one starting point; a small light can create more distinct highlights.

Creased tin foil and neon lights work wonderfully together.
12. Cut Out Colorful Tissue Paper
Cut out different shapes and tape them to a wall. You can use colored tissue paper or any other kind of colored fabric that’s easy to cut. Colored tissue paper is ideal for photos of children, events, and children’s products. It can also be used to create funny self-portraits.
If you work with children in your photoshoot, this is a great opportunity to let them create their own DIY photo backdrops! If you use their shapes and creations, your portraits will look personal and creative.

Cut colored tissue paper into circles to create fun polka-dot backdrops.
13. Easy Curtain Background
A curtain you already own can become a backdrop for a close portrait. Pull a section into the background of your frame and arrange its folds. If it needs extra support, secure it with a fixture suitable for the curtain’s weight and the surface you’re using.
Choose whether to light the curtain from the front or let window light pass through it. These give different results, so check the exposure on the face as well as the background. Moving the curtain away from the window changes the arrangement, but does not guarantee a brighter photo.
Frame tightly if the curtain does not cover a large area. A colorful shower curtain can work as another patterned surface.

If you plan to take photos for at least an hour, use something reliable (like a nail) to hold your curtain in place.
14. Fairy Light Arrangement
Fairy lights can make a dotted background or a loose pattern of glowing shapes. Decide where your subject will stand before arranging them.
Before you arrange the fairy lights, you have to create supports for them to hang on. I used tiny nails in the photo below. Use mounting points suitable for your wall and follow the light maker’s instructions. Arrange the strings randomly or outline a shape that fits the portrait.
For soft circles of light, keep the lights behind your subject, focus on the face, and try a wide aperture. Move the lights farther back if they still look too sharp. Nikon’s holiday-light guide explains this setup.
If you use the fairy lights as the only light source, check that the face is bright enough and the shutter speed does not blur your subject. Adding a separate light on the face gives you more control.

Working with unusual lights helps you take interesting portraits in all lighting situations.
15. Creative Balloon Backdrop
Balloons are another fun DIY project perfect for kids and adults. You can stack them on top of each other, fill them with helium, and let them float, or place a few behind your subject.
A balloon photo background doesn’t have to be used for only happy photos. If you use neutral-colored balloons, you can create a more subdued atmosphere. It can be a great addition to a fine-art portrait. Vibrant colors can suggest a more playful mood.

These balloons were made specifically for Halloween parties and helped me take fine-art portraits.
16. Bed Sheets for Interesting Background Detail
Yes, you can use a sheet as a photography backdrop. Hang it from a suitable clothesline or support and check how it looks in the light you’ll use. A plain sheet gives a simple background; a patterned one makes the fabric part of the picture.
You don’t need a backdrop stand if you already have a secure place to hang the fabric. You can also use scarves, tablecloths, or a large piece of clothing for a tightly framed portrait.
For a smoother background, remove creases according to the fabric’s care label and spread the sheet evenly. If light reveals objects behind a thin sheet, change the angle or add an opaque backing. Keep deliberate folds if texture is the look you want.

To create this portrait, I hung a large patterned scarf over a folding screen.
17. A Backdrop With Stencils and Spray Paint
Use spray paint and stencils to make a repeat pattern or a single large design. Work on a removable panel so you can reuse the backdrop and change its position.
Choose a surface compatible with the paint, such as suitable plywood or poster board. Check the product instructions before painting fabric or an already finished surface. Paint only material you own or have permission to alter.
Draw a stencil on thick card, print a design, or make your own using digital drawing software. Cut it on a cutting mat, position it on the panel, and apply the paint as directed on the can. Let each stage dry for the time specified before moving the stencil or bringing the backdrop into your set.
Choose a face mask and filters only after checking the protection required for your paint; a generic face covering is not a substitute for suitable respiratory protection. Follow the label and safety data sheet for ventilation, eye and skin protection, and drying. The paint maker’s safety guidance also warns to keep spray paint away from flames and other ignition sources.

Photo by Bekky Bekks (Unsplash)
18. Depth and Meaning With Old or Printed Photos
Attach old photos to a wall, corkboard, or removable panel to make a backdrop with a personal story. Use copies of treasured prints so you don’t have to put tape or pins through the originals.
Black-and-white photos give the display a consistent look even when the subjects differ. You can buy bundles of old photos and postcards, or look through garage sales and thrift stores for a theme such as beach scenes or a favorite city.
Using old family photos adds another layer of depth to a portrait. Photograph an older relative in front of pictures from different stages of their life, and leave a few of those pictures visible around them.
This can be a self-portrait project, too. Build a display of your own photos, then decide how much of it should stay sharp in the final portrait. If you don’t have many prints, you can print digital ones.

Photo by Joanna Kosinska (Unsplash)
19. A Cabin Look with Wood Paneling
A wood surface gives portraits or products a rustic background. Use an existing wooden wall if you have one, or make a smaller panel that fills your camera’s frame.
Ask the owner before taking spare wood or pallets, and choose clean material in good condition. You can construct a wooden backboard using planks of wood, with a size and support suited to your setup. For small products, a wooden tabletop can provide the same texture without building a portrait-sized wall.
If you want the pattern without assembling wood, faux-wood vinyl panels are another option. Lay them flat or mount them on a supported backing. Take a test photo to check that the printed scale and any reflections suit the subject.

Photo by Scott Webb (Unsplash)
20. Homemade Paper Chains
Paper chains take repeated cutting and joining, so make a short sample before committing to a whole wall. Choose colors that stand out from the surface behind them.
Cut colored craft paper into equal-width strips. Join the ends of one strip to make a loop. Pass the next strip through it and join that strip’s ends. Repeat until you have a chain of the length you need, then hang several chains side by side.
Vary the lengths to make a stepped edge, or keep them equal for a curtain of loops. You can also cut separate snowflakes, animal shapes, or letters and string them into garlands. These are different shapes to try alongside the chains.
A dark wall can help pale chains stand out. For a black-and-white photo, take a test shot first to see whether the paper and wall still look distinct once their colors are removed.

If you work with children, paper chains can be a great way to nurture their creativity.
21. “Cheat” With Editing Software
This last idea is an editing option rather than a physical backdrop. You can use photo editing software to replace the background after taking the photo. Programs such as Luminar Neo offer background-removal tools, but expect to inspect and refine the result.
In Luminar Neo, Background Removal AI is accessed through Layer Properties and Masking. Select the subject to keep, remove the background, and use the Refinement Brush where needed. Add the replacement image on a layer beneath the cutout. Skylum’s instructions note that the tool may require an upgrade if it is not available in your installation.
You can change backgrounds in Adobe Photoshop, too. Its Remove Background action isolates the subject for compositing; refine the resulting mask if the selection misses edges. Adobe documents the process in its background-removal guide.
There are also free photo editing programs to consider. Check that the one you choose has the selection, masking, and layer tools you need. With any editor, choose a replacement background whose light direction and camera angle fit the subject, then inspect the edges before exporting.


Conclusion: DIY Photo Backdrops
Start with one backdrop that fits your subject and the space you have. A sheet, a few streamers, or a small paper arrangement is enough to try a new look without building an entire studio.
Take a test photo before finishing the setup. Check the edges of the frame, the light on your subject, and any tape or reflections you can see. Then change one thing at a time so you can judge what improves the picture.
For more creative background ideas, read our article on creating a DIY photo booth. Or, check out our creative eBooks and courses for more tips and tricks to use in your photography.