Flowers make beautiful subjects for photography, but capturing their essence in a photograph can be tricky. In order to get the most out of your flower photos, you need to know how to edit them properly. Here are nine tips to help you edit flower photos in Lightroom.
1. Edit Flower Photos: How to Pick the Best Image
The better the initial flower photography image, the better the results.
Lightroom’s library module gives you the option to easily compare a group of images. To do so, first select all the images. You can do that by pressing Ctrl (Windows) or Command (Mac) while you click on each of them.
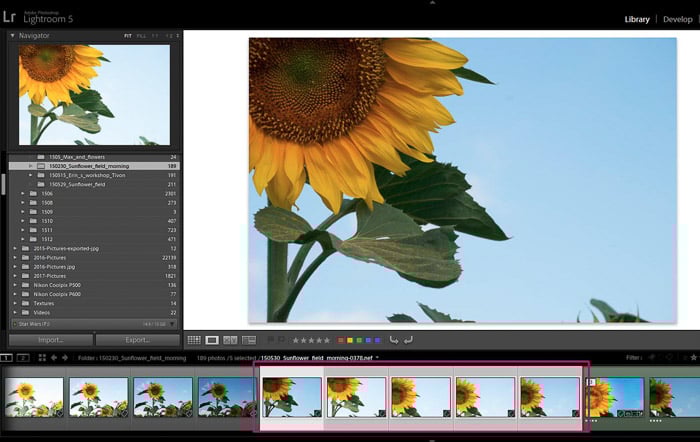
Then, in the lower toolbar of the Library module, click on the Survey View symbol (Or use the shortcut “N”).
If you don’t see this icon in the toolbar, you can make it appear by checking the “View Modes” in the drop down menu.
![]()
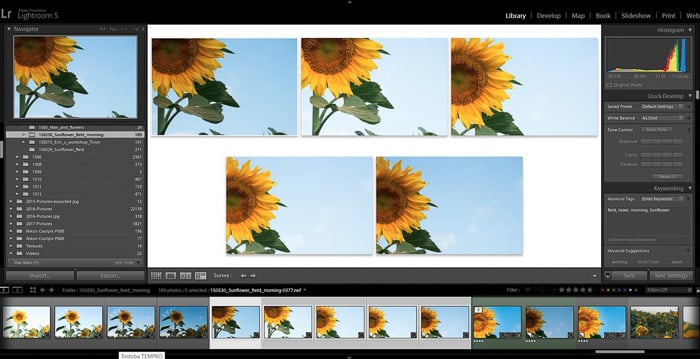
Using this view mode Lightroom will show you all the selected photos at once.
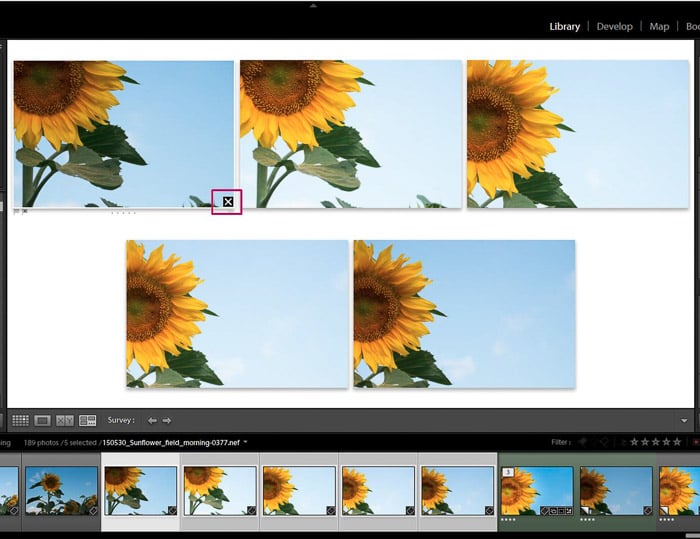
Here you can discard photos one by one by clicking the little cross at the corner of each photo until you are left with the photo you want to work on.
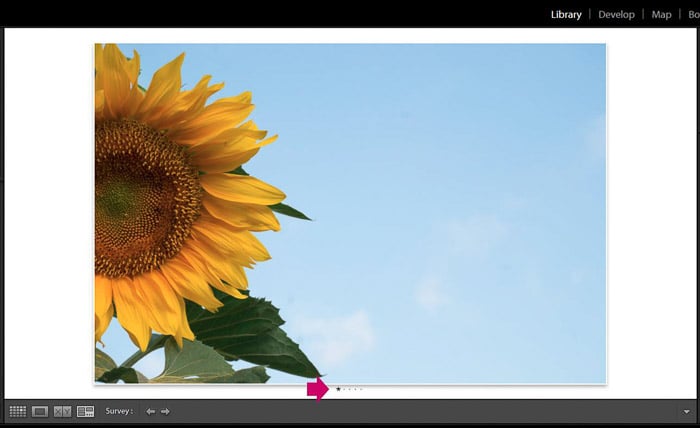
I like to mark my favorites with one star (by pressing “1”). By doing that you will be able to distinguish between your chosen photos and the rest of your photos in the gallery.
2. Global Adjustments First
When editing your image, it’s better to start with global adjustments and then do the local ones if needed (such as brushes, spot removal or graduated filters).
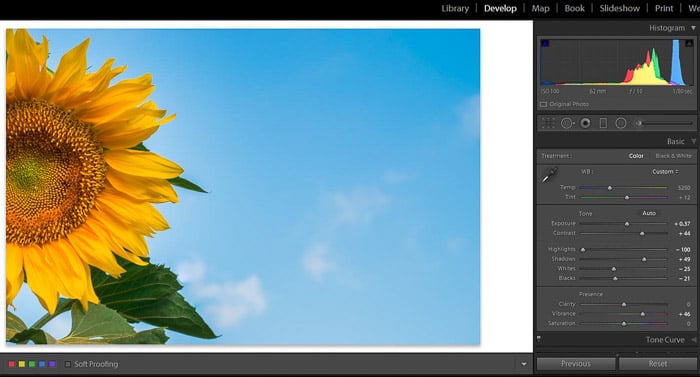
You will find the general adjustments in the first right panel of the Develop module.
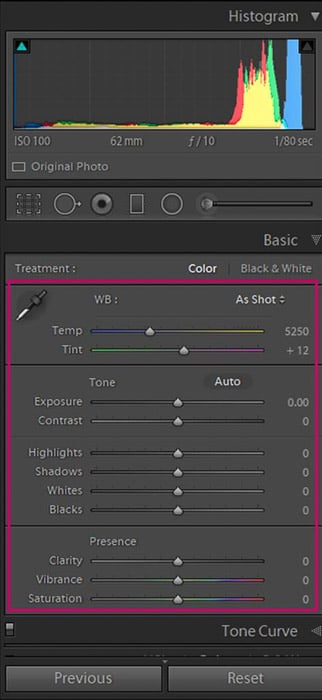
It works really well to follow the order that Lightroom suggests: white balance (WB to adjust the color temperature), tint, exposure, contrast an so on. You don’t have to use them all.
I find it helpful to go over the different elements one by one and decide whether I like the picture as is or if it needs some modification.
I usually increase the exposure, add a bit of contrast and decrease the highlights.
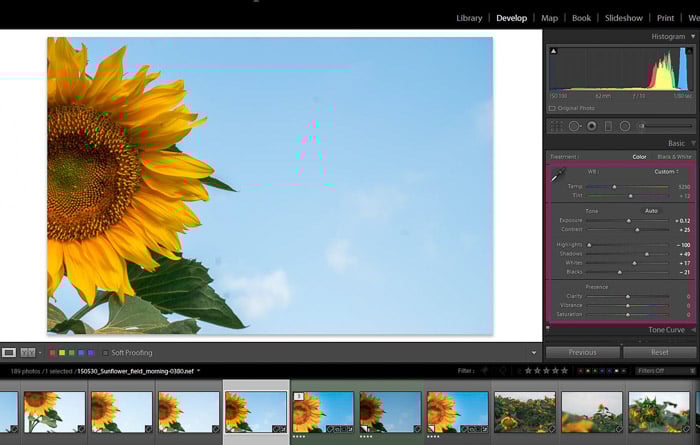
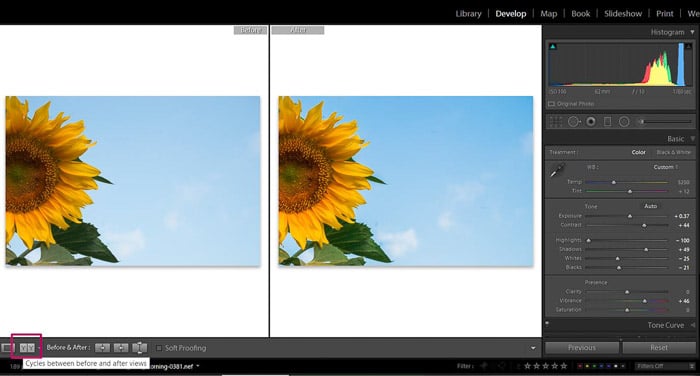
You can compare your before and after image by clicking on “Cycle between before and after views” in the lower toolbar.
You can see that with just a few adjustment you can improve your flower photos quite a lot.
However, every photo is a bit different and adjustments also depend on your own personal taste, so feel free to experiment with each slider in this panel.
3. Bring Out the Colors
Colors have an important role in flower photography. You can do interesting global adjustments to the colors of your image using the Vibrance and Saturation sliders.
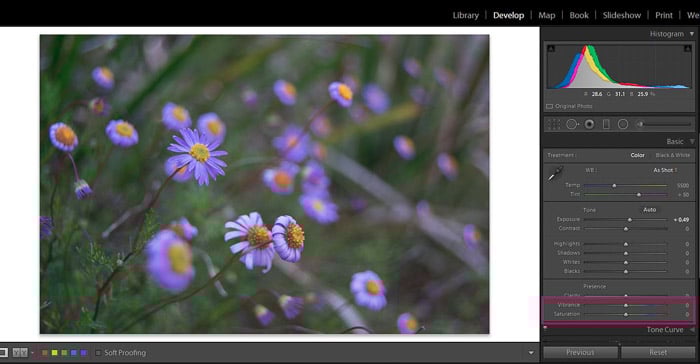
By moving the Saturation slider to the right, you can increase the color intensity in the entire image.
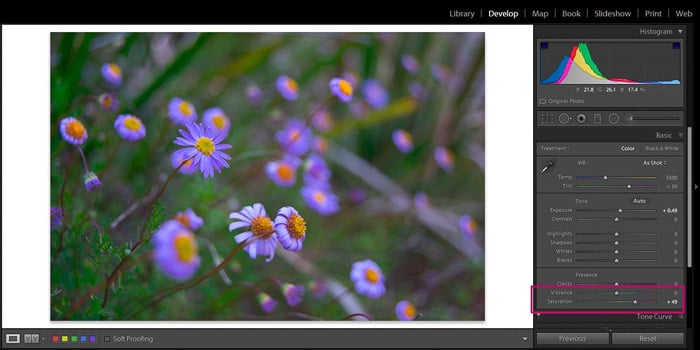
As you can see in this example, I increased the intensity of the purples, yellows and greens. For a more subtle effect, you can use the Vibrance slider instead.
If you do that, you will increase the intensity of only the more muted colors in the image.
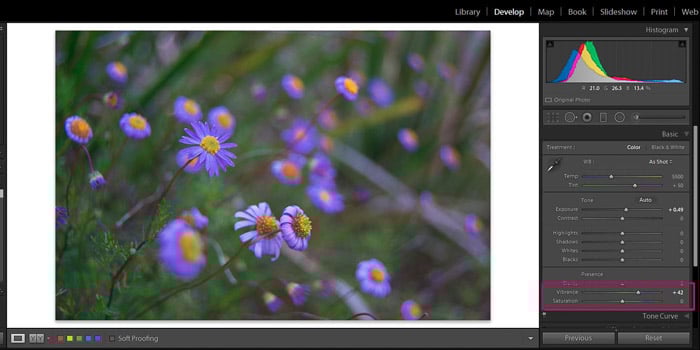
In this example, I increased the purple in the flowers because it was the most muted color. Green and yellow remained the same.
Be careful with these two sliders. Overdoing the color intensity will give the image an artificial appearance (see below). I recommend moderate adjustments here.
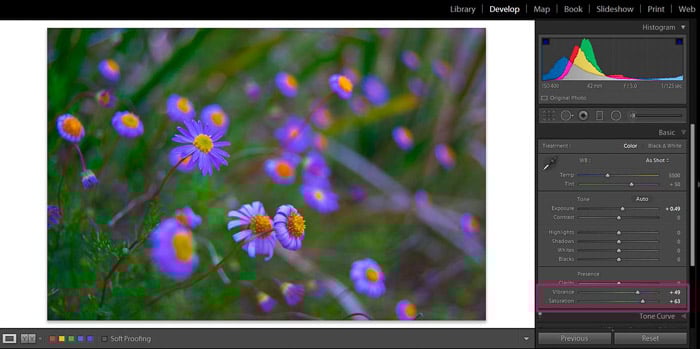
You can also decrease the Saturation and/or the Vibrance to get the opposite effect and tone down the colors. This gives the image a more delicate look.
Keep in mind that while editing with these two sliders you are making global changes. They will affect the whole image and you won’t have a lot of control over individual colors.
If you want to have more control, read on.
4. Adjust Colors Individually
In some photos you might want to modify some specific colors, while keeping others untouched. For these, Vibrance and Saturation sliders aren’t enough.
Fortunately, Lightroom has a special panel to modify colors one by one: the HSL/Color/B&W.
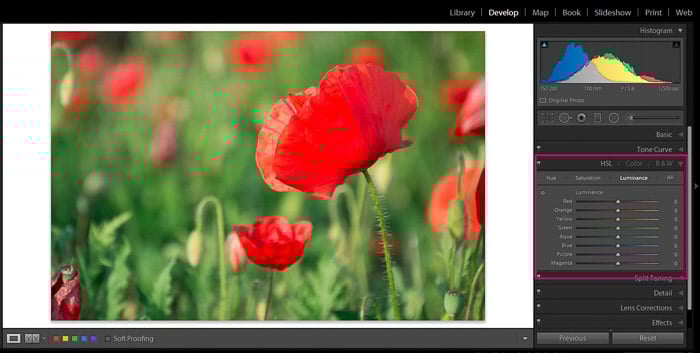
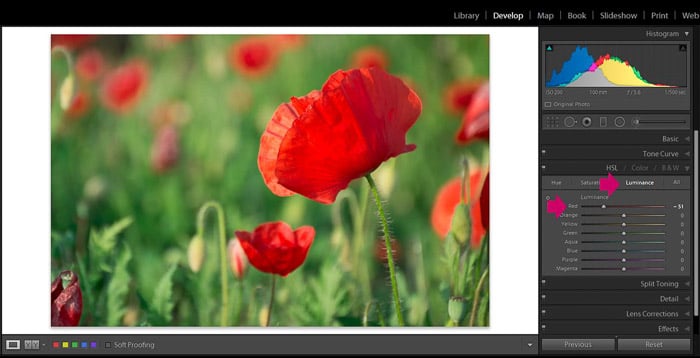
In the HSL section, you can modify the luminosity (brightness), saturation and even the tint of each color individually. These adjustments can have a profound effect on your image.
For example, in this photo I was able to show the flower in better detail by lowering the brightness of the red color. I selected the Luminance panel and I decreased the red value.
I also wanted to increasy the intensity of the greens, so I moved to the Saturation panel and I worked with just the greens.
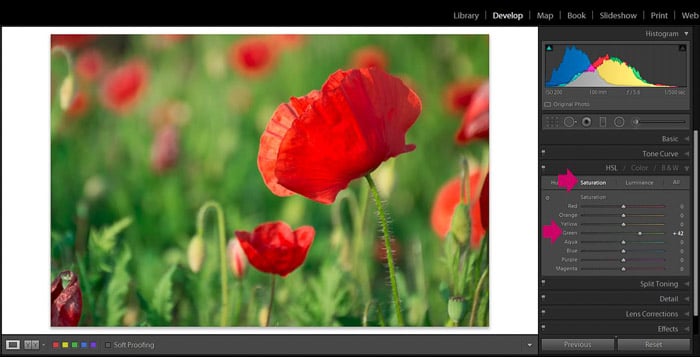
This Lightroom editing option allows you much more control over colors than the global adjustments.
5. Emphasise Texture or Softness With Clarity
I use the Clarity slider to give the flowers either a softer or a harder look. This slider affects the contrast of the mid-tones. By increasing the clarity you can bring up details and by decreasing it you can soften textures.
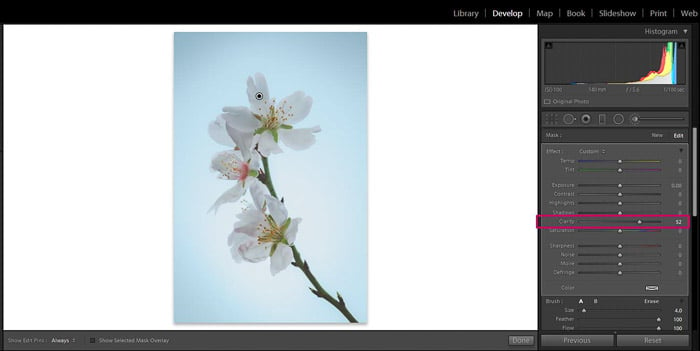
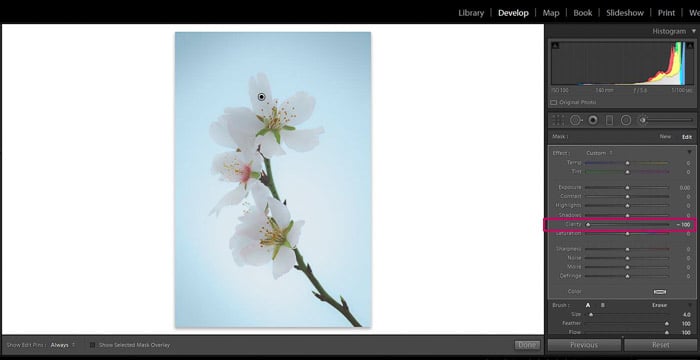
Although there is a Clarity slider in the general adjustments panel, like all the others global adjustments, it will change the clarity of the entire image. If you want to work on a particular flower I recommend you work on its clarity locally using a brush tool.
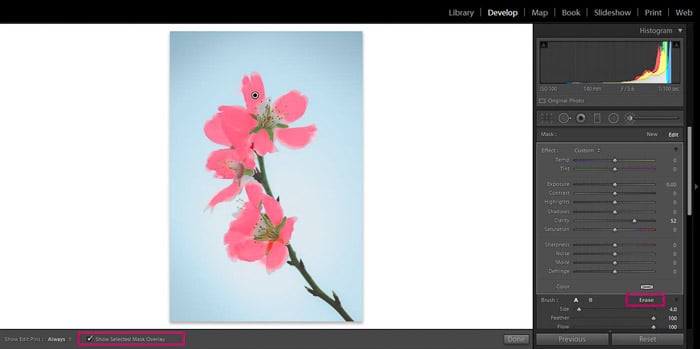
To do so, you first need to select the brush tool.

You can adjust the size of the brush using the slide or with the square bracket keys “]” and “[" in order to make the brush bigger or smaller. I always recommend to feather the brush to avoid sharp edges.
Adjust the Clarity slider of the brush to get the effect you want: to the left for softening the area and to the right to bring out details and texture.
Now all you need do is to paint over the parts of the flower you want to modify. When you do that, the area you brush will be marked in red. This is meant to help you see the area that you covered with the brush tool. When you finish with the brush it will disappear, leaving only the adjustments you wanted to do.
6. Adjust the Exposure With Radial Filters
The human eye has a natural tendency to look at the lighter parts of an image first. For that reason, making your flower look lighter will make it more eye catching.
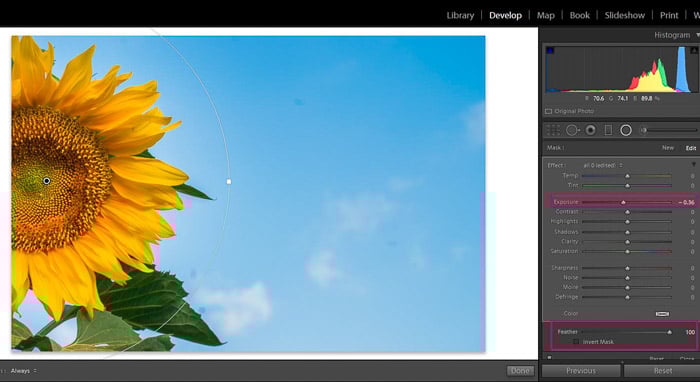
To do so you can either increase the exposure of your flower or make the background darker. To achieve either of these effects you need a radial filter.
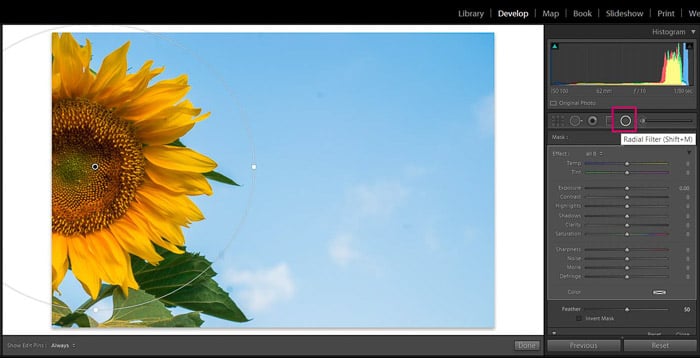
To make the flower lighter just add a radial filter and check the Invert Mask. Now all the adjustment you make to the filter will affect the area inside it.
Feather it to make the effect look more natural and increase the exposure a little.
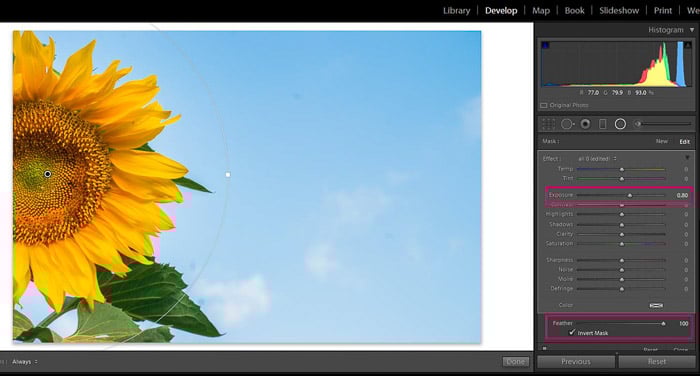
To darken the background, you add a radial filter in the same way but this time you leave the Invert Mask unchecked. Now the changes will affect everything outside the filter.
Decrease the exposure and there you have it!
7. Add a bit of Bokeh
As I said in the previous tip, the lighter parts of an image are eye catching. But this is not the only way to attract the viewer's attention to a certain part of the photo.
We also prefer sharper and well defined areas over blurry ones. In flower photography this concept is really useful. You can isolate a certain flower or a part of it from the rest of the image by making it look sharper.
This is ideally done when you take the photo by shooting with a low aperture number (to get a narrow depth of field) and get this beautiful bokeh effect in the background.
If, for any reason you were unable to take the photo this way, you can add blurriness with some Lightroom editing, although with some limitations.
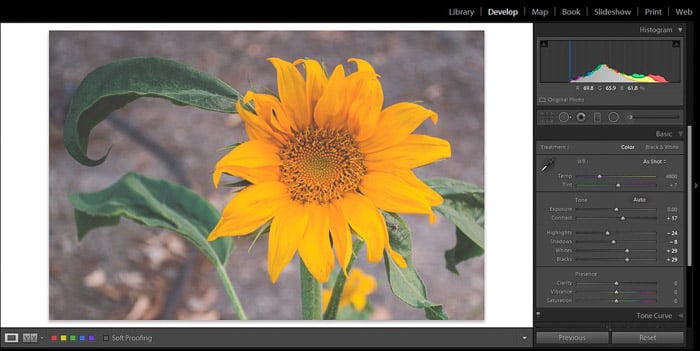
Let's take this photo:
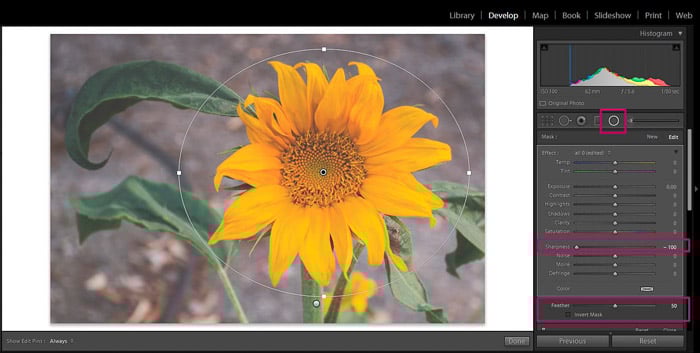
The easier way to do it is by adding a radial filter to adjust the sharpness. Make sure that it is feathered and that the box Invert Mask is unchecked.
Feather it at around 50 and move the sharpness slider to the left until you get the effect you like.
In this photo I was able to move the slider completely to the left, but be careful. In some cases it will be too much and the effect will look artificial.
8. Add a Matte Effect
You can easily achieve a nostalgic matte effect by making some adjustments to the Tone Curve. First of all, click on the curve at around 30-40% to set a fix point.
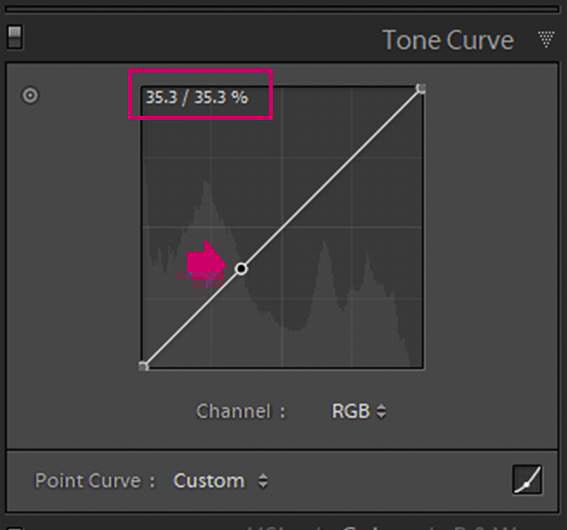
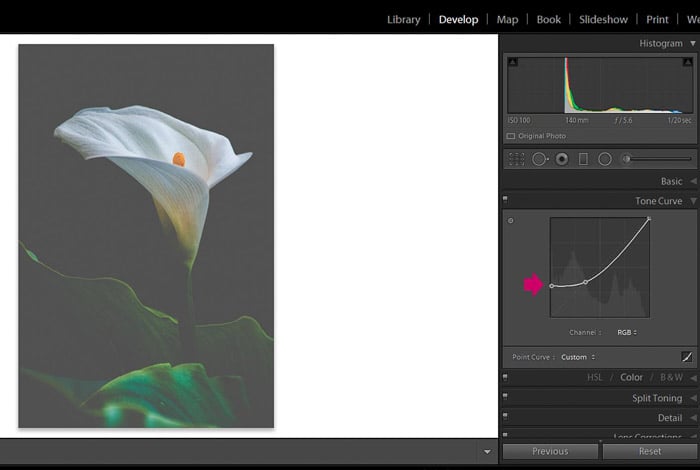
Then, drag the black extreme of the curve (bottom left) upwards.
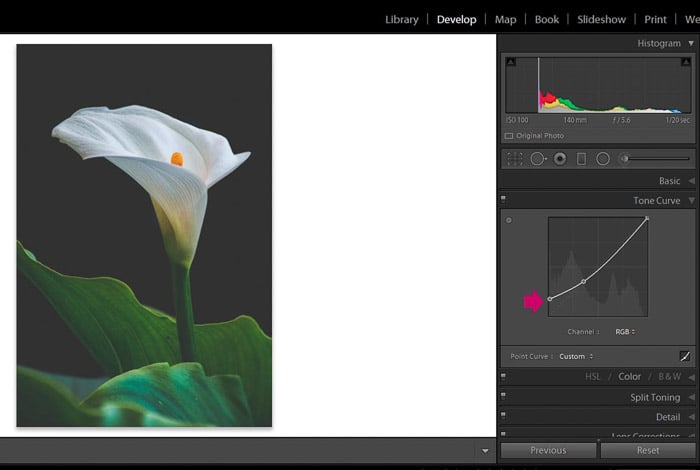
The higher the point, the more washed out the blacks will look. The exact adjustments will depend on your personal taste.
I recommend not to overdo it to avoid clipping the blacks too much (look at the example below).
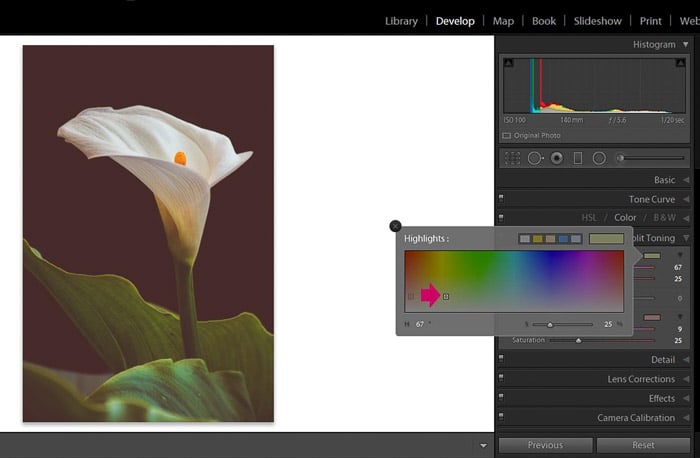
After modifying the curve you can also give the photo a more vintage look by adding colors to the shadows and to the highlights.
You can do that in the Split Toning panel.
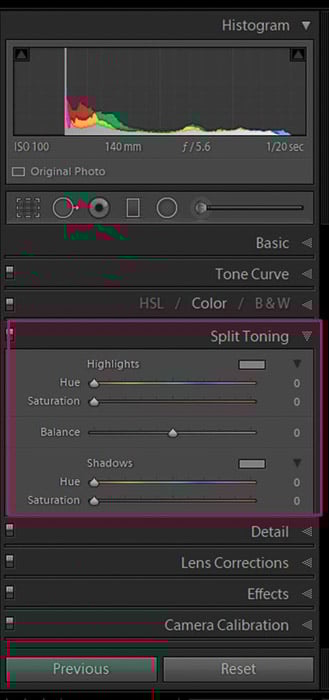
You can add color to the shadows by selecting it with the eye drop and modifying its saturation.
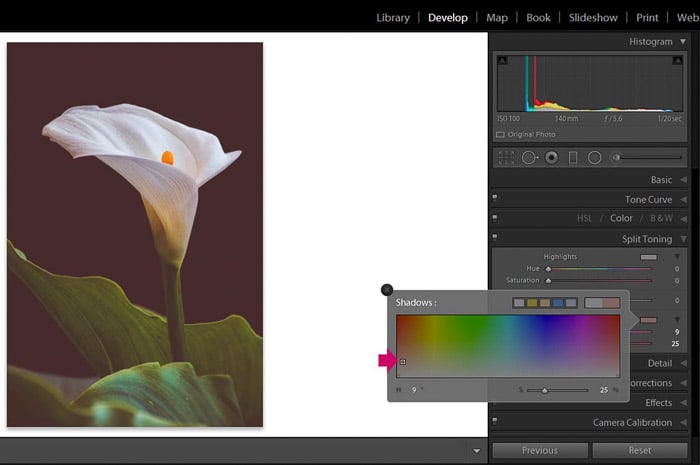
In the example above I used red for the shadows. In the same way you can select a different color for the highlights.
In the next example I chose orange.
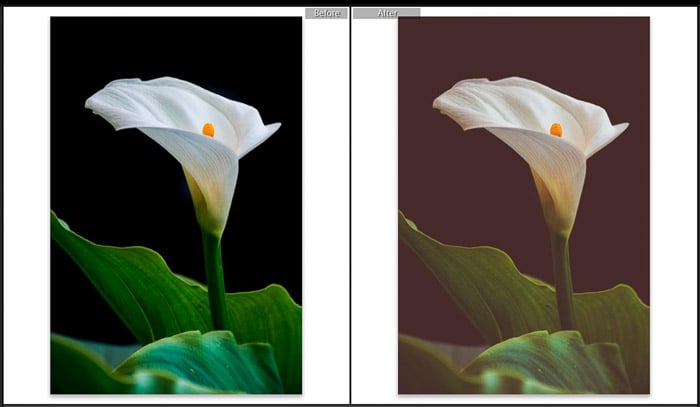
Try different color combinations until you find the one you like the most. I like this red-orange because it gives a nostalgic look to the image.
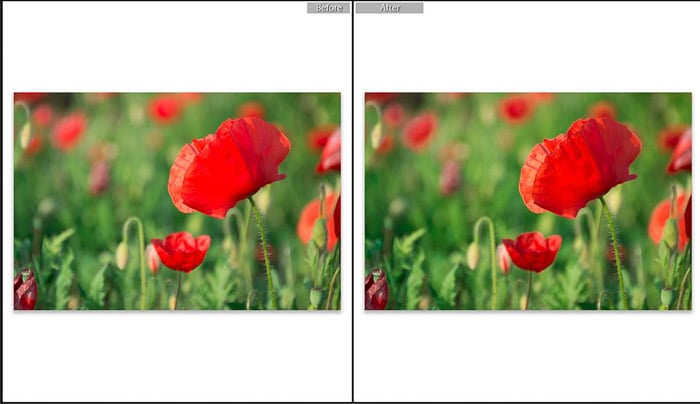
See the difference between the original image and the edited version:
9. Delete Imperfections With the Spot Removal Tool
Sometimes you might get some dust or smudges on your lens or the sensor that then show up in your image. In this case, the dirt usually appears as dark spots in the image.
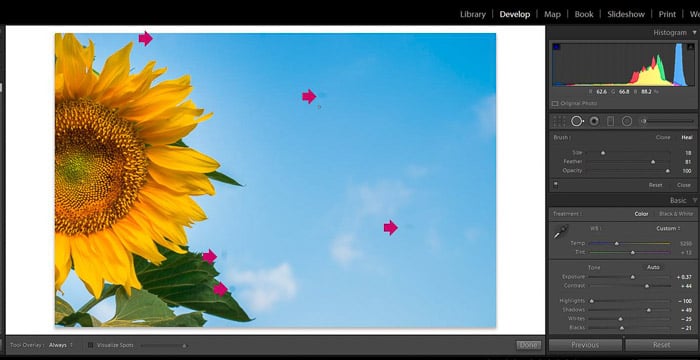
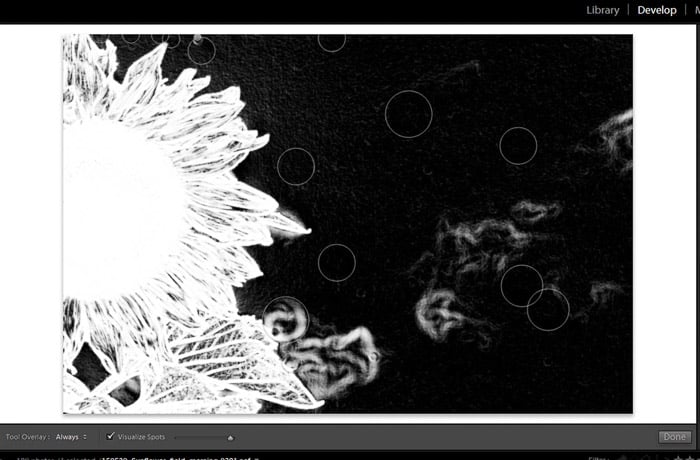
You can clean them using the spot removal tool. There is a way to make the spots easier to spot.
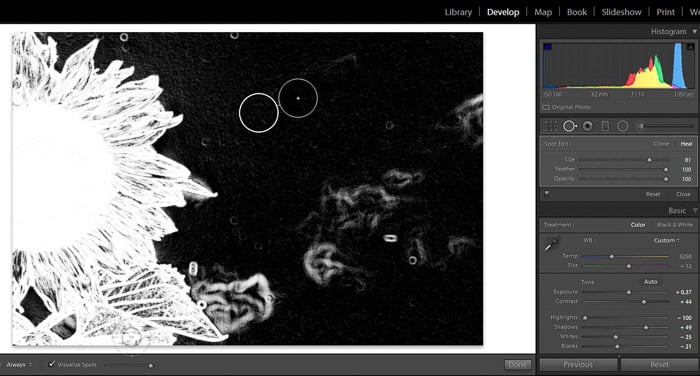
Once you are in the spot removal tool, check the box "Visualize spots" on the bottom tool bar and move the slider towards the right until you get to a point where you can see just the borders of the image.

Now you can select the dirt spots with the spot removal tool. You can adjust the size using the slider on the panel or with the shortcuts "]” and “[“.
I like to use it as “Heal” and not as “Clone” because the last one might be quite noticeable. The healing option is more delicate and looks much more natural.
Once you click on the spot you want to remove, this tool will copy an area that Lightroom considers suitable. You can always drag the area from where Lightroom copied it and select a different area you think will work better. Repeat for each dust spot.
Once you are done the image will be totally spot free!
Conclusion
Adobe Lightroom is a great tool for doing quick edits and adjustments to your flower photography. Start with any global adjustment you need and then do the local ones.
Regarding colors, individual adjustments give a lot of versatility to the process. To emphasise a particular flower, you can make it look lighter or you can try to blur its background and add bokeh with a radial graduate tool. Get a bit more creative by adding a matte effect or colors to the shadows and highlights.
Editing is very much a matter of personal style, so feel free to experiment and have fun!
We have a great tutorial on luminosity masks for digital blending you should check out too. Don’t have Lightroom? Check out our article on Lightroom alternatives here.