It’s easy to add a glitter effect in Photoshop. In this tutorial, we’ll show you how to create a sparkling effect in Photoshop using just a few simple steps.
First, open up the photo you want to edit in Photoshop. Then, select the area you want to add the glitter to and create a new layer. Next, choose your desired color and paint over the selected area.
Finally, set the layer mode to “Screen” and adjust the opacity until you’re happy with the results. You can also add some extra sparkle by duplicating the layer and changing its blending mode to “Overlay.”
Creating a Glitter Effect in Photoshop: How to Create a Glitter Texture
Step 1: Open a New Document
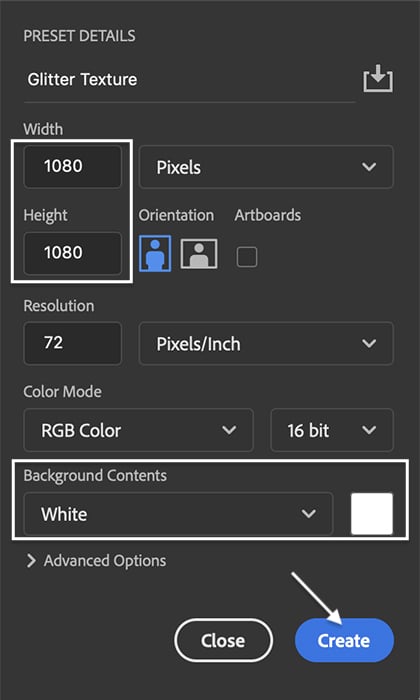
Start by opening a new document in Photoshop. Go to the File drop-down menu and select File > New. Your document can be any size. Choose a white background.
Click Create.
Step 2: Add Noise
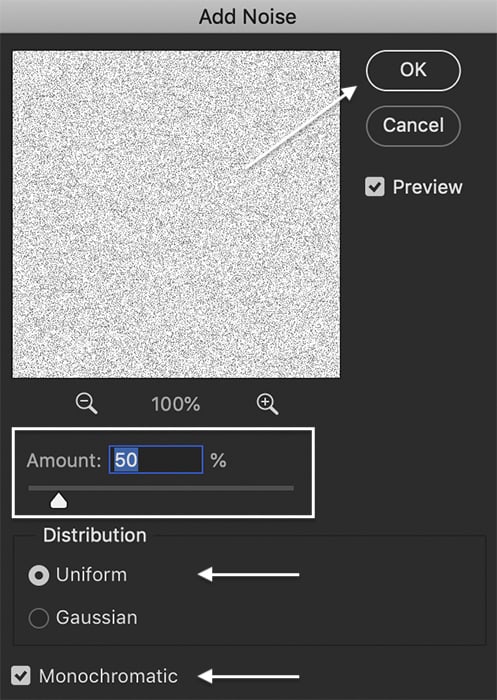
Add noise to the background layer by going to the Filter drop-down menu. Select Filter > Noise > Add Noise. In the Add Noise window, set the amount to 50% and select Uniform. Check the Monochromatic box.
Click OK.
Step 3: Add a Crystallize Filter
Add a Crystallize filter to the noise layer by going to the Filter drop-down menu. Select Filter > Pixelate > Crystallize. In the Crystallize window, set the cell size to 5.
Click OK.

Step 4: Copy and Rotate Texture
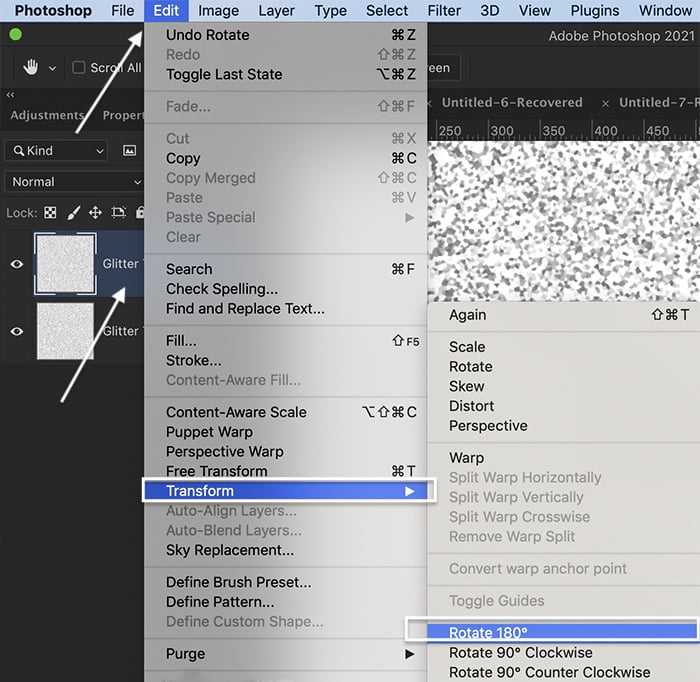
To add fullness to the texture, copy the background layer. Open the Layer drop-down menu and select Layer > Duplicate (Ctrl or ⌘J).
Highlight the duplicated layer. Go to Edit > Transform > Rotate 180.
Step 5: Change the Blending Mode
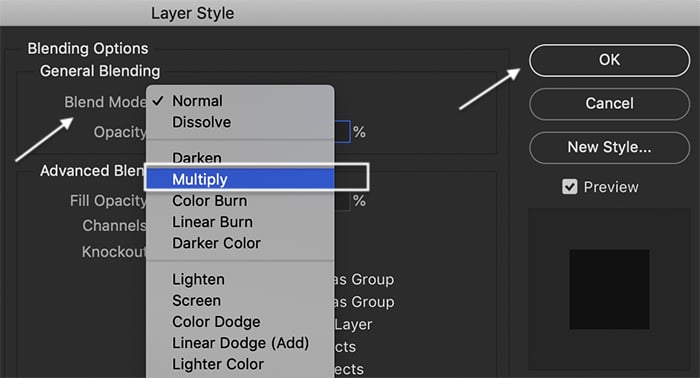
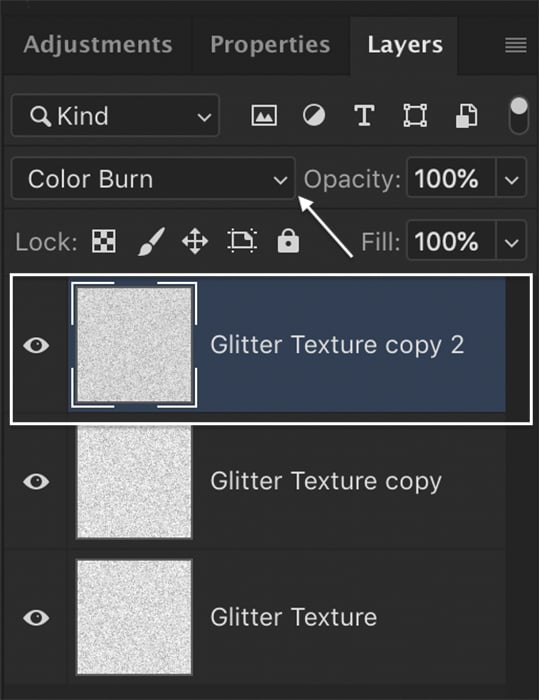
Double click on the duplicate layer. In the Layer Style window, change the blend mode to Multiply. You can experiment with other blend modes like Color Burn or Overlay.
Click OK.
Step 6: Add More Glitter (Optional)
If you want a denser texture to your glitter, copy the original layer again. Go to Filter > Noise > Add Noise. Set the amount to between 10% and 25%.
Go to Edit > Transform > Rotate 90 Clockwise.
Set the blend mode to either Multiply or Color Burn.
How to Save a Glitter Texture Pattern
That's it! You have created a glitter texture. We will add color in a moment.
But first, let's save the texture as a glitter pattern in Photoshop. Saving your glitter texture as a pattern will let you access it any time you want.
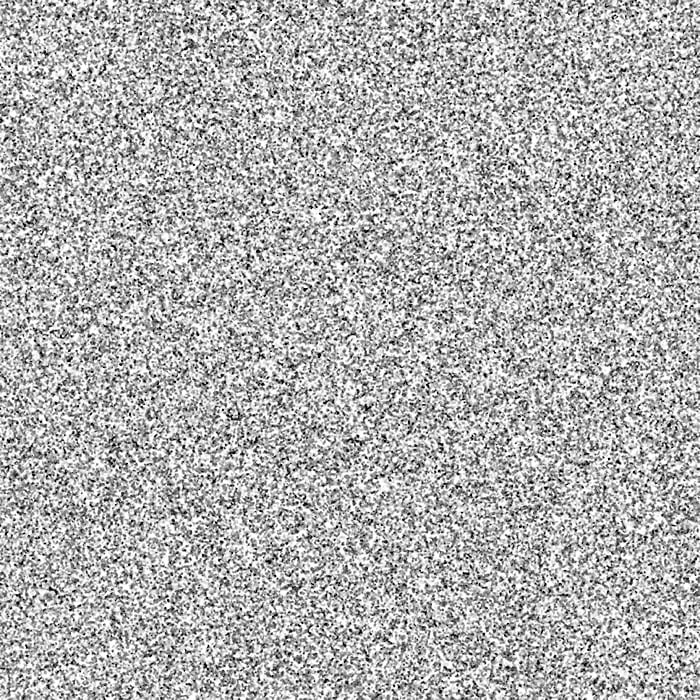
Monochromatic glitter texture
Step 1: Merge Layers
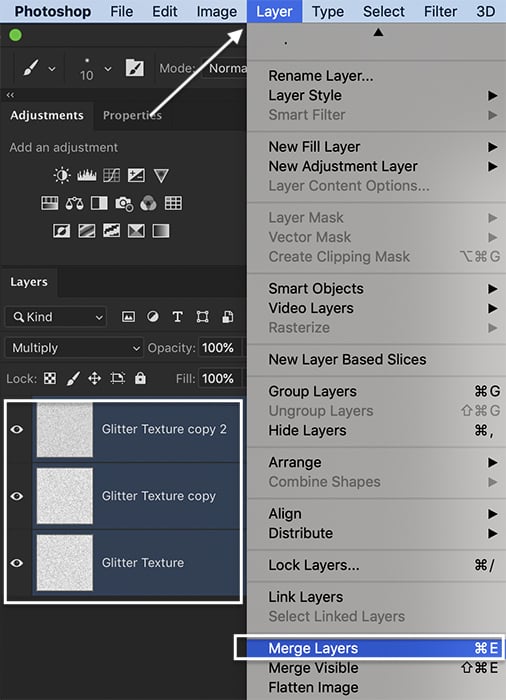
Highlight all layers ((hold Ctrl or ⌘) and go to the Layer drop-down menu. Select Layer > Merge Layers (Ctrl or ⌘E). This collapses the layers into one.
Step 2: Define (Name) the Pattern
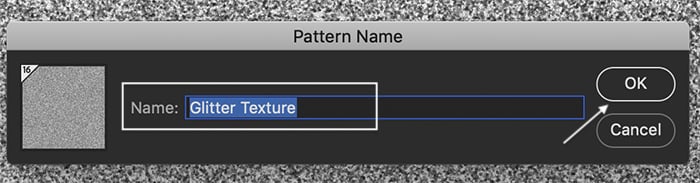
Go to the Edit drop-down menu. Select Edit > Define Pattern. Give your pattern a name and click OK.
Step 3: Apply Pattern to New Layer
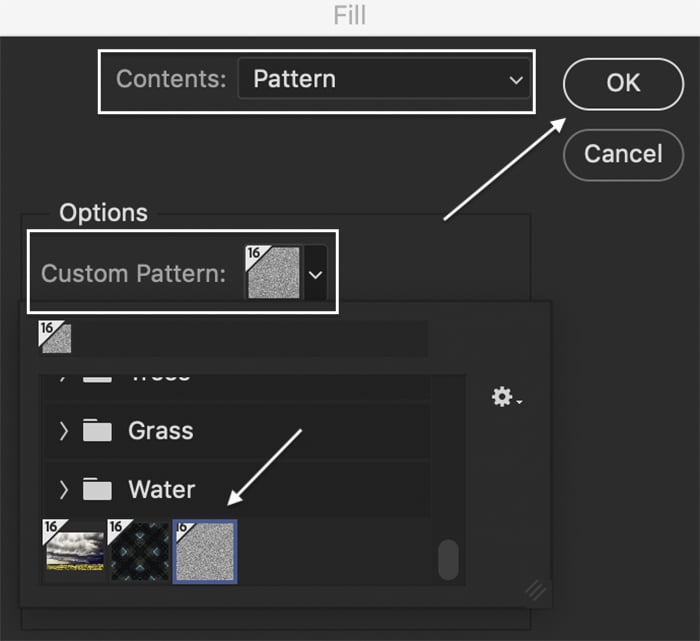
Your glitter pattern in Photoshop is ready to use. Open a new file or a new layer. Go to the Edit drop-down menu. Select Edit > Fill. In the Fill window, set Contents to Pattern. Open the Custom Pattern menu. Your new glitter pattern should be at the bottom.
Click OK.
You can add glitter any time you want! You can also access your pattern from other tools like the Paintbrush and Paint Bucket. Now, let's add some color.
How to Add Color to the Glitter Texture
Step 1: Add Fill Layer
To add color to your glitter texture, open the Layer drop-down menu. Select Layer > New Fill Layer > Solid Color. Name your color layer.
Click OK.
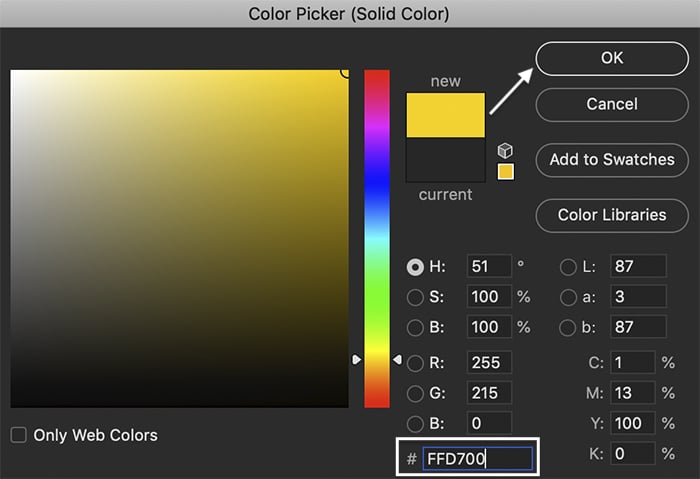
In the Color Picker (Solid Color) window, select the color you want to use as the basis for your glitter. To make gold glitter, type FFD700 next to the # symbol. But you can use any color.
Click OK.
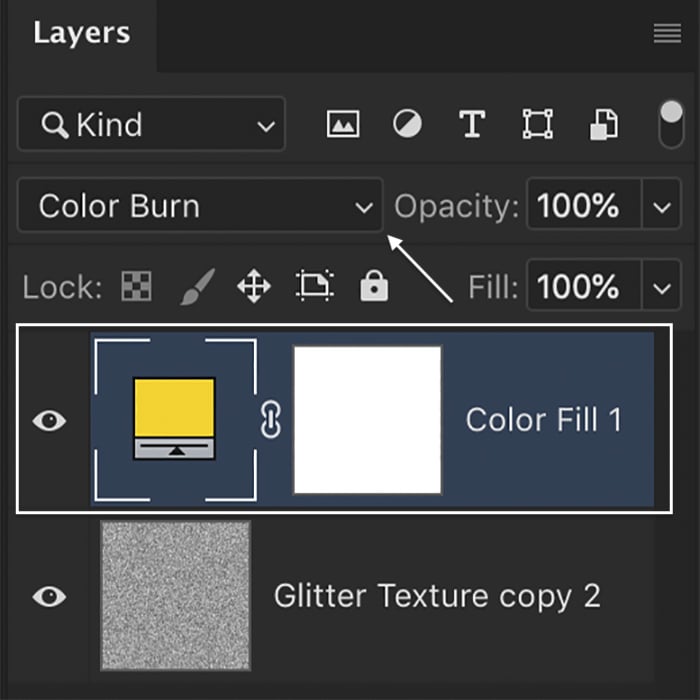
Step 2: Change the Blending Mode
Highlight the Color Fill layer. Change the blend mode to Color Burn or Soft Light. Soft Light will give you a lighter effect.
Double click the Color Fill layer to change the color.
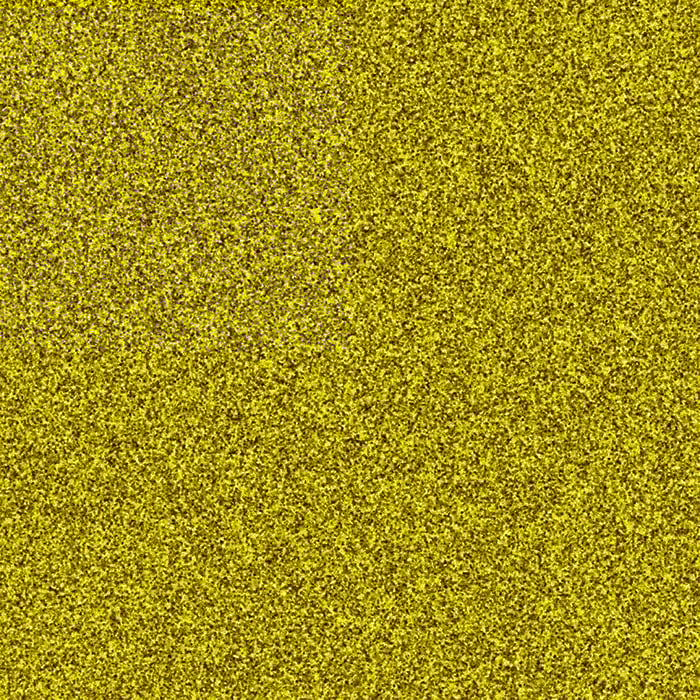
Gold glitter texture
How to Add Glitter to Text or Symbols
Step 1: Merge Layers
To apply the glitter texture to text or a symbol, merge the Color Fill and Texture layer. Highlight both layers and go to the Layer drop-down menu. Select Layer > Merge Layers (Ctrl or ⌘E).
Step 2: Add Text or Symbols
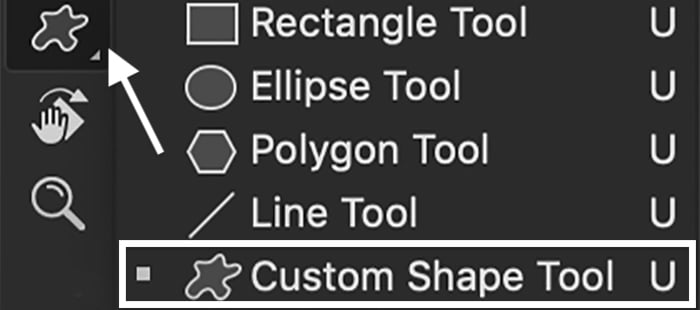
Use the Text tool to type text. Or open the Shape tool menu and select the Custom Shape tool. Choose from shapes in the options menu (more shapes are available online to download.) Merge layers with text and symbols into one.
Step 3: Drag the Color Fill layer to the Top
Drag the Color Fill layer to the top of the Layers panel. This applies the color to the layers below.

Step 4: Create a Clipping Mask
To let the text show through, highlight the Color Fill layer and go to the Layer drop-down menu. Select Layer > Create Clipping Mask.

How to Create a Glitter Ombre Effect
You can make a glitter gradient in Photoshop by using a layer mask. The texture fades out, creating an ombre effect (colors and tones shade into each other).
Step 1: Merge Layers and Add a Layer Mask
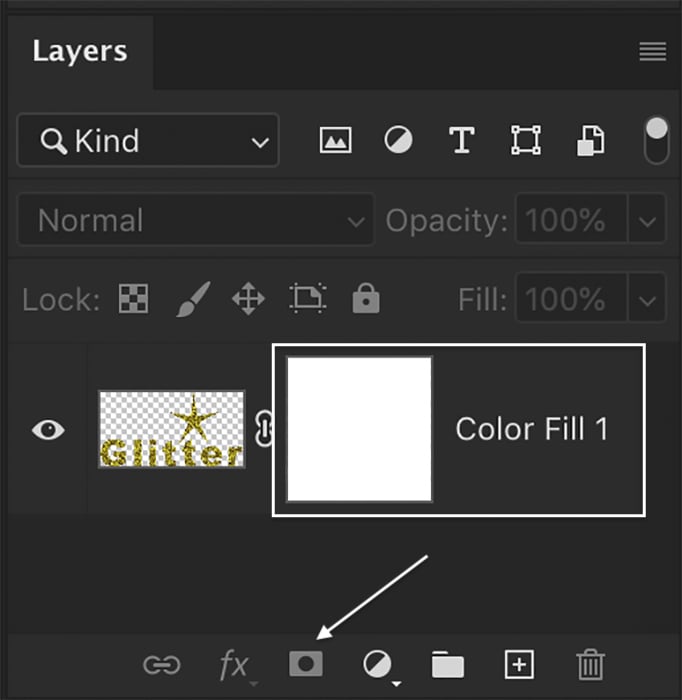
Merge text and texture layers. Select Layer > Merge Layers (Ctrl or ⌘E). At the bottom of the Layers panel, click the Layer Mask icon. Or go to the Layer drop-down menu and select Layer > Layer Mask > Reveal All.
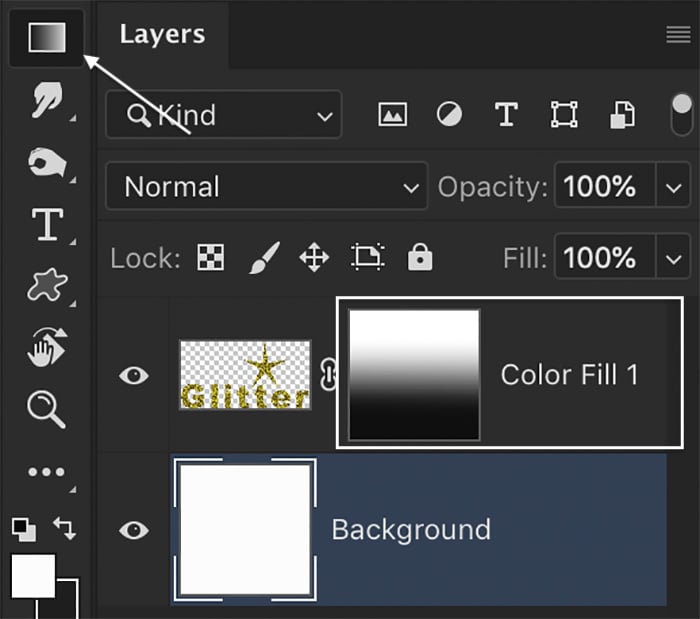
Step 2: Add a Gradient to the Layer Mask
Add a gradient to the layer mask by selecting the Gradient tool from the toolbar.
Highlight the layer mask. Drag up in your canvas to apply a gradient. Experiment with where you start and end the gradient. This determines how much the texture will fade.
 Conclusion
It is easy to create a glitter texture in Photoshop. Adding color to the texture and applying it to text or symbols takes only a few additional clicks. Once you have made your glitter texture and saved it as a pattern, you can apply it to new files in any color you want!
Are you looking to improve your photos with the click of a button? You should check out The Preset Collection for shortcuts to perfection!


