Do you want to change the color of an object, the sky, or the ground?
You can change the color of an object in Photoshop. Actually, you can change the color of anything in Photoshop. And there are a lot of different tools available to do it.
In this article, I’ll teach you how to change a color in Photoshop.
How to Change The Color of An Object In Photoshop
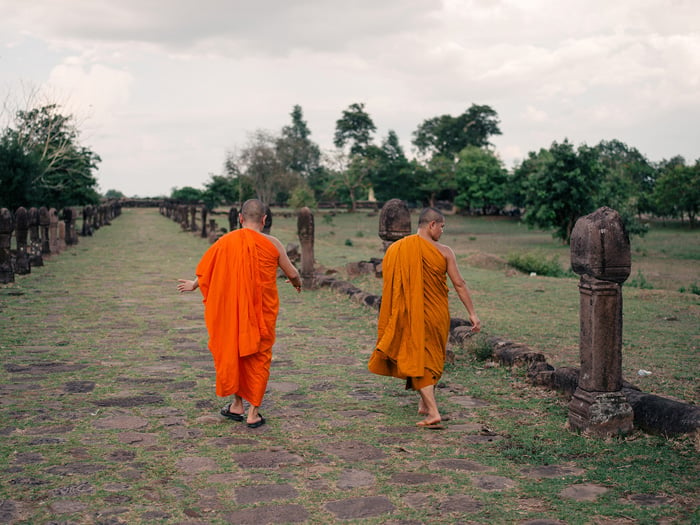
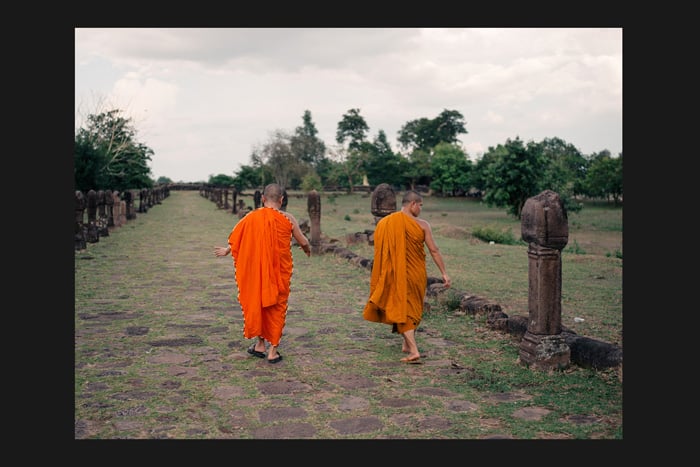
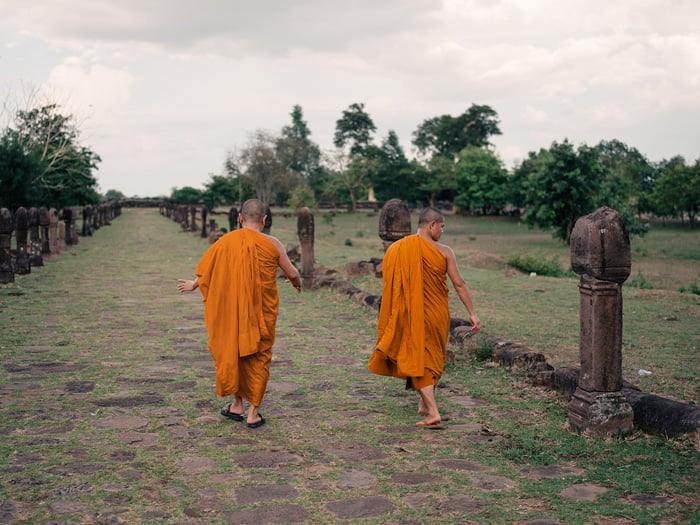
Let’s start with changing the color of an object. The monks in this photo are both wearing robes, but the colors don’t match.
I want both robes to be the same color.
Step 1. Color Range
First, let’s make a quick selection of the color we want to change, in this case, the brighter orange robe.
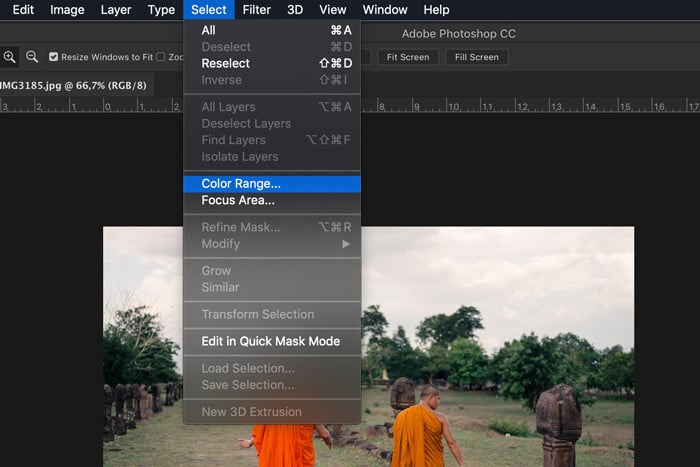
Go to “Select” in the top menu and select “color range.”
Select “sampled colors” from the drop-down menu.
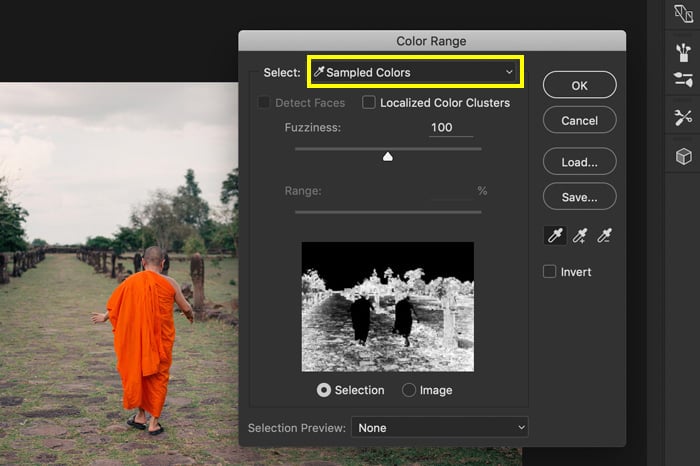
The cursor changes to a pipette. Now, click on the color you want to change in your photo. In my case, the orange robe of the left monk.
In the preview thumbnail, you can see your selection. White areas are part of the selection.
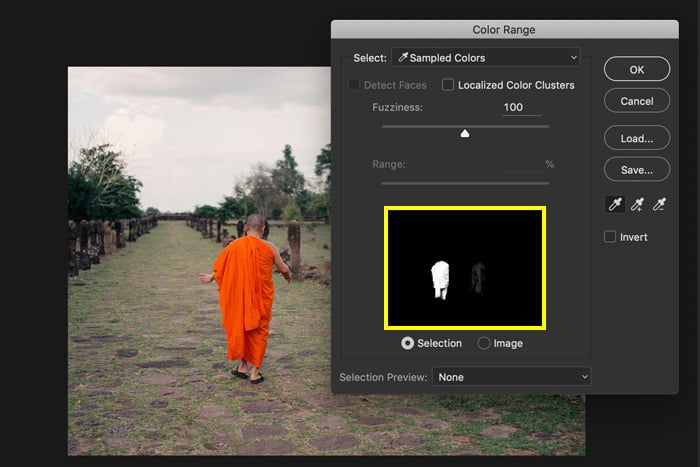
Now, drag the Fuzziness slider to the left or right to add or remove from the selection. It doesn’t have to be perfect. We’ll do that in the next step.
The more you slide it to the right, the more shades of orange will be selected.
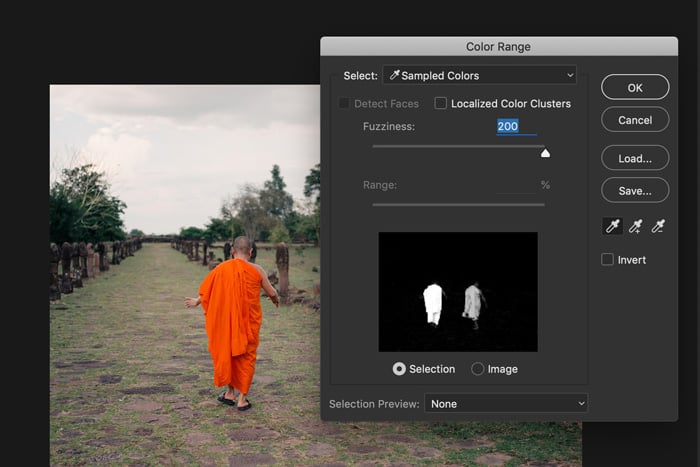
I’ll leave it at 100 for my example. Click OK. This is what my selection looks like now.
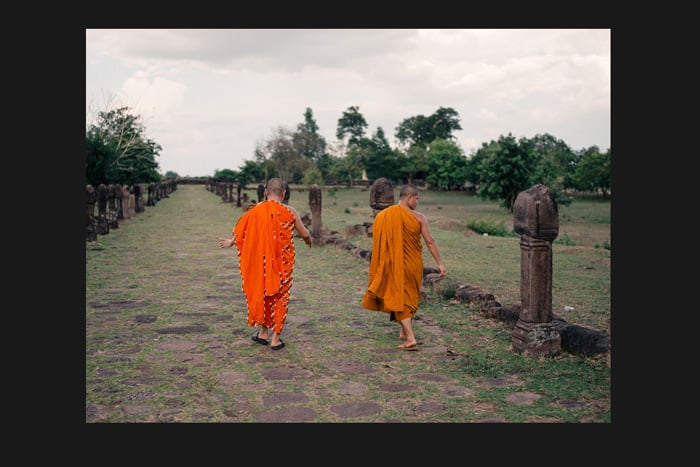
Step 2. Edit the Selection In Quick Mask Mode
The selection needs to be edited because some of the darker shades of orange on the robe aren’t selected.
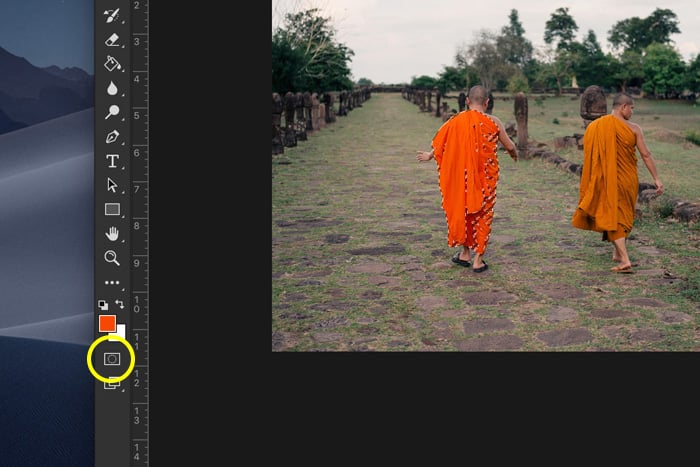
Click on the Edit in Quick Mask Mode icon in the toolbar. A red overlay appears.
In the Channels panel, click on the eye next to the RGB layer. The red overlay will change to a black and white one.
If you can’t see the Channels panel, go to Window in the top menu and select “channels.”
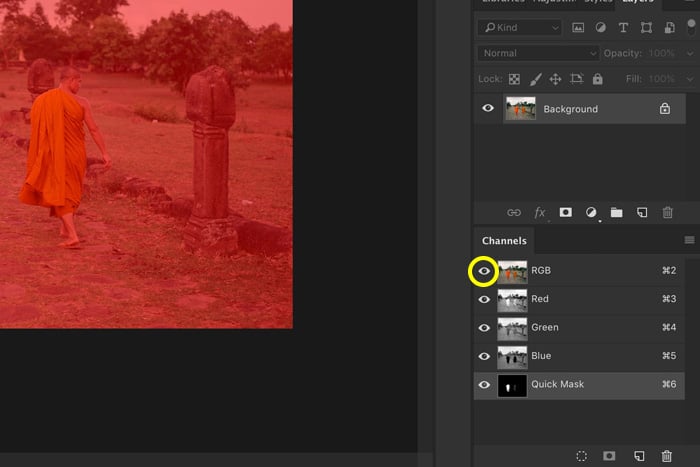
Now, you can see where the selection needs to be edited. White areas are part of the selection.

Select the Paint Brush from the toolbar. Now start painting with black or white. The goal is to make a clean white selection of the object whose color you want to change.
You can easily switch between black and white with the “X” shortcut.
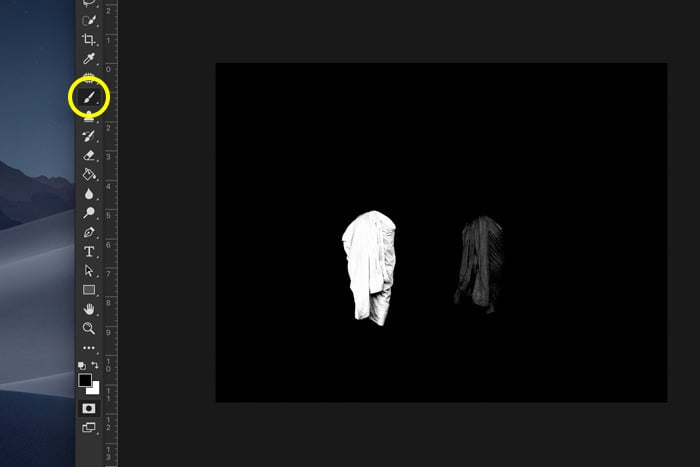
My selection now looks like this.
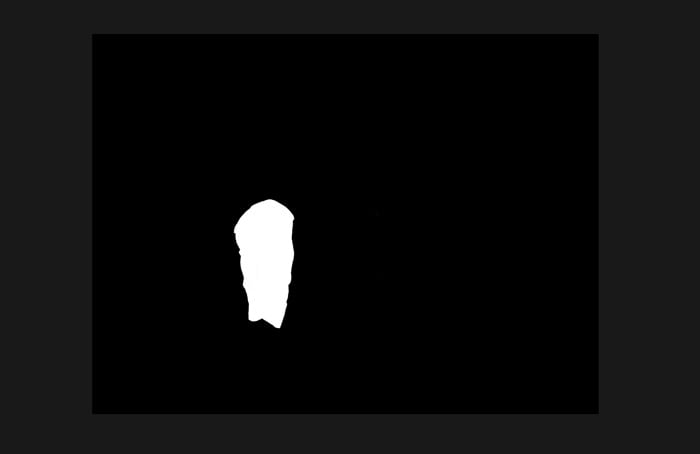
When you’re finished, click once more on the eye next to the RGB layer in Channels.
Then, click on the Edit in Quick Mask Mode icon in the toolbar again and the selection appears.
Step 3. Hue/Saturation
Click on the Create New Fill or Adjustment Layer icon and select “Hue/Saturation.”
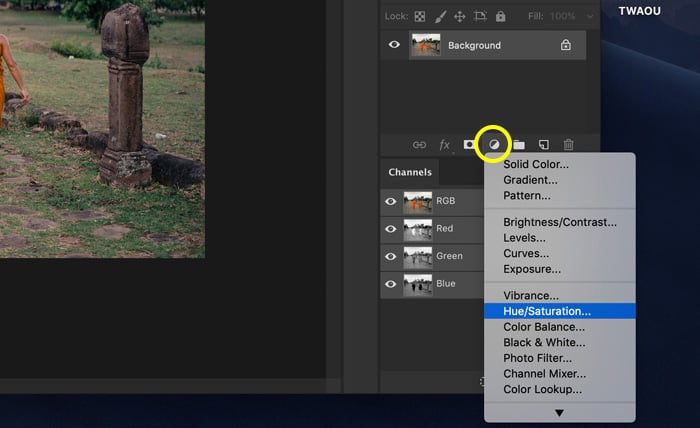
Drag the Hue and Saturation sliders to change the color of the selection.
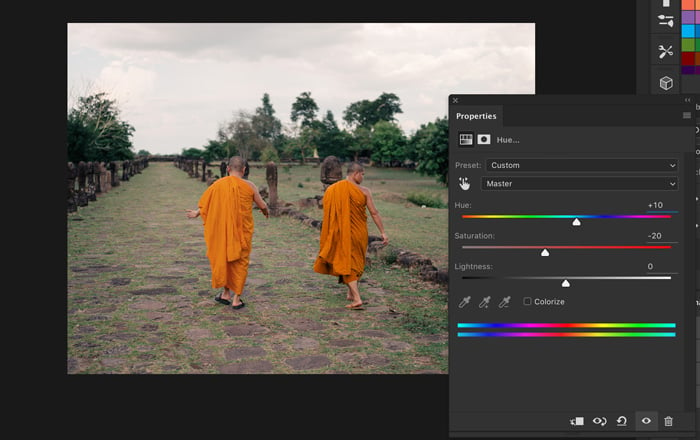
Step 4. Blending Mode
Now let’s add more contrast and depth to the robe.
Alt + Click on the layer mask thumbnail to reselect the robe.
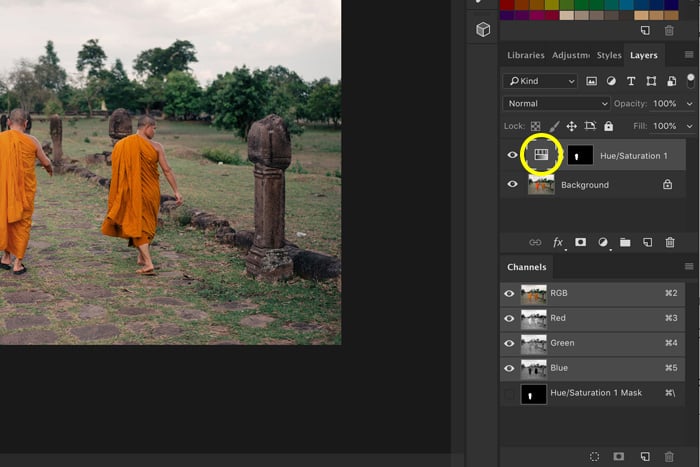
Select the Background layer. Use shortcut “Cmd + C” and “Cmd + V” to make a copy of the selected object. (It’s “Ctrl + C” and “Ctrl + V” for Windows.)
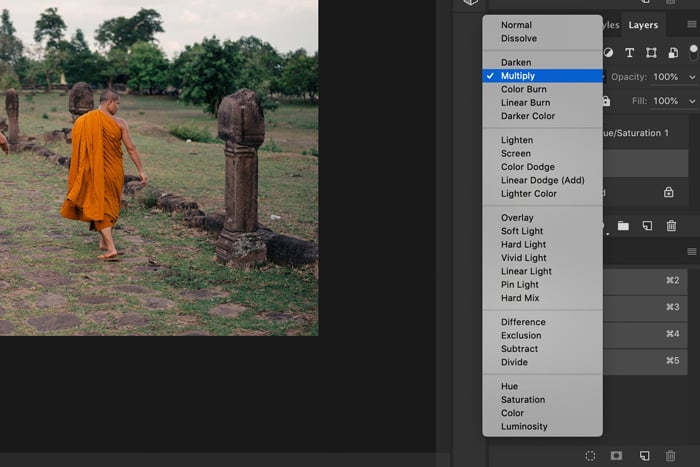
Set the Blending Mode of the new layer to Multiply.
Double click on the Layer thumbnail of the Hue/Saturation layer. Adjust the colors again.
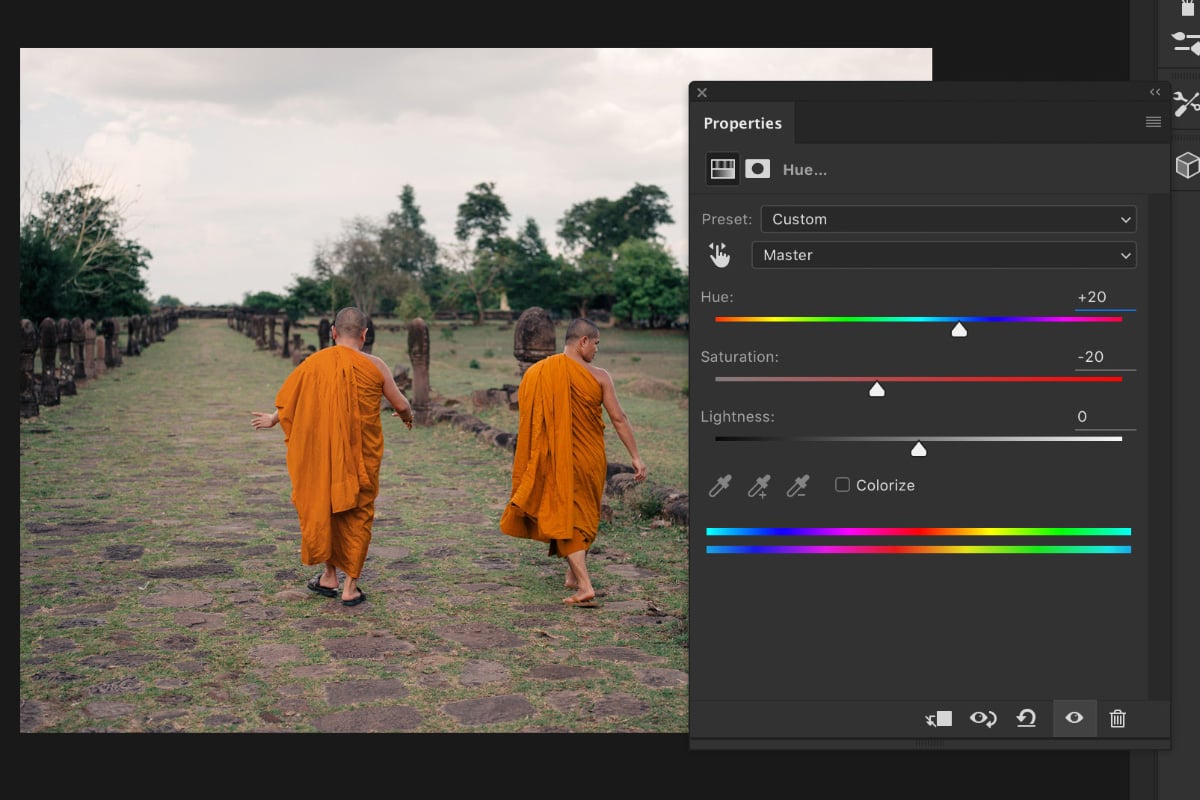
Here’s the result.
How to Change the Color of the Sky in Photoshop
Changing the color of the sky is fairly easy. It’s best to make subtle changes for a natural looking result.
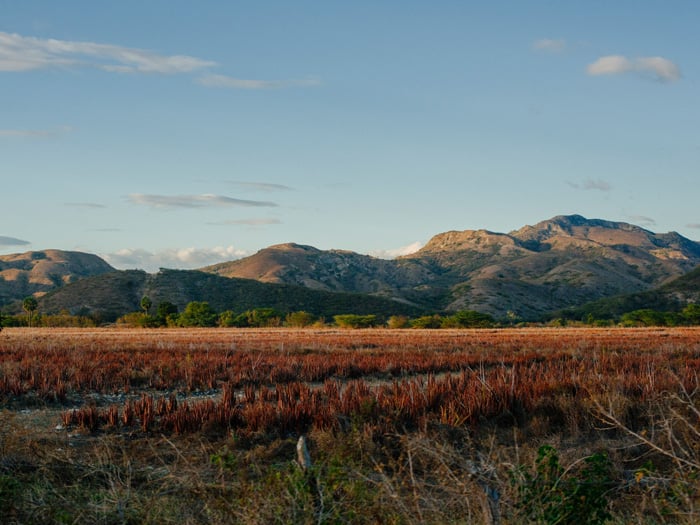
I’ll change the color of the sky in this photo to a warmer shade of blue.
Step 1. Make a Selection
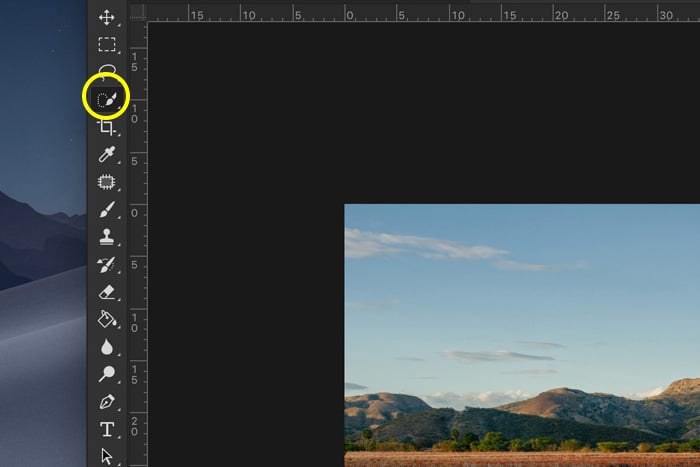
Click on the Quick Selection tool from the toolbar and make a selection of the sky.
Step 2. Change the Color
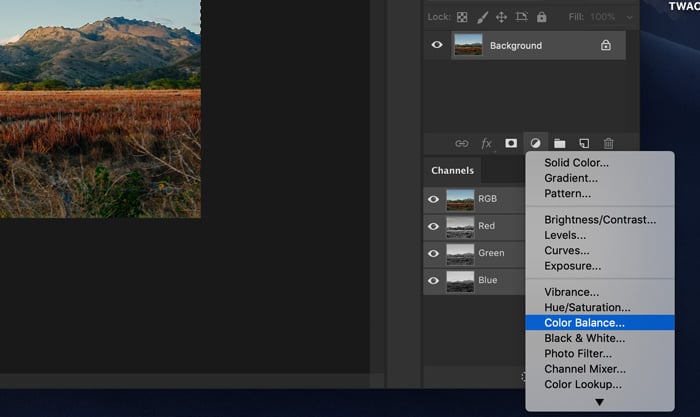
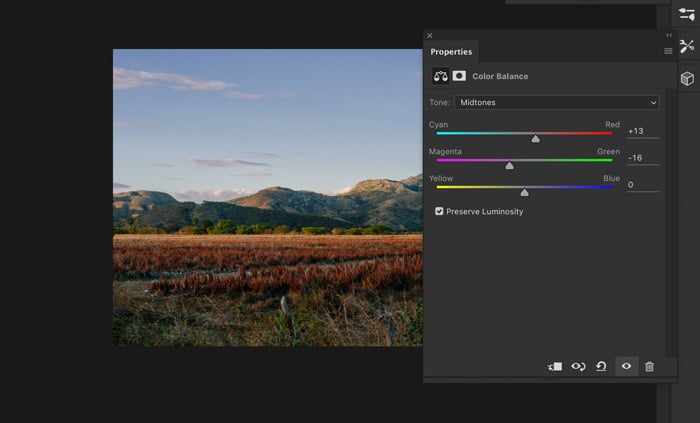
Click on the Add New Fill or Adjustment Layer icon and select “color balance.”
Drag the sliders to the left or right to change colors.
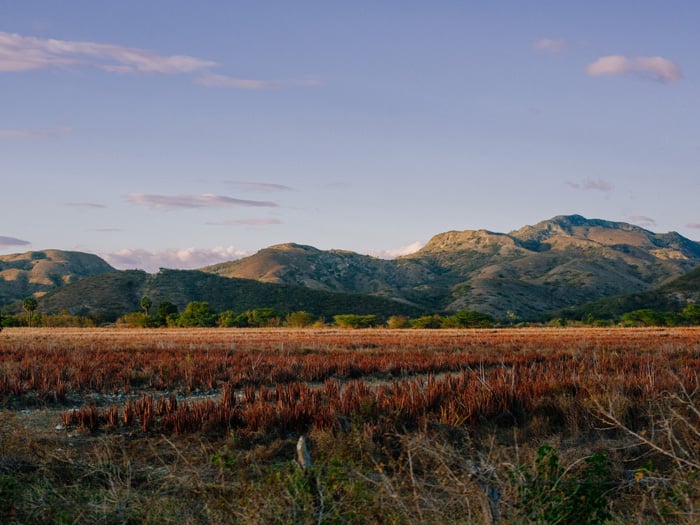
This is the result.
Conclusion
Now you know how to change the color of an object in Photoshop. Whenever you want to change a color, start by making a selection and take your time. The quality of your selection decides if the end result will look natural.
Also, don’t forget to match the lightness with contrast. Everything has to look realistic for a convincing end result.
Check out our Effortless Editing with Lightroom course to become a master of editing your photos!


