Photography has always been a great way to show our own perspective of the world. And this article will teach you how to turn photos into paintings!
These days we have powerful tools to add more of our personal vision to the images. One of them is Adobe Photoshop. This software allows us to modify our photos by adding filters and layers, transfer elements from one photo to another, eliminate unwanted elements and that’s just the tip of the iceberg.
Thanks to Photoshop we can be much more creative, possibilities are endless and sometimes a bit intimidating. But if you want to try an easy and satisfying way to give your photos a bit of an artsy look, editing them so they look like a painting is a great way to do it.
Turn Photos Into Paintings: What You Need
- The original photo you want to turn into a painting (I recommend you use a high resolution one. I usually work with 300ppi images)
- A photo of a painting you like. In this tutorial I use a post-impressionist painting because I love both this movement and artistic style. But you can choose pictures of any type. I recommend you make a collection of paintings and pictures with different color palettes so you can try and experiment with them. (Note: you can totally turn a photo into a painting without using a picture, but it is fun to try it.)
- Adobe Photoshop software. Mine is version CS6, so if you are using a different one, you might find some little differences between what I explain and what your software looks like.
Prepare Your Images to Turn Them Into a Painting
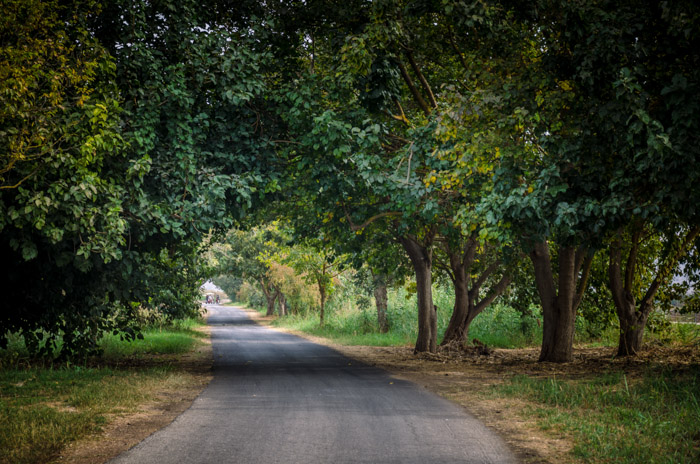
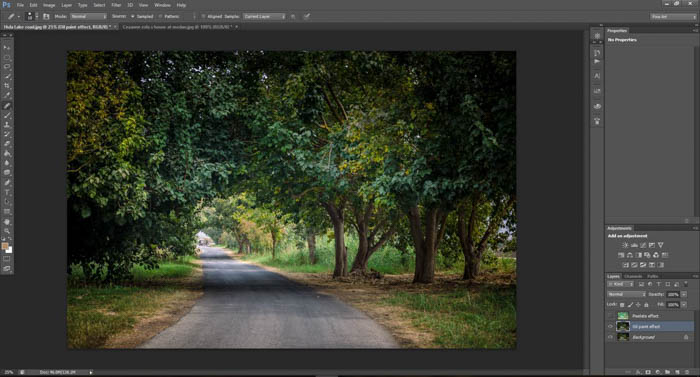
My original photo is one of a beautiful road. I took this picture during a trip to the Hula Lake in Israel.
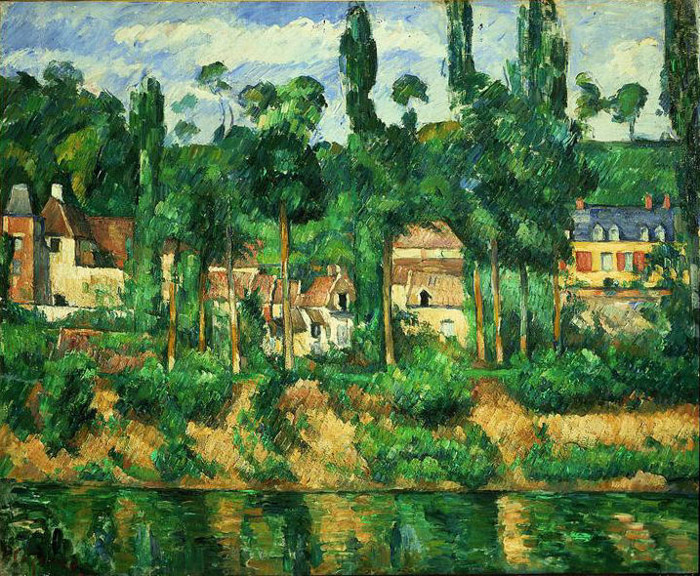
The painting I decided to use is Zola’s House at Médan, by Cézanne (1881).
What You Need to Do to Turn Photos Into Paintings
1. Open Your Images in Photoshop
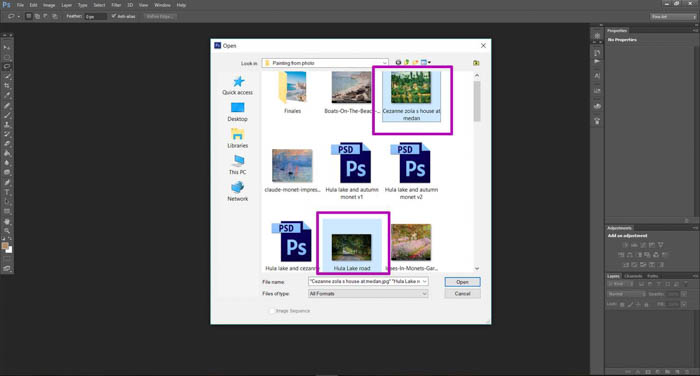
The first step is to open both the photo you want to edit and the image of the painting you want to use. To do so, open Photoshop, click on File in the toolbar and click on Open…
This will open the file selection window. Now you can select the files.
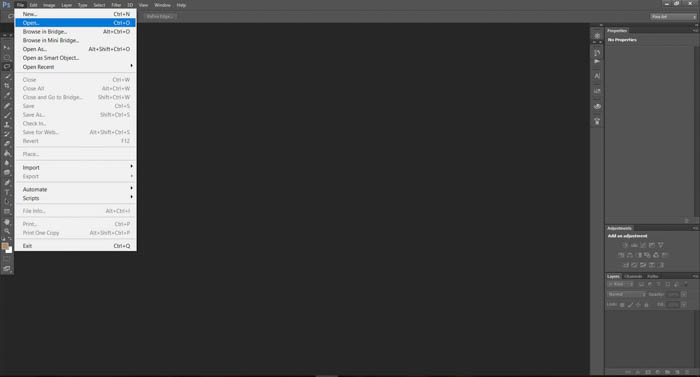
You can select both of them at the same time to make it a bit faster.
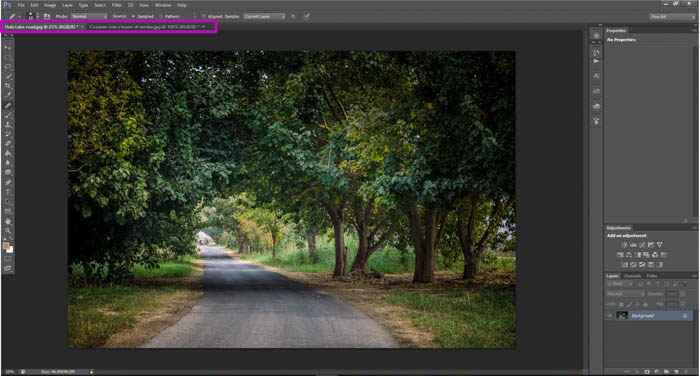
The images will appear in two different windows. Note that the image you are looking at has its name in a lighter shade.
You can switch between the picture you see by clicking on the picture’s name.
2. Prepare Your Image to Apply the Effect
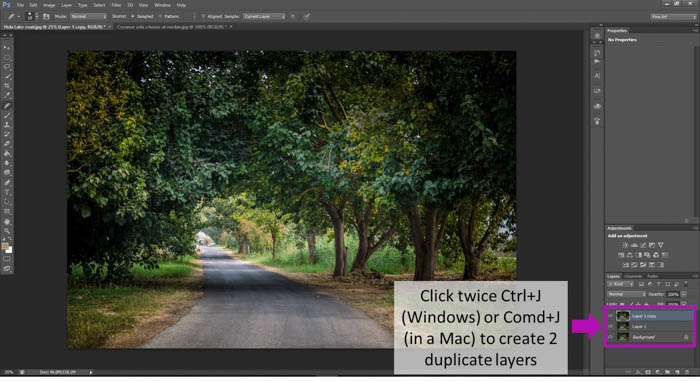
To do this, you need to create two new layers in your image window.
You can do it using the toolbar by going to Layer>New>Layer or you can use the shortcut Ctrl+J if you are a Windows user or Comd+J you use a Mac.
Repeat the action in order to get two layers. You could see that new layer icons will apear near the bottom right corner of the screen, newer layers will be located at the top of the list.
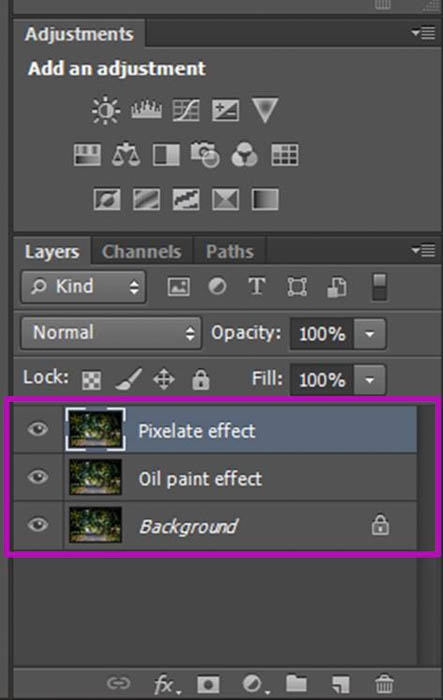
3. Rename Them as Pixelate and Oil Paint Effect
This step is optional, but I recommend you to do it to have it all well organised.
You can rename the layer by double clicking on its name.
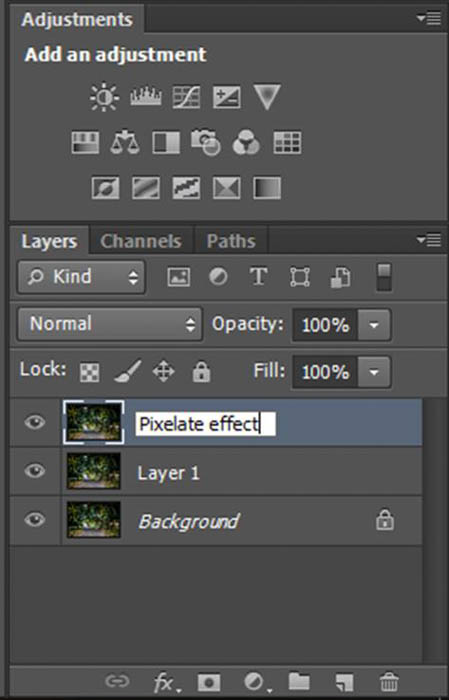
Rename the one called "Layer 1" as "Oil paint effect" and the one called “Layer 1 copy” as "Pixelate effect". Note that the order is important here.
Adding a Pixelation Effect
First of all, we are going to match the colors from the painting to the photo. It might sound complicated, but it is really not!
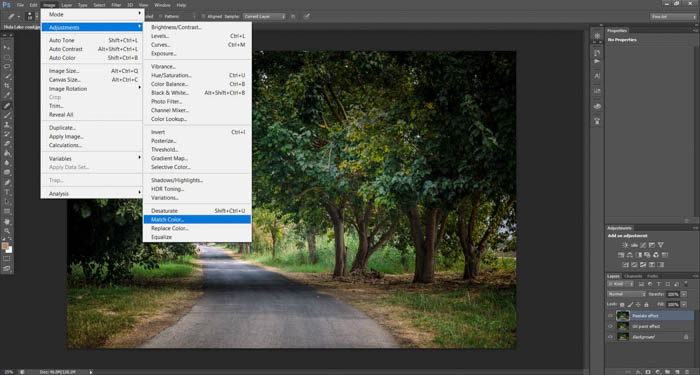
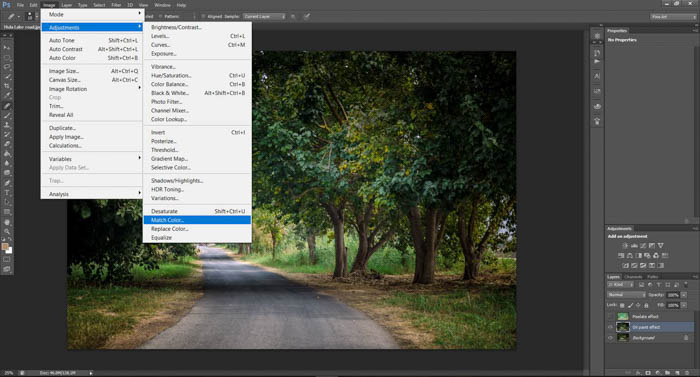
Make sure you are on the Pixelated effect layer, the small image in the layer list should have a frame around it. If it’s not so, simply click on the image near the name of the layer. once that’s done click on Image in the toolbar>Adjustments>Match colors.
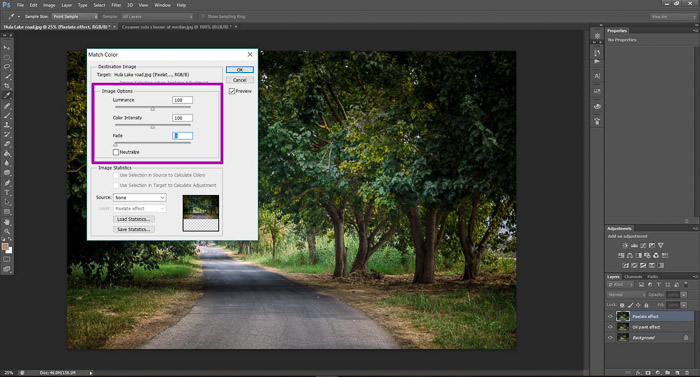
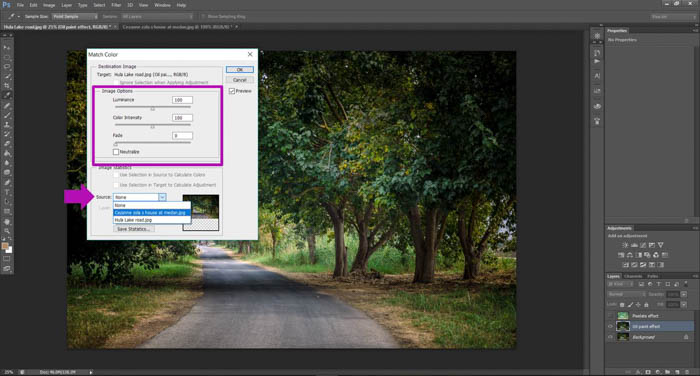
A screen will appear with several settings. I leave “Luminance” and “Color Intensity” at 100 and “Fade” at 0.
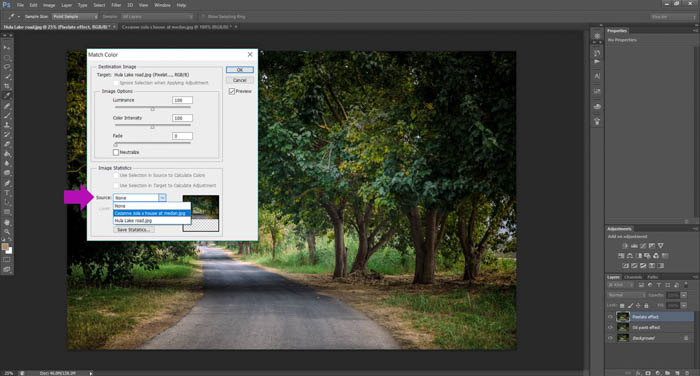
Then, in the field Source, select the image you want to copy the colors from and press OK.
To give it that painting feeling, we are going to add a bit of a pixelation. This imitates the irregularities paint tends to have over canvas.
To do so, Click on Filter in the toolbar, go to Pixelate and click Pointillize.
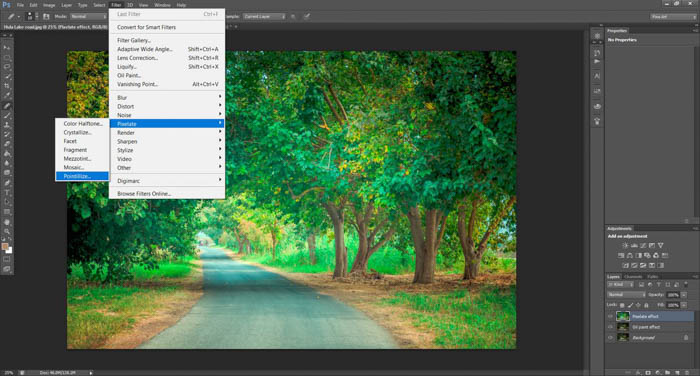
Select the point diameter you like. I prefer them to be small, so I usually select the minimum possible diameter. In this case, I set it on 3. You can play and experiment with different values and see the affect in the preview display.
When you are happy with the effect you’ve created press OK.
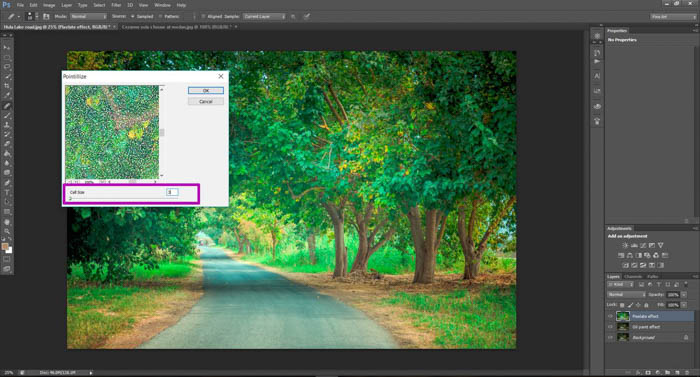
At this point your photo will have a really heavy pixelated effect:
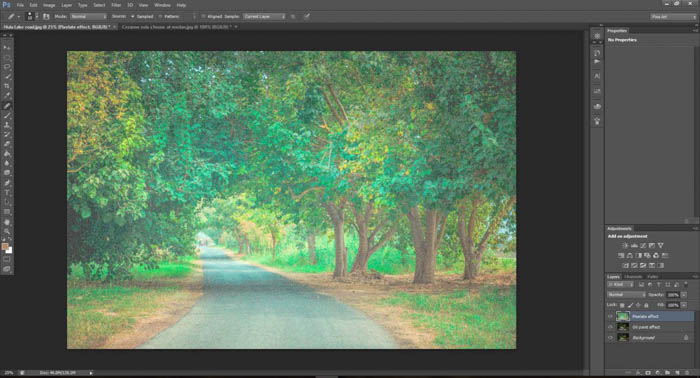
You can make the pixelate effect a bit more subtle by resetting the opacity to a lower value. To do so just enter a new opacity percentage at the bottom right of the screen, in the field "Opacity".
I usually set it at 40-50% and it works really well.
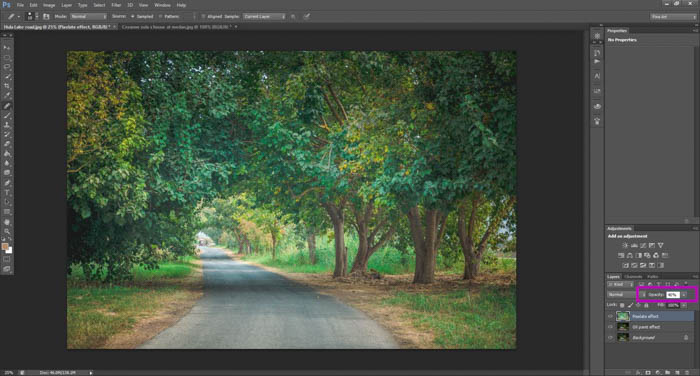
With that done, you are all set regarding the pixelated effect. We can now move on to work on the Oil paint effect.
Righ now we have the Pixelate layer displayed on top of our image. If you want to see the effects of the changes we’ll make using the Oil paint layer, just click on the eye icon located on the left of the Pixelate layer. This will hide away all the effects you did without deleting them.
Adding a Photoshop Painting Effect With The Oil Paint Filter
We are going to start in the same way as we did for the Pixelate effect: matching colors.
Like you did earlier, select Image go to Adjustments and click Match colors, select the same settings and pick your paint as the source for color matching.
The oil paint filter works in a slightly different way than the pixelated one.
click on Filter in the toolbar and select Oil paint.
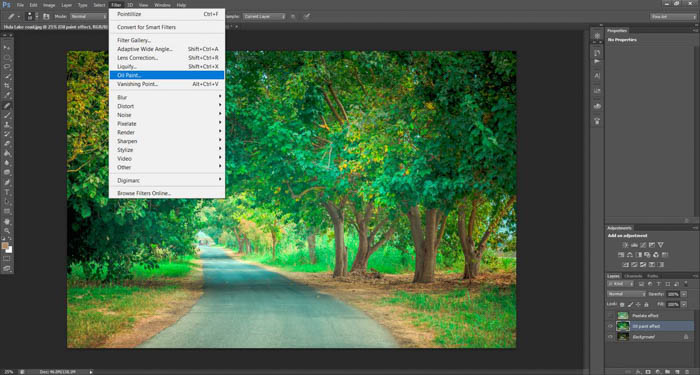
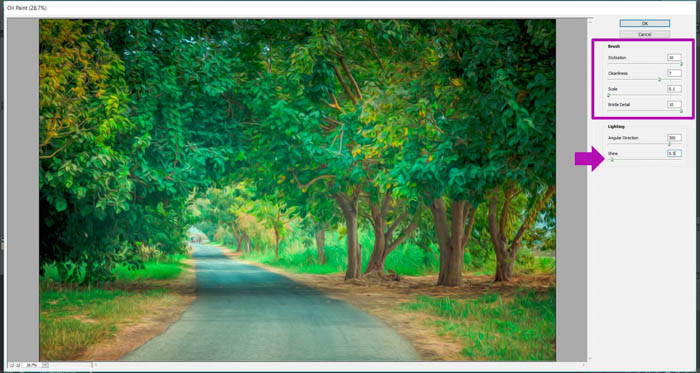
A new window will open. Here, you can choose different settings.
I will tell you what I use so that you have a starting point, but feel free to experiment here.
Select Stylization 10, Cleanliness 7-8, Scale 0.1, Bristle Detail 10, Shine 0.5 and click OK. You can see the effect of these setting on the image, it looks much more like a painting!
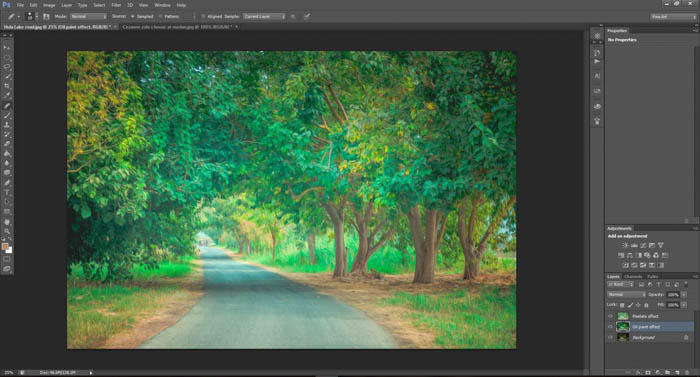
Activate the pixelate layer (if you deactivated it before) by clicking on the same spot you did in order to hide it earlier. At this point most of the job is done.
We just need to do some final retouches.
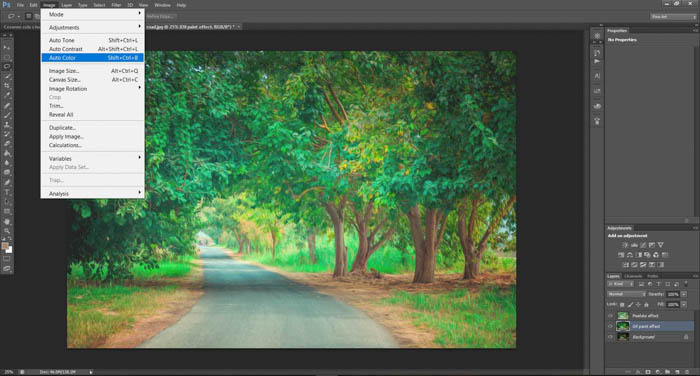
Some Final Adjustments
Go to Image and click on the Auto Tone, Auto Contrast and Auto Color. If you apply something you don’t like, you can undo it by clicking Ctrl+Alt+Z if you’re using Windows or Comd + Z if you use a Mac.
This combination is the general shortcut for undoing your last action in Photoshop. It is quite handy.
And that’s all! That’s how you make your photos look like paintings using Photoshop!
I want to point out though, using impressionist and post-impressionist paintings, I noticed that it is common to get really saturated colors. If you want your picture to have a lower color saturation, you can do that by adding a saturation layer on top of all the previous layers.
To do so, first of all make sure you are in the last layer.
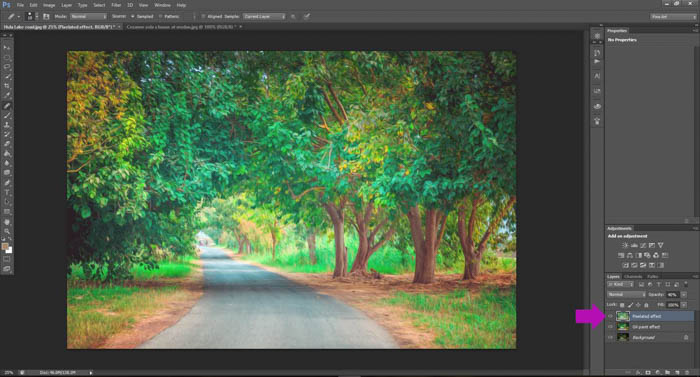
Now click on the little icon I marked in the image below. This will create a new hue/saturation adjustment layer.
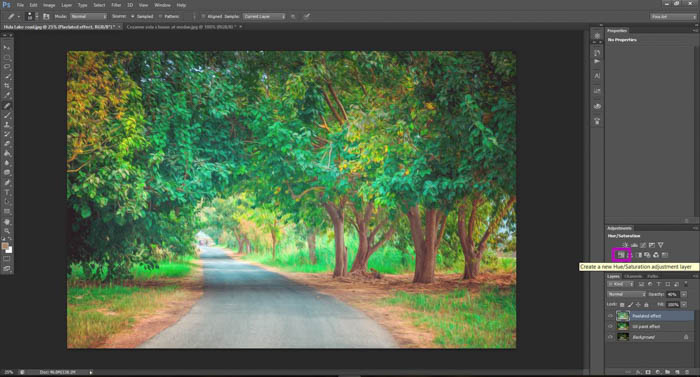
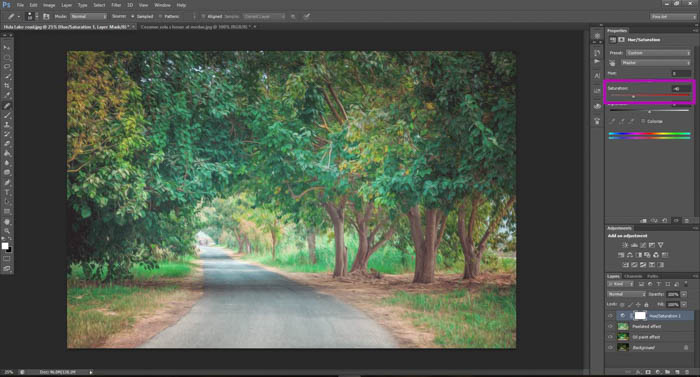
After you click the icon you will see that a new layer has been created and that now at the left of the screen you have several bars and other options. You can decrease the saturation level by moving its slider to the right.
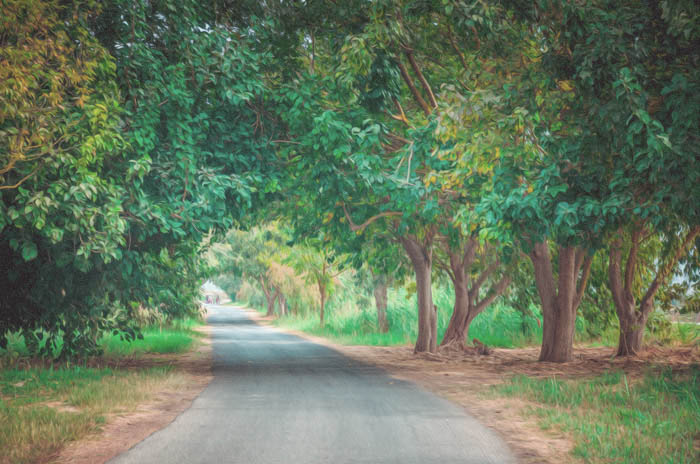
And that concludes this tutorial! You have transformed your photo into a beautiful oil painting using Photoshop, I hope you are happy with the result!
Keep in mind that different settings and source paintings will give you different results. Play and experiment different combinations to see what you can do, also try creating the effect without using source painting and see what happens! Good luck and enjoy!
We have a great article on using selective color in Photoshop or creating cool Photoshop lighting effects you should check out too.
