You’ve just finished a photo shoot. But when you take a look at your photos, the light just isn’t right. Is it dull and boring? Don’t worry! You can create your own lighting effects in Adobe Photoshop.
This article will show you how to add cool Photoshop lighting effects to your images.
How to Create Lighting Effects in Photoshop Using Stacked Light Sources
This is not, strictly speaking, creating your own lighting effects in Photoshop. But layering different images together to create a longer stream of light is still an efficient tool.
Layering also allows you to add several light flows into one image. This intensifies the light flow, which is useful when photographing light motion trails.
This technique is often used for car light trails. Today we’re going to look at how it can be applied to boat light trails.
Boats won’t give you super fast speed lighting effects, like a car would. That means you’ll need to stack several images together. That way the light will flow continuously through the photo.
Car light trails make for great stock images, if you’re wondering why you should learn this.
How to Choose the Location for Your Photos
You’ll need to choose a location where you know there will be a regular flow of boats. A popular location for that might be somewhere like Venice, but anywhere with boat traffic will work.
Compose your photo, and begin taking your photos. You will need to lock your shutter to take photos continuously. That means using an external shutter release cable. And one that allows you to lock the shutter until you’re finished.
Aim to expose at 30 seconds per photo, and adjust your other setting accordingly. Now keep taking photos until you feel you have enough light trails to work with.
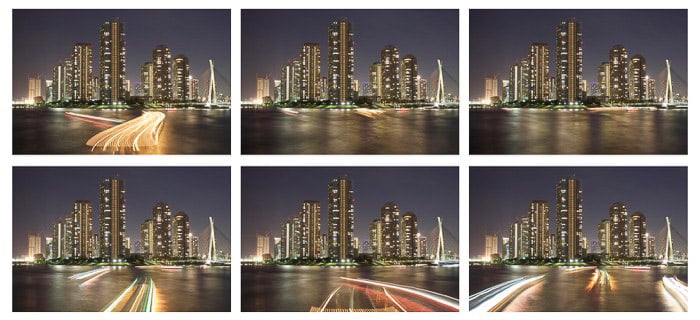
In this photo there are several photos that need to be merged together using photoshop.
Import the Images to Photoshop
The chances are you’ll have many photos, and some that have no light trail, or a light trail you don’t wish to use.
Go through the images you have, and decide which ones you want to turn into light trails. One continuous light trail from a boat is likely to mean around 4 images, it might be more or maybe it’s less.
Now you have these images, go ahead and import them into Photoshop.
How to Layer Your Images
The lighting effects that you’re going to produce requires some paintbrush work.
Let’s look at how you layer the images to produce the final result.
- Layer the images on top of each other. Aim to do this in the order that the light trail moves away from the camera.
- Apply the black layer mask to your layer. This will hide it from view. Do this for all your layers, and you should be left with the background image.
- Now you’re ready to reveal the light trails. The aim is to only paint in the light trail. In order to do this change the blending mode to lighten. Now only light areas of the image will be painted in.
- You have used a black layer mask, so make sure you have a white paint brush to add in the lighting effects.
- Now paint across the layer to reveal the light trail.
- Repeat this on each layer, until you have one complete light trail through your image.
- You can also add more than one boat light trail. As long as you have the images to do so, you can then repeat steps 1-6.
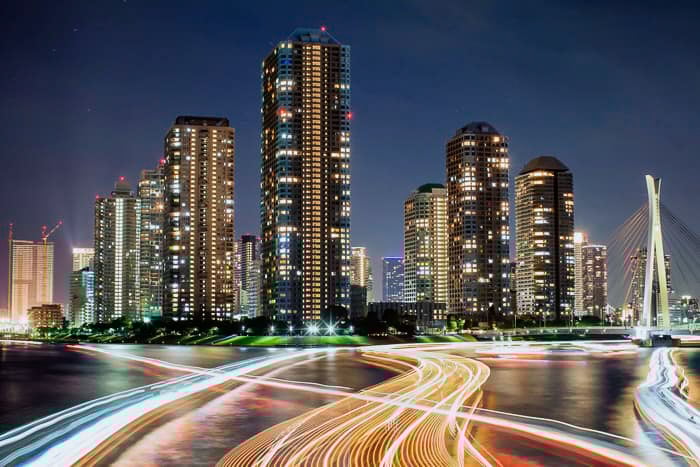
The final image shows how the light trails have been merged. A lighting effect in post processing.
How to Add Lighting Effects to Your Image
Another way to add light trails to your photos is to simply create them using Photoshop. There are a number of approaches to do this.
One of the best is to use the paintbrush tool. Follow these steps to create your Photoshop light painting!
Create Your Light Path
- Choose an image you feel will work well with added light streaks. This might be a portrait, or an architecture photo where you wish to frame the subject using this technique.
- Once you have your image, import it into Photoshop.
- Now create a blank layer, this is where you’ll create your streak of light.
- Now select the pen tool. Create an interesting line using this tool, the anchor points can be used to manipulate the curvature of the line. To do this hold down the mouse and drag the anchor in your desired direction.
- Once you are satisfied with your line it’s time to save it. To do this click the path tab, it’s next to layers and channels. Double click your path, and name it “light painting“.
Paint the Path With a Brush
- The next step is to get your brush ready. There are several preset brushes you can use. For this guide you can use preset 100. Now in the brush tip shape menu adjust the spacing of the brush. To do this use the slider at the bottom of the tab, and set it to 2%.
- The brush is almost ready, but now you’ll want to select the shape dynamic. In this menu make sure pen pressure is selected.
- Now you’re ready to paint, so return to the path tab and select your path. To the right of the path tab you’ll see a menu tab, and you’ll want to select this. Within this menu you’ll see an option to “stroke path”.
- Now a new tab will appear. In this tab make sure you have the brush selected, and you select “simulate pen pressure”.
- Your simulated light stroke is ready, but to make it look like light you’ll need to give it some glow. To do this select the layers menu.
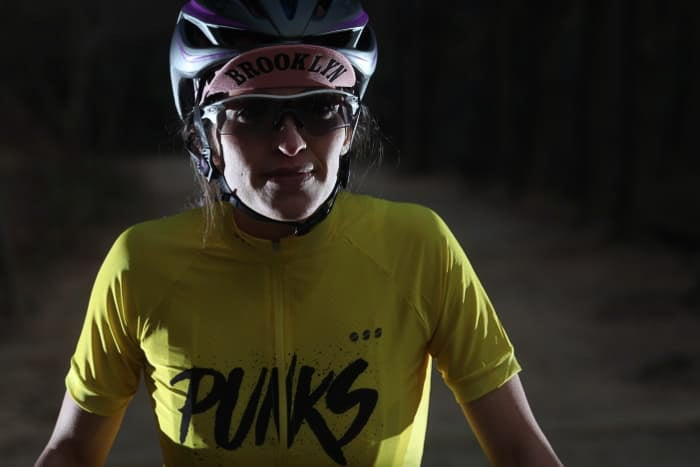
This shows the original image without processing.
Customize Your Lighting Effects
- In the menu at the bottom of the screen you’ll see an fx tab, select this.
- In the fx tab you’ll find the two options you need, outer and inner glow. Select the inner glow option.
- You’ll see a square color block, and you’ll want to change this to your desired color. Do this either with the dropper tool, or by simply selecting a color with the color picker.
- Now before closing the tab select the outer glow option, and repeat step 3.
Add More Streaks to Create Drama
- Now to add more interest lets add some more streaks. Return to the path tab, and now you need to manipulate the path.
- Press control on a PC or command on the Mac, and hover your mouse over the path. You’ll see the pointer has turned white, and not you can select an manipulate your anchor points.
- Adjust the line slightly, avoid big adjustments. You’ll want the line to keep more or less the same direction. But perhaps finishing and ending at slightly different points.
- Now your line is ready once again select the menu tab to the right of the path menu, and stroke the path.
- Repeat steps 2-4 until you are happy with the light line you have painted.
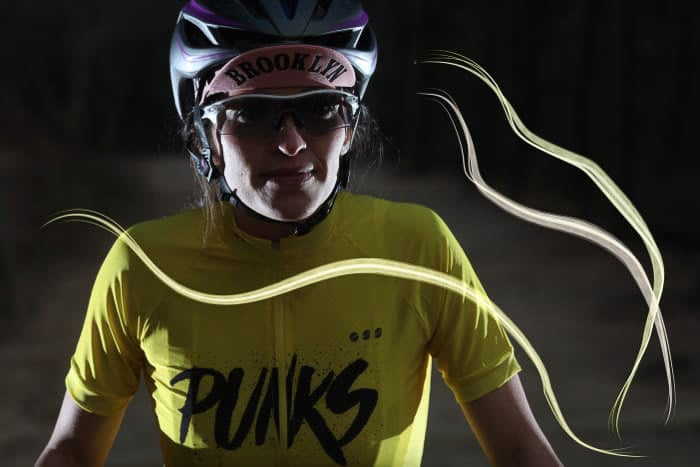
Here is the final result, using the technique described.
How to Selectively Brighten Your Image
Use Luminosity Masks
Another way to influence the lighting in your photos is to use luminosity masks. You can selectively target areas of your photo, and then either lighten or darken them.
Luminosity masks are an excellent tool to work with, and you can see how they’re made by watching this video.
Alternatively you can download the easy panel, where creation of these luminosity masks is done for you through an action.
Once you have your luminosity masks you can select them by switching to the channels tool. You’ll have various masks you can apply from light to dark.
- Should you wish to only effect an area that’s bright select one of the light luminosity mask.
- You’ll see the area is selected, and now only this area will be effected when you paint over it with a brush.
- With a black layer mask, you can now use a white paint brush to reveal your selected effect only in the area you want to change.
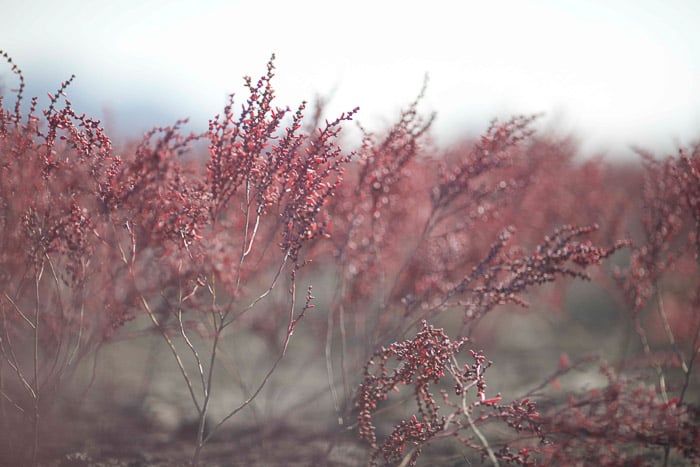
This photo of seepweed can be changed a little to add some color to it.
Use the Gradient Tool
There are images without a huge variety of bright and dark areas. But you’ll still want to selectively effect parts of your image.
This is where you can use the gradient tool to simulate a graduated filter. Apply this to a layer you have created. Click on your image, and drag a line from the area you don’t want affected, through the area you want to change.
If you start at the bottom of your photo, and drag the line up the graduated filter will be applied across the whole image, with the top being most effected.
What Effects Can You Apply
There are any number of effects you can apply through Photoshop, and different ways they can be achieved.
- Curves – These can be used to darken, lighten, or add more contrast to your photo. Go to Layers>New adjustment layers>Curves. Once you open this you’ll see a histogram, with a diagonal line running through it. You can manipulate this line by dragging it. Dragging the line up will brighten your photo. Dragging the line down will darken your photo, and giving the line an S-curve will add contrast. You can then selectively add these light effects to your photo.
- Solid color – In addition to brightening and darkening your image, you can also add the illusion of sun flare. This isn’t just about brightening the image, but also adding warmth to the area as well. To do this you’ll need to add a solid color layer. So proceed to New fill layer>solid colors. You can then choose the color. Use the color picker to choose a warm color, something that’s yellow or orange in hue. This layer will blank out your photo, so you’ll need to use a gradient tool to choose where you want the effect to be used. It’s also a good idea to adjust the fill of this layer, subtle effects are better here so adjust down to 10 or 20%.
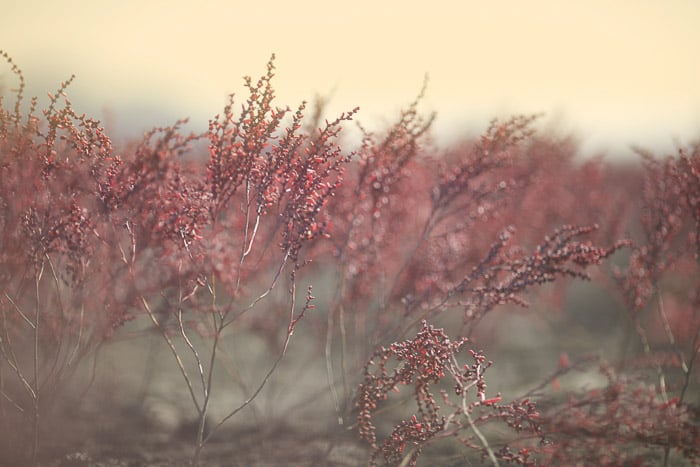
The photo has had some warmth added to it.
How to Add Light Rays to Your Photos
Adding light rays to your photo for more dramatic lighting effects is also something you can use Photoshop for.
Normally you’d need some mist or smoke to achieve these kind of rays, which would mean waking up early in the morning.
With this tutorial you can add them at your leisure with post processing.
Preparing Your Brush
- Select the brush tool on the left hand menu.
- Now on the right, select brush. This menu will allow you to manipulate the brush.
- The first step is to select the shape dynamic tool. Then the increase the size jitter to around 50%.
- Now move to the next option down, scattering. You’ll want to increase scattering to around 500%. When you do this you’ll notice the brush stroke at the bottom is becoming pixelated.
- Finally come back to the brush tip shape. Here you’ll need to increase the spacing to around 100%, and finally increase the hardness to 100% as well.
- The last step is to decrease the size of your brush, to perhaps 30 pixels.
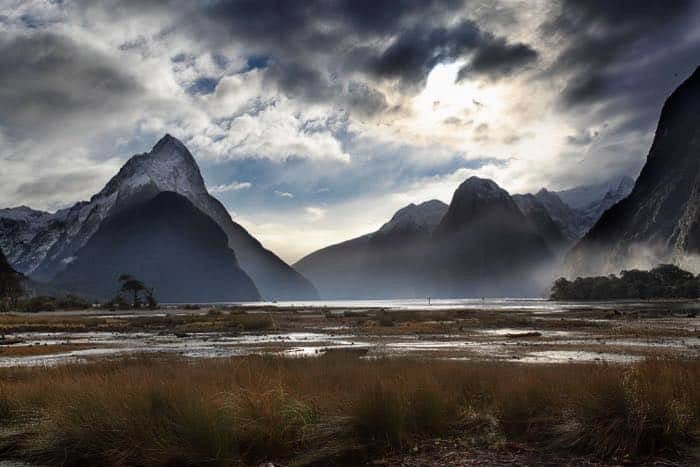
This photo is a good candidate for manipulation, with the bright sun behind the clouds.
Painting Onto Your Image
- Create a new layer, and make sure the foreground is set to white.
- Now use your brush to pain some streaks coming out from the central point you want your rays to emerge from.
- Once you have finished you’ll have a series of dots that spread out from a central area.
Creating Your Light Rays
- To do this you’ll need to utilise the filter options. Go to Filters>Blur>Radial Blur. Select radial blur, and a new menu will appear.
- Once in this menu make sure you have the zoom effect selected, and increase this to 100%.
- Now drag the square to select where within your image the zoom effect will be centered. This will take a little trial and error.
- To intensify the effect of the rays you can duplicate the layer.
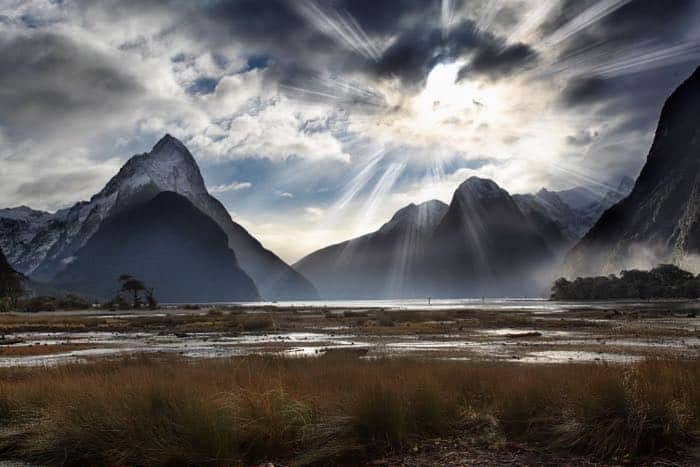
In this photo the light rays coming from the sun have been added in post processing.
Conclusion
There are many ways to adjust your image in Photoshop. From creating your own to using Photoshop’s Lighting Effects filter (in Photoshop CS6 and Photoshop CC).
In this Photoshop tutorial, we’ve shown you several different approaches to creating lighting effects, so now you can start experimenting.
Do you have a preferred method of adjusting your lighting in Photoshop?
Leave your thoughts, and any images you wish to share in the comments section of this article.


