Photoshop has many filters like radial blur to add believable effects to your photos. Even if the results are not perfect, they can evoke certain feelings or emotions that transform an image.
If you have used Photoshops blur filters before, you may be familiar with Gaussian blur. This filter gives your photo the effect of being out of focus and can be used in many different ways.
Today, we will focus on radial blur. By the end of this article, you will know how this blur method operates and how to use it in a simple Photoshop edit.
What is a Radial Blur?
The radial blur effect is a similar effect to motion blur. You can blur pictures by using a slow shutter speed and moving your camera in specific ways. The more direct and precise you are with your movements, the better the effect will be.
With motion blur, imagine your camera on a tripod panning from right to left with a slow shutter speed. This motion takes your image’s surroundings and turns them into blurred parallel lines.
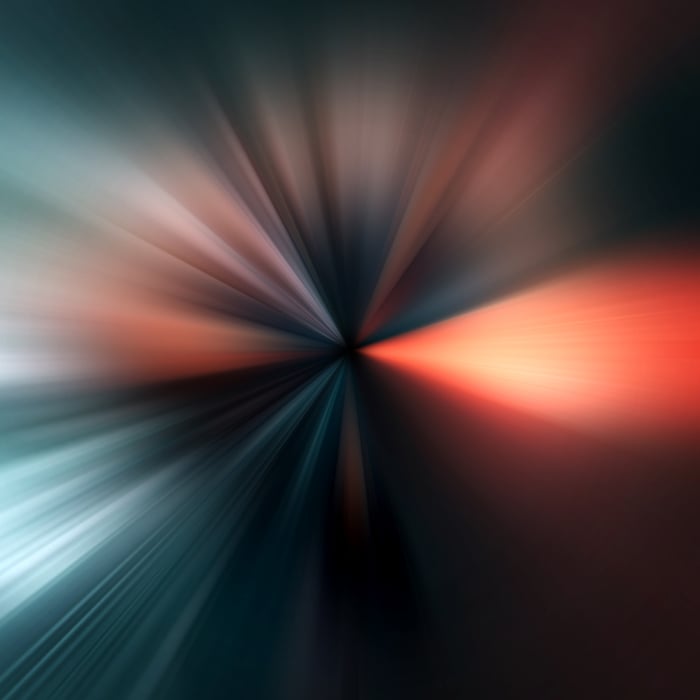
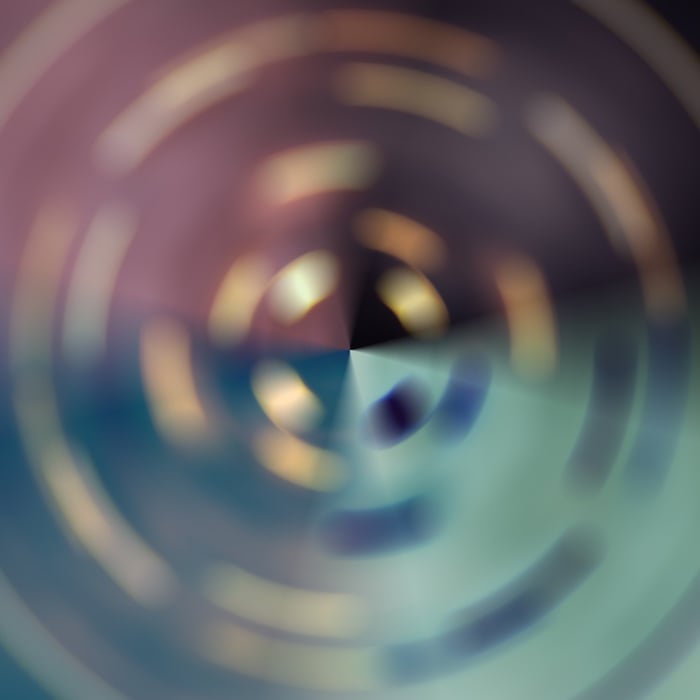
With the radial blur effect, imagine that your camera is on a turntable, spinning around the center of your lens. If you then took a photo with a slow shutter speed, it would produce a circular looking image.
You can also produce a radial blur effect by zooming in with a slow shutter speed. If you have done this correctly, it will look like you're traveling at warp speed in space. Or, it will look like you have significant tunnel vision.
What is the Radial Blur Filter in Photoshop?
You can simulate both motion and radial blur methods in Adobe Photoshop. Photoshop can read the image and apply a filter that accurately imagines what the blur method will look like.
The Radial Blur filter in Photoshop has two different settings—spin and zoom—both pretty self-explanatory. Spin simulates the turntable radial blur, and zoom creates the tunnel radial blur.
You can apply radial blurs to make your photos more dramatic. Radial blur can add a sense of speed to images of fast-moving objects. It can also add a vertigo effect to a high building or a birds-eye-view photo.
How to Make a Simple Radial Blur in Photoshop
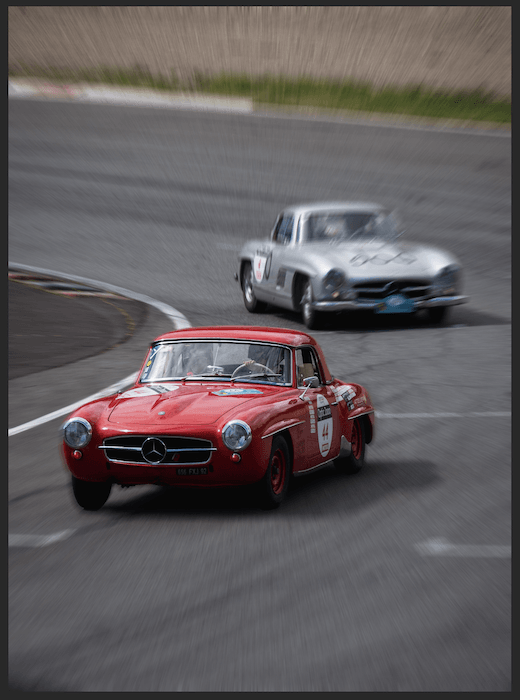
Now, I will guide you through a simple radial blur edit that you can apply to many different images. For this example, we will use the zoom function of the radial blur. We will use the Radial Blur filter to add a look of speed to an original image of racing cars.
Step 1: Crop Original Image and Make a Duplicate Layer
First, we open up the original photo in Photoshop.
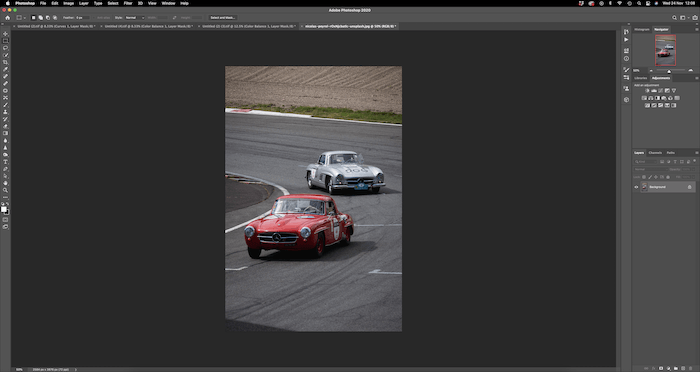
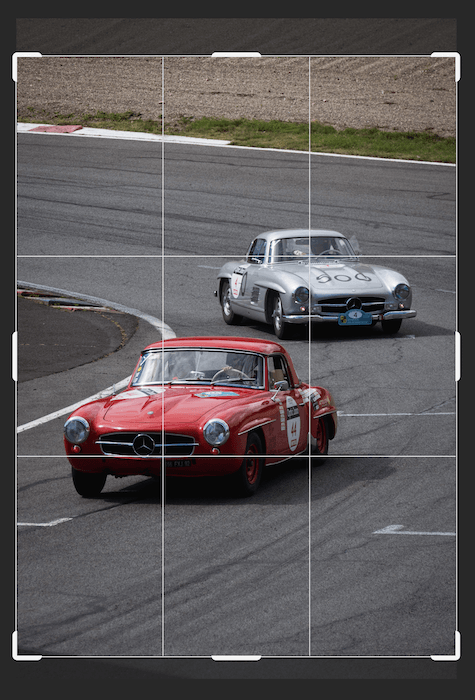
If the image needs a slight crop, use the Crop tool and tailor the frame to your preference.
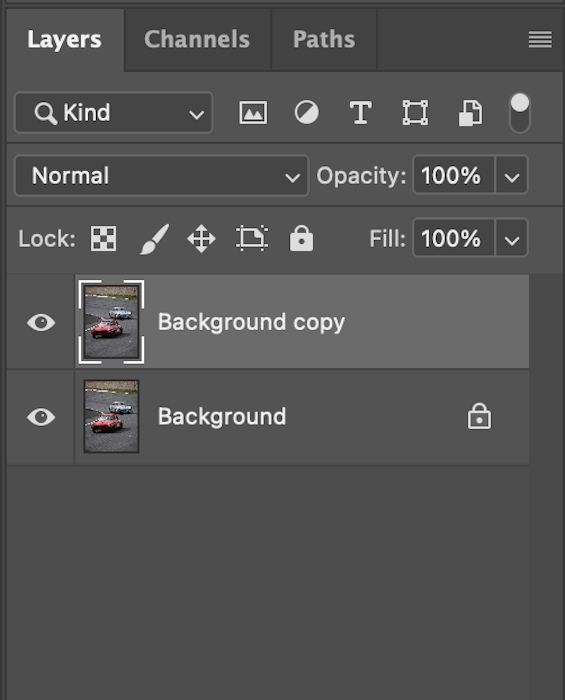
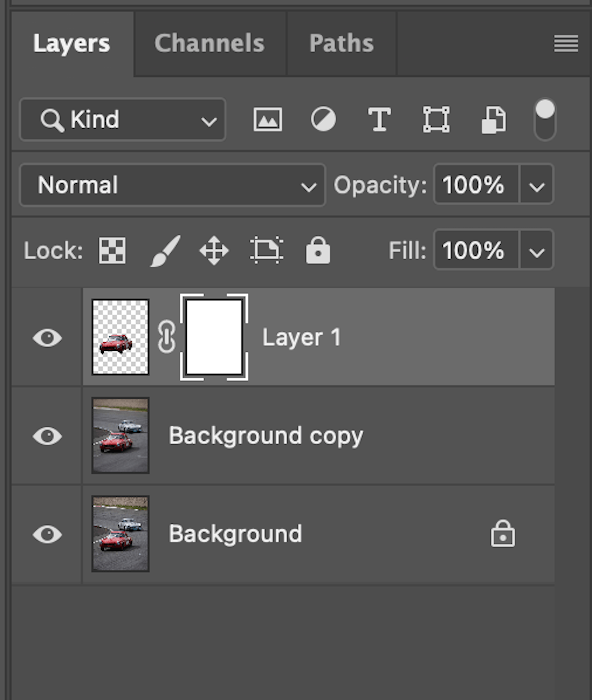
Make a duplicate copy of the ‘Background’ layer in the layers panel (Layer > Duplicate Layer).
Step 2: Select and Make the Subject a New Layer
Now, select the part of the image not to be affected by the radial blur. In my case, this was the car in front. Keeping the subject in sharp focus will draw attention to this element.
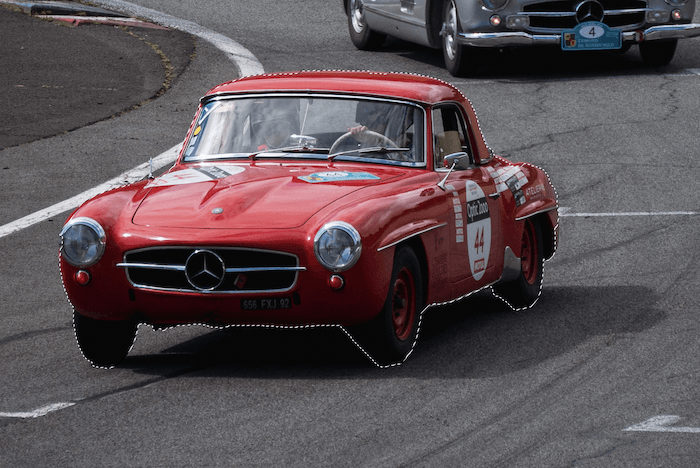
For this step, we use the Quick Selection tool. There are many ways to select specific parts of your image. I use the Quick Select tool because you do not have to be strict on where the edges lie when applying a radial blur in this fashion.
First, select the Quick Selection tool. Then make sure to have the duplicate background layer selected. Also, make sure the brush is set to a positive addition in the top toolbar.
![]()
Next, start to paint inside the subject, so the 'marching ants' encompass your subject. For refinement, select the negative addition of the Quick Select tool.
![]()
Now, we can start to take out the places that the Quick Select tool filled in. In my case, this was the shadow under the car. After some quick refinement, our image should look like this.
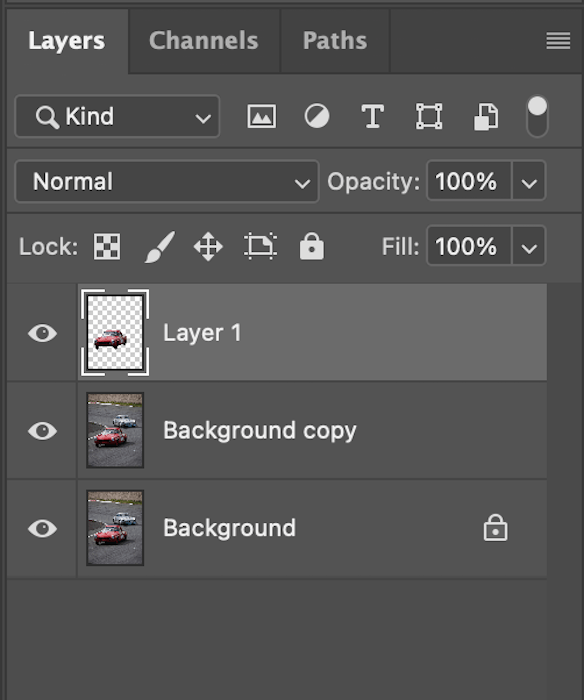
If we click Command+J (Ctrl+J), Photoshop makes this selection a new layer. This is what my Layers panel look like.
Step 3: Add the Radial Blur
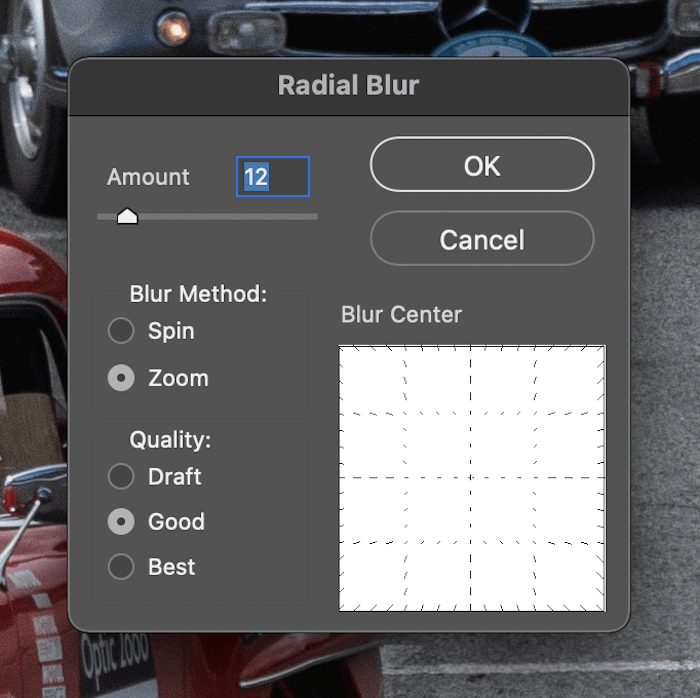
To add the radial blur, we first want to ensure the ‘Background copy’ layer is selected. Next, go to Filter > Blur > Radial Blur. We now see the Radial Blur dialogue box with all the controls we need.
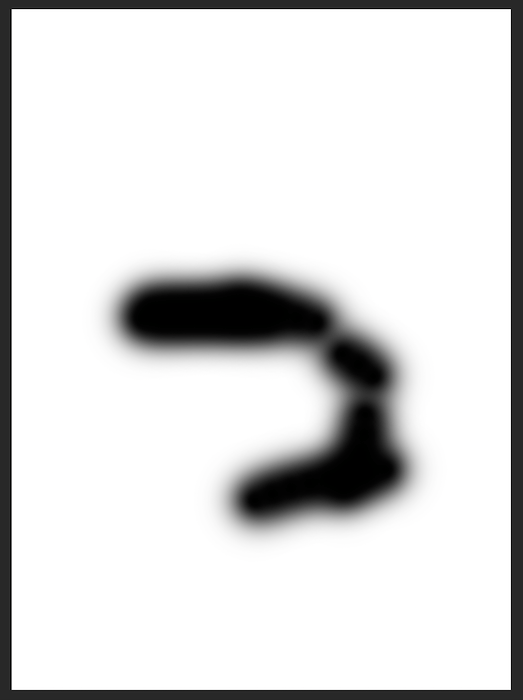
I applied a slight blur of 12. You will get a preview of the severity of radial blur that you will put on your image in the white box.
This is what the white box shows if you increase the number to 80.

Here, we can also adjust the center point of the blur. Apply this to a similar point of the image to where the subject is. Here is an example of moving the center point of the radial blur.

Experiment with the settings in the dialogue box. You may need to return to this point to adjust the radial blur again. When you apply the radial blur, your image should look similar to this.
Step 4: Refine the Radial Blur
To refine the radial blur effect, we first want to make a new layer mask for the subject. Click the ‘Add layer mask’ icon at the bottom of the Layers panel. This is what your layers panel should now look like.
Grab the Brush tool and make sure to paint in black (foreground color). Also, make sure the opacity and flow are at 100%.
![]()
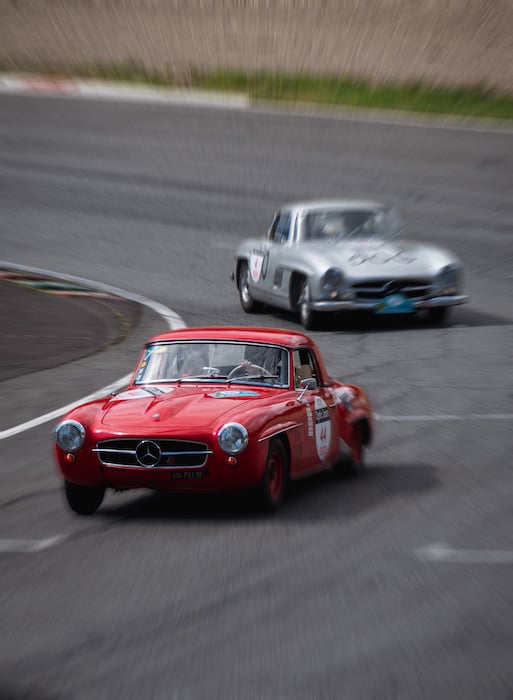
Now, slowly paint in around parts of the subject that you don't want in focus. For me, this was the back end of the car, as I wanted it to look as if it was jumping into focus. This is what my layer mask thumbnail looked like on its own.
And this was my final image with the layer mask applied. Now, the photo looks a lot more dramatic than before. The radial blur adds a sense of speed and urgency to the image.
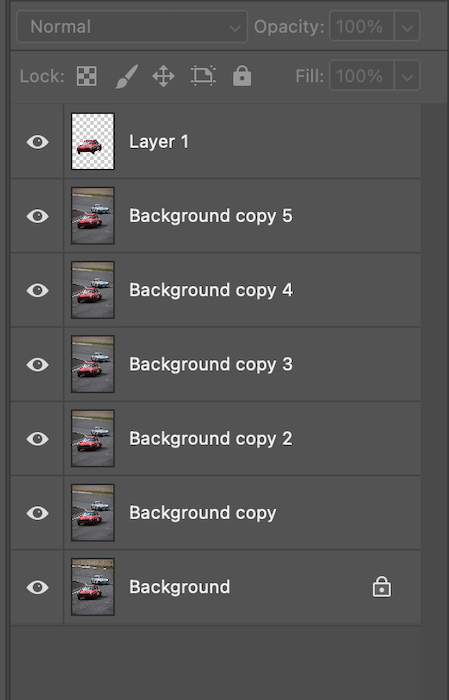
Tip 1: Use Multiple Layers to Compare Radial Blurs
Playing around with the intensity of the radial blur can be a long process. Instead going back to change the intensity at different times, consider making different layers.
Make multiple copies of the background layer and add different radial blur filters to each one. This allows the option to quickly show and hide different filters to compare the results.
Small changes in workflow like this can save you time, especially if you are being meticulous. Take it one step further and rename the increments you adjust your radial blur to. You will then clearly see the exact intensity and center focus that you want.
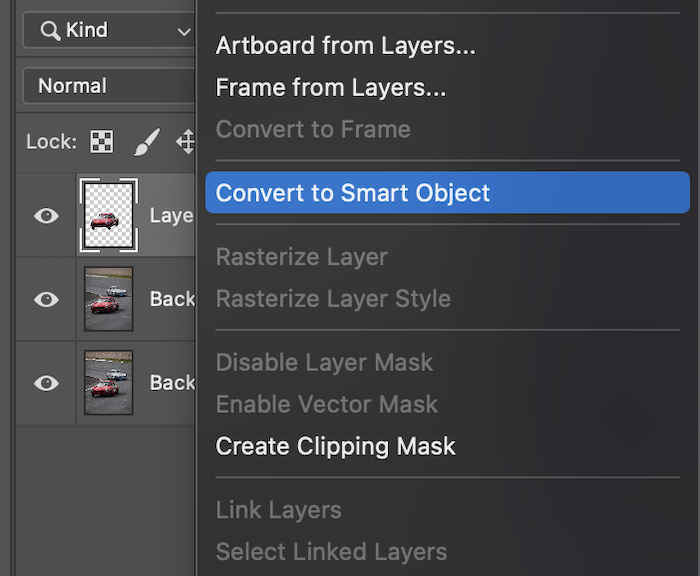
Tip 2: Make Sure Your Images Are Smart Objects
When you cut images out in Photoshop, you want to be conscious if the image has been registered as a smart object. A smart object is a layer where you can perform nondestructive edits. This means you can resize your image countless times without having to worry about the image quality.
If your layer is not registered as a smart object, you may damage the image quality with every transformation you make. For instance, if you made an image smaller, then decided you wanted it bigger after applying the transformation, you will notice clear pixelation.
Photoshop will prompt you before you transform your image if it is not a smart object. Make sure you convert your layers to smart objects!
Conclusion
After looking at this process, you can see that a simple radial blur can significantly alter the feeling of a photo. The original image was relatively static and didn't convey the sense of speed these race cars would be reaching on the racetrack. Now, the image has a bit more drama without being over the top.
A simple edit like this can take under five minutes to do. And there are other ways to apply the radial blur method to other kinds of images. Remember, you can blur as much or as little as you like using different masks.
Photoshop greatly rewards those who experiment. So, the best way to get good at it is to repeatedly practice this radial blur edit. Soon, you will be making more complex edits in no time!
Try out The Magical Photography Spellbook to take enchanting photos in every season!


