High-contrast scenes are a photography nightmare, with shadows that are too dark and highlights that are too light. Enter Active D-Lighting, Nikon's proprietary technology, to rescue high-contrast scenes in-camera.
Nikon's Active D-Lighting isn't as time-intensive nor as over-the-top as HDR but it can improve photographs in similar situations. But what's the best way to use Active D-Lighting? Where do you find it on a Nikon camera? Here's how to get the most from Nikon's Active D-Lighting.
What Is Active D-Lighting from Nikon?
Active D-Lighting is a setting available on Nikon cameras. It corrects the shadows and highlights in a high-contrast scene. With high contrast, the shadows are often too dark and the highlights are often too light. Turn on Active D-Lighting, and the camera will lighten up those shadows and return the color and detail to the lightest areas of the photograph. Nikon says that Active D-Lighting also helps enhance contrast in photos with flat lighting and minimal contrast.
As Nikon explains, Active D-Lighting works locally. In other words, the effect is applied to different areas of the image and not the image as a whole. The setting lightens the dark areas while darkening the light areas. It is ideal for working with difficult lightings such as bright sun and silhouetted subjects.
Active D-Lighting is applied as the image is captured. D-Lighting is a similar effect that's applied after the photo is already taken, through the camera's retouch menu.
How to Use Active D-Lighting on a Nikon Camera
The exact location of the Active D-Lighting controls may vary a bit based on your camera model. However, most recent Nikons will have a similar process, detailed below. If you can't find the right options, consult the user manual for your specific camera model.
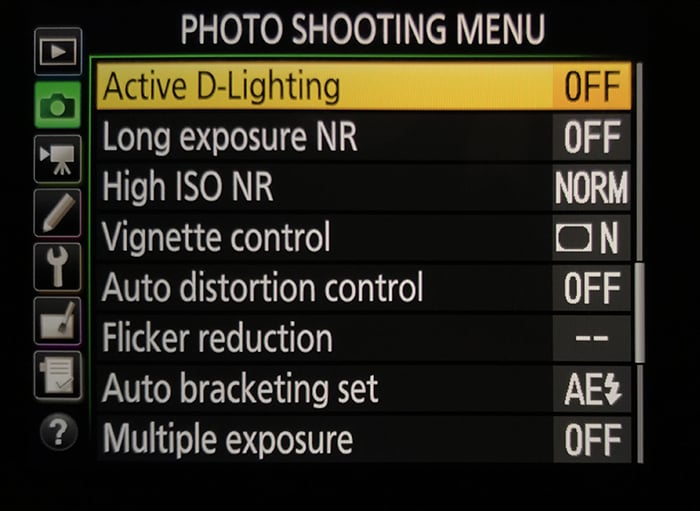
1. Locate the Active D-Lighting Option in the Photo Shooting Menu
Inside the menu, navigate to the photo shooting menu – the one that's designated by a camera icon. Scroll down until you locate the Active D-Lighting option.
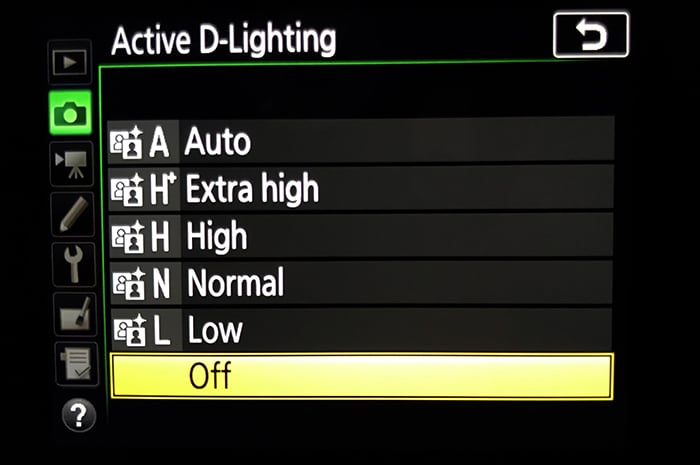 2. Choose the Active D-Lighting Setting
Active D-Lighting comes in several different strengths. Use extra high for a very high contrast scene. Use low for a scene with minimal contrast. Normal or high settings are good for images with moderate contrast.
If you don't want to switch the settings back and forth for the differing amount of contrast in the image, use the auto option. With this setting, the camera chooses what strength of D-Lighting to apply.
Click OK on the setting to select and apply the option that you've selected. Then, proceed to take photos as you would normally.
3. (Optional) Apply Active D-Lighting with Bracketing
If you're not sure whether or not to use Active D-Lighting, Nikon offers you a bit of help. Bracketing allows you to save one photo with and one photo without the setting. This is helpful when you are trying out the setting for the first time, or don't have the time to turn the setting on and off. However, you will end up with twice as many files, which of course means eating up memory card space twice as fast.
In the same photo shooting menu (designated by the camera icon), find the option “Auto Bracketing Set”. On the next screen, choose the "ADL bracketing" option. On some cameras, the option is located inside the Custom Setting Menu under bracketing/flash.
To select what level of Active D-Lighting (like auto, or high) to use with the bracketing, use the "i" menu. Access the options from the quick menu (some cameras only allow you to turn the feature on and off, not choose which level of Active D-Lighting to use).
On cameras with a BKT button, such as the Nikon D850, press the BKT button. Use the control dials to flip through the different options.
3. Alternately, Apply D-Lighting to Existing Photos
Active D-Lighting works better than D-Lighting, which is applied after the image is taken. However, D-Lighting can still be helpful. Find the image that you'd like to adjust in the playback on the camera. Tap the "i" icon, then select retouch to access the retouch menu. Choose D-Lighting.
On the screen, you can now choose the level of D-Lighting to apply, from high to low, using the arrow keys. Most cameras will show a before and after comparison on the screen, allowing you to make the best decision for the image. Click okay when you are finished, or the playback button to go back without applying the changes.
Common Active D-Lighting Questions
Does Active D-Lighting Affect Raw?
No. All in-camera processing is turned off for RAW photography, including Active D-Lighting. However, the effect will be applied on-screen in the JPEGs that the camera displays during playback. Looking at a photo with Active D-Lighting when it's not actually on the RAW file may mislead you. For that reason, Active D-Lighting is often best left off when shooting in RAW.
How Do You Use Active D-Lighting?
Active D-Lighting is a simple setting that's turned on and off in the camera menu. Follow the full steps above or consult the user manual for your particular camera model.
Should You Use Active D-Lighting?
If you are shooting in JPEG format for a high-contrast scene, yes. The setting will improve the image's dynamic range without taking the time for elaborate photo editing. If you shoot RAW, however, leave the setting off so the camera displays a more accurate preview of what your shot will look like.
What Is ADL In-Camera?
In-Camera ADL is an option to add the D-Lighting effect after the photo is taken. This helps for images when you weren't sure whether or not to turn the setting on.
What Is Multiple Exposure in Nikon?
Multiple exposure overlays two images together. This fun effect is inspired by film photography when the film wasn't advanced to the next frame before taking the next photo. Multiple exposure is unrelated to Active D-Lighting but can be confused with bracketing. Bracketing offers an option to take one photo with Active D-Lighting and one photo without.
Conclusion
High contrast scenes are difficult to work with. Thankfully, Nikon's Active D-Lighting helps preserve some of those details in the lightest and darkest areas of the image. In most cases, Active D-Lighting is helpful, but photographers working with RAW will want to simply leave the setting off. If you're unsure, using ADL bracketing is a great way to test the feature out.
Why not check out our posts on using Canon Pictures Styles or best Lightroom Plugins next!


